 EN
EN  العربية
  Български
  Čeština
  Dansk
Dansk  Deutsch
  Ελληνικά
  Español
  Suomi
Suomi  Français
  עברית
עברית  हिन्दी
  Bahasa Indonesia
  Italiano
  日本語
日本語  한국어
한국어  Bahasa Melayu
  Nederlands
  Norsk
Norsk  Polski
  Português
  Română
  Русский
  Svenska
  Kiswahili
  ไทย
ไทย  Türkçe
  Українська
  Tiếng Việt
  中文
中文 User guide
Custom template editor
Build your own invoice layout from the 25 gallery starters or from scratch, style each element, limit it to certain profiles and apply it to an invoice.
The twelve built-in designs cover most invoices, but they decide for you where the logo, the dates and the client address go. The custom template editor lets you compose those parts yourself. You place elements into six slots around a fixed body, style each one, and save the result as a template of your own. From then on any invoice can be switched to that template with two taps, and the PDF is drawn by a separate custom renderer rather than by one of the twelve designs.
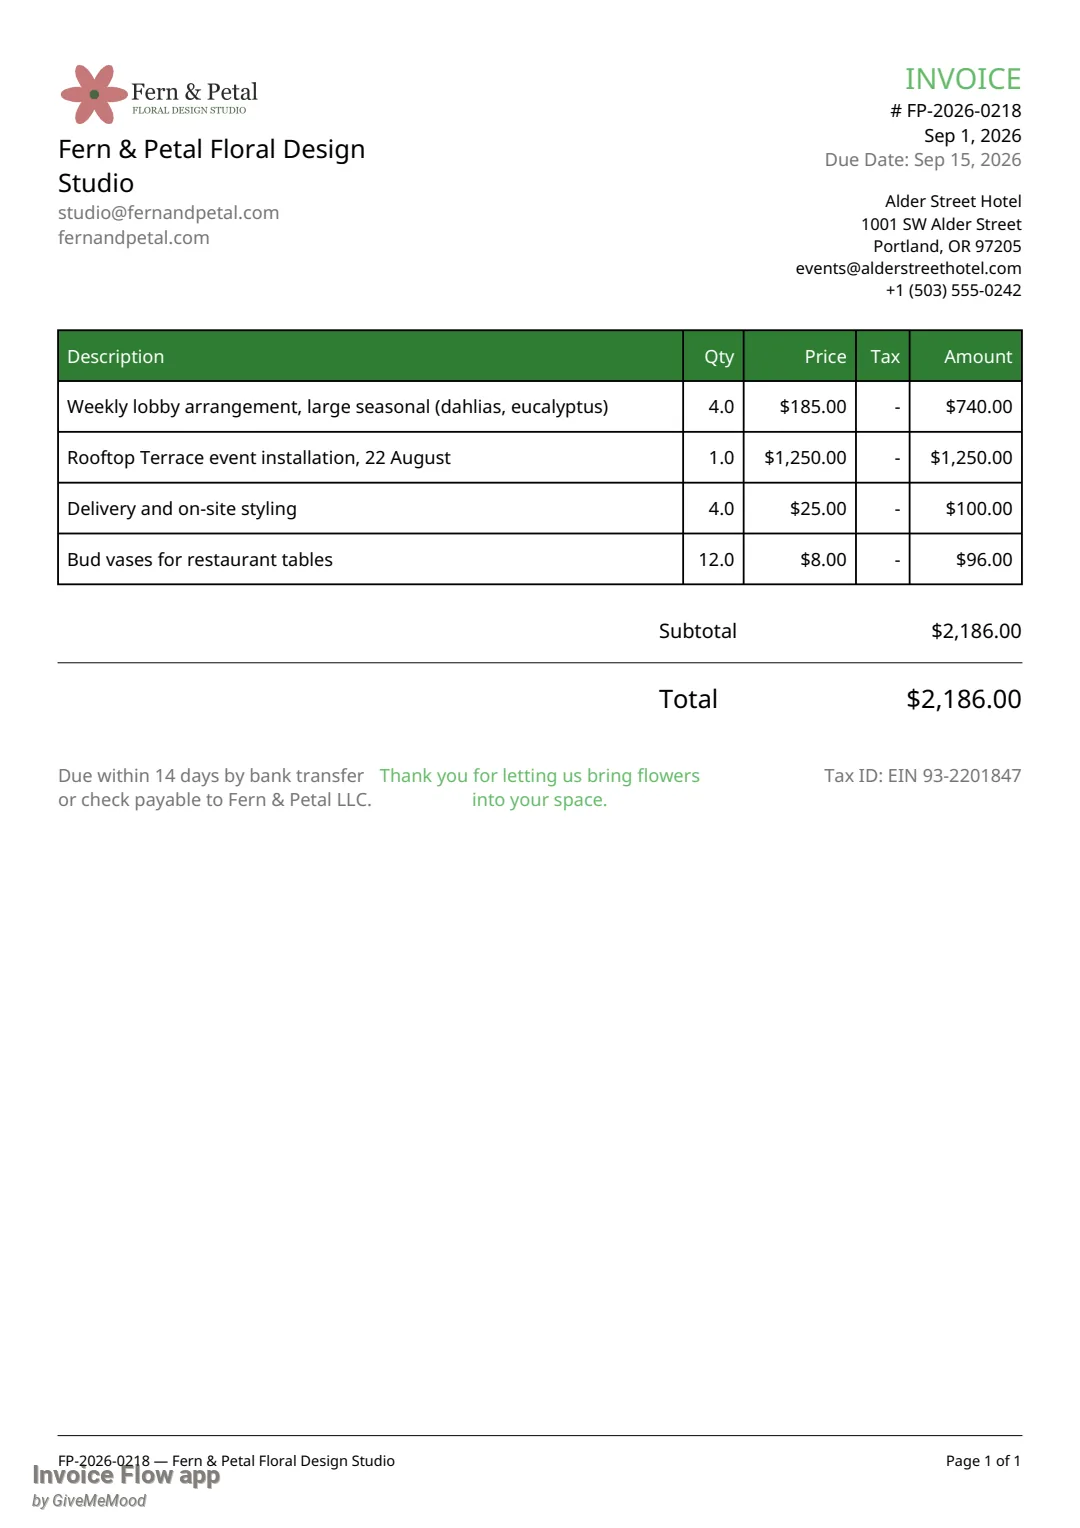
This guide follows Nadia Okafor of Fern & Petal Floral Design Studio in Portland, Oregon. She wants a quiet, mostly white page for hotel and restaurant clients: a wide logo and two contact lines on the left, the invoice details and the client address on the right, and a single green thank-you line in the footer. Her invoice FP-2026-0218 to the Alder Street Hotel is used for the final PDF. She also runs a second business profile, Fern & Petal Weddings, which is why the profile-scope feature shows up along the way.
What you see on the screen
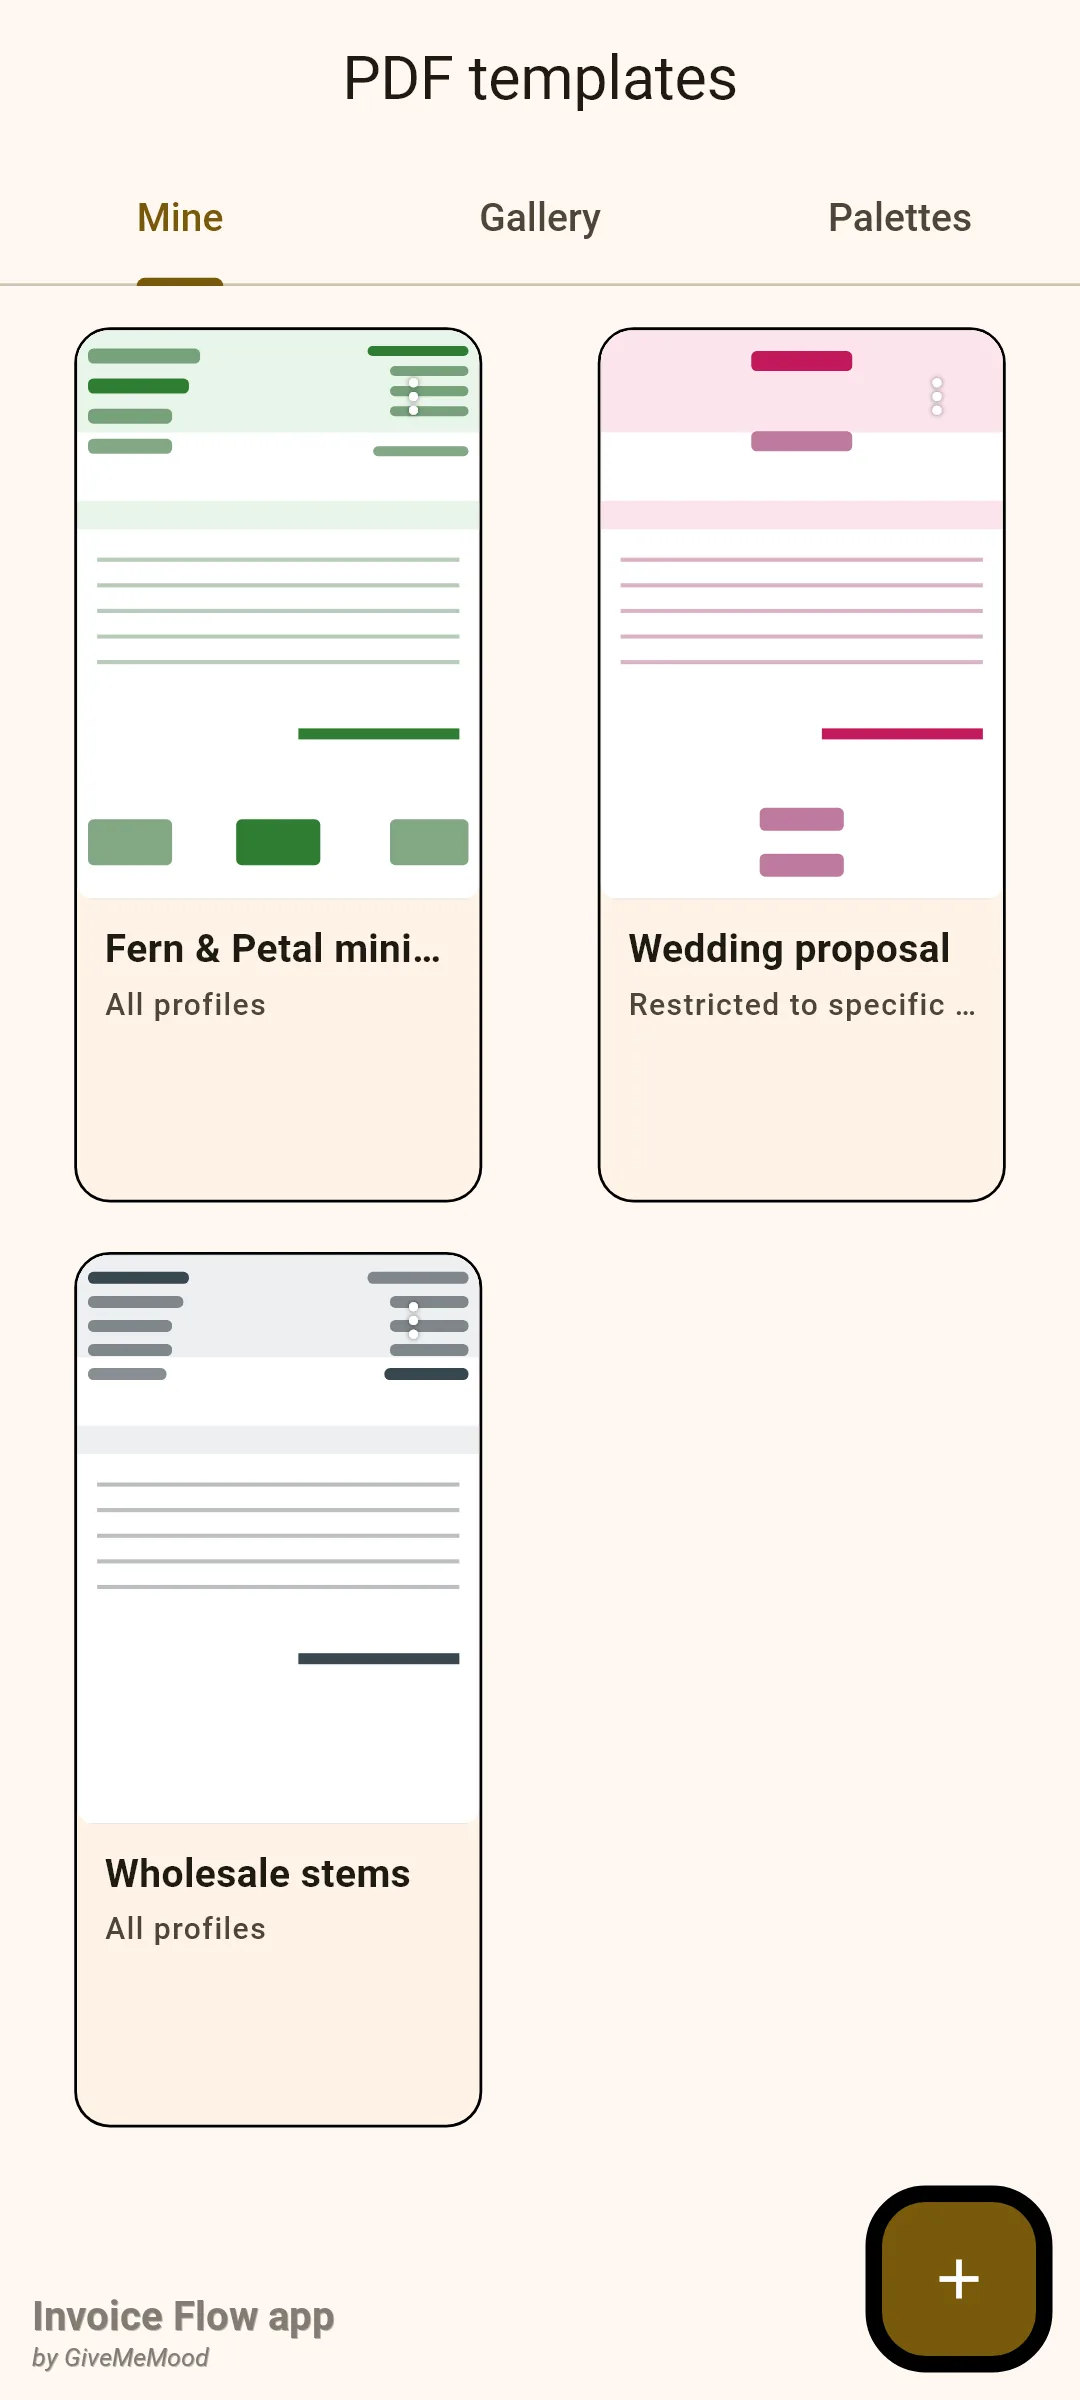
Custom templates live in Settings, under the PDF templates row (subtitle “Build and manage your own layouts”). The screen has three tabs. Mine lists the templates you have saved as a two-column grid of cards. Gallery holds 25 starter layouts in six categories that open in the editor pre-filled. Palettes is where custom colour sets are built; that tab is covered in the palettes guide and only matters here because a saved template remembers which palette it uses.
Each card in Mine shows a schematic thumbnail drawn from the layout (coloured bars, not a real PDF render), the template name in bold and a scope line that reads either All profiles or Restricted to specific profiles. A white three-dot button in the corner of the thumbnail opens a menu with Duplicate and Delete. Tapping anywhere else on the card opens the editor. The + button in the bottom-right corner starts a blank template. When the list is empty the screen says “No custom templates yet. Tap + to build one.”
The editor itself is a single scrolling page. The title bar is an editable name field with the hint Template name, followed by three controls: an eye icon (Preview), a sliders icon (Scope & options) and the Save button. Below the bar comes a Header heading with three boxes labelled Left, Center and Right, then a grey block titled Body (fixed) listing “Items table, Totals, Signature”, then a Footer heading with another Left, Center and Right row, and finally a Scope card whose subtitle repeats the availability setting.
Every element you place appears as a rounded chip inside its column with its name and a small three-dot button. Hidden elements carry a crossed-eye icon. Each column ends with a + button that opens the element catalog.
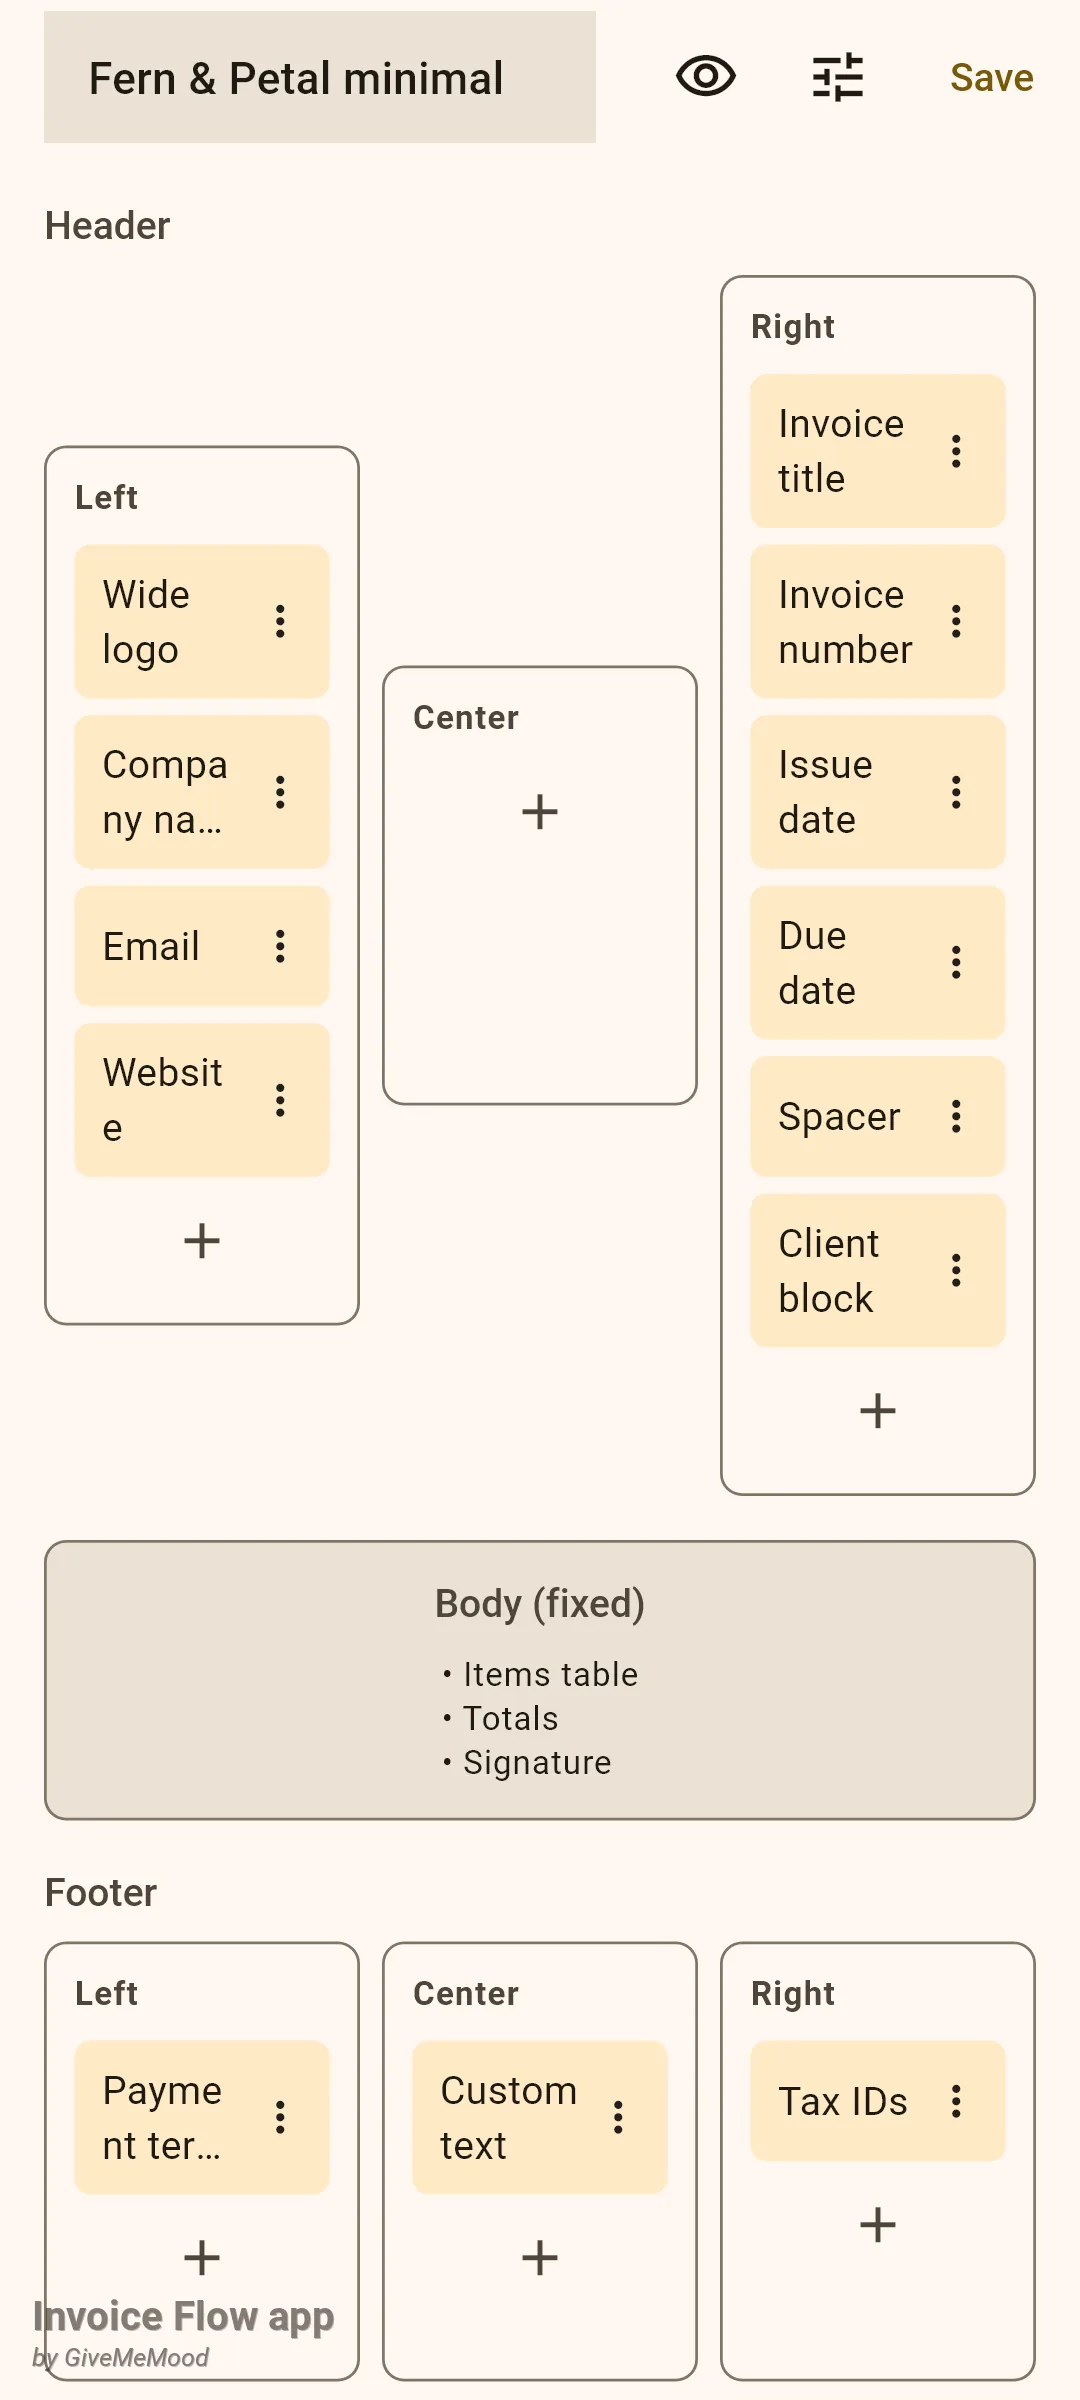
The most important thing to understand is what is not on this page. There is no page-size selector, no margin field, no column-width slider and no control over the items table, the totals block or the signature. The body is always printed in that order between the header row and the footer row, using the palette the template was created with. What you control is everything above and below it.
How to start a template
You can begin from a gallery starter or from a blank page. The gallery route is faster because the layout is already coherent and you only remove or restyle what you do not want.
- Open Settings and tap PDF templates.
- Switch to the Gallery tab and pick a category chip such as Minimal. Scroll the palette strip and tap a palette name if you want the starter recoloured; Default keeps each starter's own palette.
- Tap a card. The editor opens with the starter's layout filled in and its name already typed in the title field.
- To start from nothing instead, stay on the Mine tab and tap +. The blank editor is not truly empty: the header Left column holds Wide logo, Company name, Address, Phone and Email, the header Right column holds a bold Invoice title, Invoice number, Issue date and Due date aligned right, and the footer Left column holds Payment terms and Notes.
- Replace the name in the title field with your own, for example Fern & Petal minimal. A template cannot be saved without a name.
The palette chosen in the gallery strip is written into the new template, and that is the only moment the palette of a custom template is set; the editor has no palette picker of its own. For the same layout in another palette, open it from the gallery again with a different chip selected.
How to arrange and style the elements
Nadia’s minimal page comes from the blank starter after a handful of changes: she removes Address and Phone from the header, adds Website, moves the client block to the right column under the dates, and puts a thank-you line in the footer.
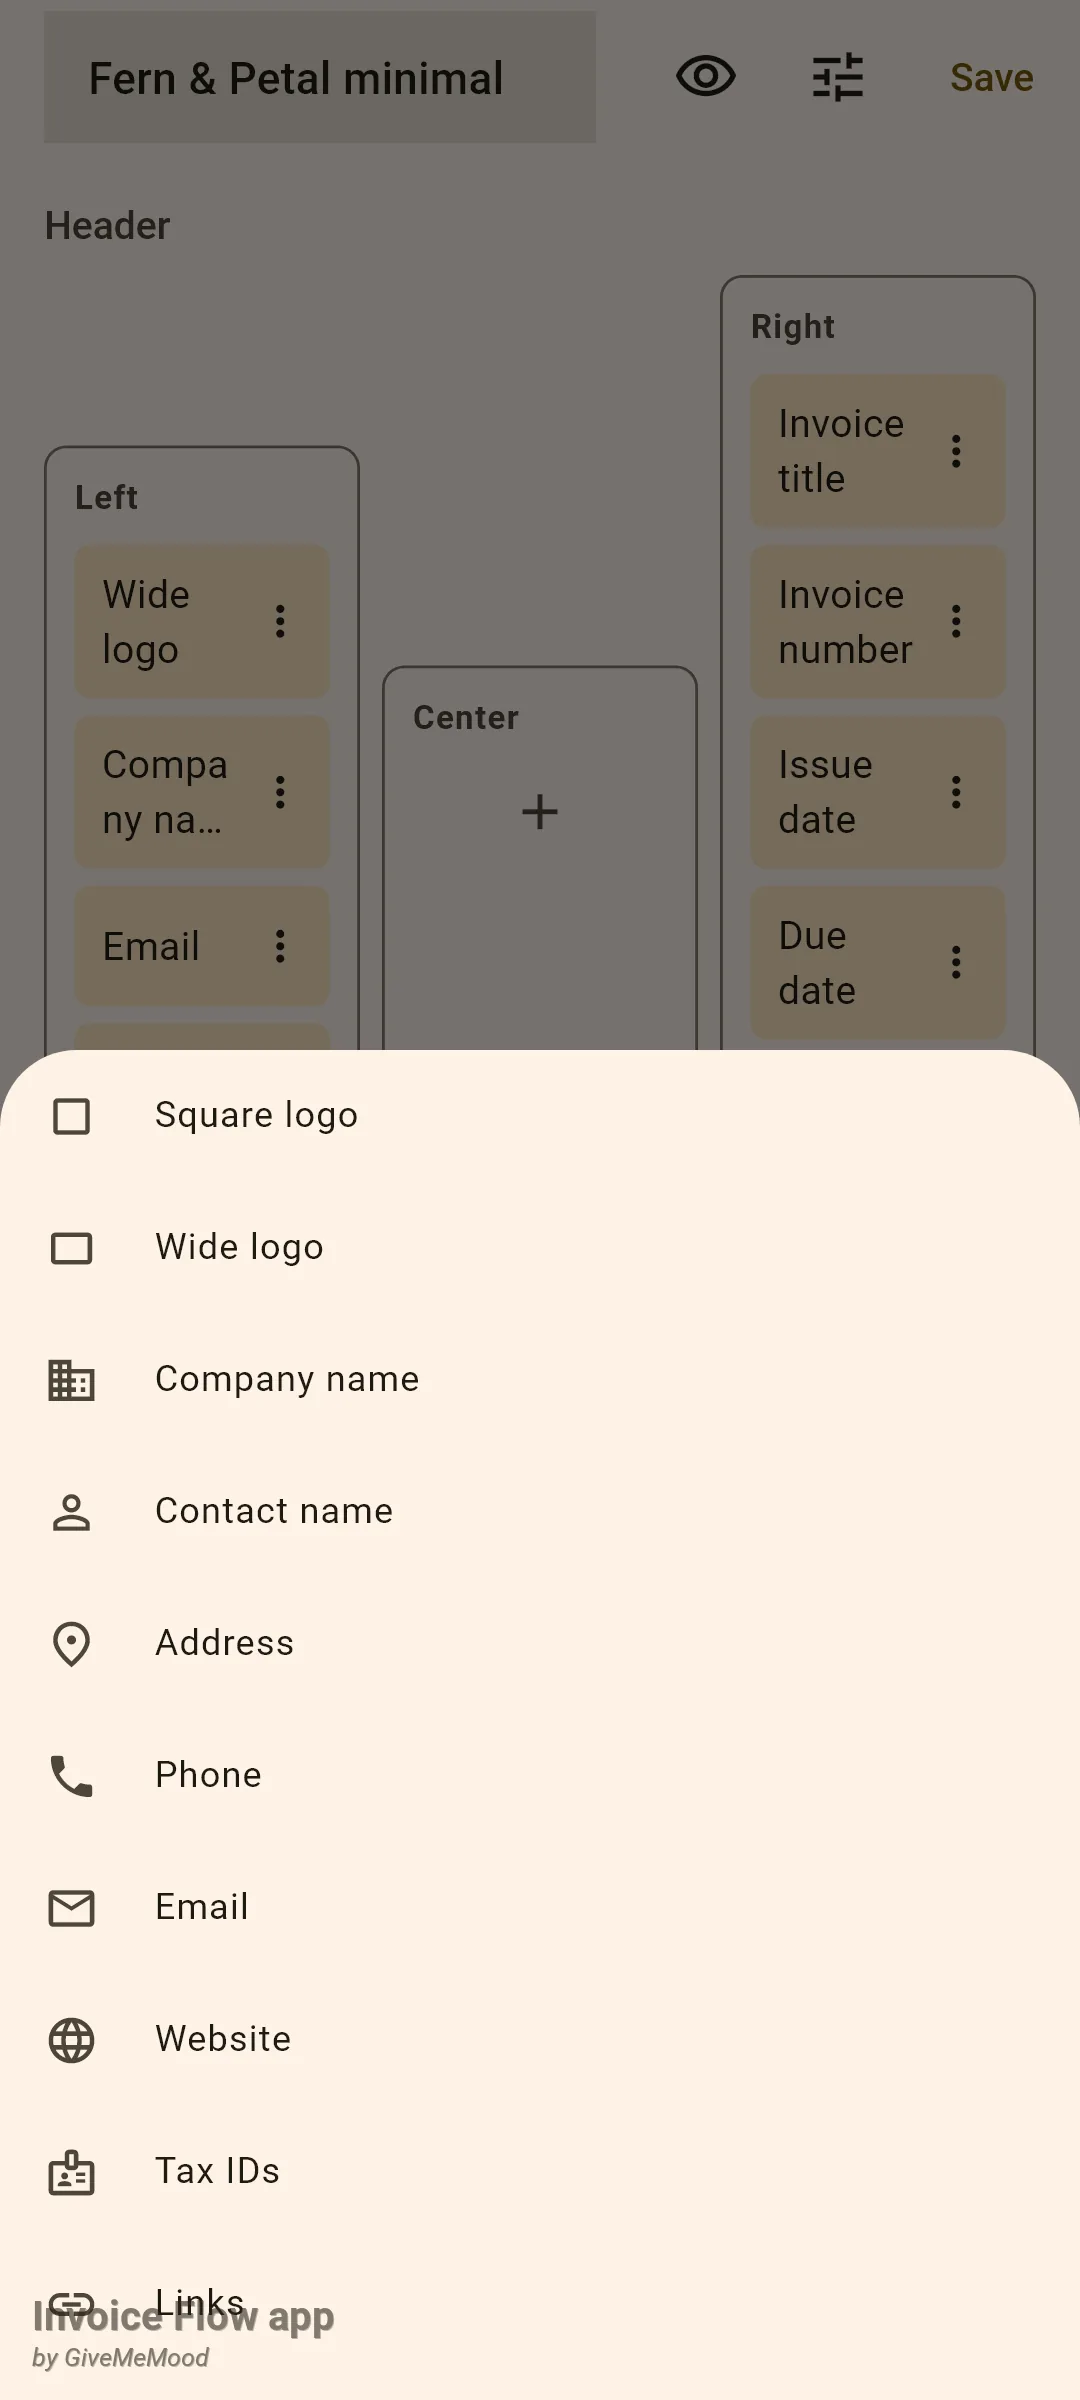
- Tap + at the bottom of the column where the element should go. A sheet lists every available element in a fixed order: Square logo, Wide logo, Company name, Contact name, Address, Phone, Email, Website, Tax IDs, Links, Invoice title, Invoice number, Issue date, Due date, Client block, Client name, Payment terms, Notes, Custom text, Spacer and Divider. Tap one and it is appended to the bottom of that column.
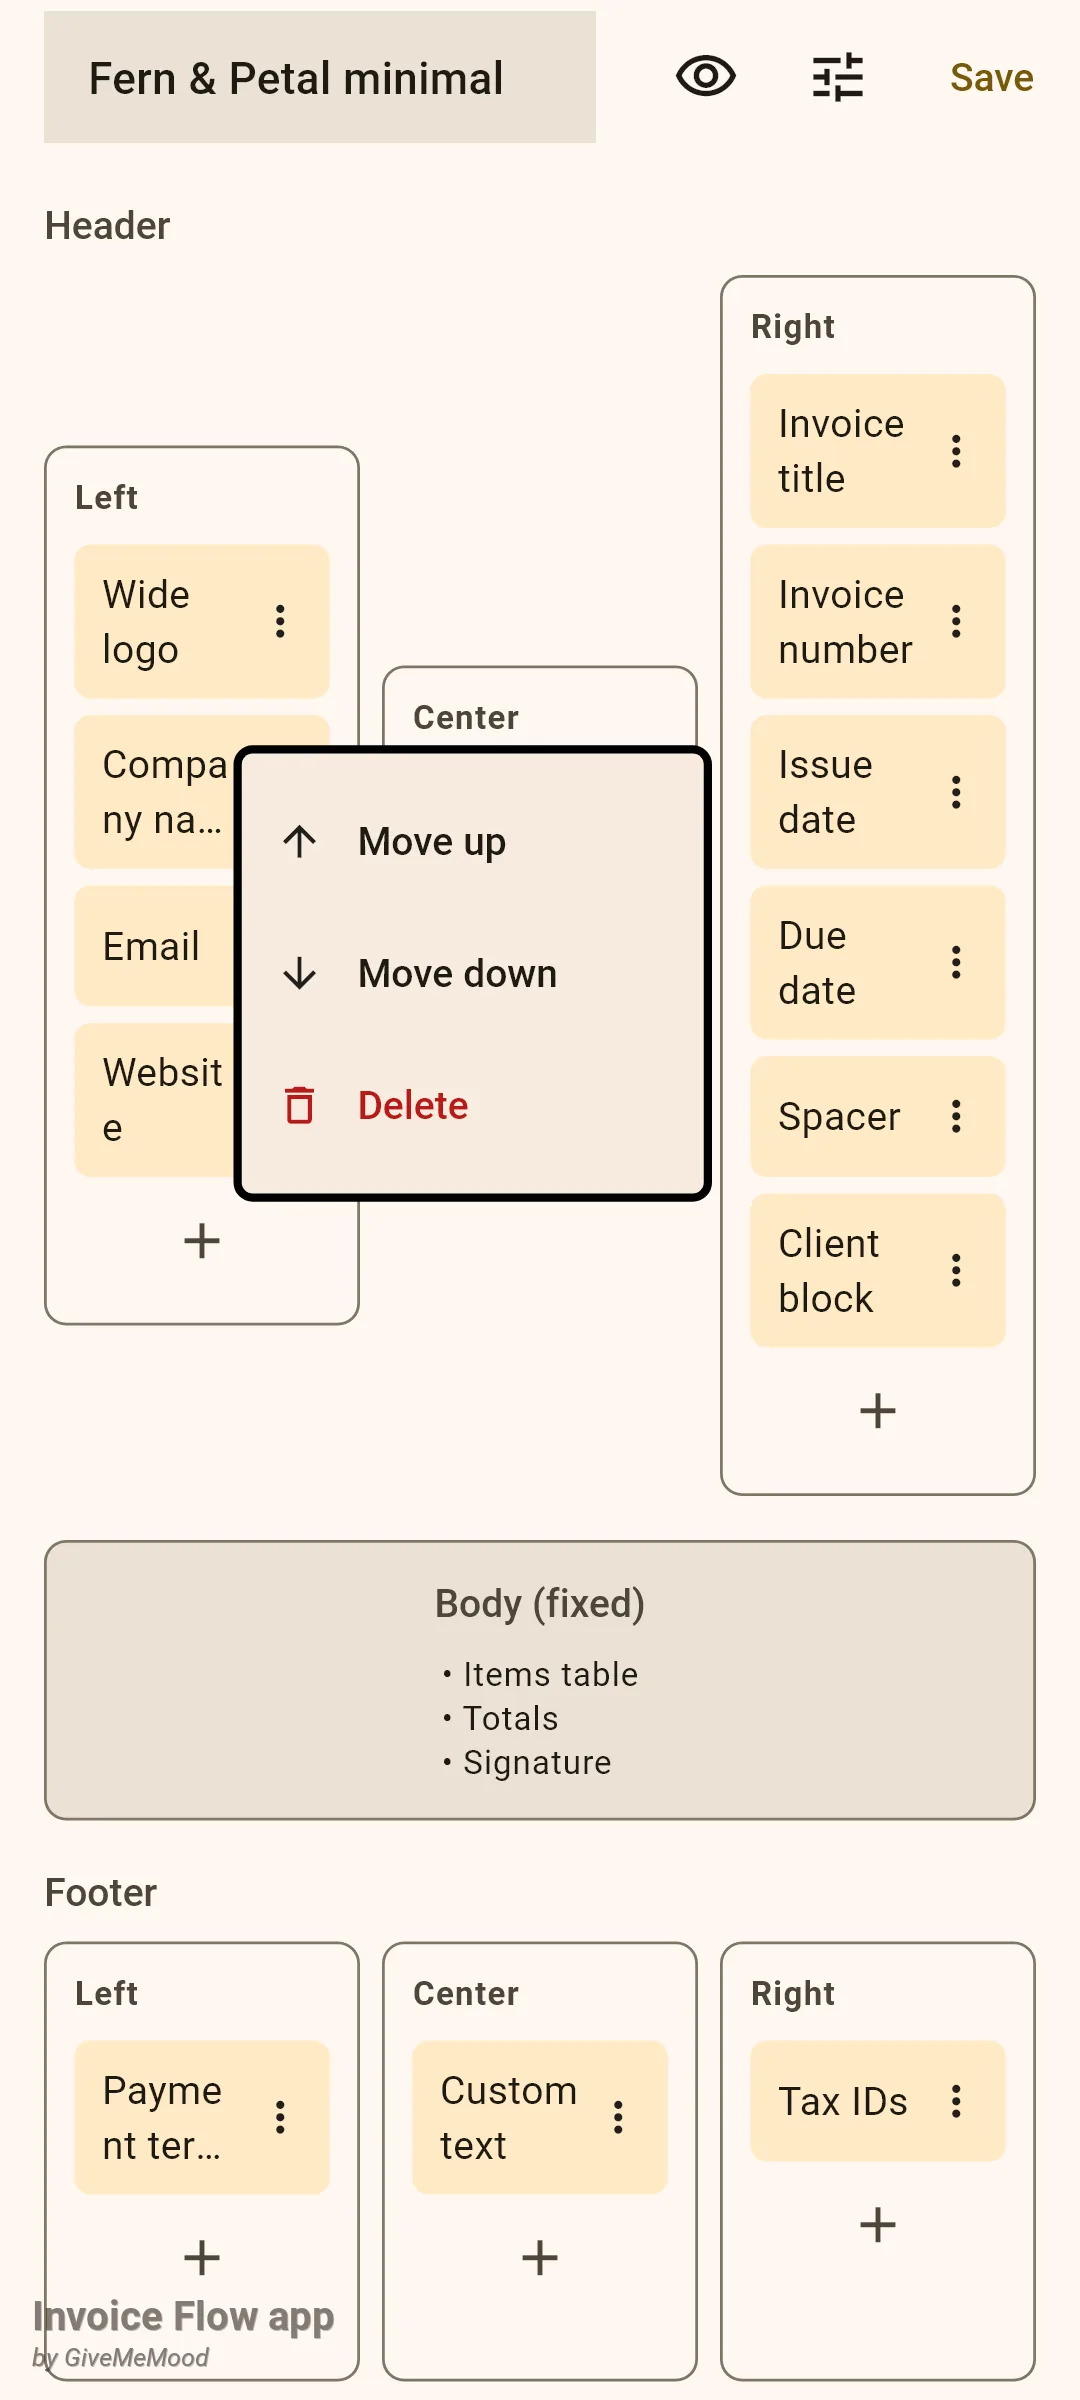
- To change the order, tap the three-dot button on a chip and choose Move up or Move down. The first chip has no Move up and the last has no Move down. The same menu holds Delete.
- To move an element into a different column, delete it and add it again from that column's +; there is no drag-and-drop and no cut-and-paste between columns.
- Tap the body of a chip to open Element settings. Turn Visible off to keep the element in place but leave it out of the PDF.
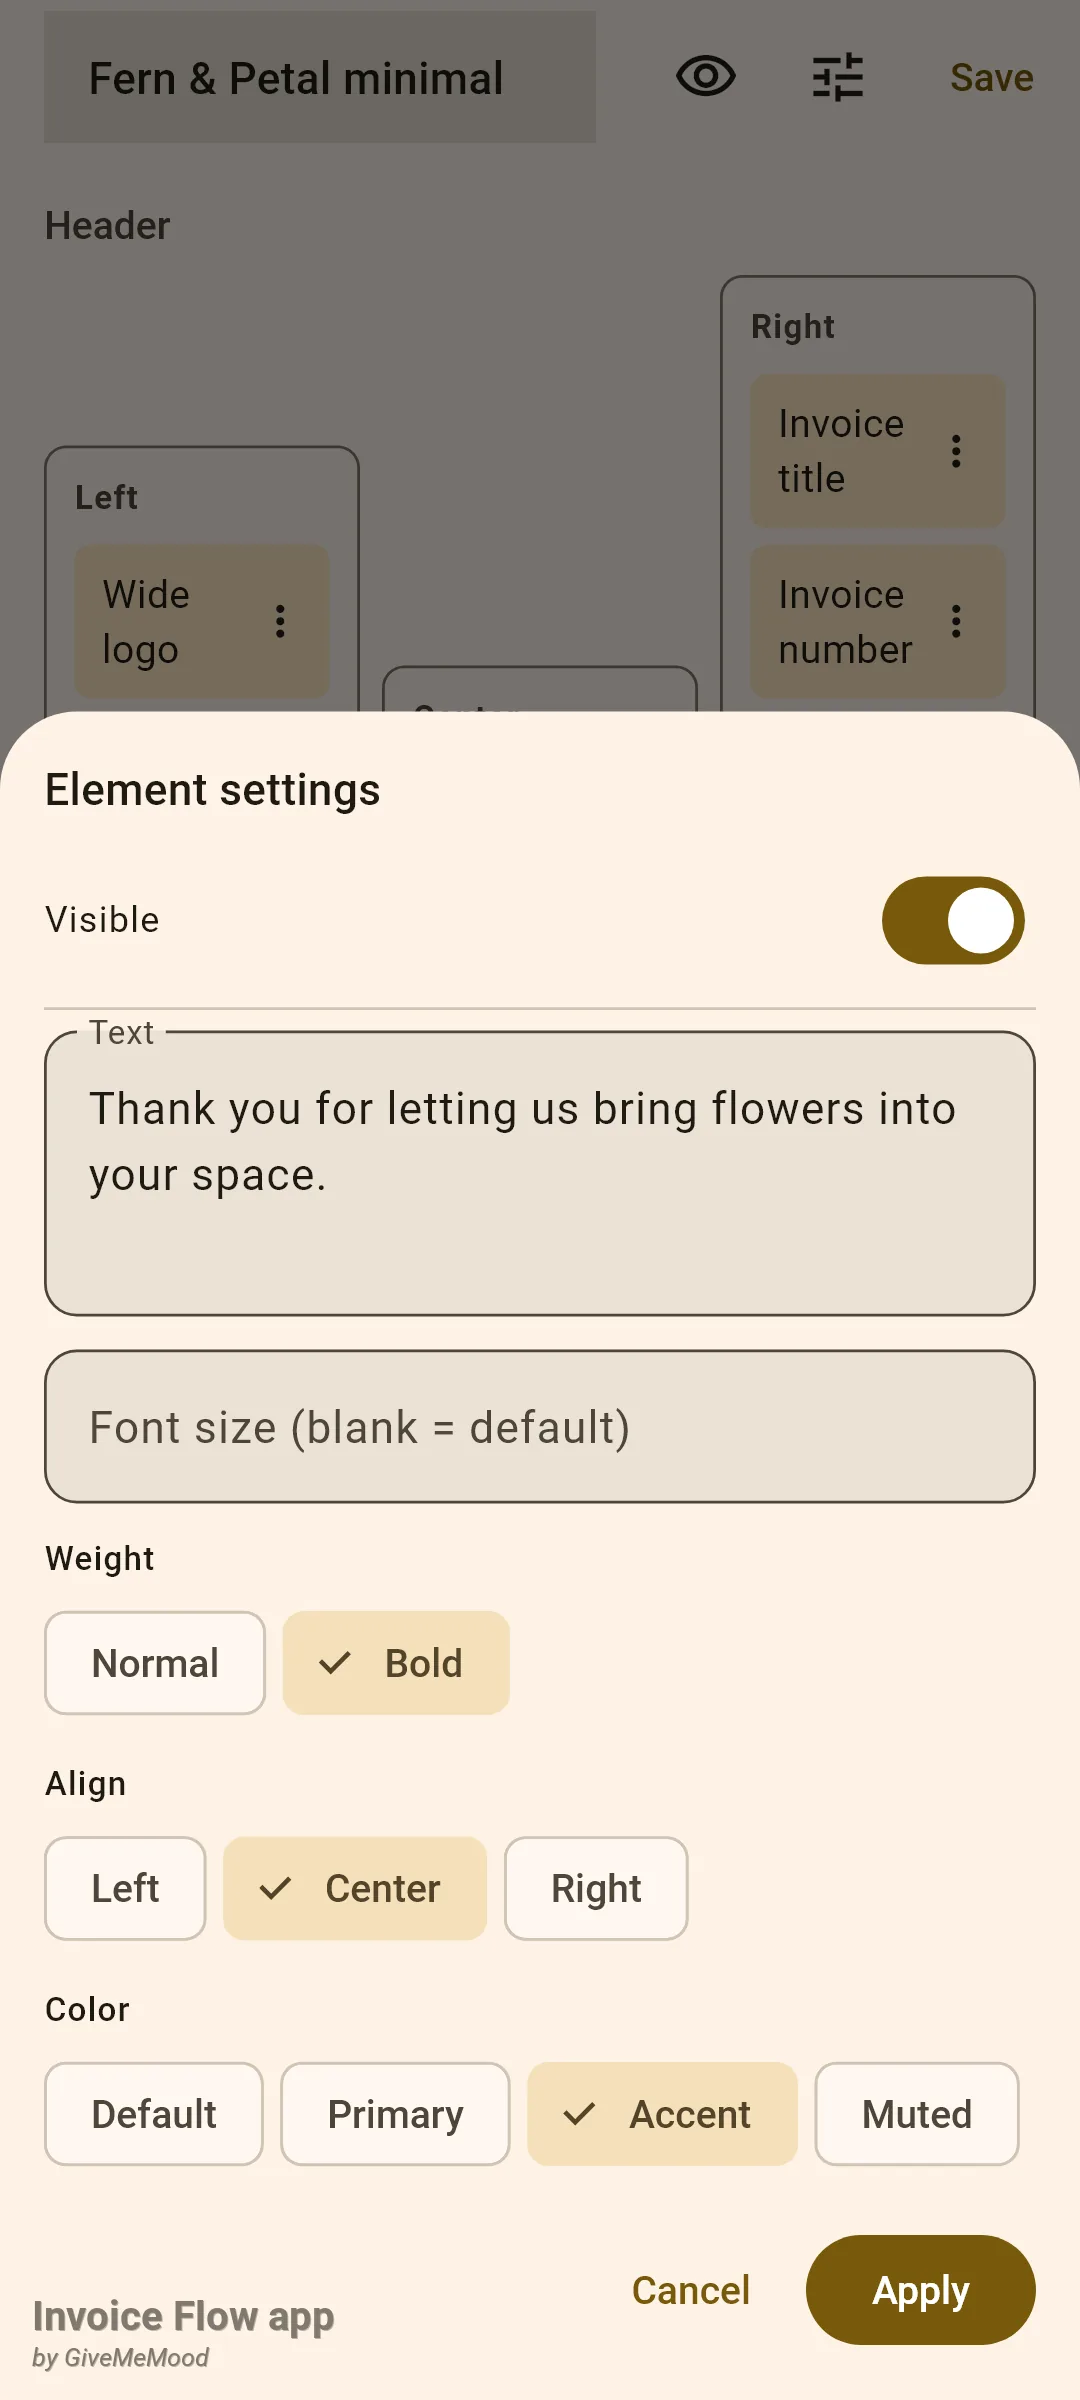
- Type a number in Font size (blank = default) to override the default size, or leave it empty. Pick Normal or Bold under Weight, Left, Center or Right under Align, and Default, Primary, Accent or Muted under Color.
- For a Custom text element, type the wording in the Text box (up to three visible lines; longer text scrolls). For a Spacer, enter Height (px); the default is 8.
- Tap Apply to keep the changes for that element, or Cancel to discard them.
Nadia’s footer line is a Custom text element in the footer Center column with Bold, Center and Accent selected. Accent resolves to the palette’s accent colour, so in her Forest palette the line prints green, and it would turn rose or blue if she rebuilt the template with another palette.
The four colour choices are tokens, not fixed colours. Default prints black, Muted prints a mid grey, Primary uses the palette’s header colour and Accent uses its accent colour. Spacer and Divider have no font, weight, alignment or colour controls; a spacer only has its height and a divider is always a thin grey rule with a little padding.
Client block stacks the client’s name, address, email and phone in one column, while Client name prints the name alone; Nadia uses the block, right-aligned at 9 points, so it tucks under the dates.
How to limit a template to certain profiles and save it
By default a saved template is offered on every business profile. Nadia’s wedding layout should only appear on her Weddings profile, so she restricts it.
- In the editor tap the sliders icon Scope & options, or tap the Scope card at the bottom of the page.
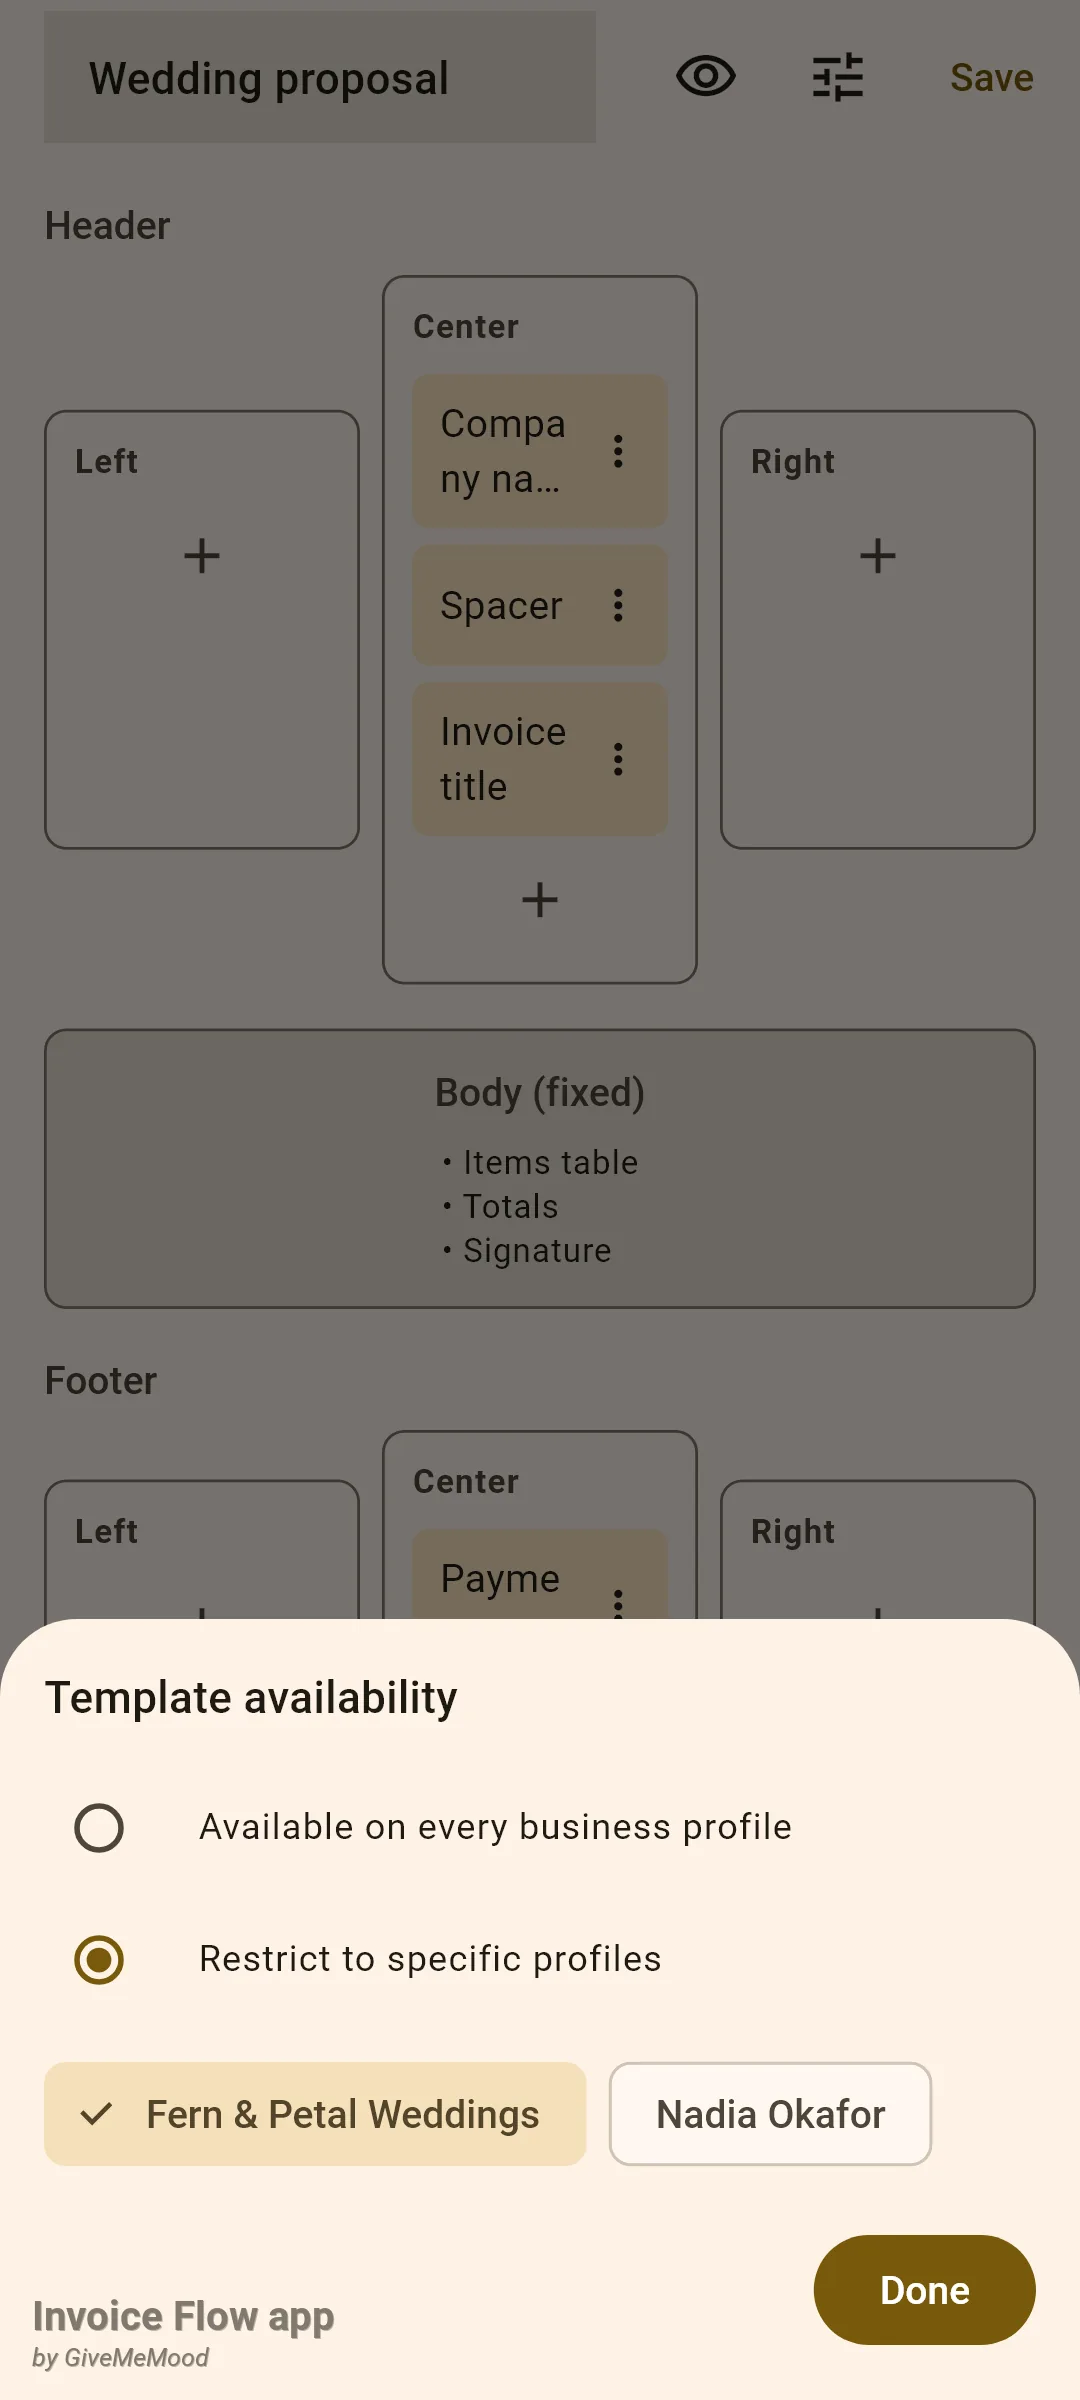
- In the Template availability sheet choose Restrict to specific profiles.
- Tick the profile chips that should see the template; each business profile appears by its name. Leave Available on every business profile selected instead if you want no restriction.
- Tap Done. The Scope card subtitle changes to Restricted to 1 profile(s) or however many you ticked.
- Tap Save in the title bar. The button shows a small spinner while the template is written, then the editor closes and the card appears at the top of the Mine tab.
Before saving you can tap the eye icon to open Preview. It renders the layout through the real PDF renderer with your default profile’s data, drawing grey italic placeholders such as “[example: acme.com]” where a field is empty, and it has a palette strip so you can see the same layout in other colours. That strip is for looking only; closing the preview does not change the template’s palette.
How to apply a custom template to an invoice
A custom template is not a global setting. Each invoice keeps its own choice, and the built-in design and palette stored on the invoice stay in place underneath so you can switch back at any time.
- Open the invoice in the editor and scroll down past the payment cards to the Select Template card.
- Directly beneath it, tap the expand arrow on the Custom template card. This card only exists when at least one saved template is available to the invoice's business profile.
- Pick a template by name from the menu. The card subtitle changes from Using built-in template to the template's name, and the Select Template subtitle above it now reads Custom template.
- Save the invoice. Every preview, share and export of it now goes through the custom renderer.
- To return to the built-in design, open the same menu and choose Use built-in. The design and palette you had chosen earlier are still there.
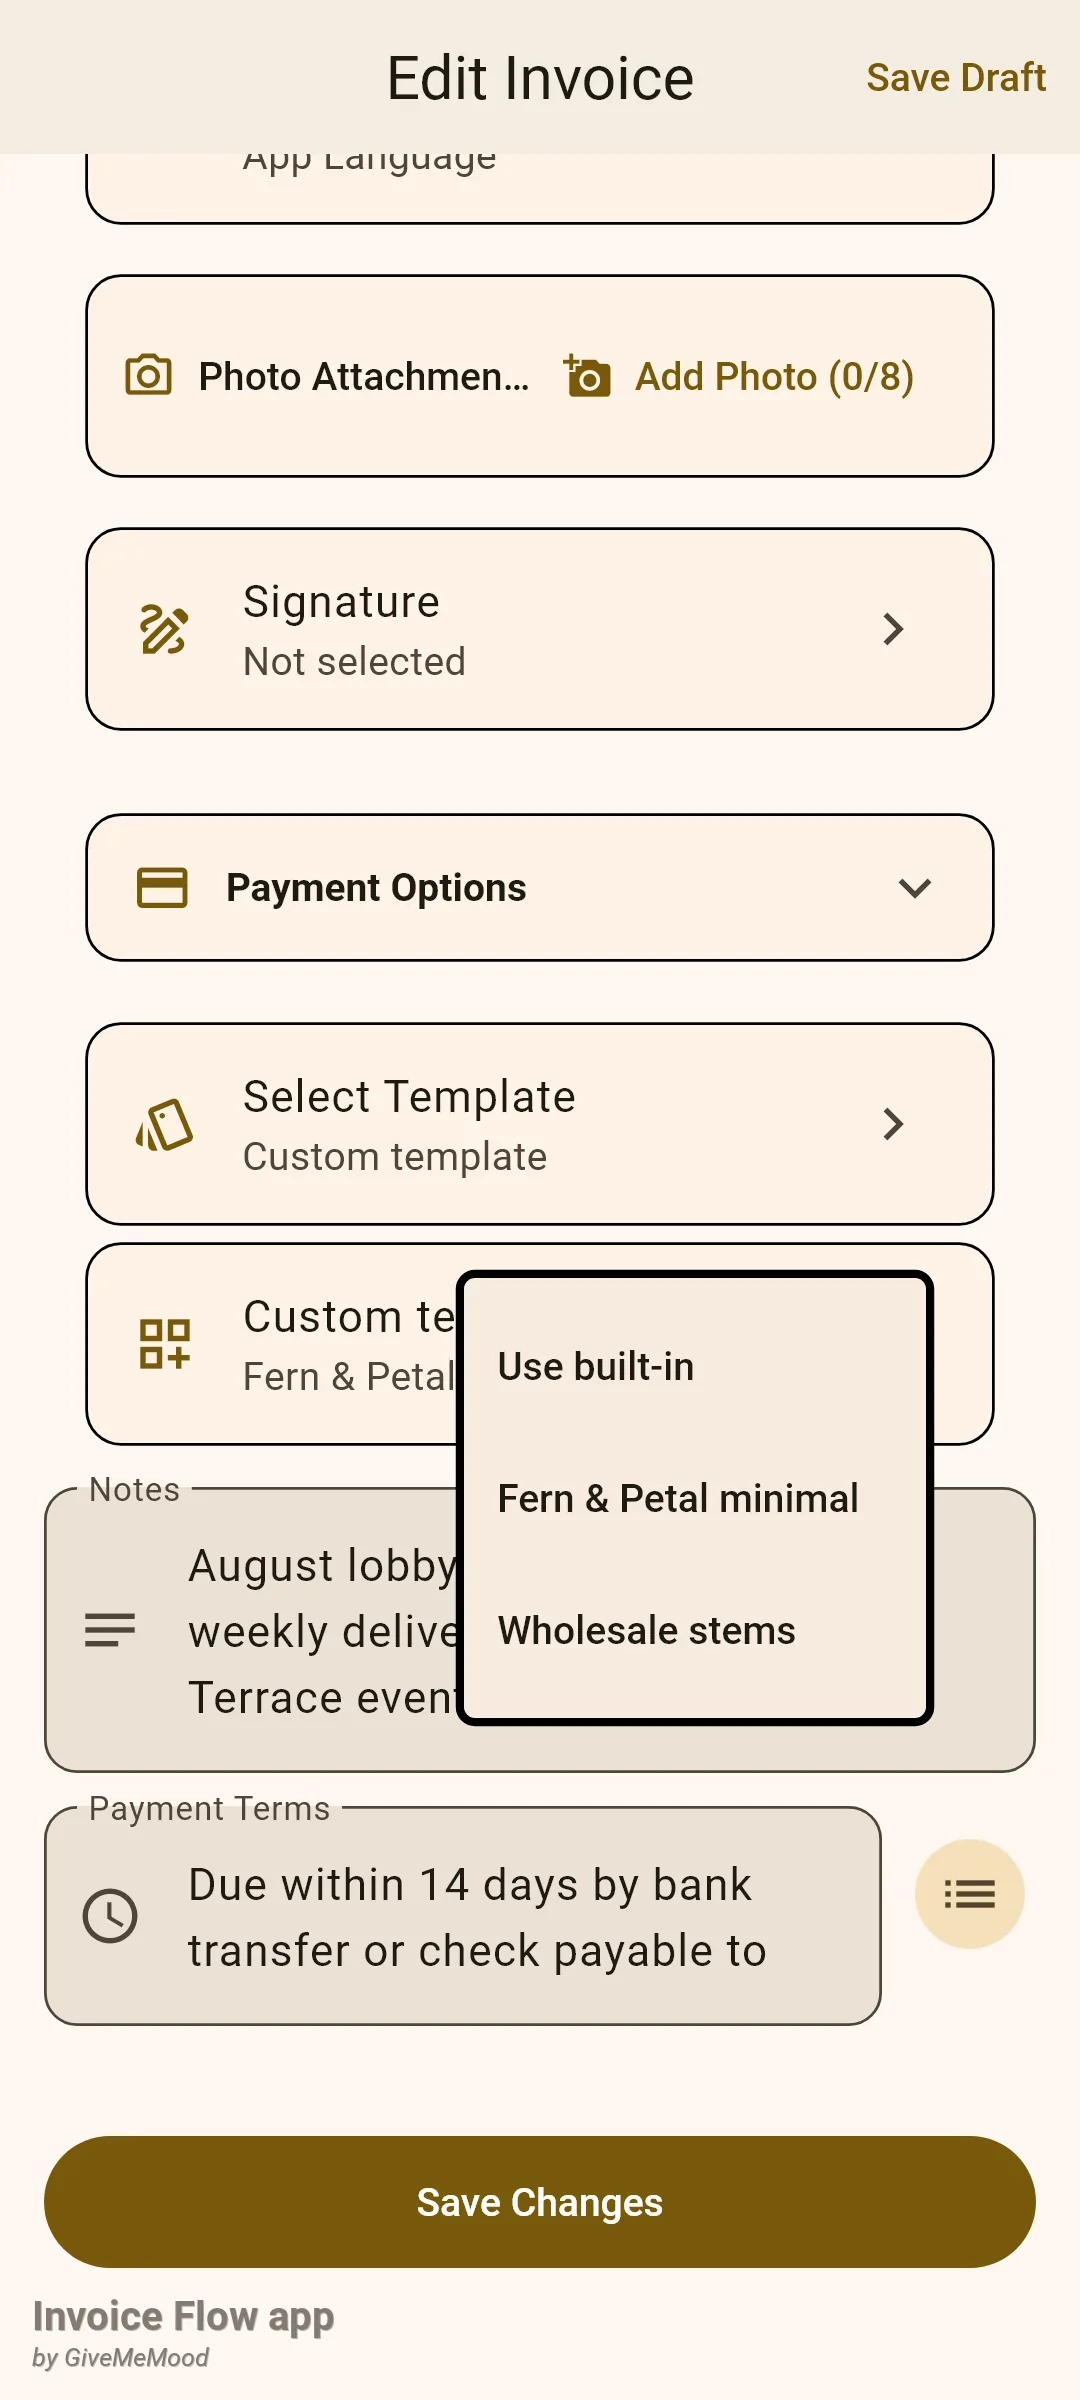
The Wedding proposal template is missing from Nadia’s menu because this invoice belongs to the studio profile and that template is restricted to the Weddings profile. Here is FP-2026-0218 rendered with the minimal template.
Rules and details
- Creating, opening, duplicating a template and saving one all require Pro or an active trial; the app opens the paywall otherwise. Browsing the Mine and Gallery tabs is free, and invoices already assigned a custom template keep rendering with it.
- A name is required. Tapping Save with an empty title field shows “Template name is required” and nothing is written.
- The page is always A4 with a 32-point margin. Neither can be changed in the app.
- The six columns are the whole canvas. Header Left, Center and Right are printed as three equal-width columns aligned left, centred and right; the footer row works the same way. A column with no visible elements takes up its third of the width but prints nothing, and if a whole row is empty the row is skipped.
- The body always prints the items table, then the totals, then the signature if the invoice has one, then a page footer with the invoice number, company name and page count. Custom templates do not print payment QR codes or payment buttons, the split-payment schedule, late-fee lines or early-payment discount notes; those belong to the twelve built-in designs.
- Elements whose data is empty are simply left out of the real PDF. A Website element on a profile with no website prints nothing and takes no space. Only the editor’s Preview shows placeholders.
- There is no limit on how many elements a column can hold and the same element may be added more than once.
- Reordering is limited to Move up and Move down within one column. Elements cannot be dragged, and cannot be moved between columns.
- Font size 0 or blank means the renderer default of 10 points. Company name prints 4 points larger and Invoice title 6 points larger and in capitals, whatever size applies.
- Text styling (size, weight, alignment, colour) is unavailable for Spacer and Divider.
- The palette is fixed when the template is created (from the gallery strip, or Ocean for a blank template) and cannot be changed in the editor afterwards. Custom palettes from the Palettes tab can be chosen in the gallery strip, so they reach a PDF only through a custom template.
- Duplicate in the Mine tab creates a copy named “name (copy)” with the same layout and scope. Delete asks for confirmation; deleting a template that invoices still point to does not break them: the next preview quietly falls back to the invoice’s built-in design.
- Scope links are rewritten on every save. Switching a restricted template back to Available on every business profile clears its profile list.
- Duplicating an invoice with Duplicate on the invoice screen copies its built-in design and palette but not the custom template; the copy opens with Using built-in template and you assign the custom template again.
- Backups include custom templates, and restoring on another device re-links each invoice to the restored copy of its template.
Tips
Related guides
- PDF templates, colour palettes and fonts for the twelve built-in designs, the ten palettes and how to create a custom palette.
- Invoice editor for the rest of the cards around the Custom template picker.
- Logo: square and wide variants because the Wide logo and Square logo elements print the variants you uploaded on the profile.