 EN
EN  العربية
  Български
  Čeština
  Dansk
Dansk  Deutsch
  Ελληνικά
  Español
  Suomi
Suomi  Français
  עברית
עברית  हिन्दी
  Bahasa Indonesia
  Italiano
  日本語
日本語  한국어
한국어  Bahasa Melayu
  Nederlands
  Norsk
Norsk  Polski
  Português
  Română
  Русский
  Svenska
  Kiswahili
  ไทย
ไทย  Türkçe
  Українська
  Tiếng Việt
  中文
中文 User guide
The invoice editor: from blank form to finished PDF
Build a complete invoice in Invoice Flow: pick the client and dates, add labour and material lines with tax, set a discount, attach photos and sign.
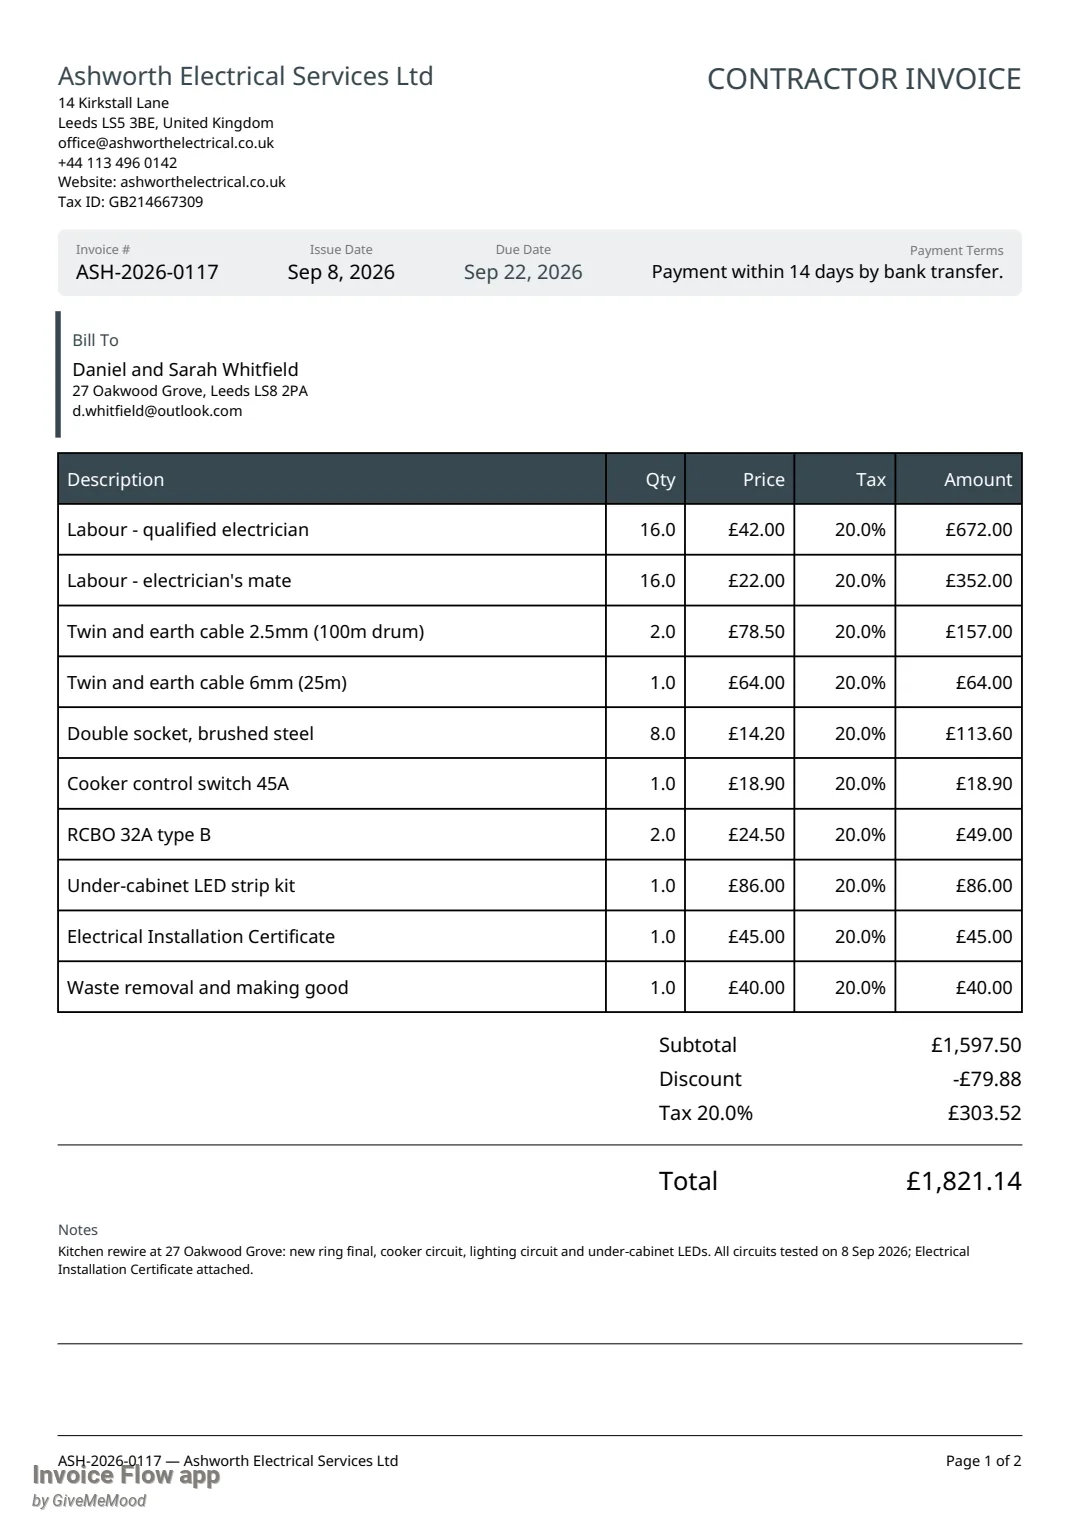
The invoice editor is the screen you will spend most of your time in. Every invoice and every estimate in Invoice Flow is created and changed here: who is being billed, what was delivered, how much it costs, which tax applies, and what the customer should see printed at the bottom of the page. This guide walks through the editor from the top of the form to the finished PDF, using a real-world example: Ashworth Electrical Services in Leeds invoicing a homeowner for a kitchen rewire, with sixteen hours of labour, cable, sockets and a certificate all on one document.
What you see on the screen
Open the Documents tab, tap the New button and choose Invoice from the Choose document type sheet. The editor opens with the title New Invoice and a Save Draft action in the top bar. Opening an existing draft from its detail screen shows the same form titled Edit Invoice.
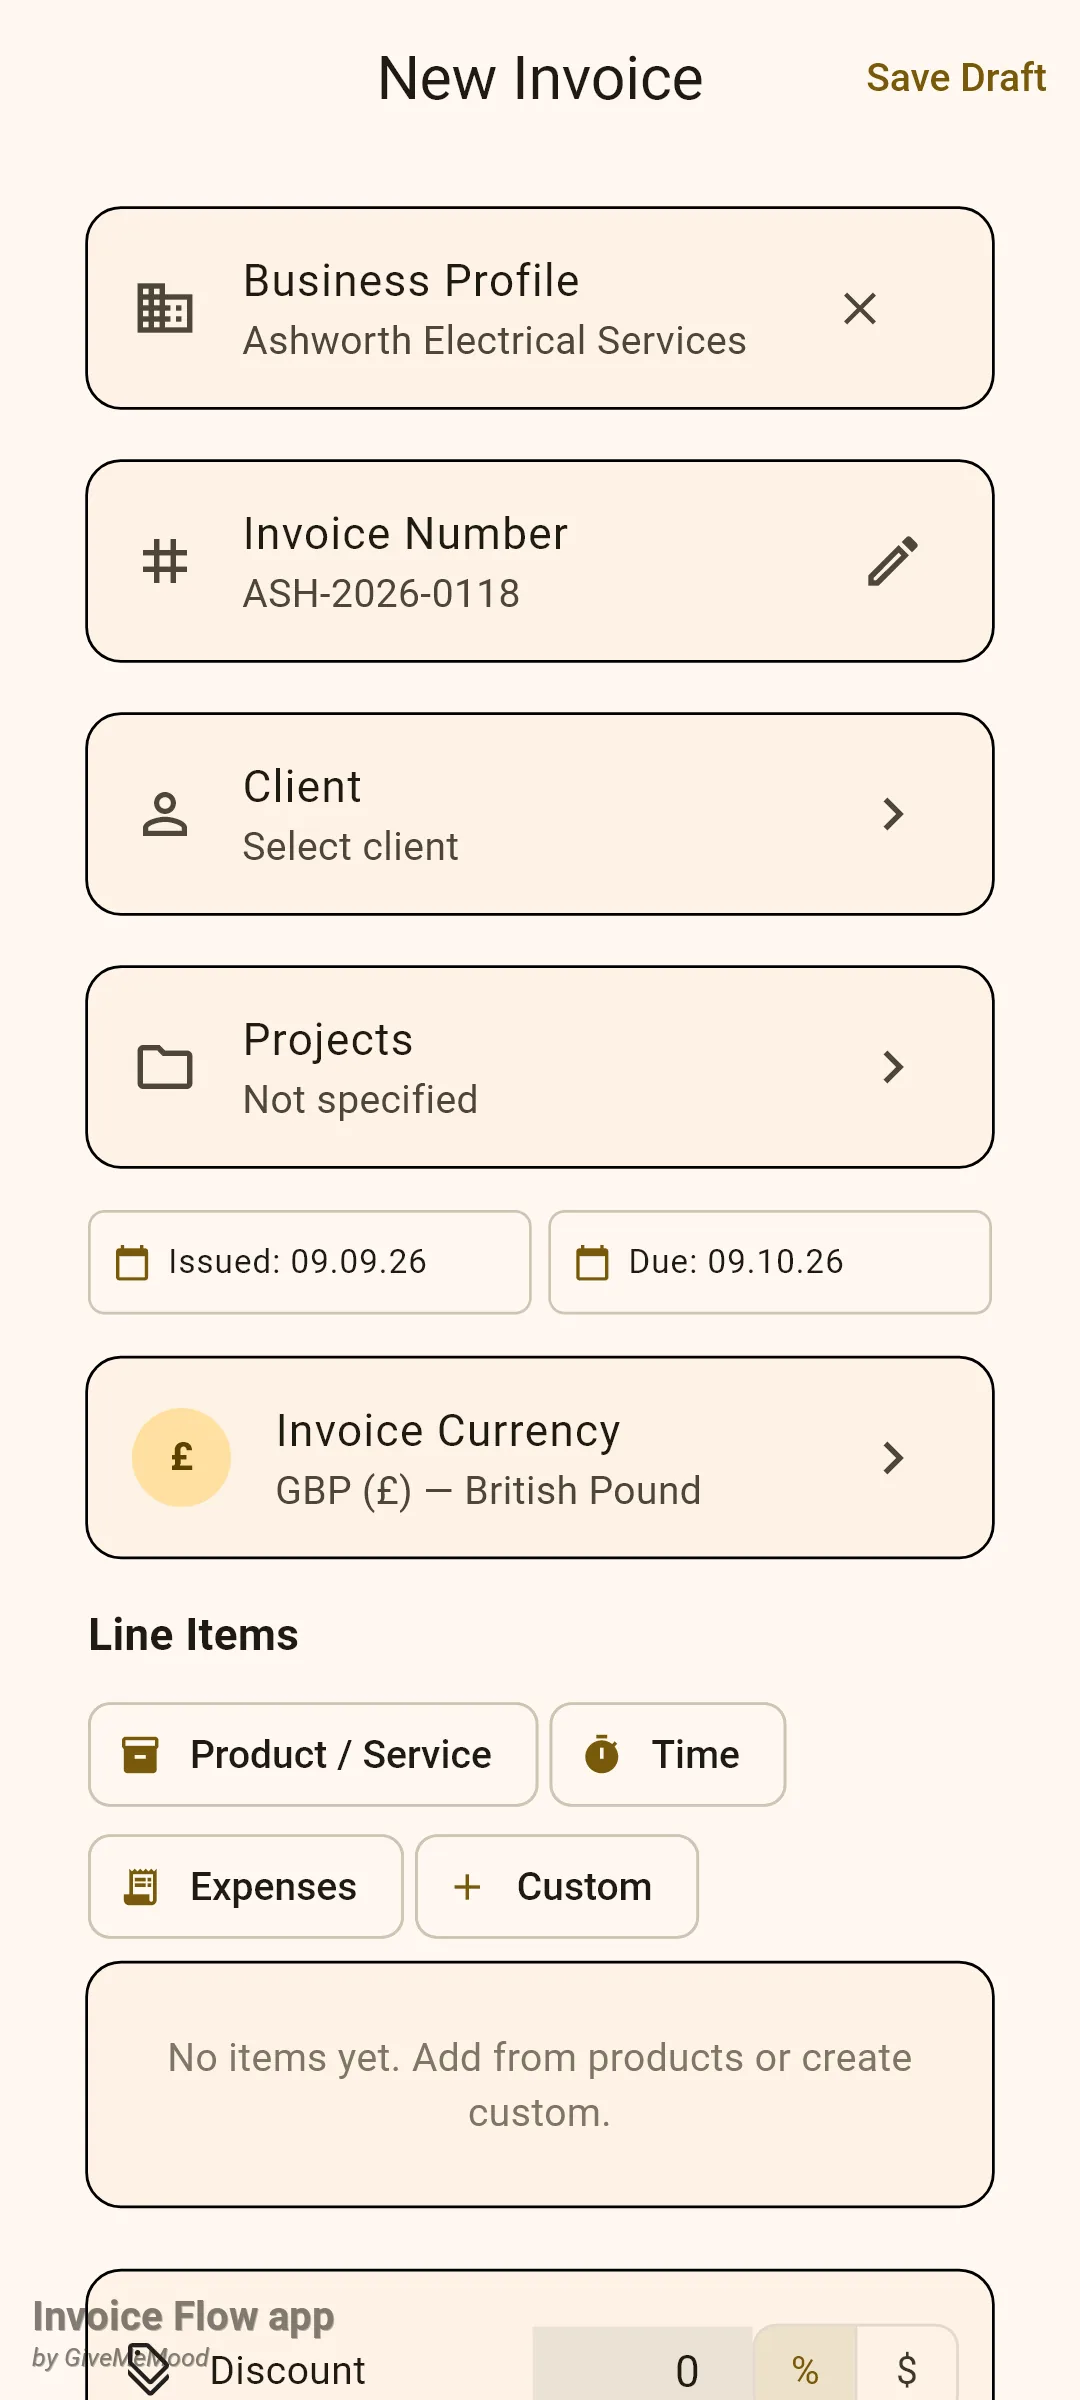
The form is one long scrolling page. From top to bottom you will find:
- Business Profile with the profile that will appear as the sender. If you run more than one profile, this card opens a Select profile dialog; with a single profile it is read-only. The small close icon (Hide from this invoice) only hides the card while you work; the profile stays attached.
- Invoice Number, already generated from your numbering series. Tap it to type your own number.
- Client showing Select client until you pick someone.
- Projects showing Not specified unless you link the document to a project.
- Two date boxes, Issued and Due.
- Invoice Currency, prefilled from the series or the profile.
- The Line Items section with add chips, tax preset chips (once a client with a known country is selected) and one card per line.
- Discount, Early-payment discount and the totals card.
- Invoice Language, Photo Attachments, Signature, Payment Options and Select Template.
- Notes, Payment Terms, then checkbox lists of profile details to print, and finally the full-width Save button (Save Changes when editing).
How to set up the header: client, number, dates and currency
- Tap the Client card and pick the customer from the Select client dialog. If the person is new, use the Add New Client row at the bottom of the same dialog; the client form opens and you come back to the invoice afterwards.
- Check the Invoice Number card. The number is rendered from the numbering series of your profile (for Ashworth, ASH-2026-0118). If you need a different number, tap the card, type the new value in the Invoice Number dialog and press Save. A reset icon (Reset to auto) then appears so you can return to automatic numbering.
- Tap Issued to change the issue date and Due to set the payment deadline. Both open a calendar picker.
- Tap Invoice Currency only if the invoice should be in a currency other than your profile default. The line prices you type afterwards are in that currency.
- Optionally tap Projects and choose a project so the invoice counts towards that project's totals.
If your profile has more than one numbering series of the same kind, an extra Invoice Series card appears above the number so you can choose which series to draw from. The series cannot be changed once the document exists; you would create a new one instead.
How to add labour and materials as line items
Every line has a description (Item), a quantity (Qty), a unit price (Price) and a tax rate (%). There are four ways to create a line, one per chip under the Line Items header:
| Chip | What it does |
|---|---|
| Product / Service | Opens Add from Saved with your product and rate library. Picking a row copies its name, unit, price and default tax rate. |
| Time | Opens Add Time Entries with stopped, not yet invoiced time entries for the selected client. Each ticked entry becomes a line with hours as quantity and the entry’s hourly rate as price. |
| Expenses | Opens Add Expenses with billable, not yet invoiced expenses for the client. Each becomes a line with quantity 1 and the expense amount as price. |
| Custom | Adds an empty card that you fill in by hand. |
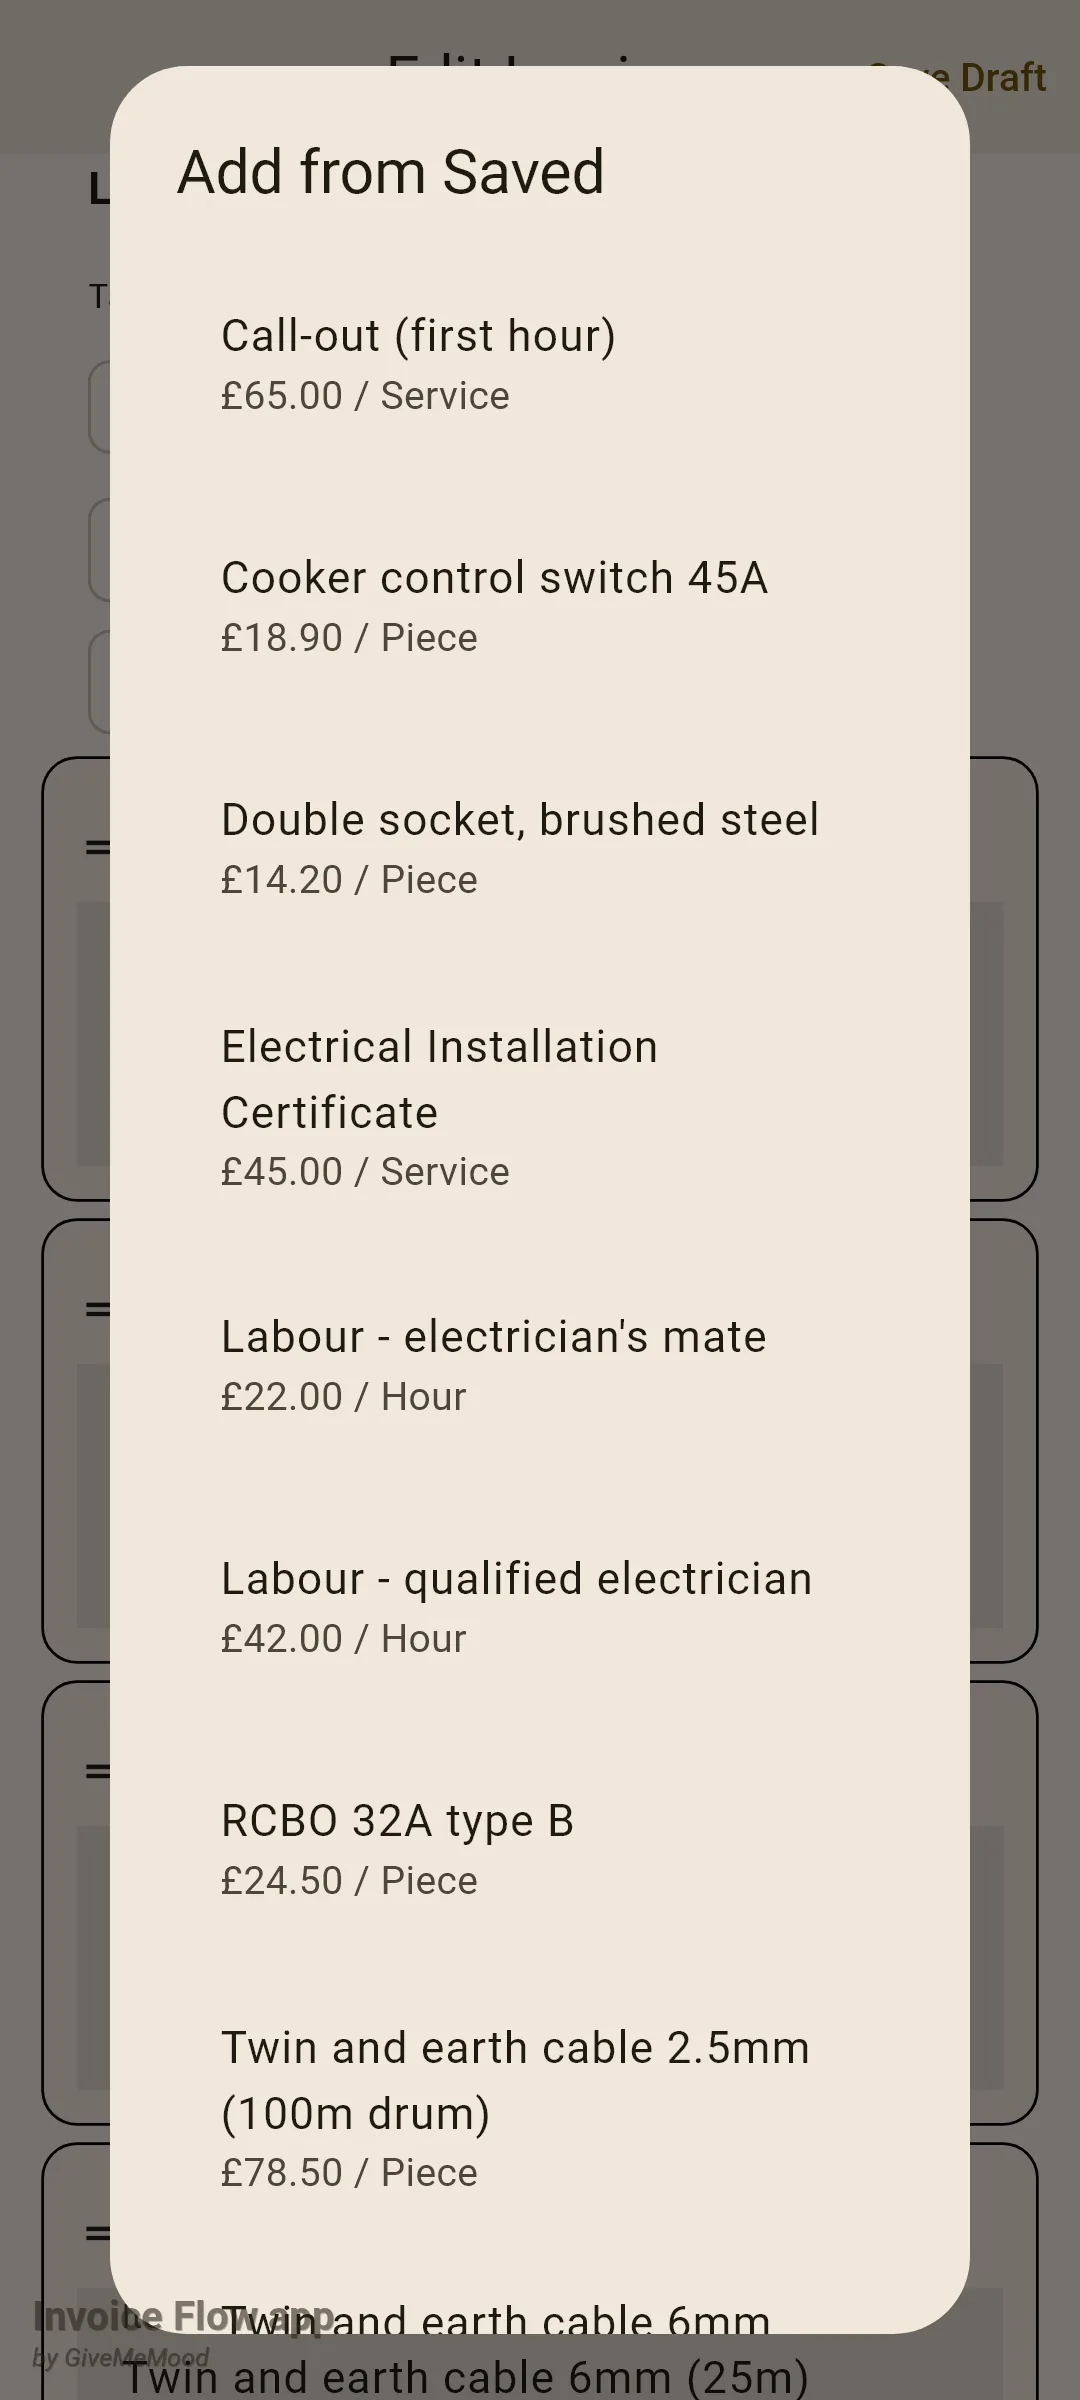
- Tap Product / Service. The Add from Saved dialog lists each saved item with its price in the invoice currency and its unit (Piece, Hour, Day, Project or Service).
- Tap Labour - qualified electrician. A new card appears at the bottom of the list, briefly highlighted, and the page scrolls to it.
- Change Qty from 1 to the hours worked, for example 16. The amount in the card header updates immediately.
- Repeat for materials: cable drums, sockets, the cooker switch, RCBOs. For items you never saved, tap Custom and type the description and price directly, as Ashworth does for "Waste removal and making good".
- If a saved product does not exist yet, use the last row of the dialog, Create New Item, to save it to the library and add it in one step.
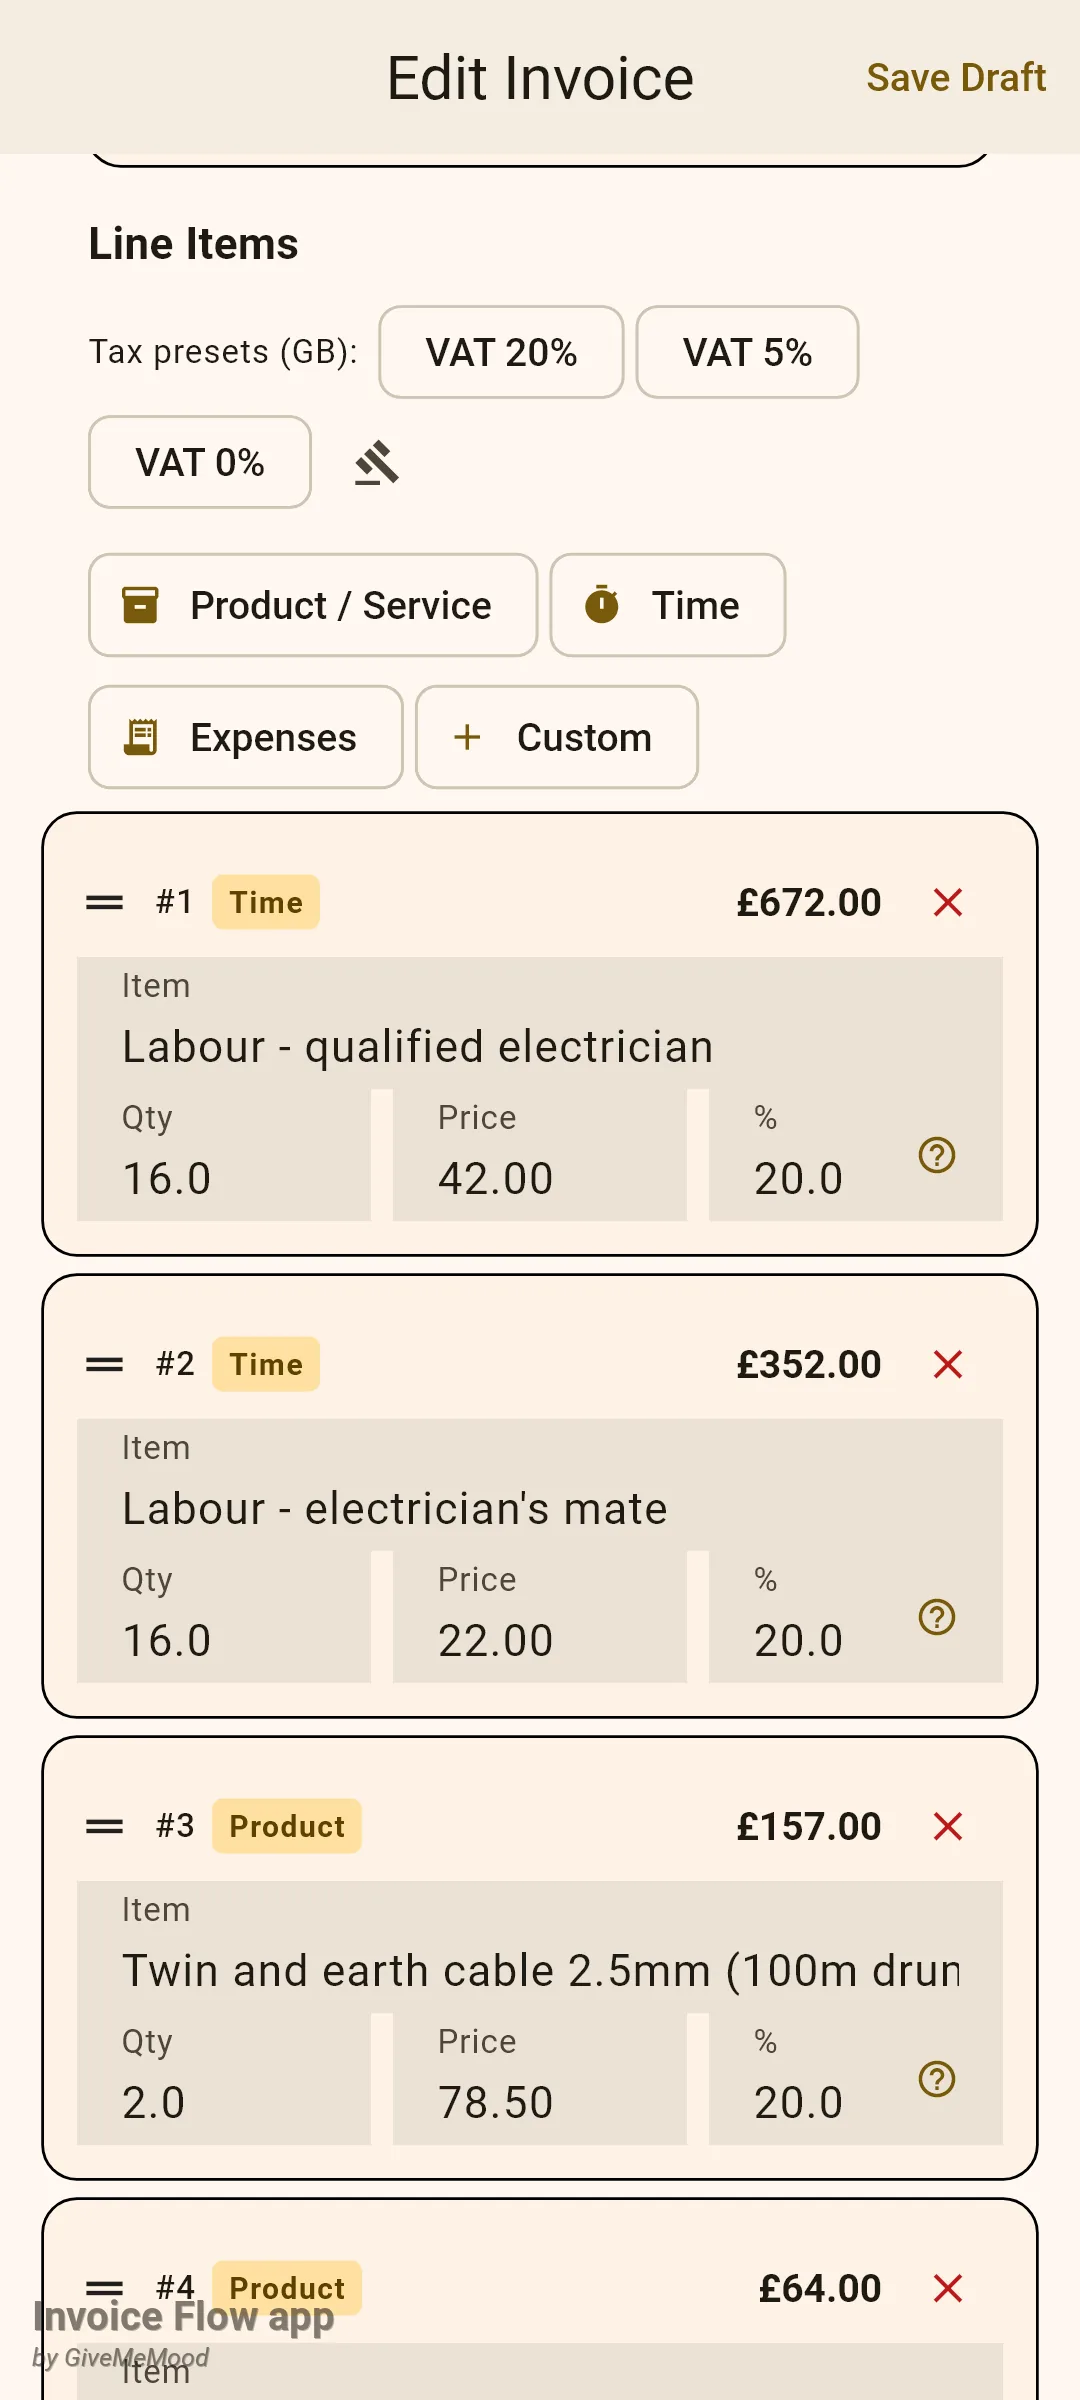
Each card has a drag handle on the left, so you can reorder lines by pressing and holding the handle; the order you see is the order printed on the PDF. The red close icon removes a line. The badge next to the line number (Product, Service, Time, Expense or Project) is worked out from the unit and the links of the line; it is not something you set by hand, and it changes if you add the same item from a different source. The unit itself is not editable on the card: it comes from the saved product (or is “item” for custom lines, “hour” for time entries).
How to set tax rates and a discount
- Once a client with a country on file is selected, a row Tax presets (GB): appears above the add chips. Tap a preset such as VAT 20% to write that rate into every line at once; a short message confirms "Applied 20% to all items".
- To set a different rate on one line only, type it into that card's % field, or tap the small help icon next to it to open the Tax Rate Reference sheet, choose a category and press Apply on the suggested rate.
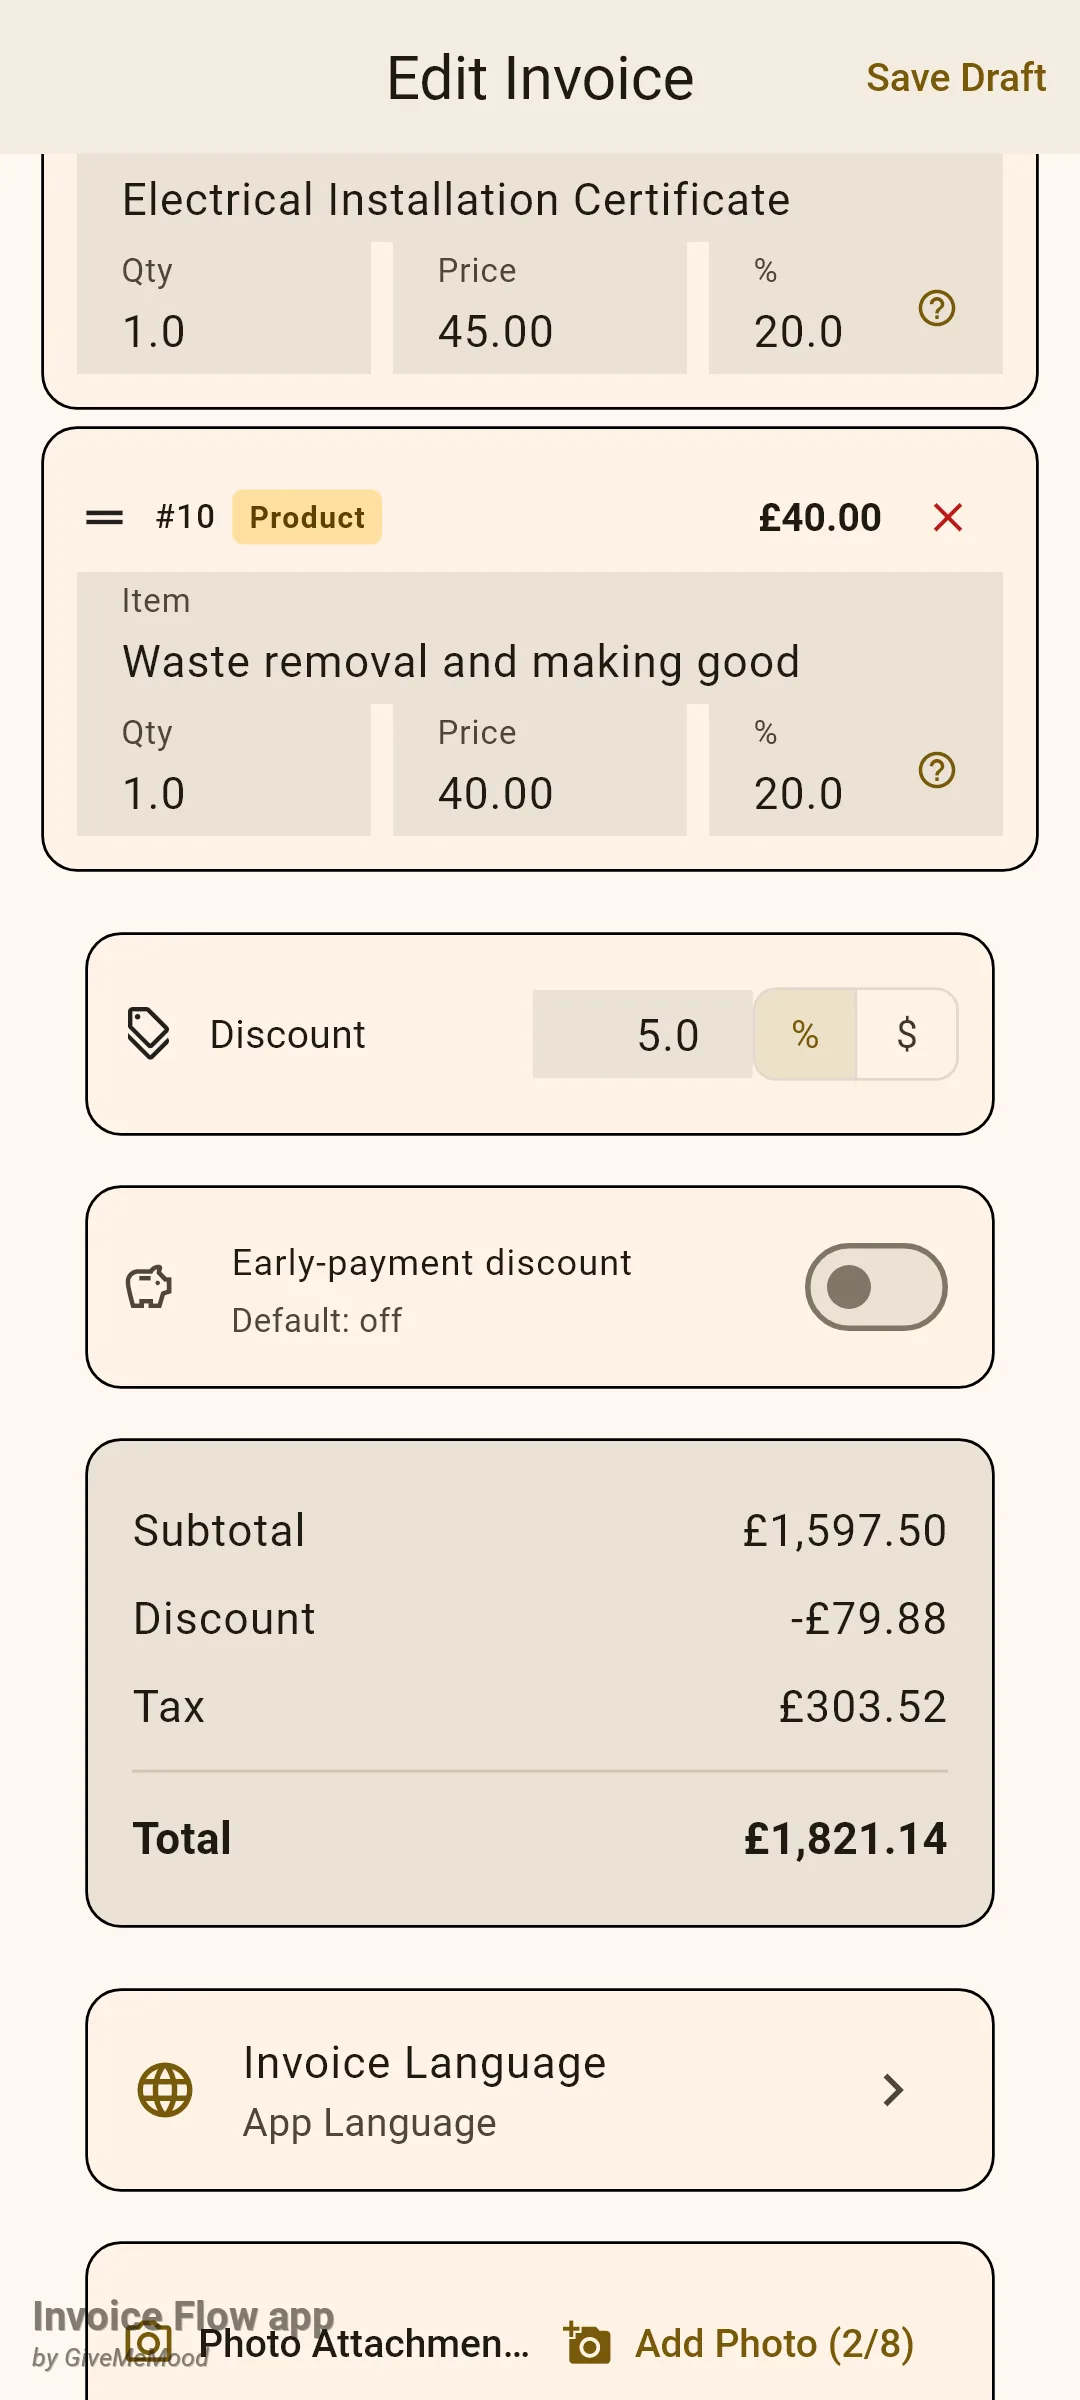
- Scroll to the Discount card, type the value and choose % for a percentage or the currency toggle for a fixed amount. Ashworth gives repeat customers 5%.
- Read the totals card: Subtotal, the discount shown as a negative line, Tax and the bold Total recalculate as you type.
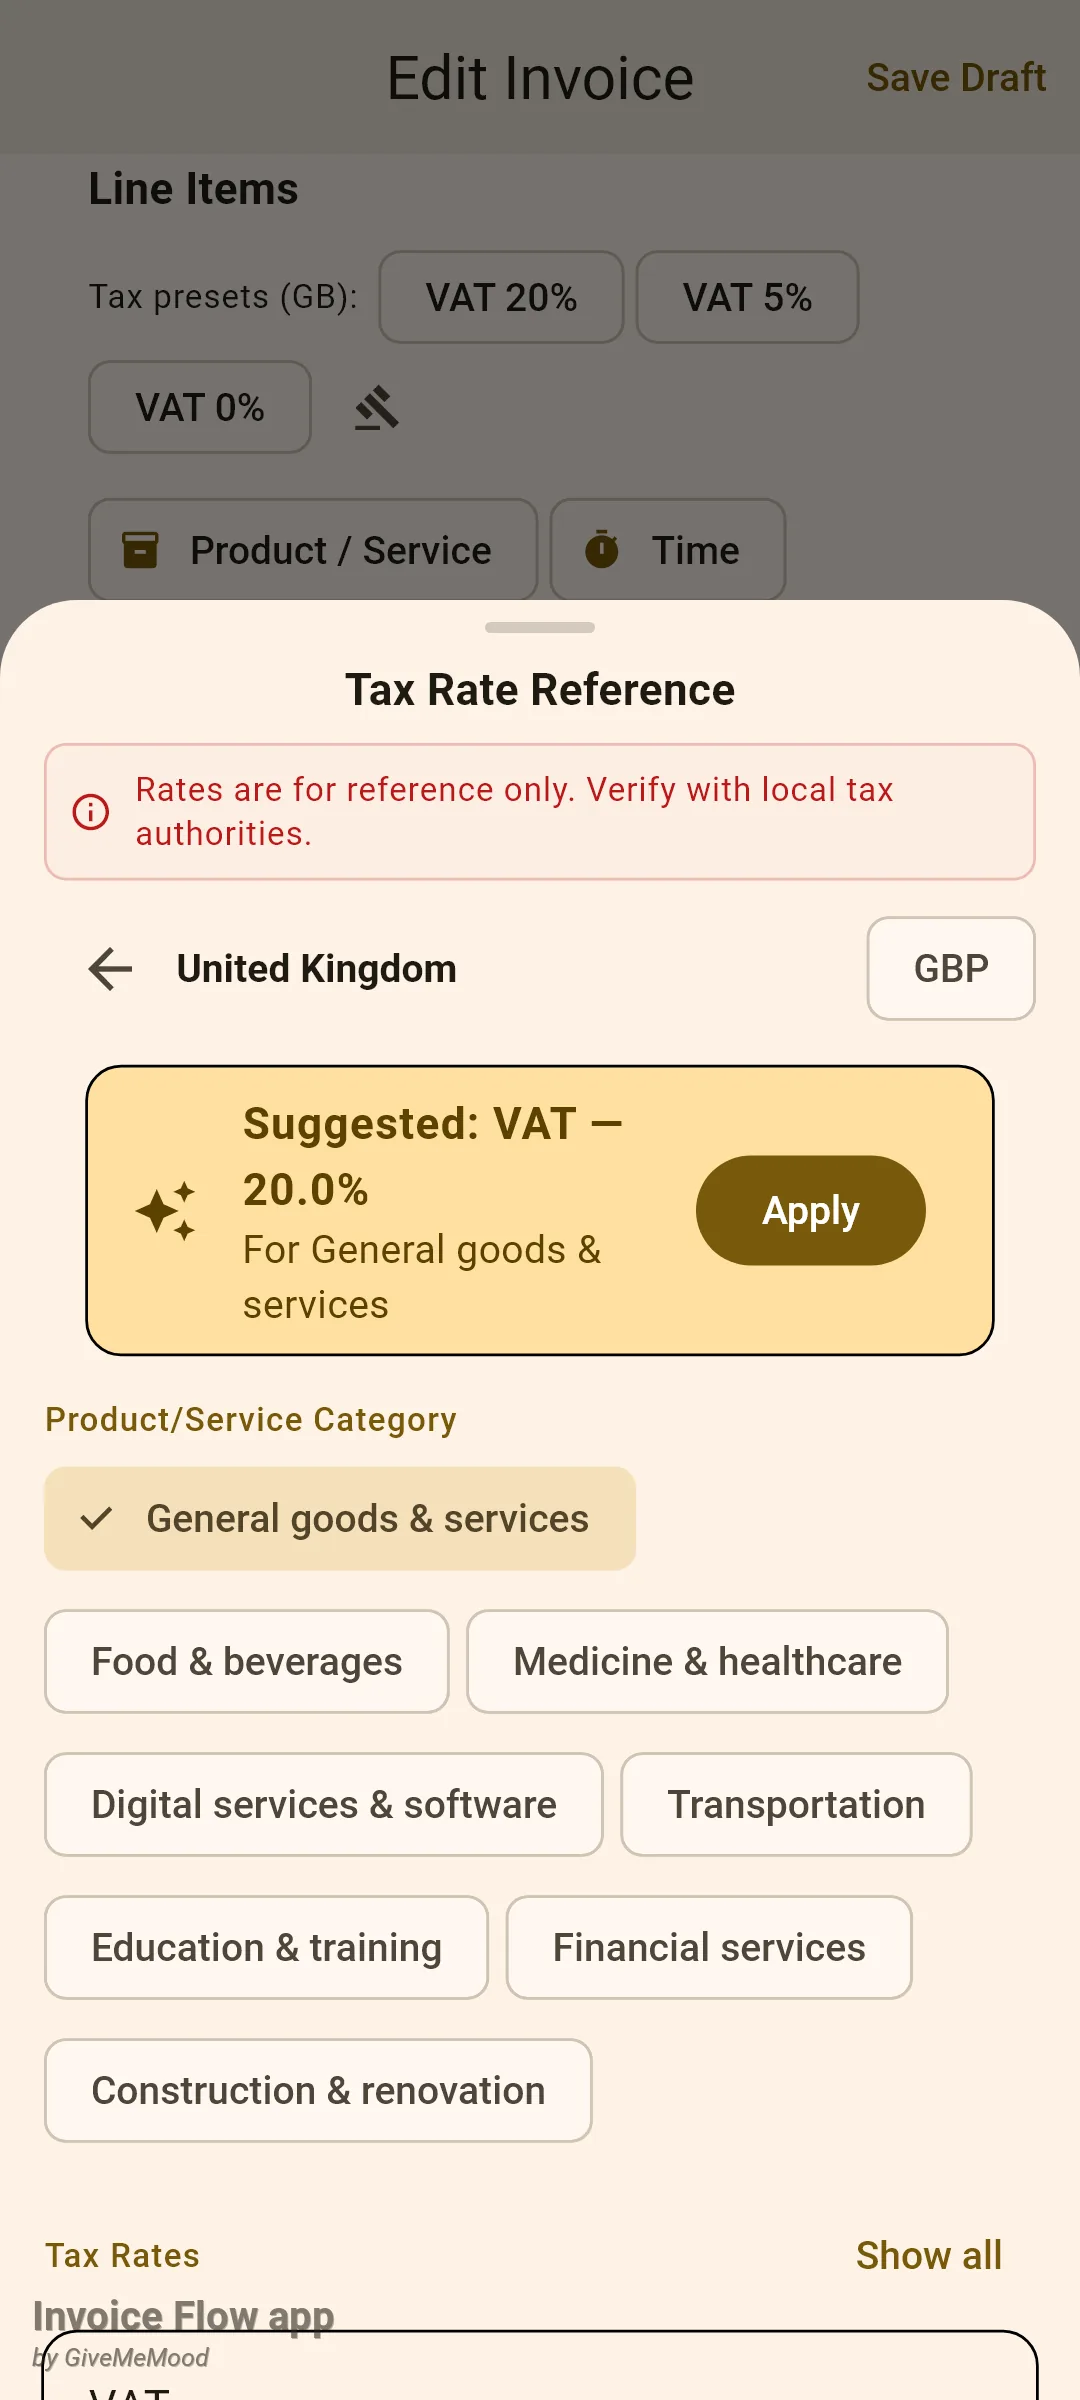
The gavel icon next to the presets opens a list of legal wording for that country (for the UK, the reverse-charge sentence) and appends the one you pick to the Notes field.
How to attach photos, sign, and choose what prints
The lower half of the form controls what the customer sees around the table of lines.
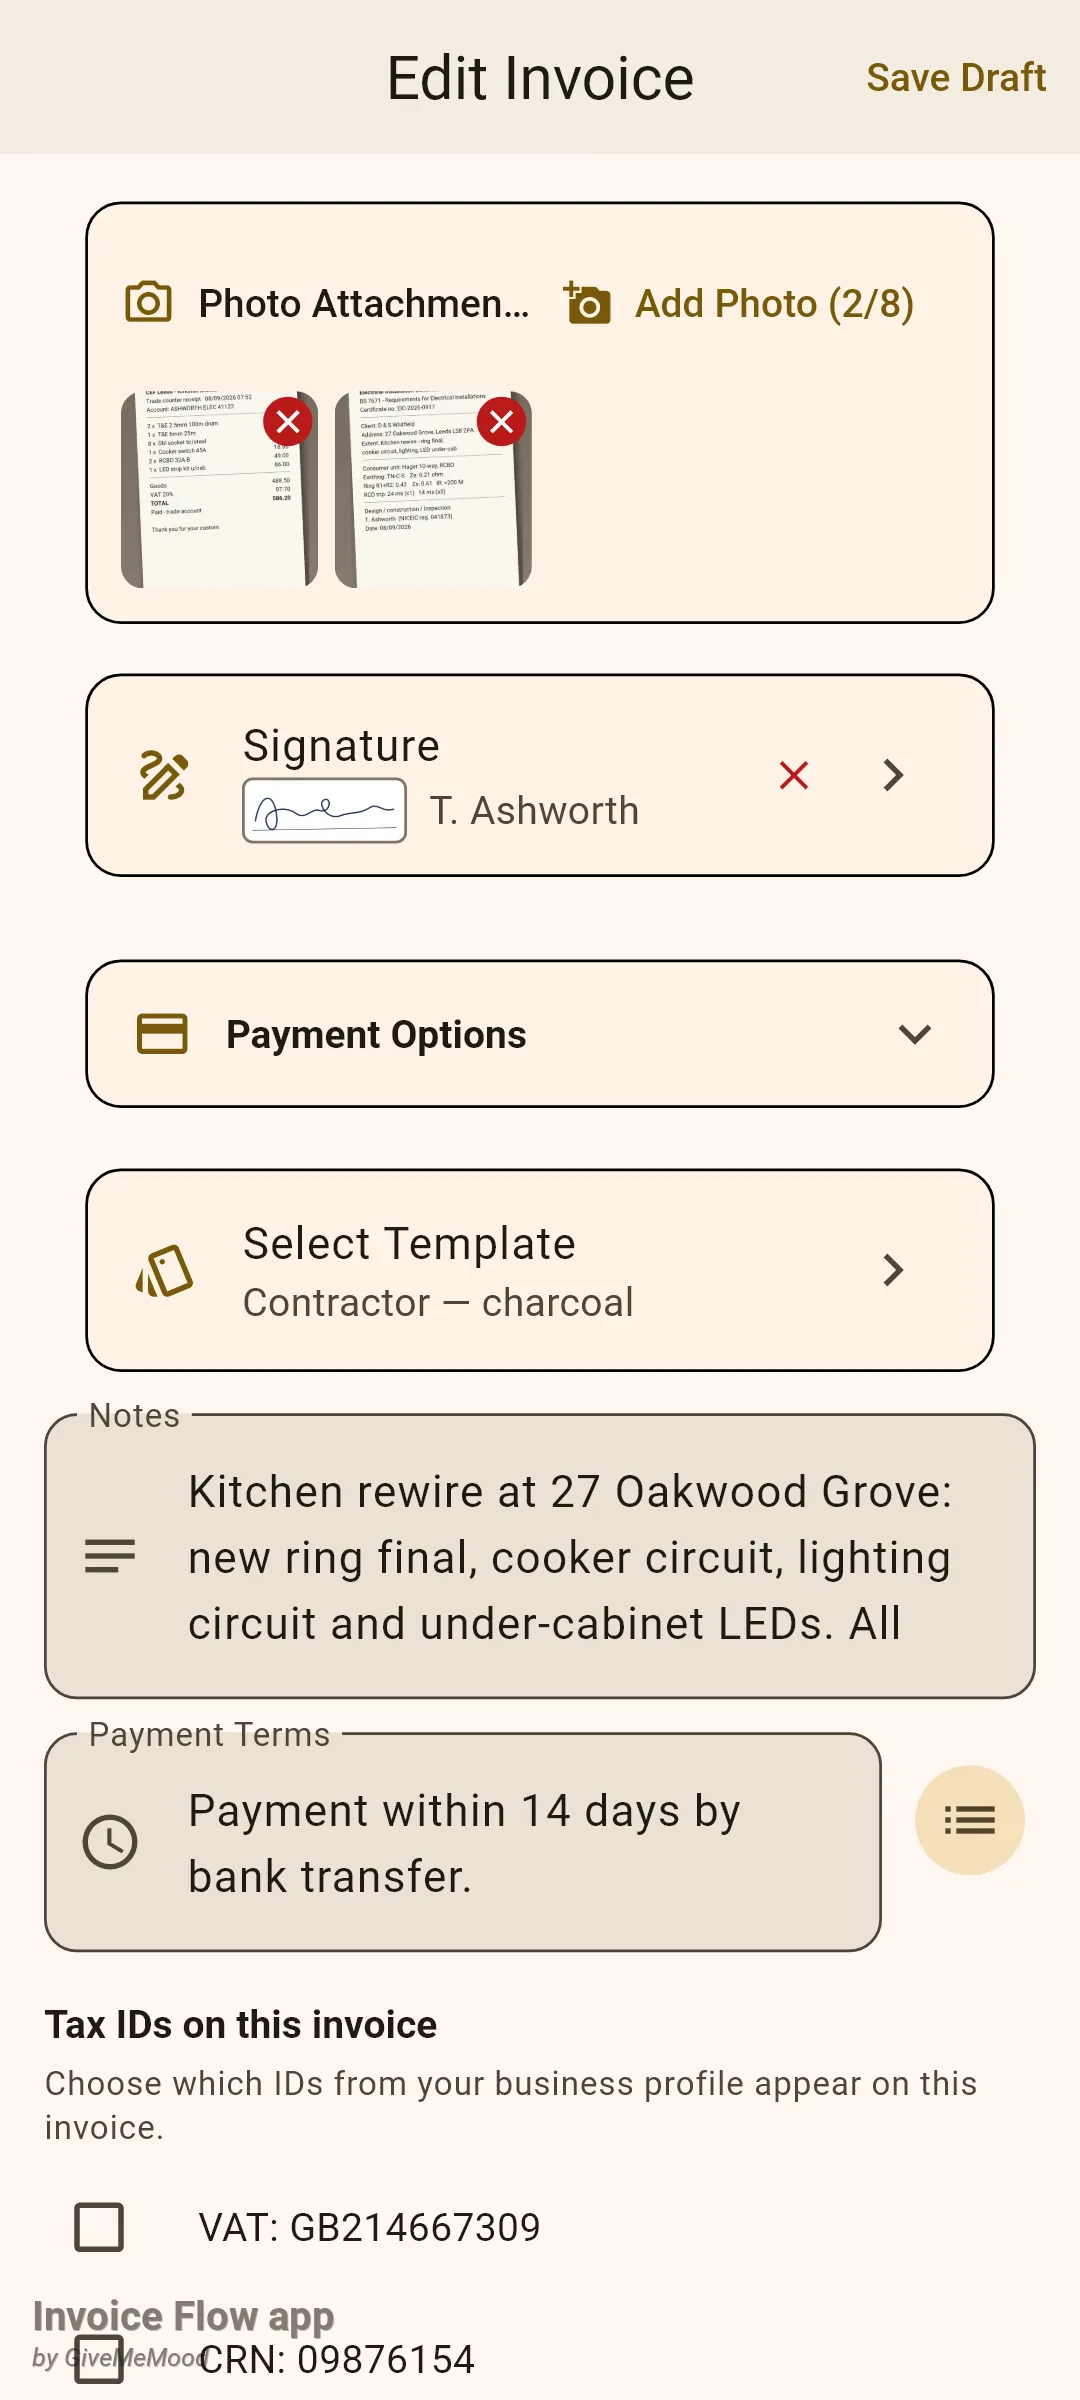
- In Photo Attachments, tap Add Photo (0/8) and choose Camera or Gallery. Ashworth attaches the wholesaler receipt and the installation certificate. Thumbnails appear four per row; the red cross on a thumbnail asks Delete photo? before removing it.
- Tap Signature. The Select Signature sheet lists your saved signatures and offers Draw new, which opens a drawing pad. The chosen signature shows as a small preview on the card and is printed on the PDF as the authorised signature.
- Tap Select Template to change the PDF design and colour palette (Ashworth uses Contractor with the charcoal palette).
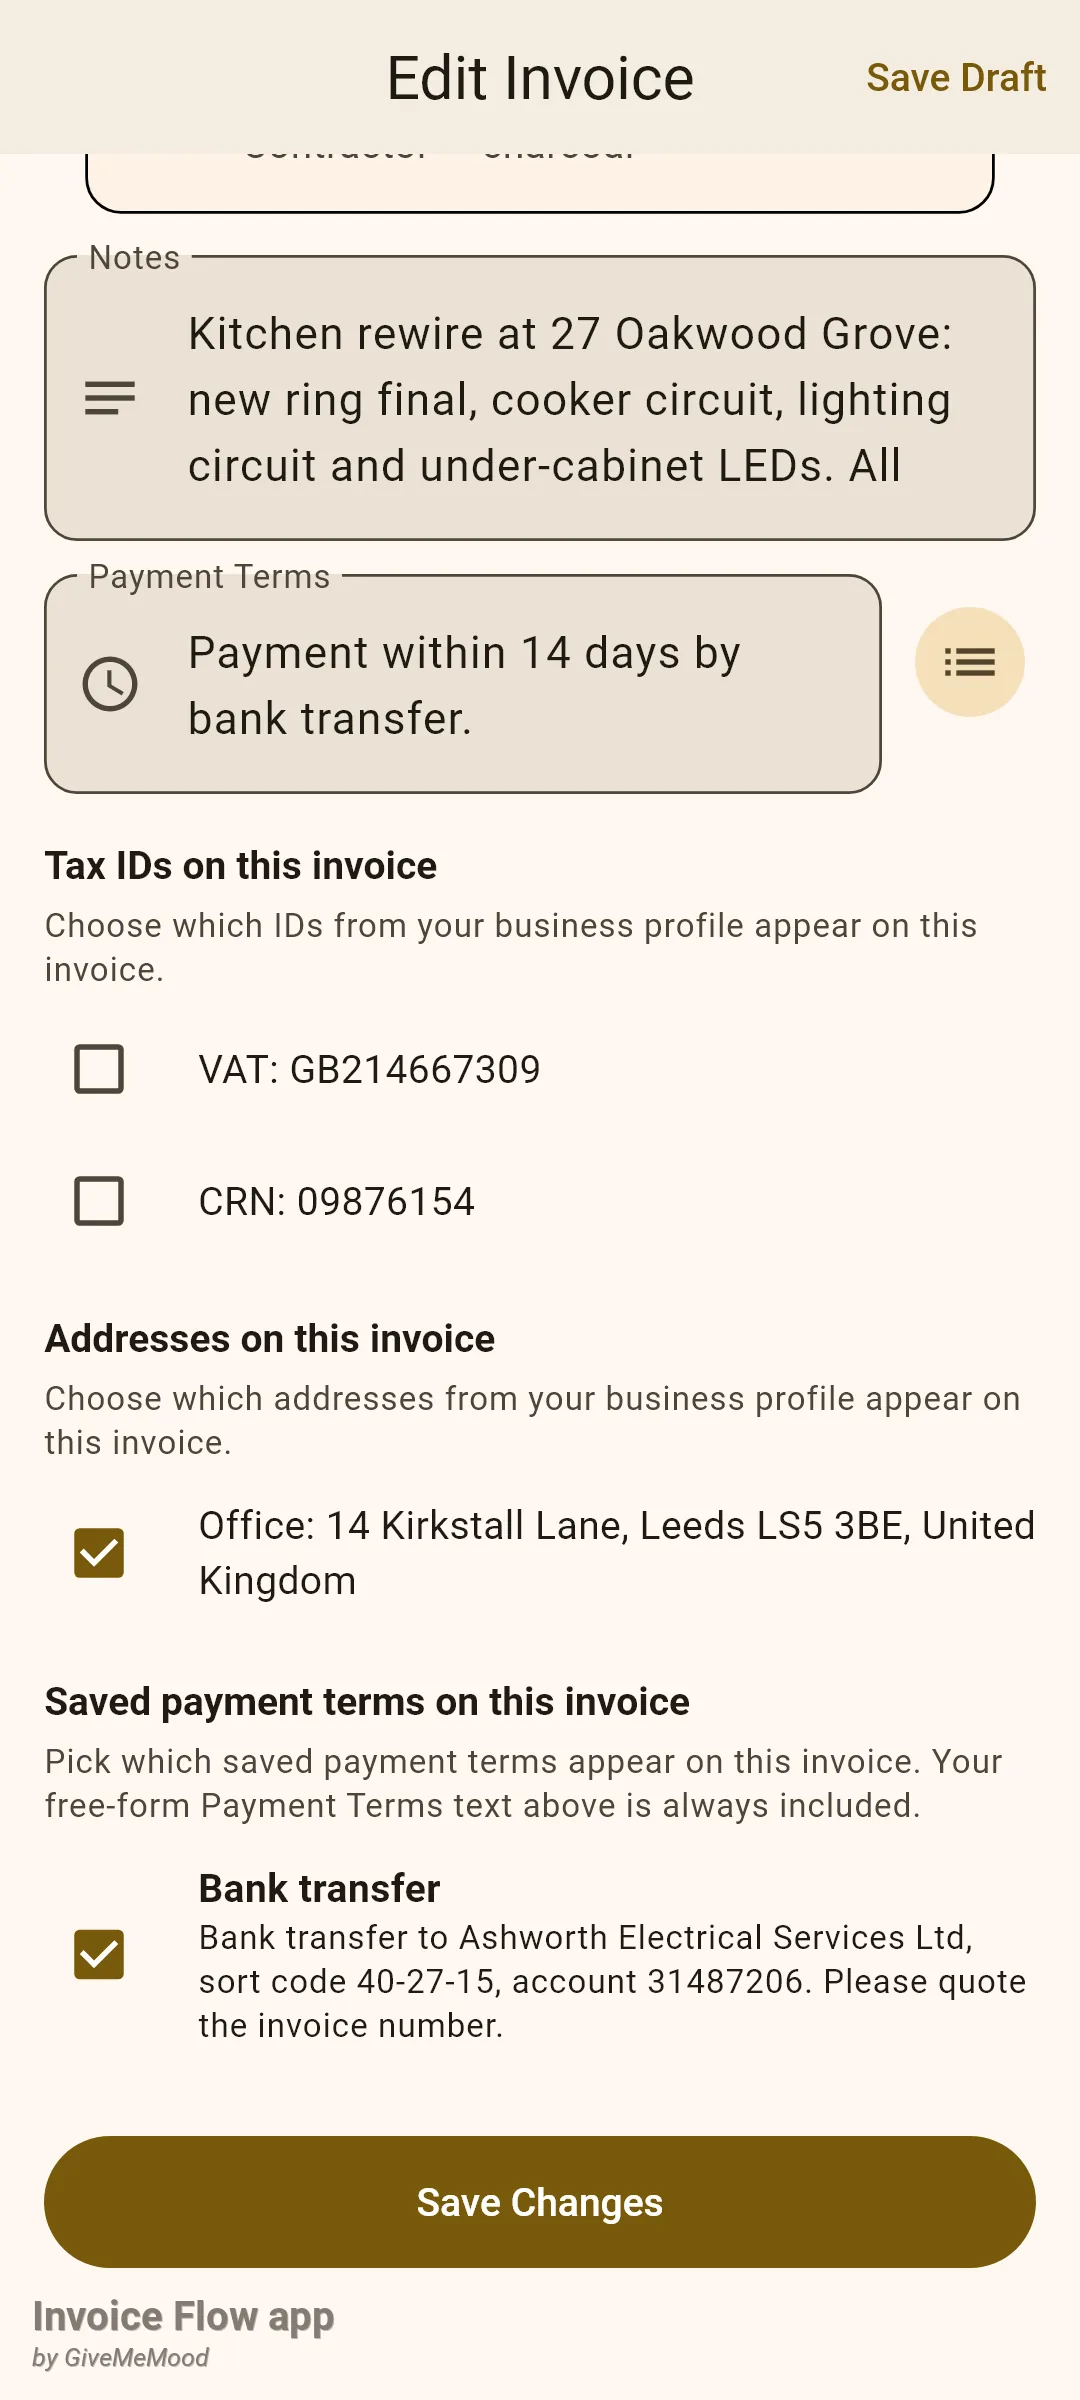
- Type any message for the customer in Notes, for example the scope of the job and the test date.
- Fill in Payment Terms by hand, or tap the list button (From saved) beside it to pick from Saved on this profile or Built-in presets.
- Tick or untick the boxes under Tax IDs on this invoice, Addresses on this invoice and Saved payment terms on this invoice to control which profile details print on this particular document.
- Press Save (or Save Changes). The editor closes and the document appears in the list as a draft.
Once saved, open the document and use the preview to see the generated PDF. The header, the table of lines, the discount and tax rows, the notes, the signature and the attached photos all come from what you entered in the editor.
Rules and details
Saving requires a client and at least one line. Pressing Save without a client shows “Please select a client”; with no lines it shows “Add at least one line item”. Each line’s Item field must be filled in, otherwise it is flagged as Required. If no business profile exists at all, saving stops with “Set up profile”.
Saving needs an active trial or Pro subscription. The editor re-checks access on save; if neither is active you are taken to the paywall instead of saving. Everything else in the editor works without it, but nothing is stored until you can save.
A saved invoice is always a draft. Whatever you edit, the document is written back with the status draft and its sent and paid timestamps cleared. Sent or paid documents therefore open in a read-only view (View-only mode with the hint “This invoice was sent. To make changes, duplicate it.”), and you would duplicate them to make a corrected copy.
Defaults for a new document: the default business profile and its default series; currency from the series, else the first allowed currency, else the profile currency; issue date today; due date 30 days later; payment terms copied from the profile; the first tax ID ticked and all addresses, phone numbers, emails and links ticked; the default saved payment term ticked; the Clean template with the Ocean palette unless you change it.
Dates: the calendar covers 2020 to 2100. If you move the issue date past the current due date, the due date jumps to issue date plus 30 days.
Numbering: numbers are unique within a profile. If the generated number already exists (for example after a restore), the editor increments the series and retries, up to ten times. The series counter only advances after a successful save, so abandoning a form does not burn a number. A manually typed number is kept until you tap Reset to auto.
Arithmetic: each line amount is quantity times price rounded to two decimals; line tax is amount times rate. A percentage discount is converted to an amount and a discount larger than the subtotal is capped at the subtotal. Tax is then scaled by the ratio of the discounted subtotal to the full subtotal, so tax is charged on what the customer actually pays. If a quantity cannot be parsed it falls back to 1, a price to 0.
Tax preset chips apply the rate to every existing line, not to lines you add afterwards; add lines first, then tap the chip, or set the rate per line.
Time entries and expenses added through the Time and Expenses chips are marked as invoiced when a new invoice is first saved, and disappear from the pickers on later invoices. This marking happens only on creation, not when editing an existing invoice. Running timers and already invoiced entries never appear.
Photos: up to eight per document. They are resized to 1200 pixels on the long edge and copied into the app’s own storage, so deleting the original from the gallery does not affect the invoice.
Early-payment discount: this switch (invoices only) does not change the total. It prints an offer such as “pay within 7 days and deduct 2%”, using the profile or client default or the manual values you enter after switching it on.
Custom fields: the editor has no separate custom-fields form. Extra references such as a purchase order number or a job reference go into Notes or into a custom line with a zero price.
Leaving the form: going back with unsaved changes shows an Unsaved Changes dialog with Stay and Leave. The check reacts to typed notes, terms, the discount, client, series, currency and added lines; changing only a date, quantity, price, template or signature does not trigger it, so save deliberately.
Tips
Related guides
- Clients, categories and groups for setting up the customers you bill and their country, which drives the tax preset chips.
- Products and inventory for the library behind the Add from Saved dialog.
- PDF preview, sharing and the PDF editor for what happens after you save: previewing, sharing and touching up the PDF.