 EN
EN  العربية
  Български
  Čeština
  Dansk
Dansk  Deutsch
  Ελληνικά
  Español
  Suomi
Suomi  Français
  עברית
עברית  हिन्दी
  Bahasa Indonesia
  Italiano
  日本語
日本語  한국어
한국어  Bahasa Melayu
  Nederlands
  Norsk
Norsk  Polski
  Português
  Română
  Русский
  Svenska
  Kiswahili
  ไทย
ไทย  Türkçe
  Українська
  Tiếng Việt
  中文
中文 User guide
Products, services and inventory
Build a product library with default prices and units, drop saved items into invoice lines in one tap, and read stock levels and stock automation rules.
A product in Invoice Flow is a saved line: a name, an optional description, a default price, a unit and a default tax rate. Once it exists, every invoice, estimate or recurring schedule pulls it in with one tap and you only adjust the quantity. The same record is the anchor for the Inventory tool, which counts what you have on hand, and for stock automation, which subtracts from that count when invoices go out.
This guide follows Kestrel Coffee Roasters in Portland, Oregon. Maya sells roasted beans in 5 lb bags to cafes across the city, plus cold brew concentrate, a shelf-ready 12 oz retail bag and a handful of barista services. Oregon has no sales tax, so her tax rates stay at zero; everything is billed in US dollars.
What you see on the screen
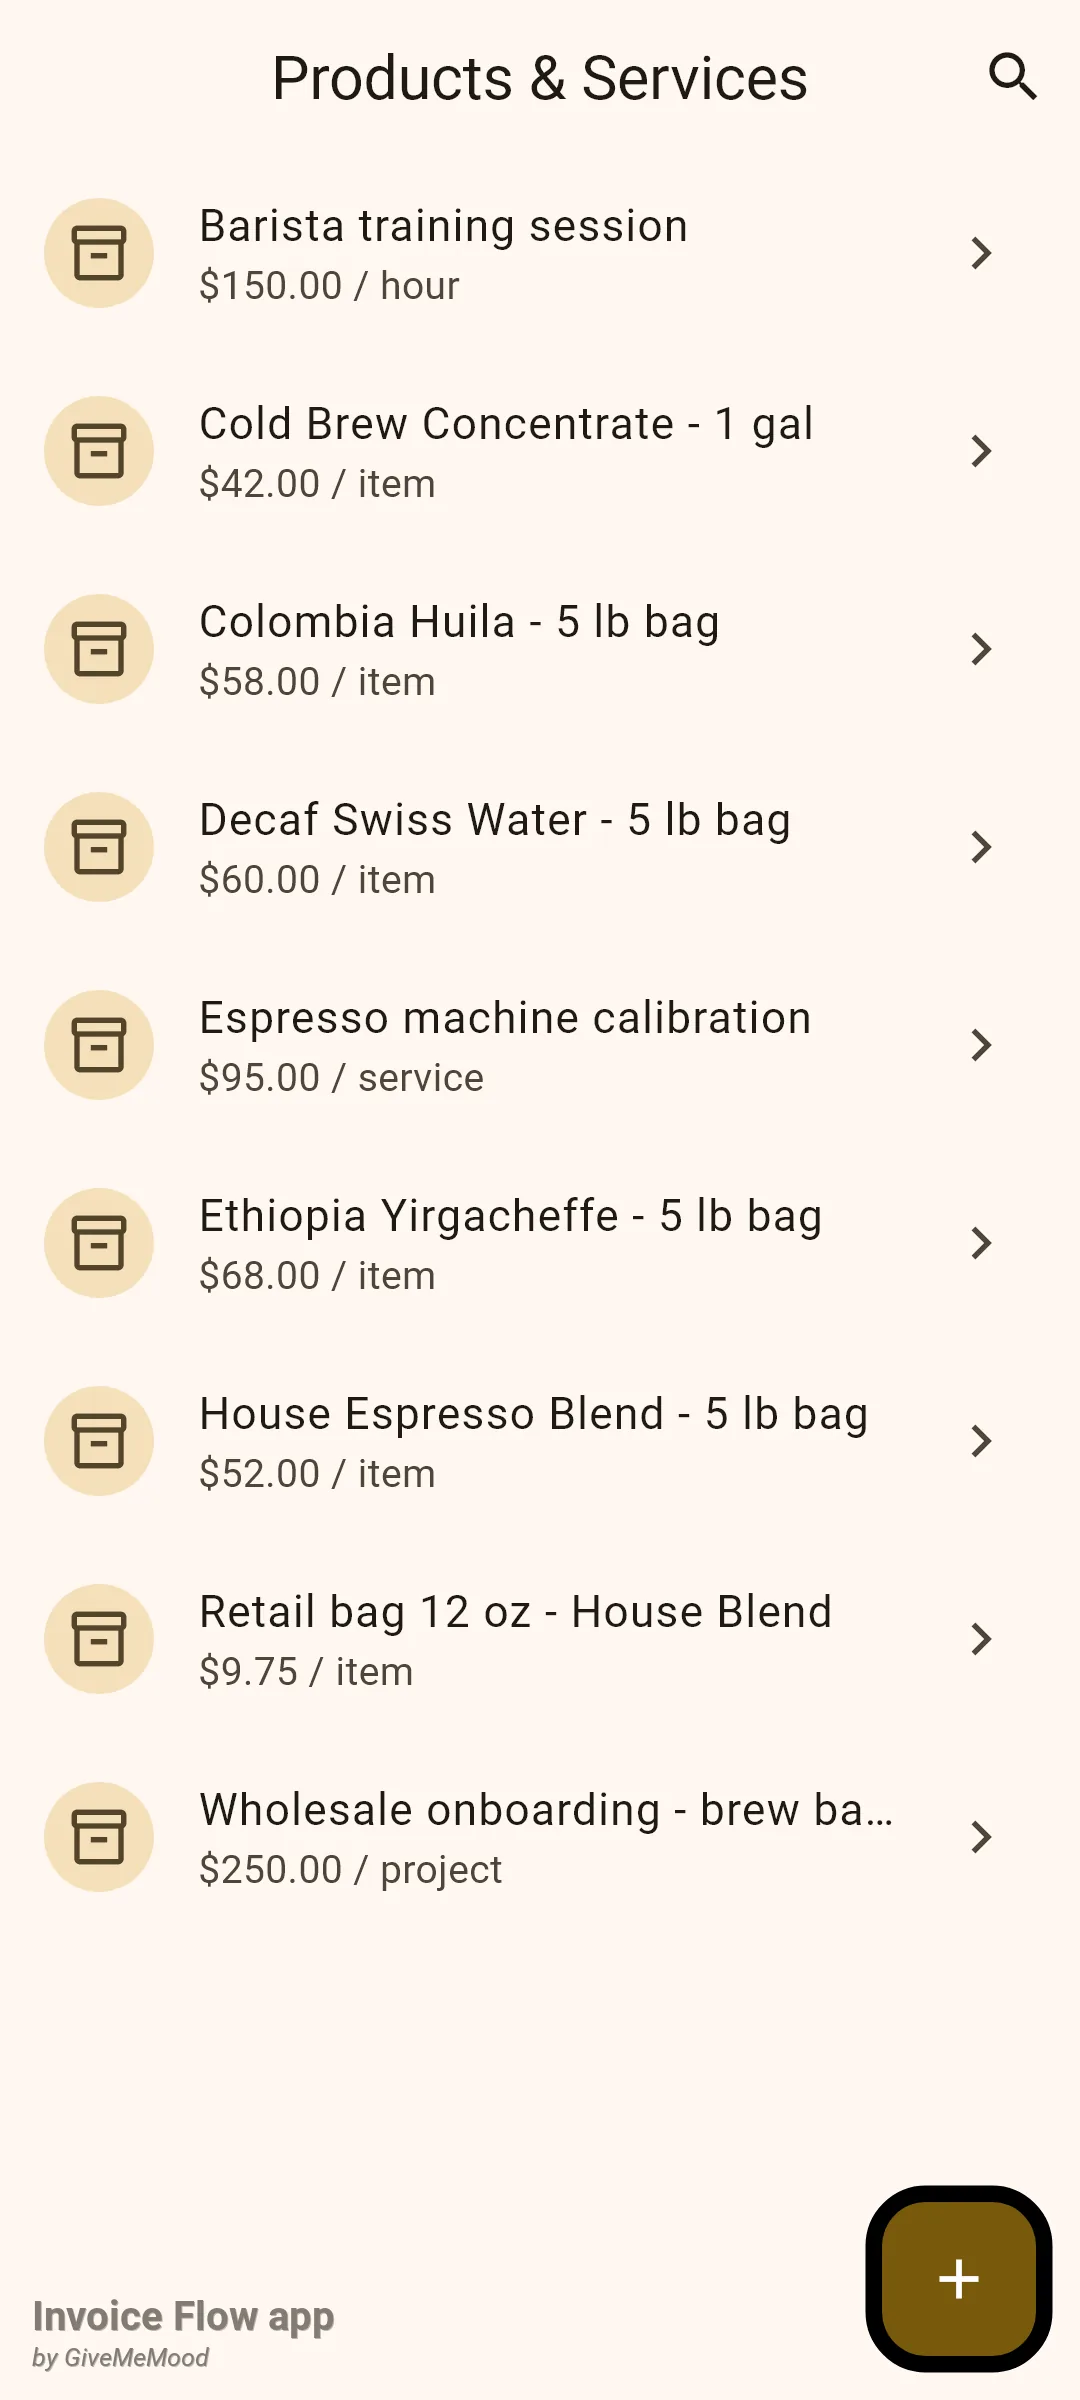
The product library lives under the Settings tab. Scroll to the Library section and tap Products & Services (subtitle “Manage your product library”). The list is sorted by name. Each row shows a box icon, the product name and, underneath, the default price followed by a slash and the unit code, for example “$52.00 / item”. When a product has a default tax rate above zero the row adds a bullet and the rate, such as ”• 20% tax”.
The magnifier in the app bar turns the title into a Search products… field that filters by name as you type; the same icon becomes a cross to close it. Swiping a row from right to left reveals a red delete strip. The round + button at the bottom right starts a new product. An empty library shows “No products yet” with an Add Product button.
Two other screens work with the same records. The Tools tab has an Inventory card that opens stock levels for products flagged as tracked, and the Library section in Settings has a second tile, Stock automation (subtitle “Auto-adjust stock when invoicing”), that decides when invoices change those levels. Both are covered further down.
How to add or edit a product
- Open Settings, tap Products & Services, then tap +. The editor opens titled New Product; tapping an existing row opens the same form titled Edit Product with its values filled in.
- Type the Name *. This is the only required field and becomes the description of the invoice line. Put the pack size in the name, as in "Colombia Huila - 5 lb bag", so the line reads correctly on the PDF.
- Add a Description if you want a note for yourself. It is not copied onto invoice lines and does not print; it only appears in this editor.
- Enter the Default Price *. The field starts at 0.00 and accepts decimals; a blank or non-numeric value blocks saving with "Required" or "Invalid number".
- Pick a Unit from the dropdown: item, hour, day, project or service. The codes are shown as-is here; the invoice editor and the product picker render them as Piece, Hour, Day, Project and Service. The PDF prints quantity and price only, not the unit.
- Set Tax Rate (%) if this product normally carries tax. Leave it at 0 for tax-free goods; a value that is not a number is rejected.
- Tap Save in the app bar. The row appears in the list at its alphabetical position.
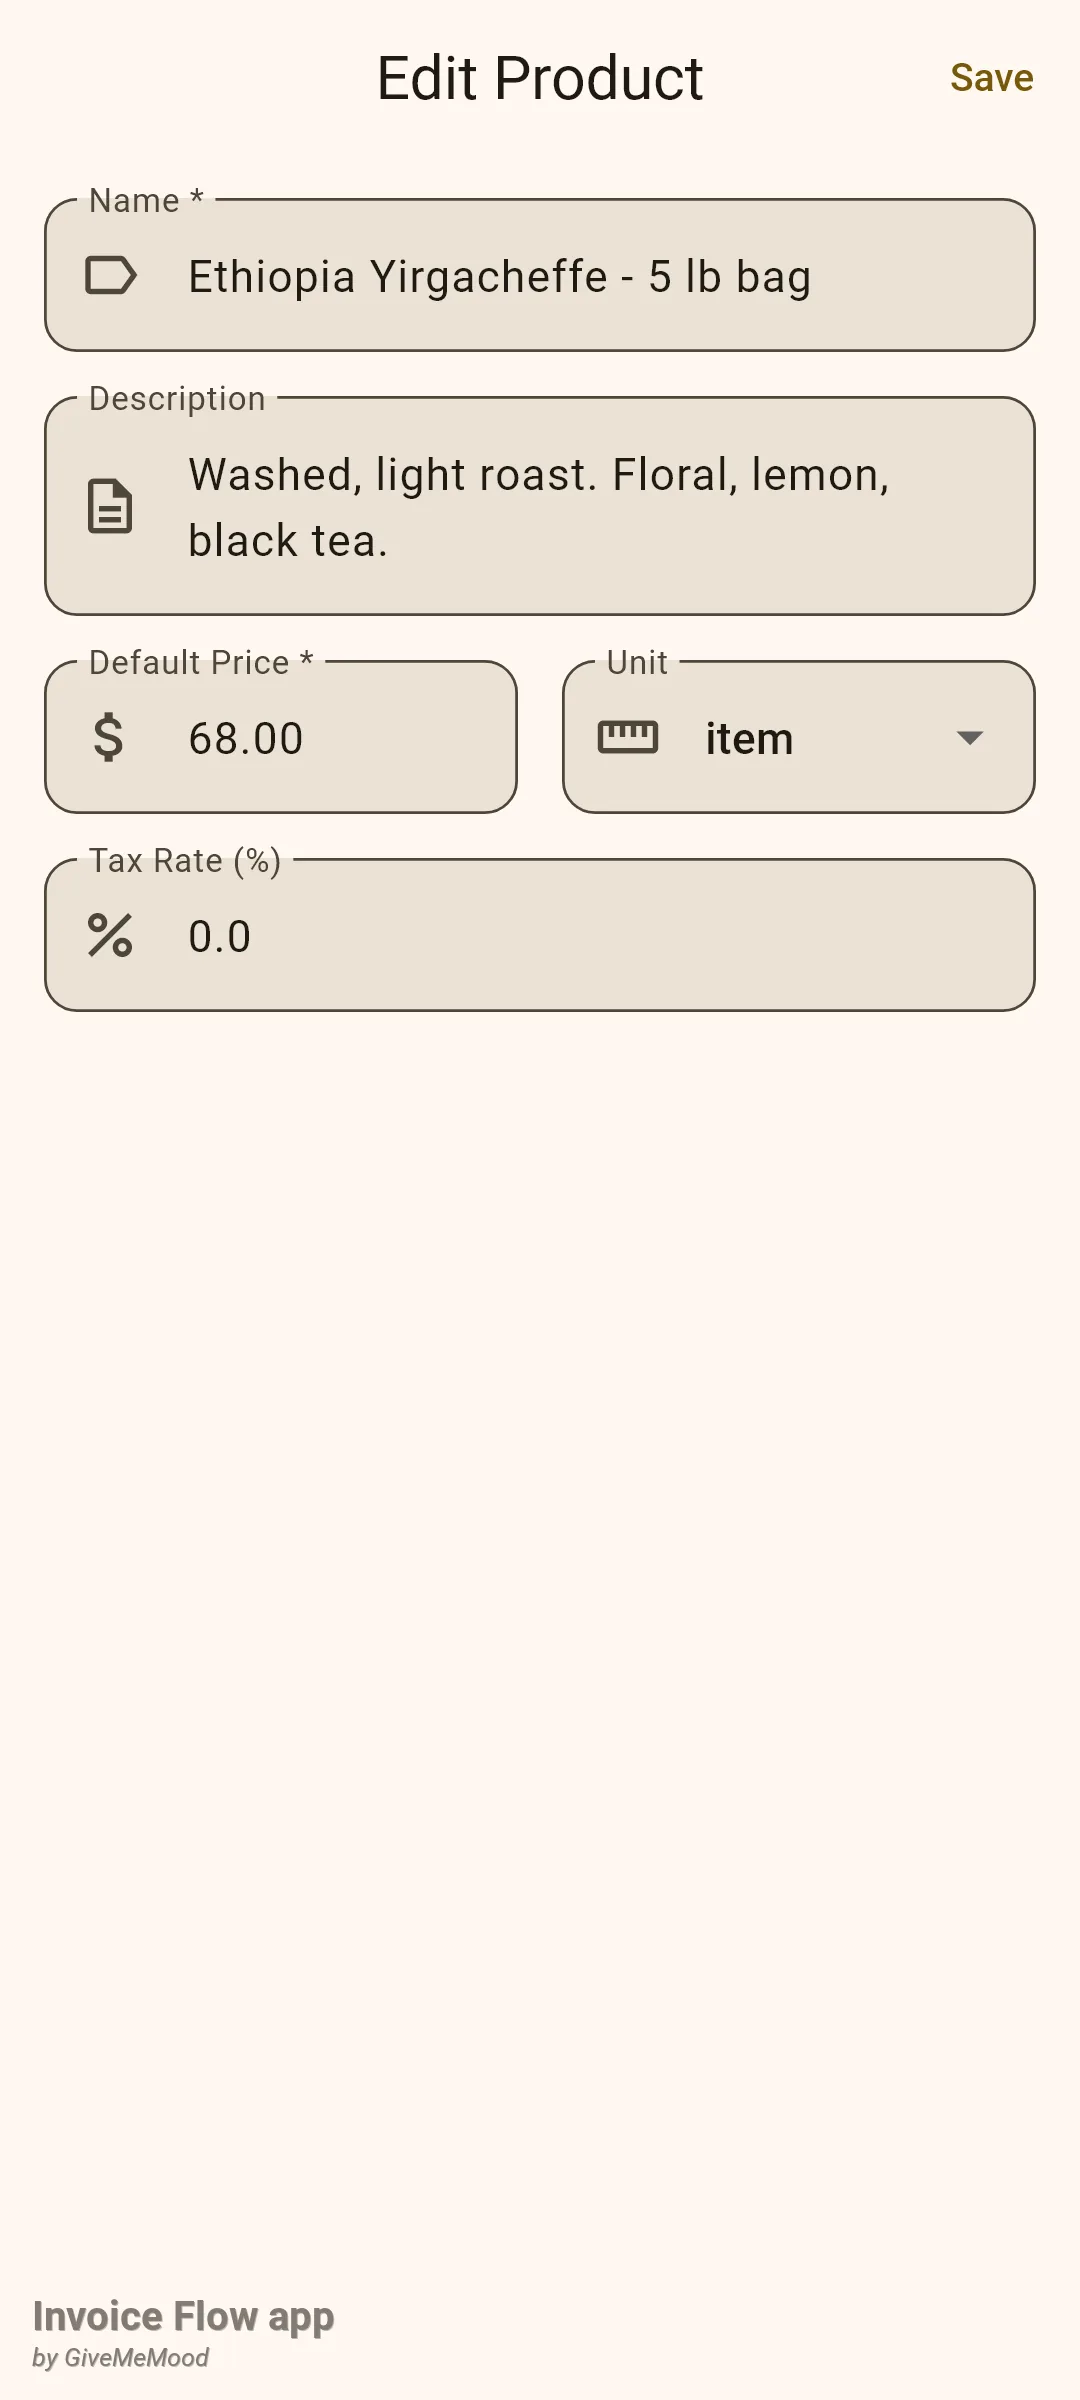
If you tap Back after changing anything, an Unsaved Changes dialog asks whether to stay or leave; leaving discards the edits. Note what the form does not contain: there is no field for a SKU, no switch to track stock, no quantity and no low-stock threshold. That has consequences for the Inventory tool, explained below.
How to put products on an invoice
The invoice editor has a chip row above the line items. The first chip, Product / Service, is the door to your library.
- In the invoice editor, scroll to Line Items and tap Product / Service.
- The Add from Saved dialog lists every product by name with its price in the invoice's currency and its unit word. Scroll if the list is long; tap a row to add it.
- The new line arrives with quantity 1, the product's unit, price and tax rate, and a link back to the product record. Change the quantity, or the price for this customer, directly on the line; the product itself is not altered.
- Repeat for each product. Every tap adds a separate line, so tap once and raise the quantity rather than tapping six times.
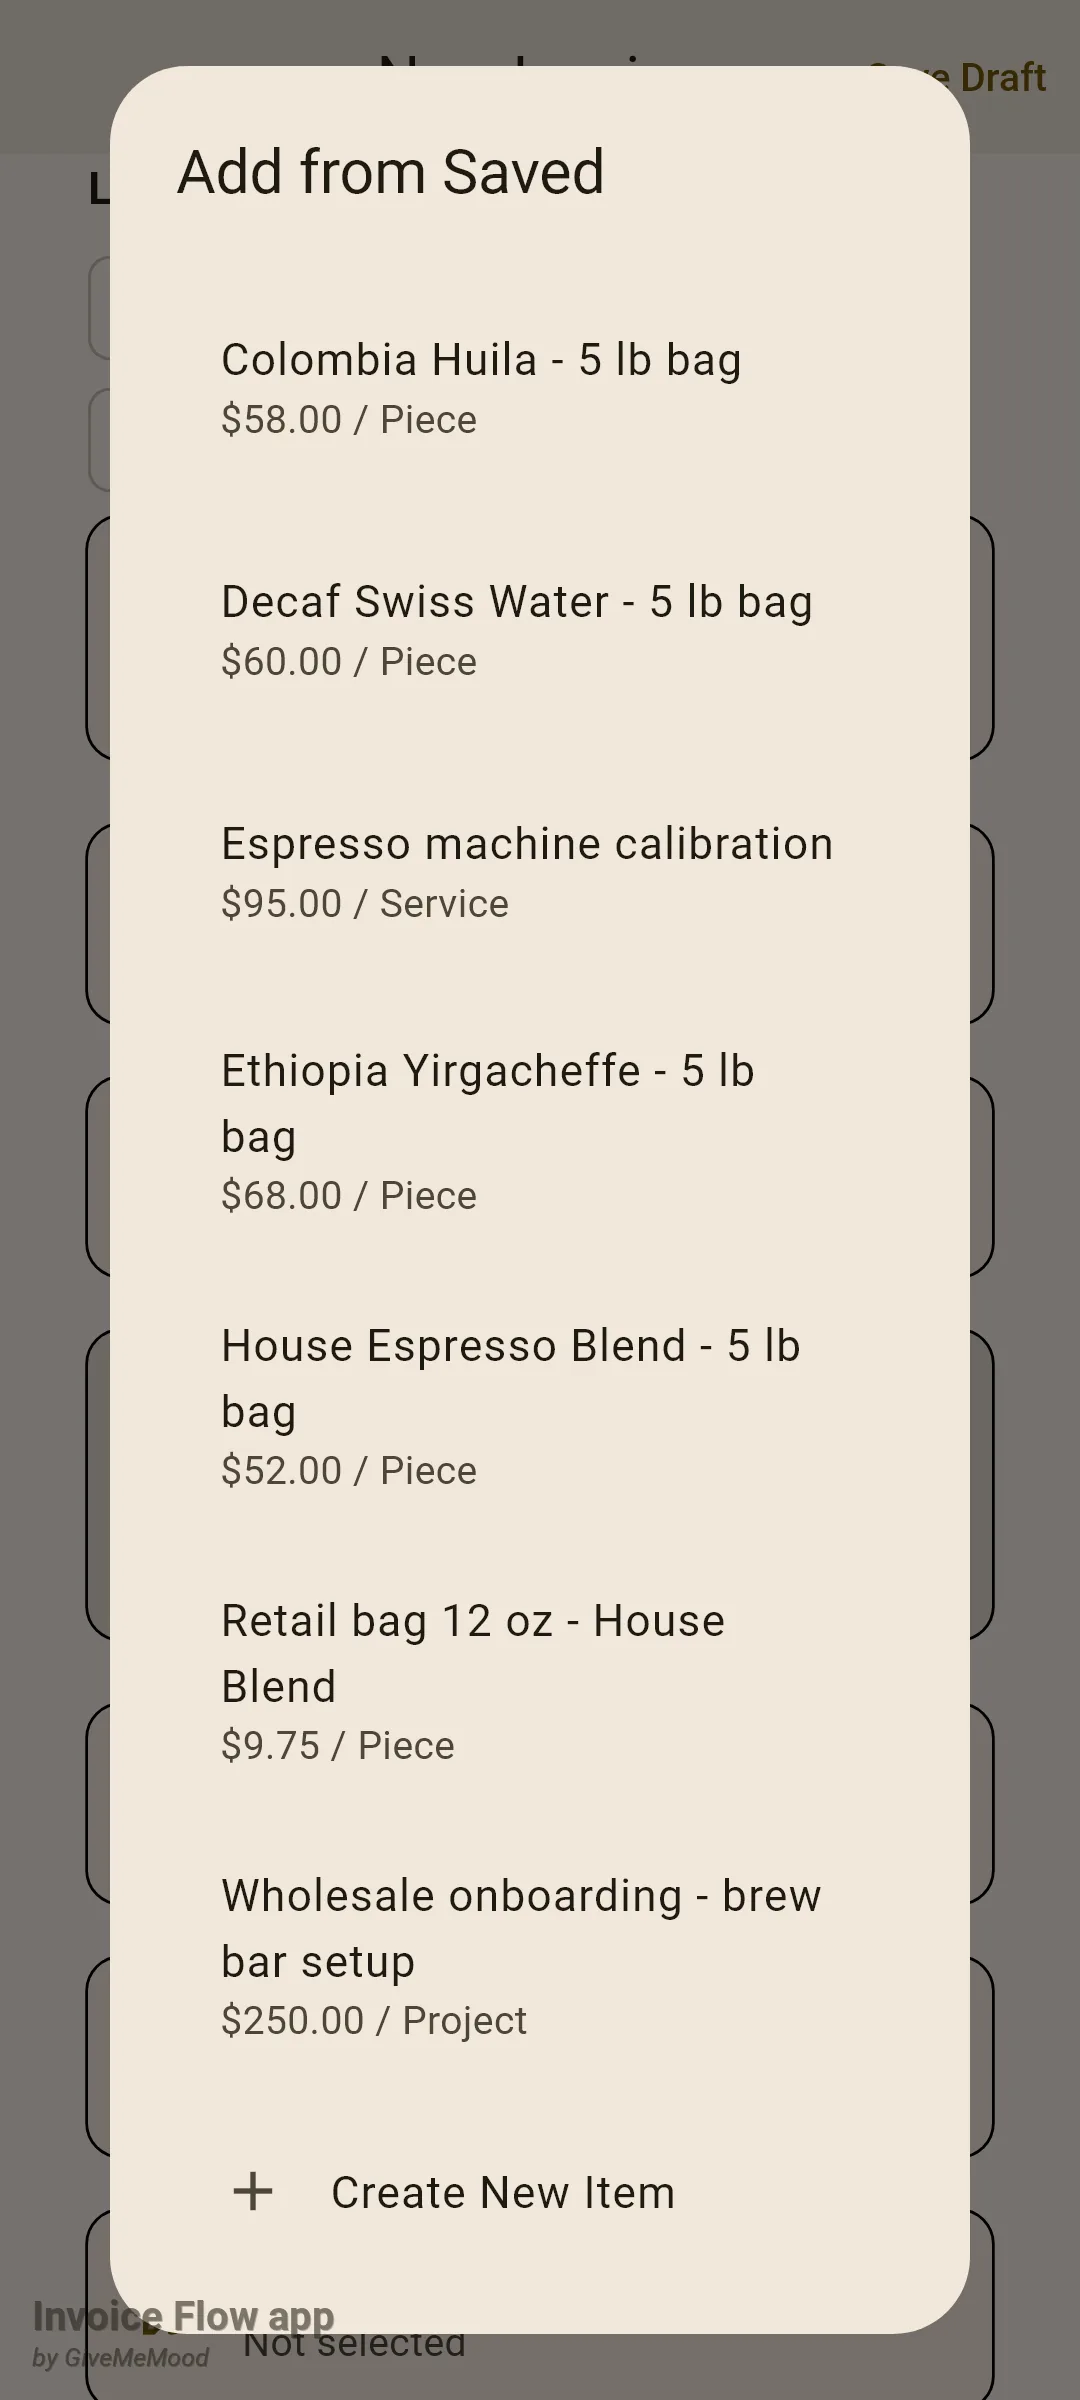
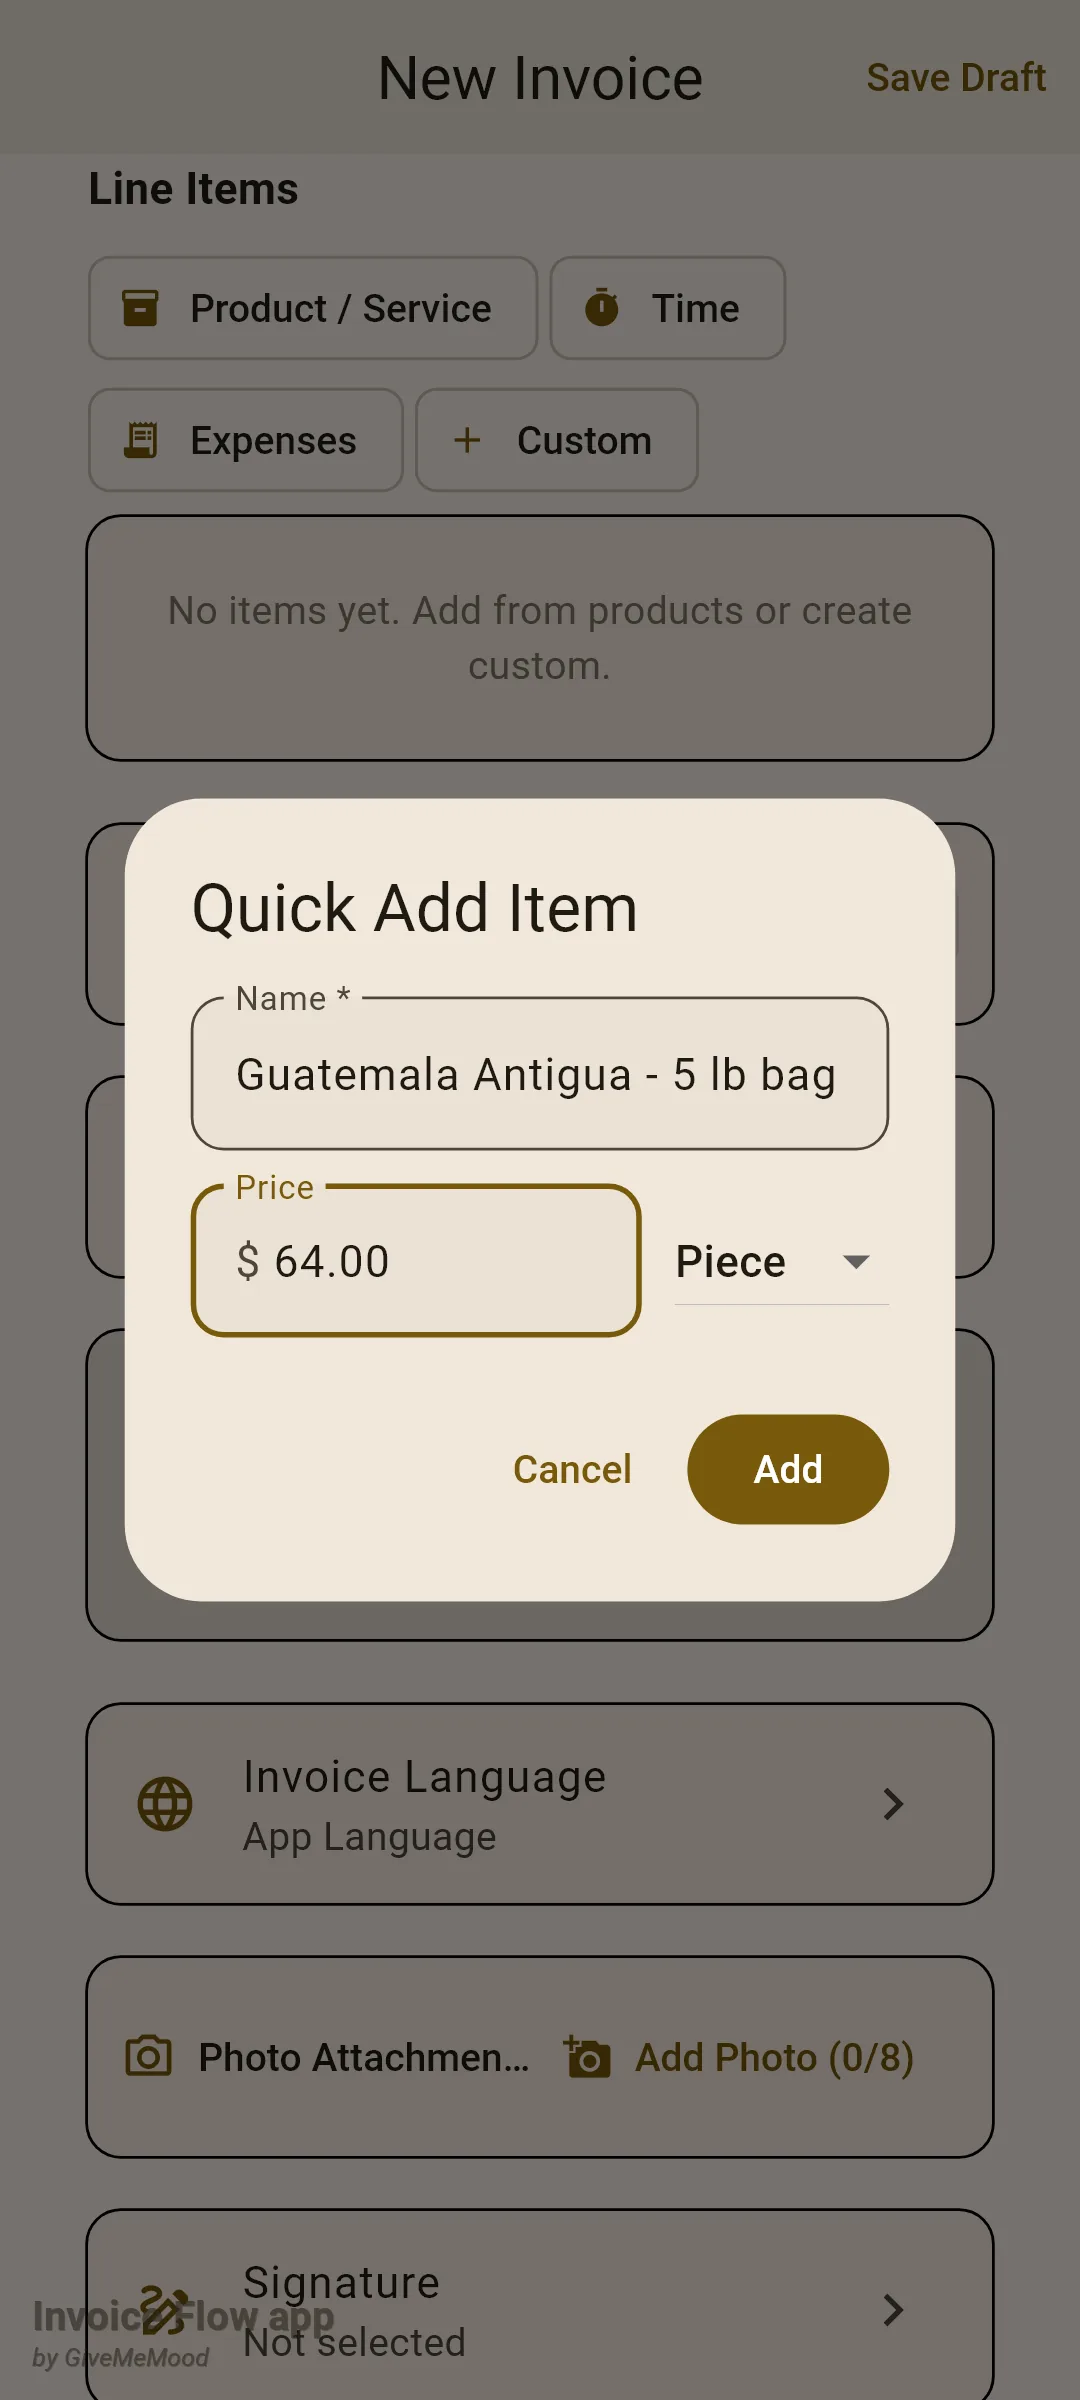
When the product does not exist yet, use the last row of the picker:
- In Add from Saved, scroll to the bottom and tap Create New Item.
- In the Quick Add Item dialog, type the Name *. The cursor is already in this field.
- Enter the Price. The prefix shows the invoice's currency symbol, so on a euro invoice you see "€" here.
- Choose Piece, Hour, Day, Project or Service from the dropdown next to the price.
- Tap Add. The product is stored in the library with a 0% tax rate and appears as a new line on the invoice. Tapping Add with an empty name does nothing; use Cancel to close without saving.
The recurring-schedule editor uses the same picker and adds the stock count to tracked products. Lines added with Custom keep no link to the library.
How to read the Inventory screen
Open the Tools tab and tap Inventory. The screen only lists products whose tracking flag is on and shows three summary cards at the top: Tracked (how many products are counted), Low Stock (amber, with a small badge when the number is above zero) and Out (red, badge when above zero). Tapping the Low Stock or Out card filters the list to those products; tapping the same card again returns to all. The magnifier searches by name or SKU.
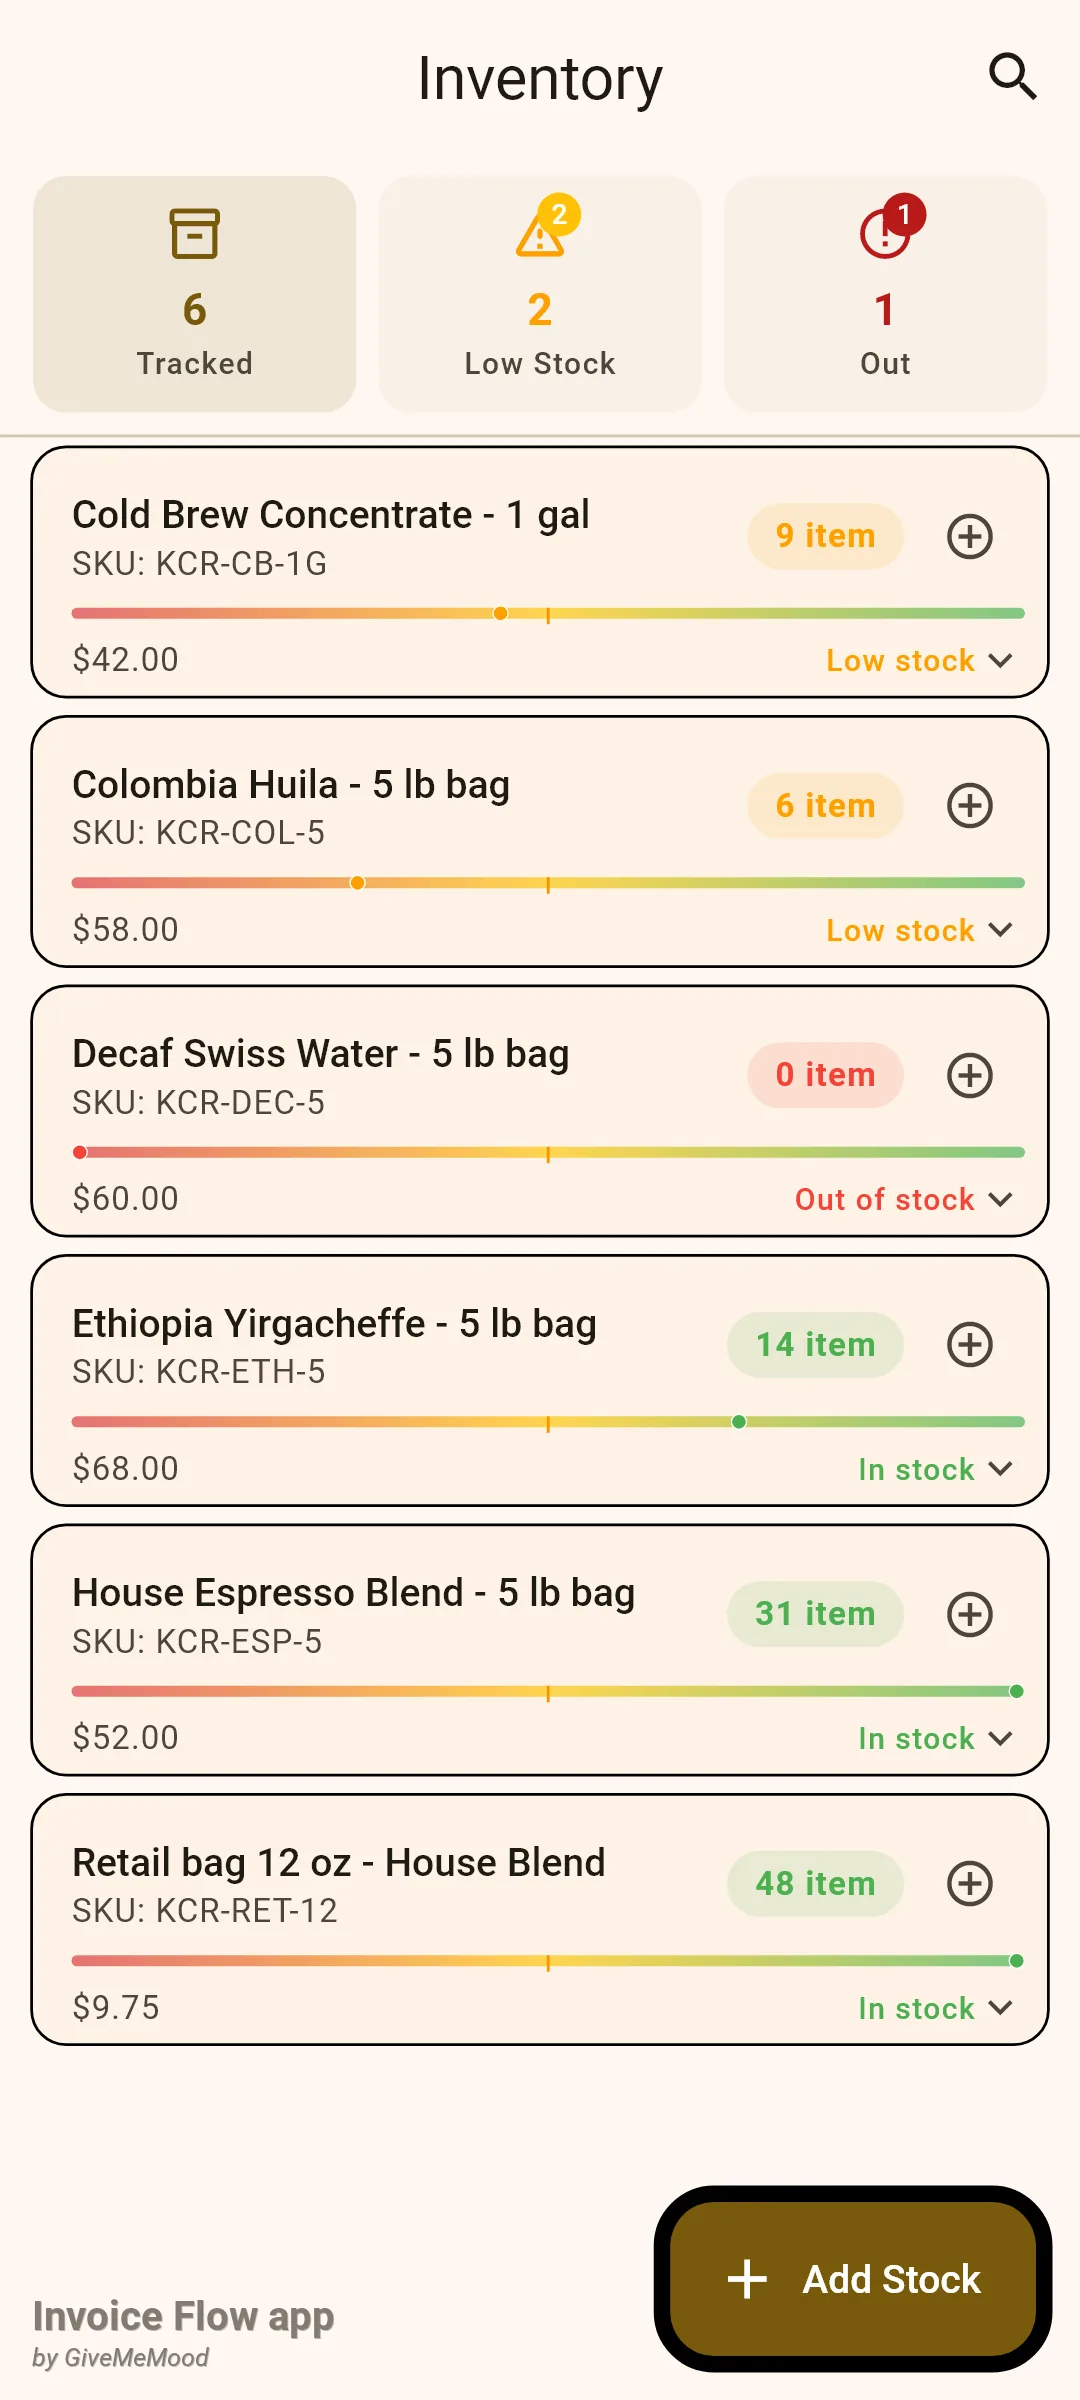
Each card shows the name, a “SKU:” line when a code is stored, a pill with the quantity and unit coloured green, amber or red, a small circled plus with the tooltip Stock action, a thin red-to-green bar with a marker at the low-stock threshold and a dot at the current level, and a bottom row with the price and the status text In stock, Low stock or Out of stock. The bar spans from zero to twice the threshold.
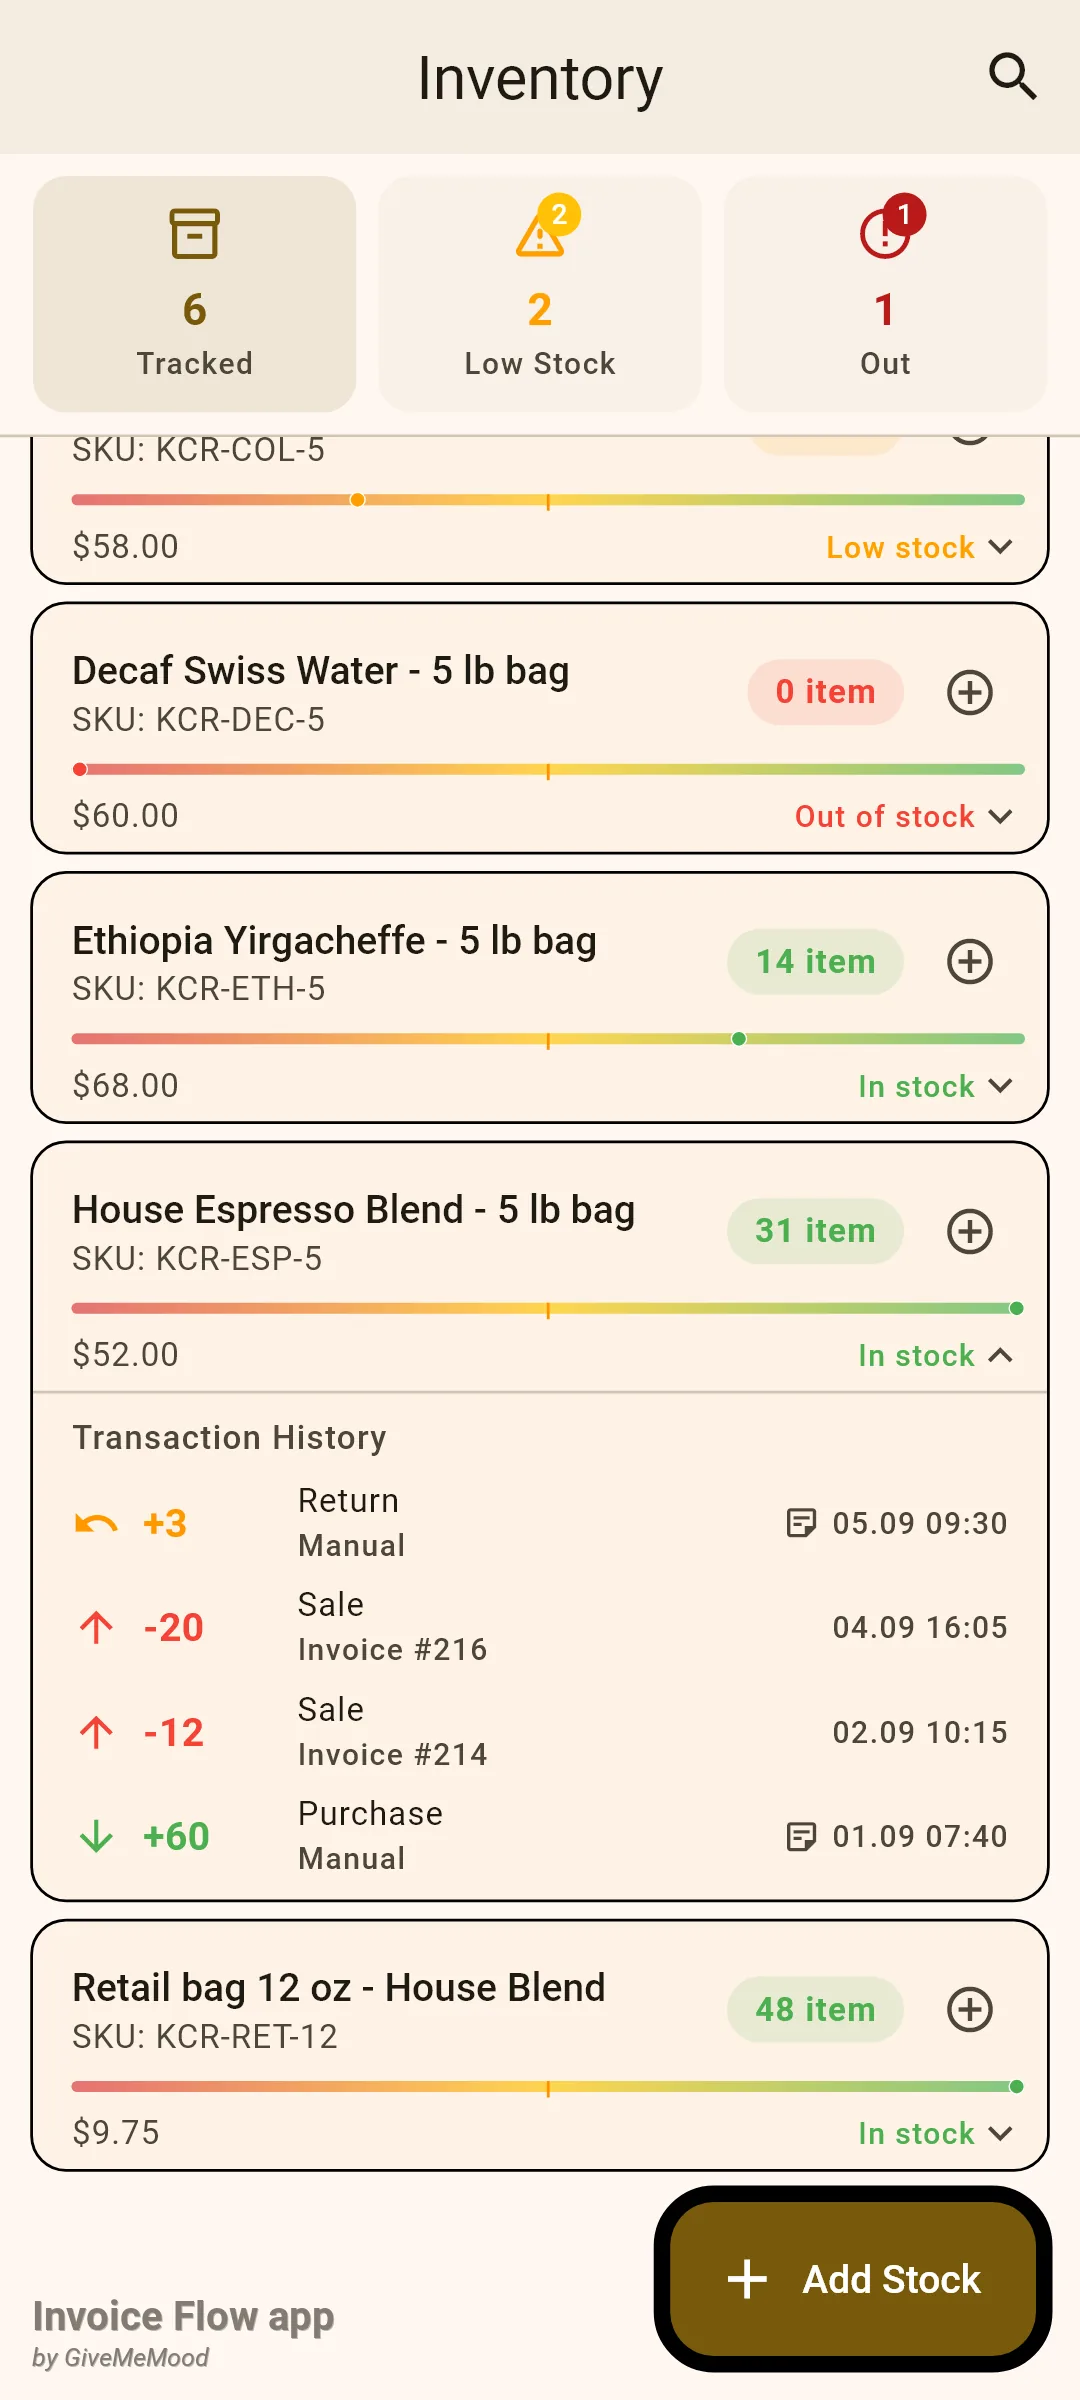
Tap a card to expand its Transaction History. Movements are listed newest first: a green down arrow with a positive number for a purchase, a red up arrow with a negative number for a sale, a blue double arrow for an adjustment and an orange undo arrow for a return. The second line names the source: Invoice # followed by a number, or Manual for movements you recorded by hand. A note icon appears when a note was saved; long-press it to read the text. After twenty rows the list ends with “…and N more”.
How to record stock by hand
When products are tracked, the Add Stock button and the per-card Stock action icon record movements without an invoice.
- Tap Add Stock at the bottom right, then pick the product in the Select Product dialog (rows read "name (SKU)"). Tapping the circled plus on a card skips this step.
- In the dialog titled with the product name choose Purchase / Receive for goods coming in, Adjustment to overwrite the count after a stocktake, or Return for goods a customer sent back.
- The next dialog is titled Purchase — , Adjustment — or Return — plus the product name and shows "Current stock" with the unit. Enter the Quantity; for an adjustment the field is called New quantity and you type the total you counted, not the difference.
- Optionally write a note in Notes (optional), such as the roast batch or the reason for the return.
- Tap Save. A snackbar reads "Stock updated:" followed by the new quantity, and the card, the pill and the summary cards refresh.
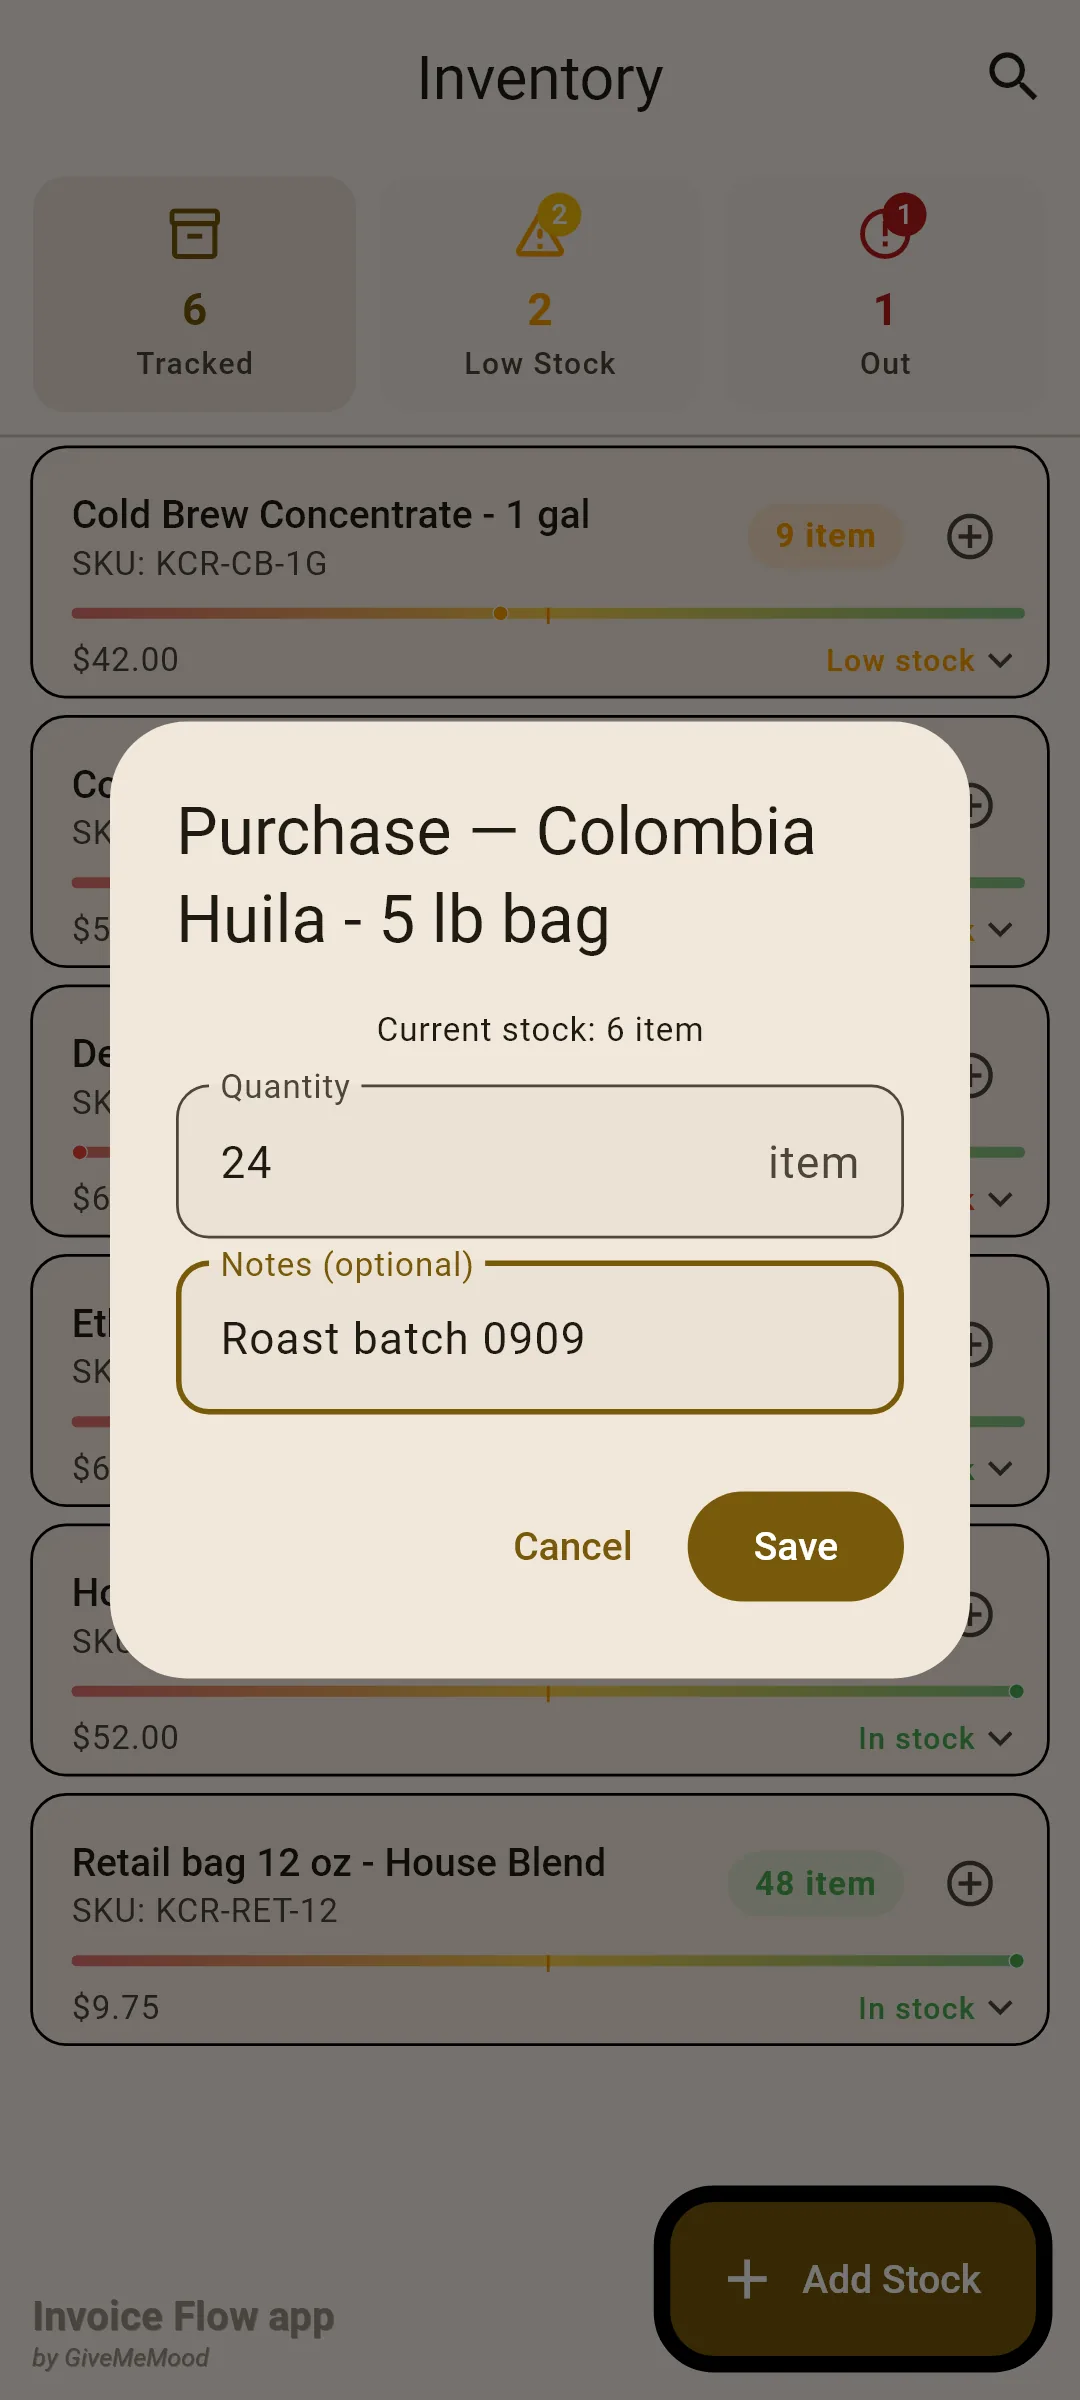
Purchases and returns add the quantity to stock and must be greater than zero. An adjustment replaces the count; the history stores the signed difference, so a stocktake that finds 28 instead of 31 appears as “-3 Adjustment”.
How stock automation works
Settings → Library → Stock automation controls what invoices do to tracked products. The hint at the top states the two hard limits: only tracked products are affected, and estimates never change stock.
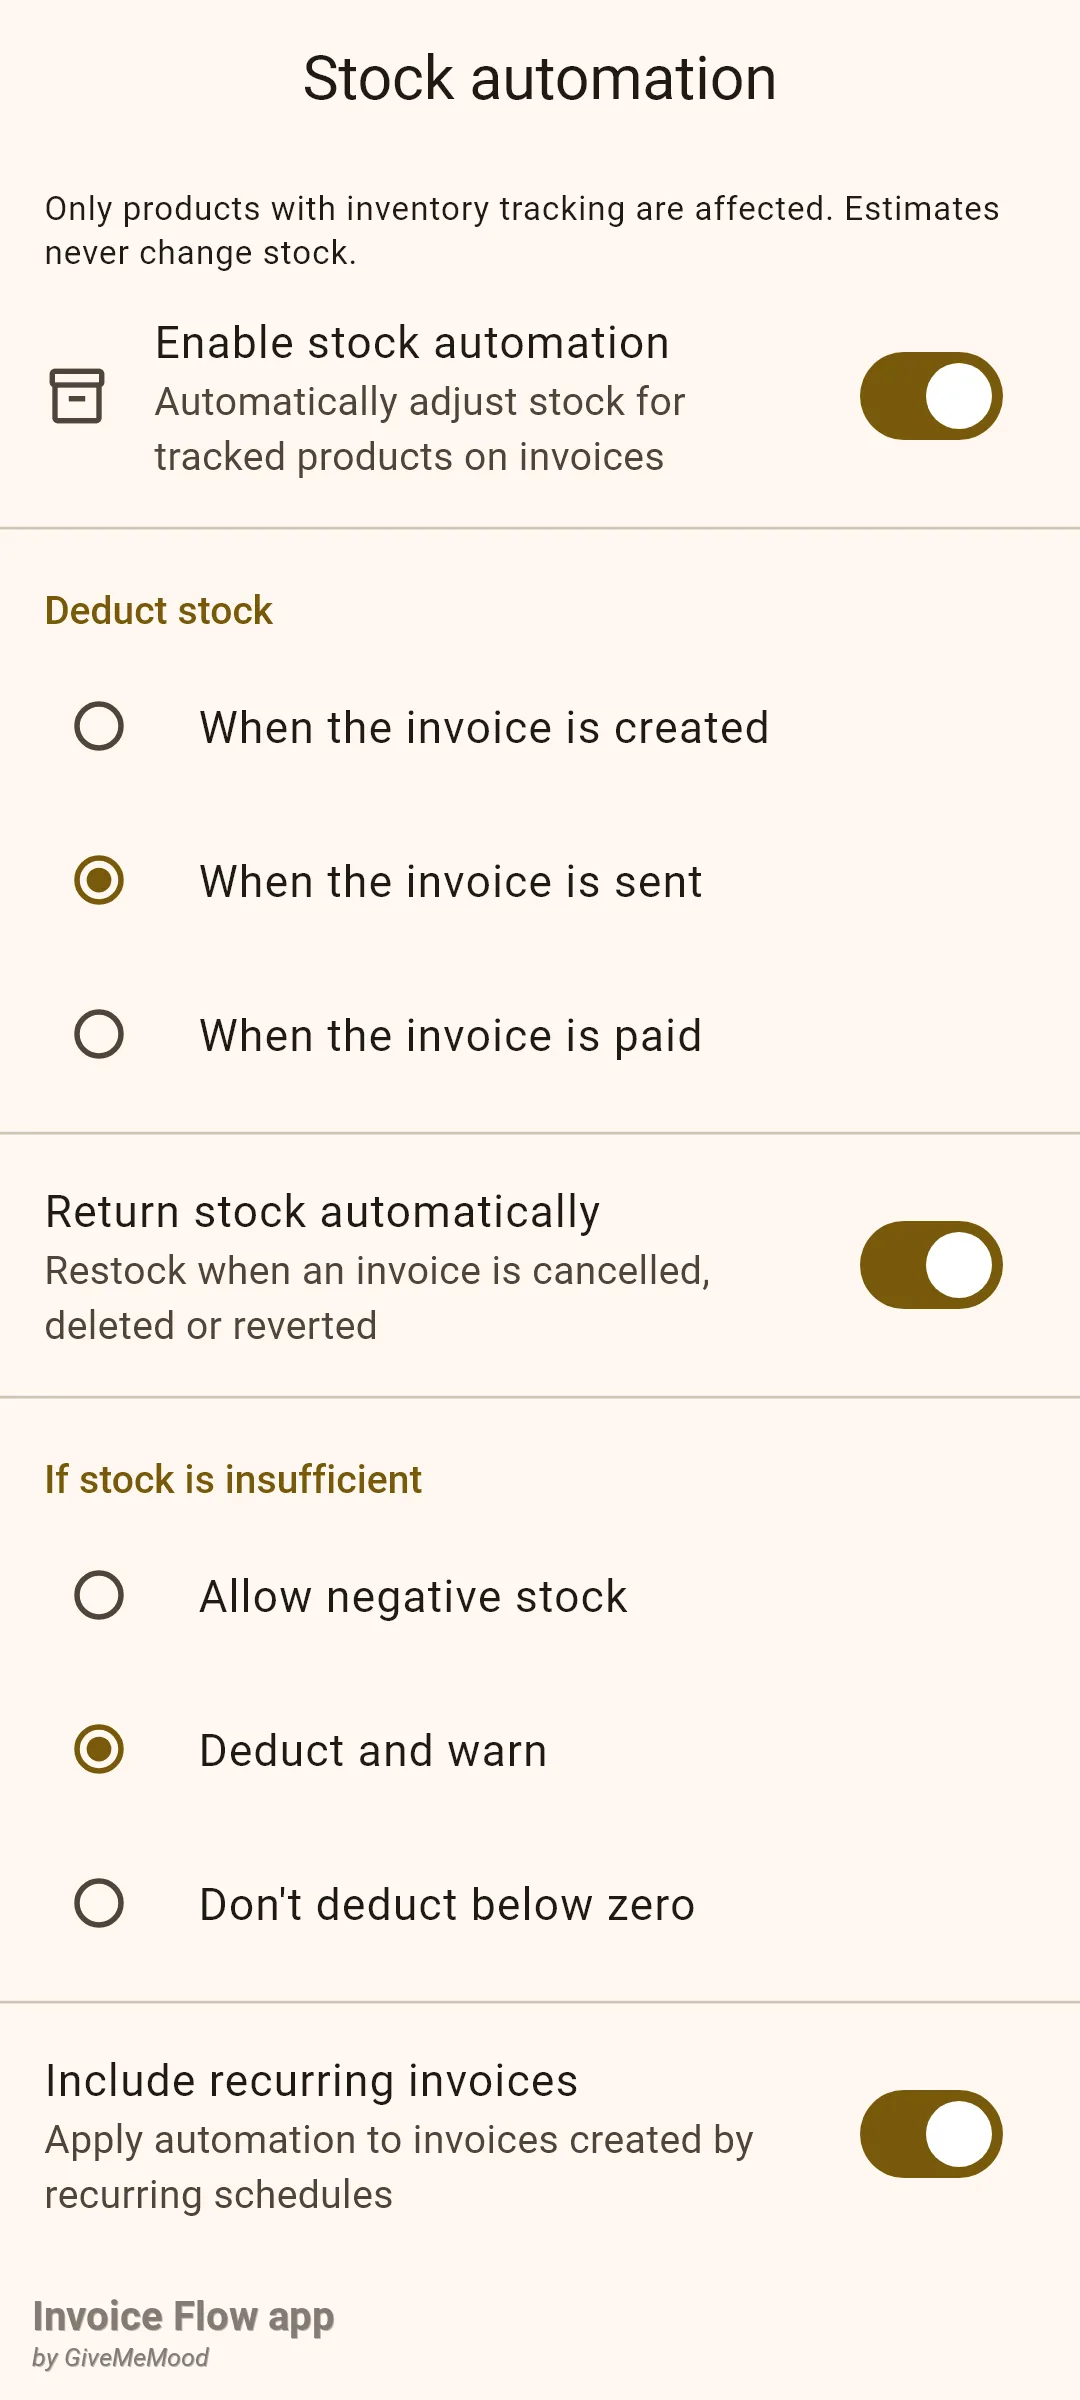
| Setting | Options | Default | What it does |
|---|---|---|---|
| Enable stock automation | on / off | on | Master switch; when off nothing below is shown or applied. |
| Deduct stock | When the invoice is created / When the invoice is sent / When the invoice is paid | sent | The status at which tracked lines are subtracted. “Sent” also covers overdue and paid invoices. |
| Return stock automatically | on / off | on | Adds the quantity back when an invoice is cancelled, deleted or moved back below the trigger (for example reverted to draft). |
| If stock is insufficient | Allow negative stock / Deduct and warn / Don’t deduct below zero | allow | What happens when a line asks for more than is on hand. |
| Include recurring invoices | on / off | on | Whether invoices generated by recurring schedules follow the same rules. |
The engine runs when you save an invoice in the editor, when you change its status on the detail screen, before a delete, and when a recurring schedule generates an invoice. It compares what has already been recorded for that invoice with what the invoice now requires and writes only the difference. Saving the same invoice five times deducts once; raising a line from 10 to 12 bags deducts 2 more; cutting it to 8 puts 4 back; reverting a sent invoice to draft with the trigger on “sent” returns everything. Deductions appear in the history as Sale with the invoice reference, automatic add-backs as a movement typed “restock”.
With Deduct and warn, the detail screen shows “Insufficient stock for N product(s)” after the status change; the editor applies the same rule silently. With Don’t deduct below zero, a product that would go negative is skipped entirely, and the shortfall is reported the same way. Allow negative stock simply lets the count go below zero, which shows as Out of stock in red.
Rules and details
- One library, no currency. Products are shared by all business profiles and store a bare number as the price. The Products & Services list always prints that number with a dollar sign, the Inventory screen prints it in your default profile’s currency, and the invoice picker prints it in the invoice’s currency. None of them converts the amount; if you bill in more than one currency, keep the price in the one you use most and adjust the line.
- Pro gating. Viewing the product list and the Inventory screen is free. Creating a product, opening a product for editing, Add Stock and the Stock action icon require Pro or an active trial; otherwise the paywall opens.
- Search. The product list matches a fragment of the name only. Inventory search matches name or SKU and ignores case.
- Deleting a product. Swipe left, confirm Delete in the “Delete Product” dialog, and the product goes together with its whole stock history. Invoice lines that were created from it keep their text, quantity and price, so old documents are unaffected.
- Editing a product later. Price, unit or tax changes only affect lines added from now on.
- Low stock. A product counts as low when its quantity is above zero, its threshold is above zero and the quantity is at or under the threshold. A product with no threshold can only be In stock or Out of stock, and its bar uses 10 as a placeholder for the marker. The dashboard’s Low Stock Alerts card lists up to three tracked products at or below their threshold, including those at zero.
- Estimates and cancelled invoices. Only documents of type invoice change stock. Estimates, and invoices in the Cancelled status, never deduct.
- Restock switch off. With Return stock automatically off, moving an invoice backwards or deleting it leaves stock untouched; you would correct it with a manual Return or Adjustment.
Tips
Related guides
- The invoice editor — the chip row, line items, discounts and totals.
- Recurring invoices — schedules that pick lines from the same product library.
- Backup, export and import — what a backup file carries, including products and stock.