 EN
EN  العربية
  Български
  Čeština
  Dansk
Dansk  Deutsch
  Ελληνικά
  Español
  Suomi
Suomi  Français
  עברית
עברית  हिन्दी
  Bahasa Indonesia
  Italiano
  日本語
日本語  한국어
한국어  Bahasa Melayu
  Nederlands
  Norsk
Norsk  Polski
  Português
  Română
  Русский
  Svenska
  Kiswahili
  ไทย
ไทย  Türkçe
  Українська
  Tiếng Việt
  中文
中文 User guide
Clients, categories and client groups
Add client cards, sort clients into categories and sub-categories, filter them by unpaid invoices or contracts, and see every document per client.
A client in Invoice Flow is the “Bill To” side of a document. Every invoice, estimate, contract, expense and tracked hour points at one client record, so the quality of that record decides how fast you can find things later: the address that prints on the PDF, the email the send screen proposes, and the country that feeds your numbering tokens all come from here. With twenty or thirty clients you want the list grouped the way you think about your work, and you want to answer “who still owes me money and has no engagement letter” without opening each client one by one.
This guide follows Ledgerline Bookkeeping, a two-person practice in Manchester that bills in pounds. Priya has twelve clients split into three categories, Retail, Trades and Professional services, with two sub-categories underneath (Online sellers under Retail, Construction under Trades), a Cheshire region group for her Thursday visiting round, and a custom Monthly retainer group for the clients invoiced on the first of each month.
What you see on the screen
Open the Clients tab in the bottom navigation. The app bar carries four icons: a magnifier that turns the title into a Search clients… field, a funnel for the advanced filter (it grows a red number badge when a filter is active), a shapes icon with the tooltip Client Groups, and a box icon for the Archive. Below the app bar, as soon as you have at least one group, a horizontal strip of chips appears: All clients first, then one chip per group in alphabetical order. Sub-categories appear in this strip under their own short name, so Priya’s strip reads All clients, Cheshire, Construction, Monthly retainer, Online, Professional services, Retail, Trades.
Each client is one row: a round avatar with the client’s logo or two initials, the name in bold, and a second line with the company and email joined by a dot. Rows are sorted by name. Tapping a row opens the client’s detail screen; swiping a row from right to left reveals an orange archive strip. The + button at the bottom right creates a new client. On a tablet or in landscape the list becomes a two-column grid of the same rows.
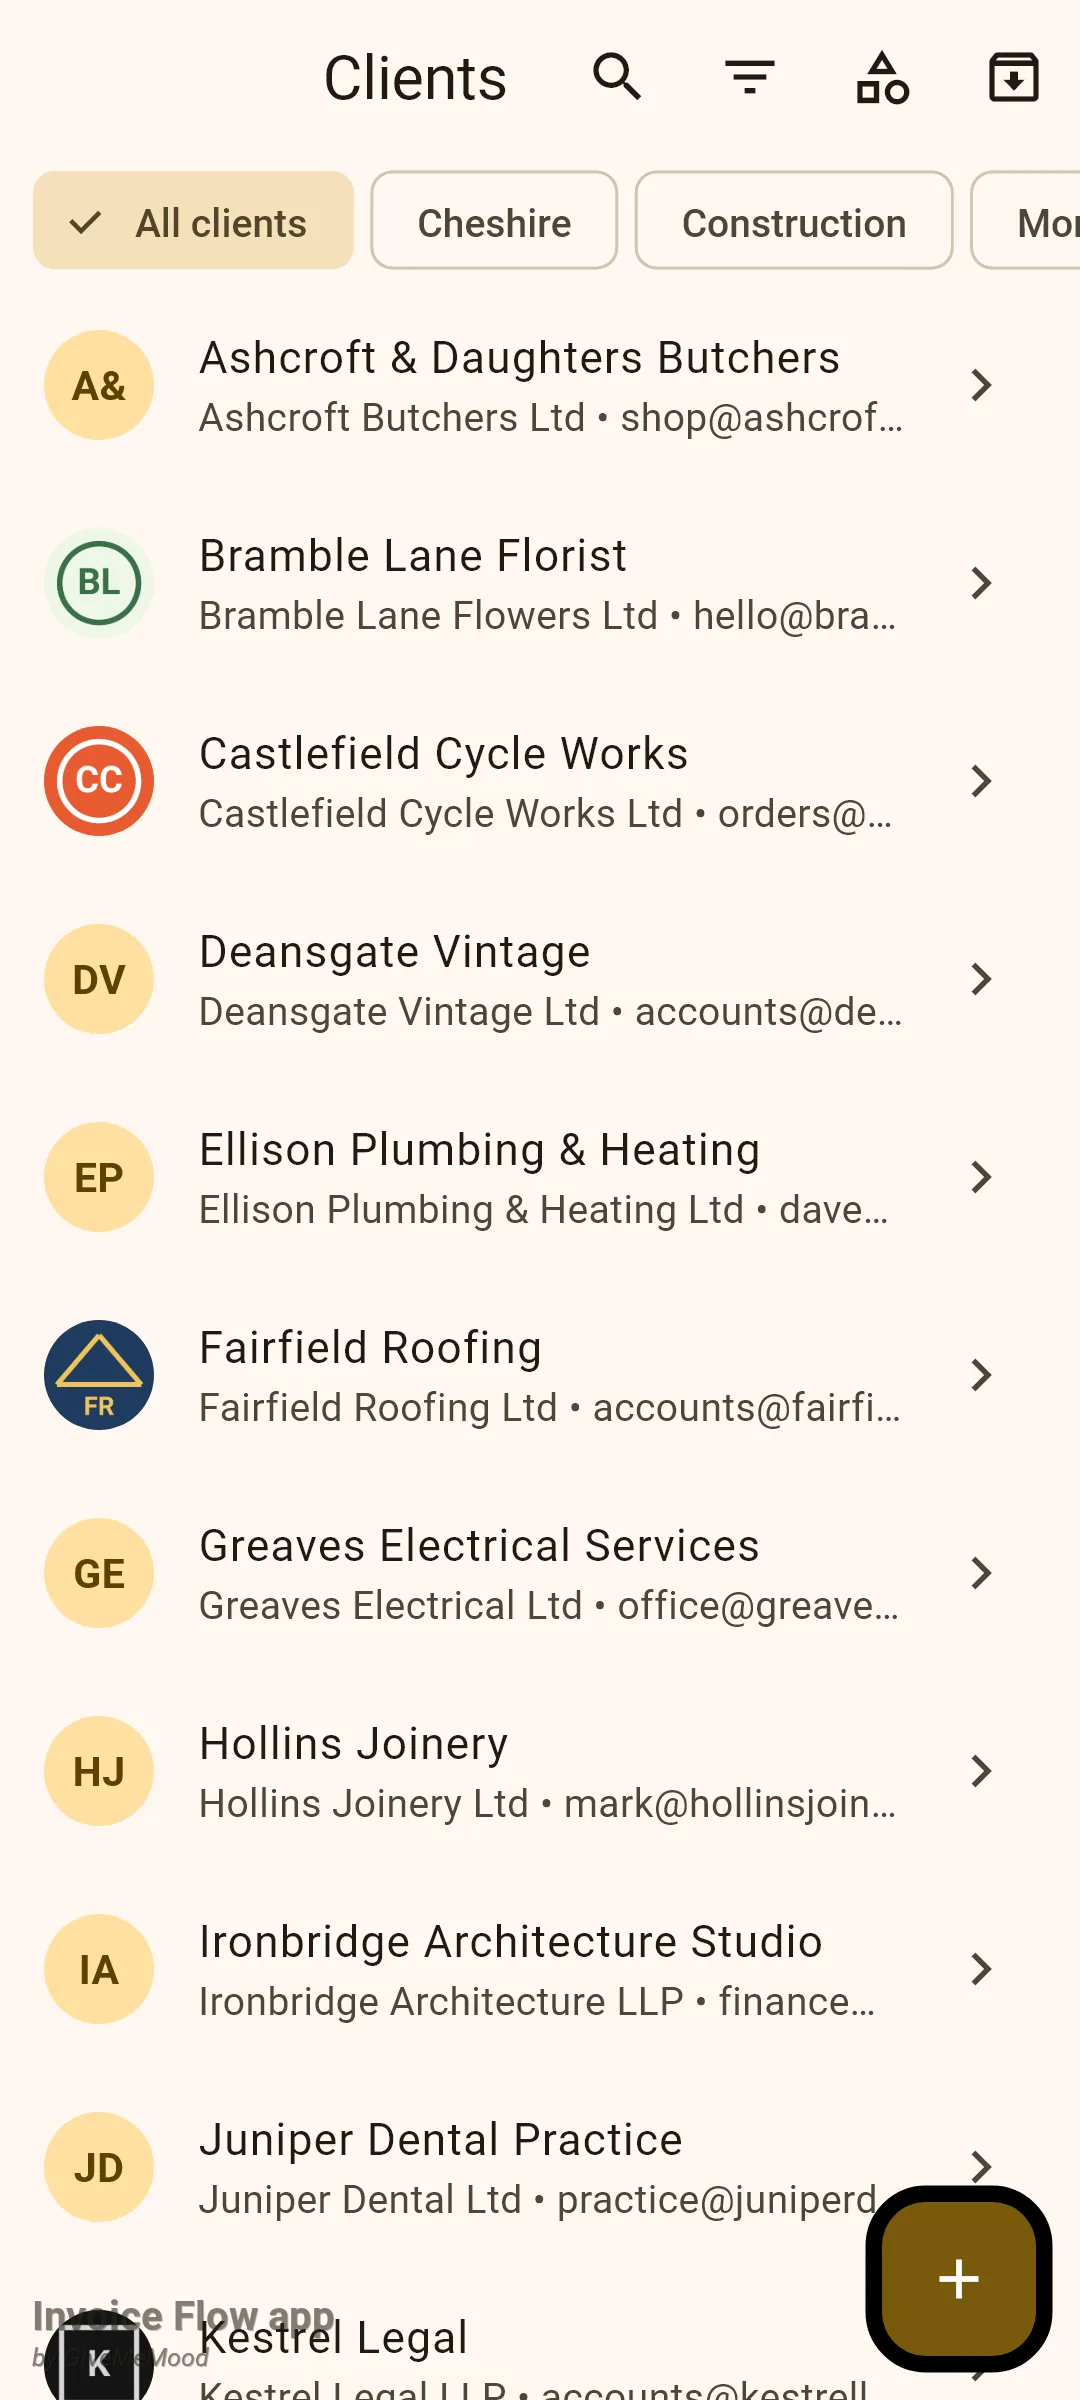
Tapping a chip narrows the list to that group’s members. Tapping a parent such as Trades also includes everyone in its sub-categories, so Hollins Joinery, tagged only Construction, appears under Trades. Tap the chip again, or All clients, to clear it. Search runs first on name and company, then the chip narrows the result.
How to add a client card
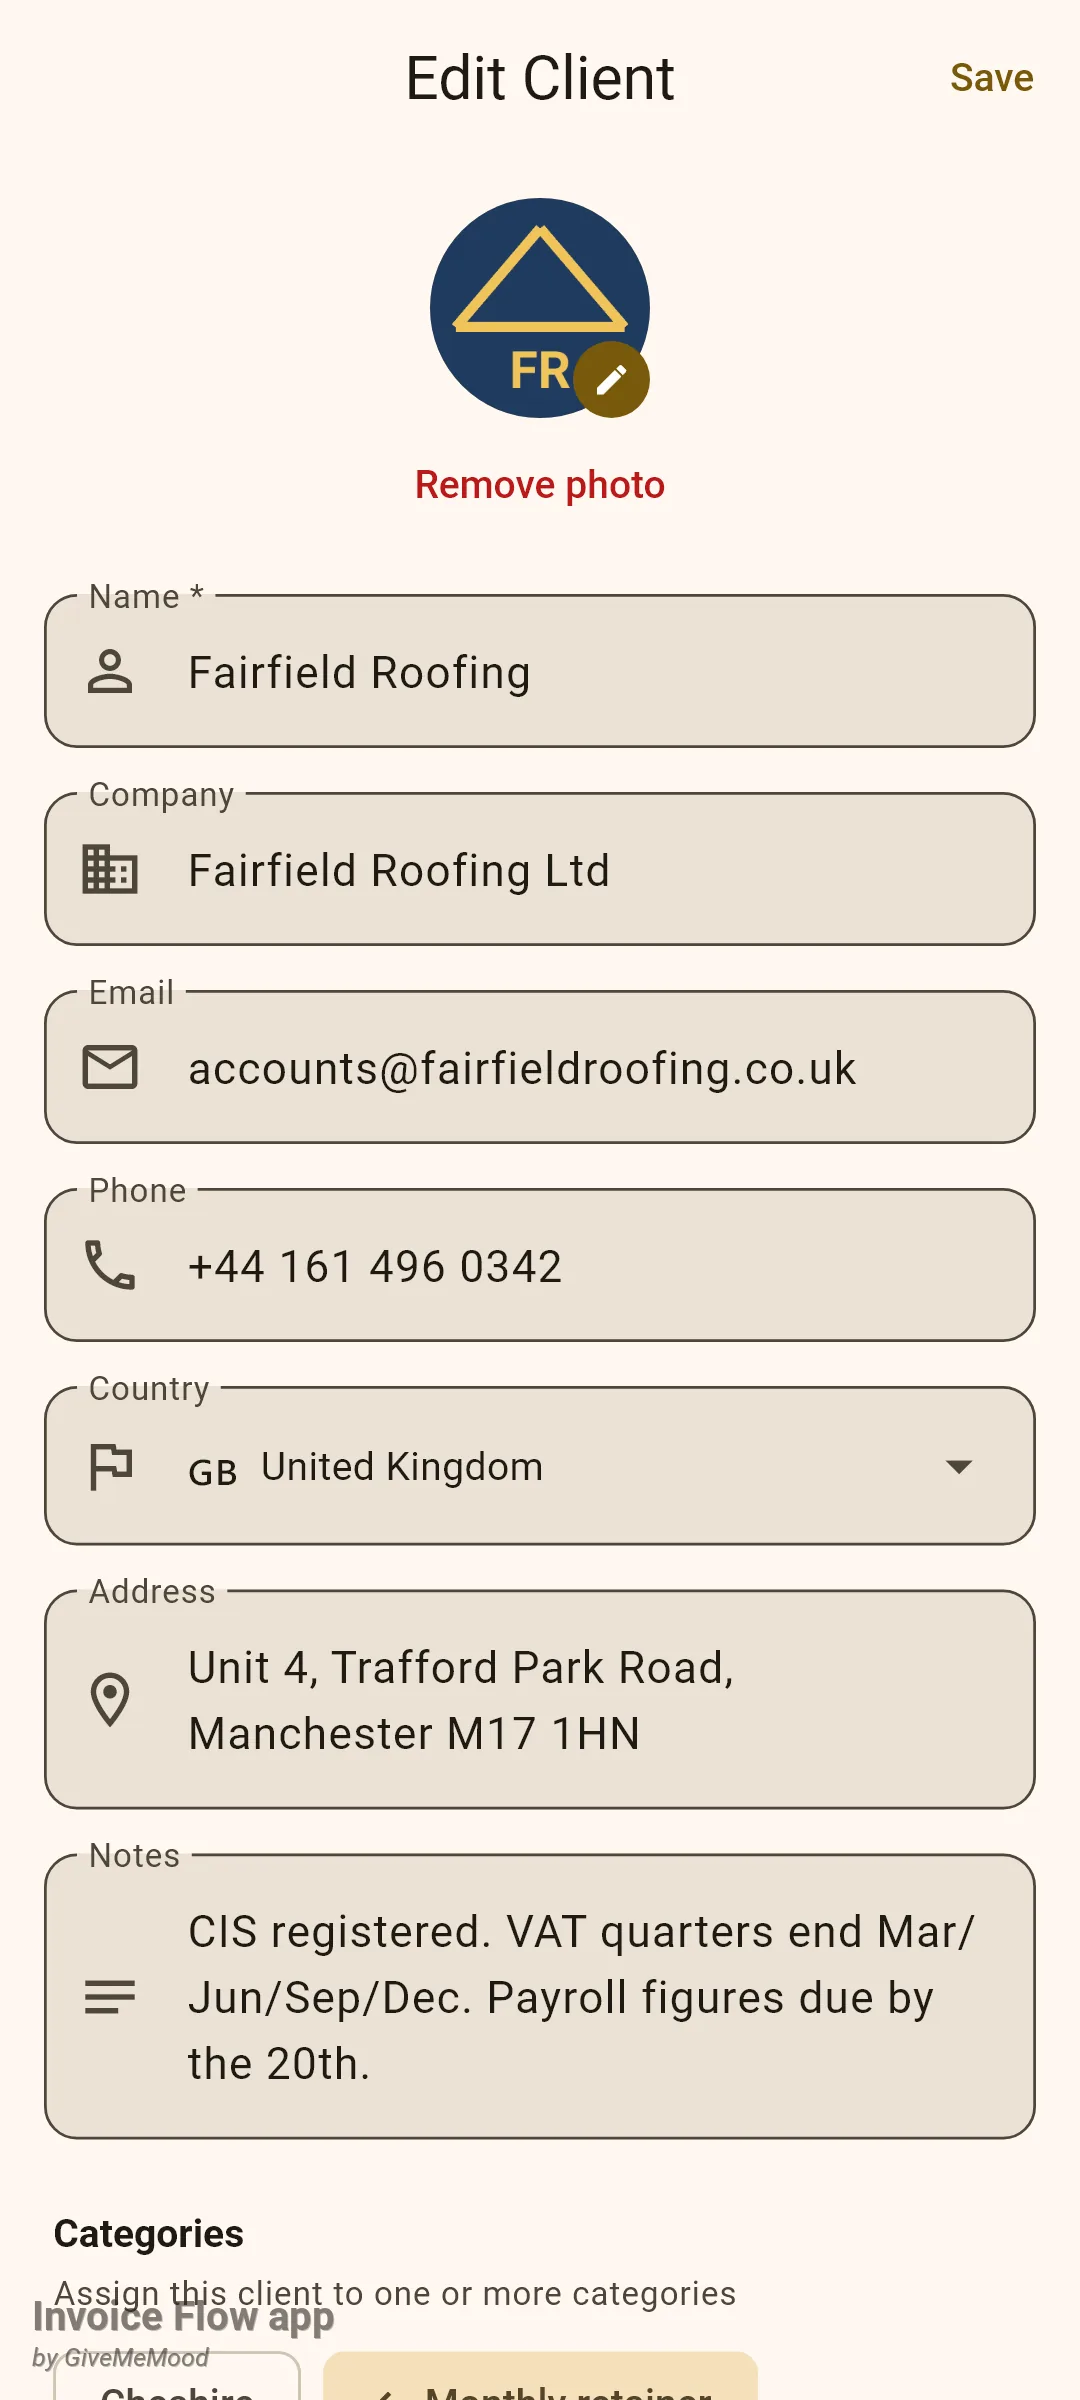
- On Clients, tap +. The editor opens with the title New Client and a Save button in the app bar.
- Tap the round avatar to attach a logo or photo. A sheet offers Camera and Gallery; both are system pickers, so they are not shown here. The picture is scaled to at most 512 by 512 pixels and stored inside the client record. Once set, a red Remove photo link appears under it.
- Type the Name *. This is the only required field and the text that appears in the list, in pickers and on the PDF.
- Fill Company, Email and Phone as needed. The company shows under the name in the list; the email is what the send screen will propose.
- Tap Country and pick from the searchable Select country list. The tile shows the flag and the country name, and the Address field below changes its example text to that country's format.
- Write the Address on one or two lines exactly as you want it printed under Bill To.
- Use Notes for anything internal. Notes are shown on the client's Info tab and never on a document.
- Tap Save. The editor closes and the new row appears in the list at its alphabetical position.
If you tap Back with unsaved edits, an Unsaved Changes dialog asks whether to Stay or Leave. Leaving discards the edits.
How to put clients into categories
Categories and client groups are the same thing under two names. The editor calls them categories and shows them as chips; the Client Groups screen manages the same list with descriptions, kinds and a member picker. Groups belong to your business profile, not to the client, so if you run two profiles each has its own set.
- Open a client in the editor and scroll to the Categories section under Notes. Every group of your current profile is a chip, top-level ones first, each followed by its sub-categories written as Parent › Child.
- Tap each chip that applies. A client can sit in as many groups as you like; Fairfield Roofing is in Monthly retainer, Trades and Trades › Construction at the same time.
- To add a group that does not exist yet, tap + Create category. In the Create category dialog, type the Category name.
- Leave Parent category (optional) at None (top level) for a new top-level category, or pick an existing top-level one to make a sub-category. The dropdown only appears once at least one top-level category exists.
- Tap Save in the dialog. The category is stored right away, and its chip appears already selected for this client.
- Tap Save in the app bar to store the client together with its memberships.
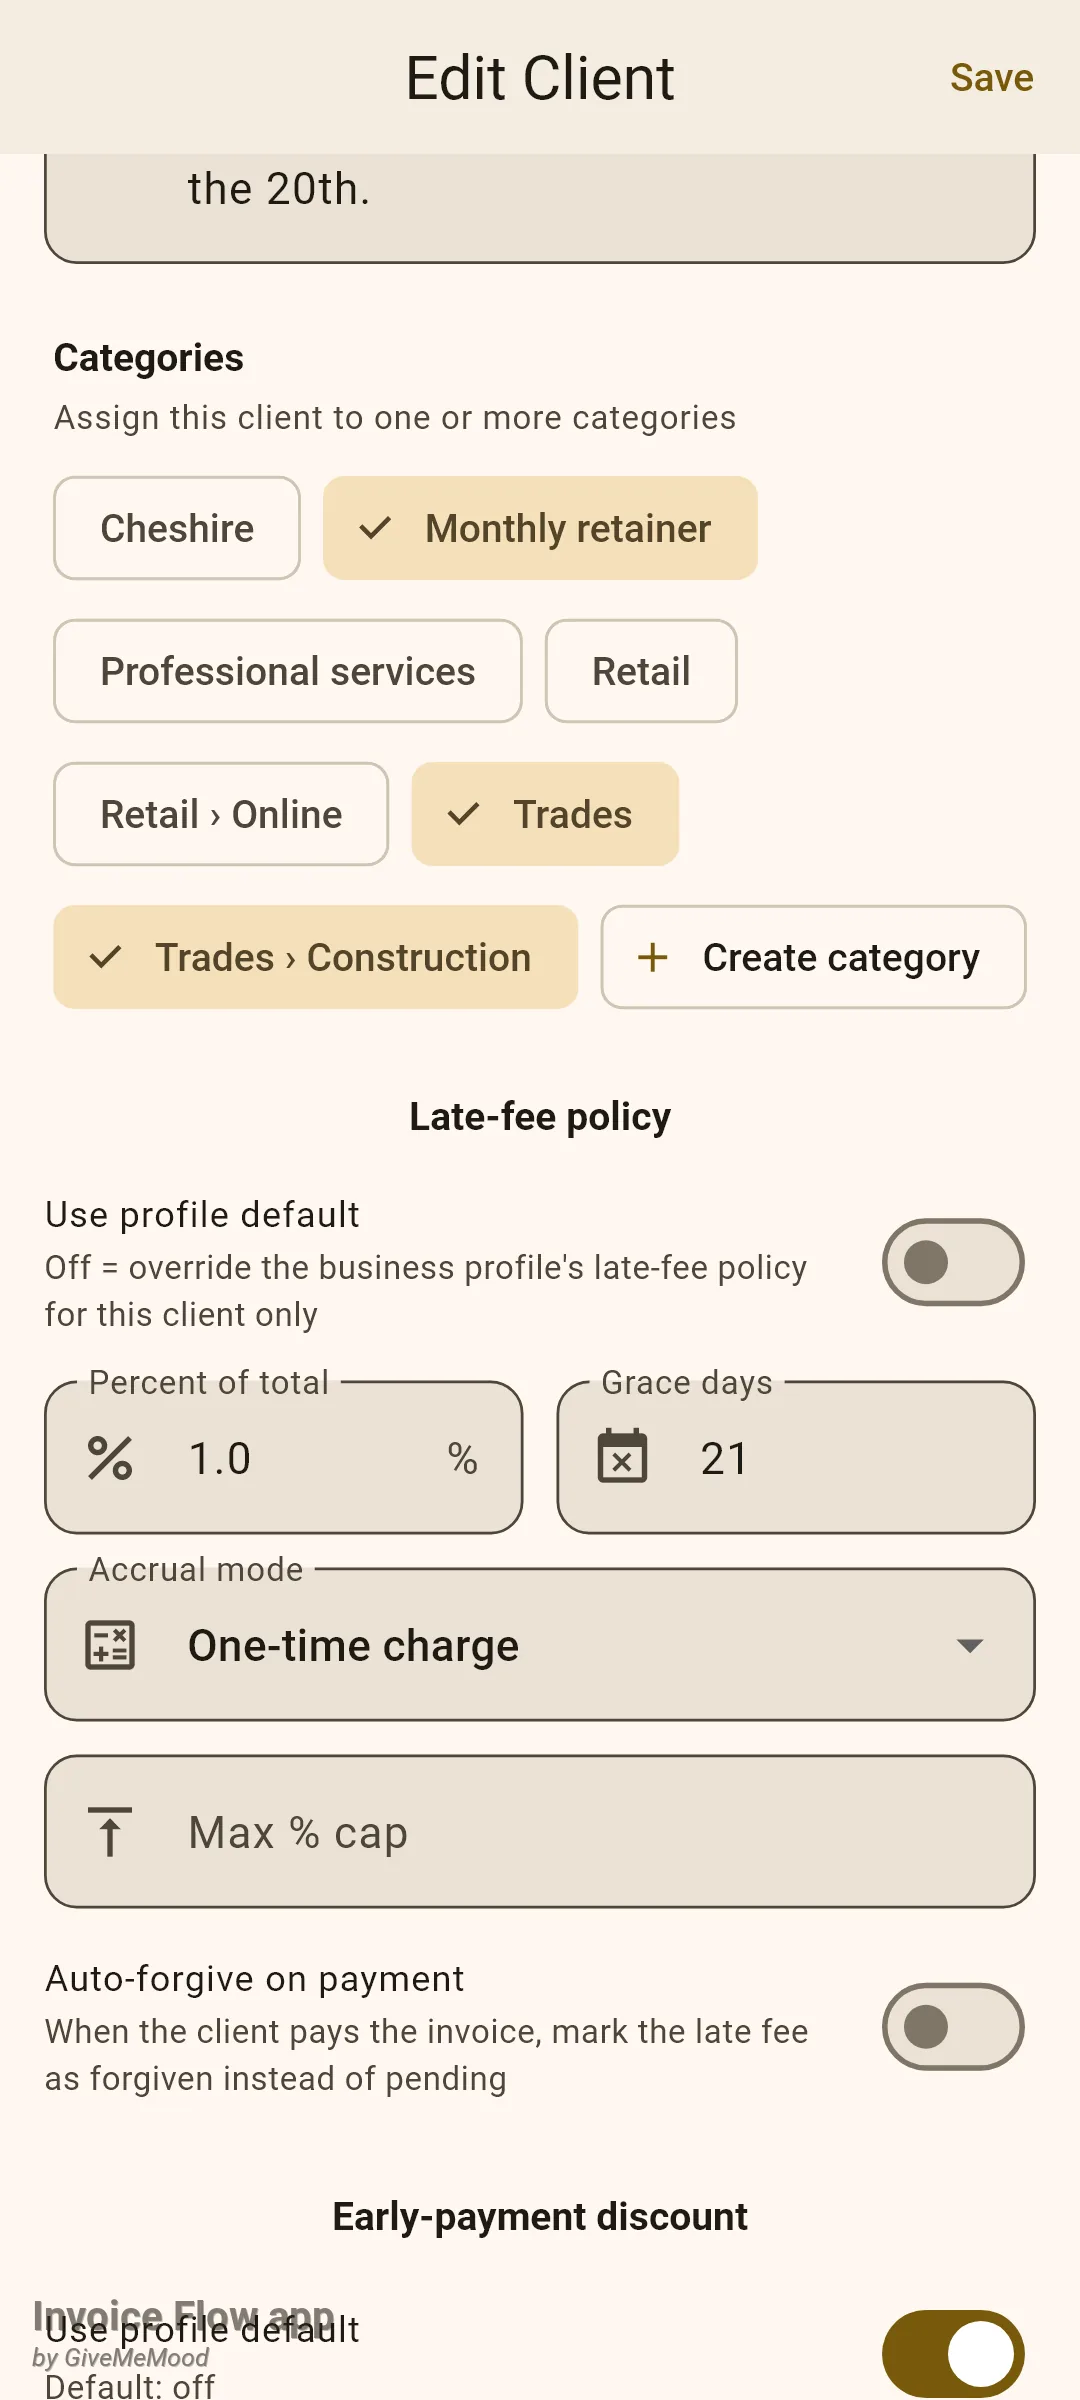
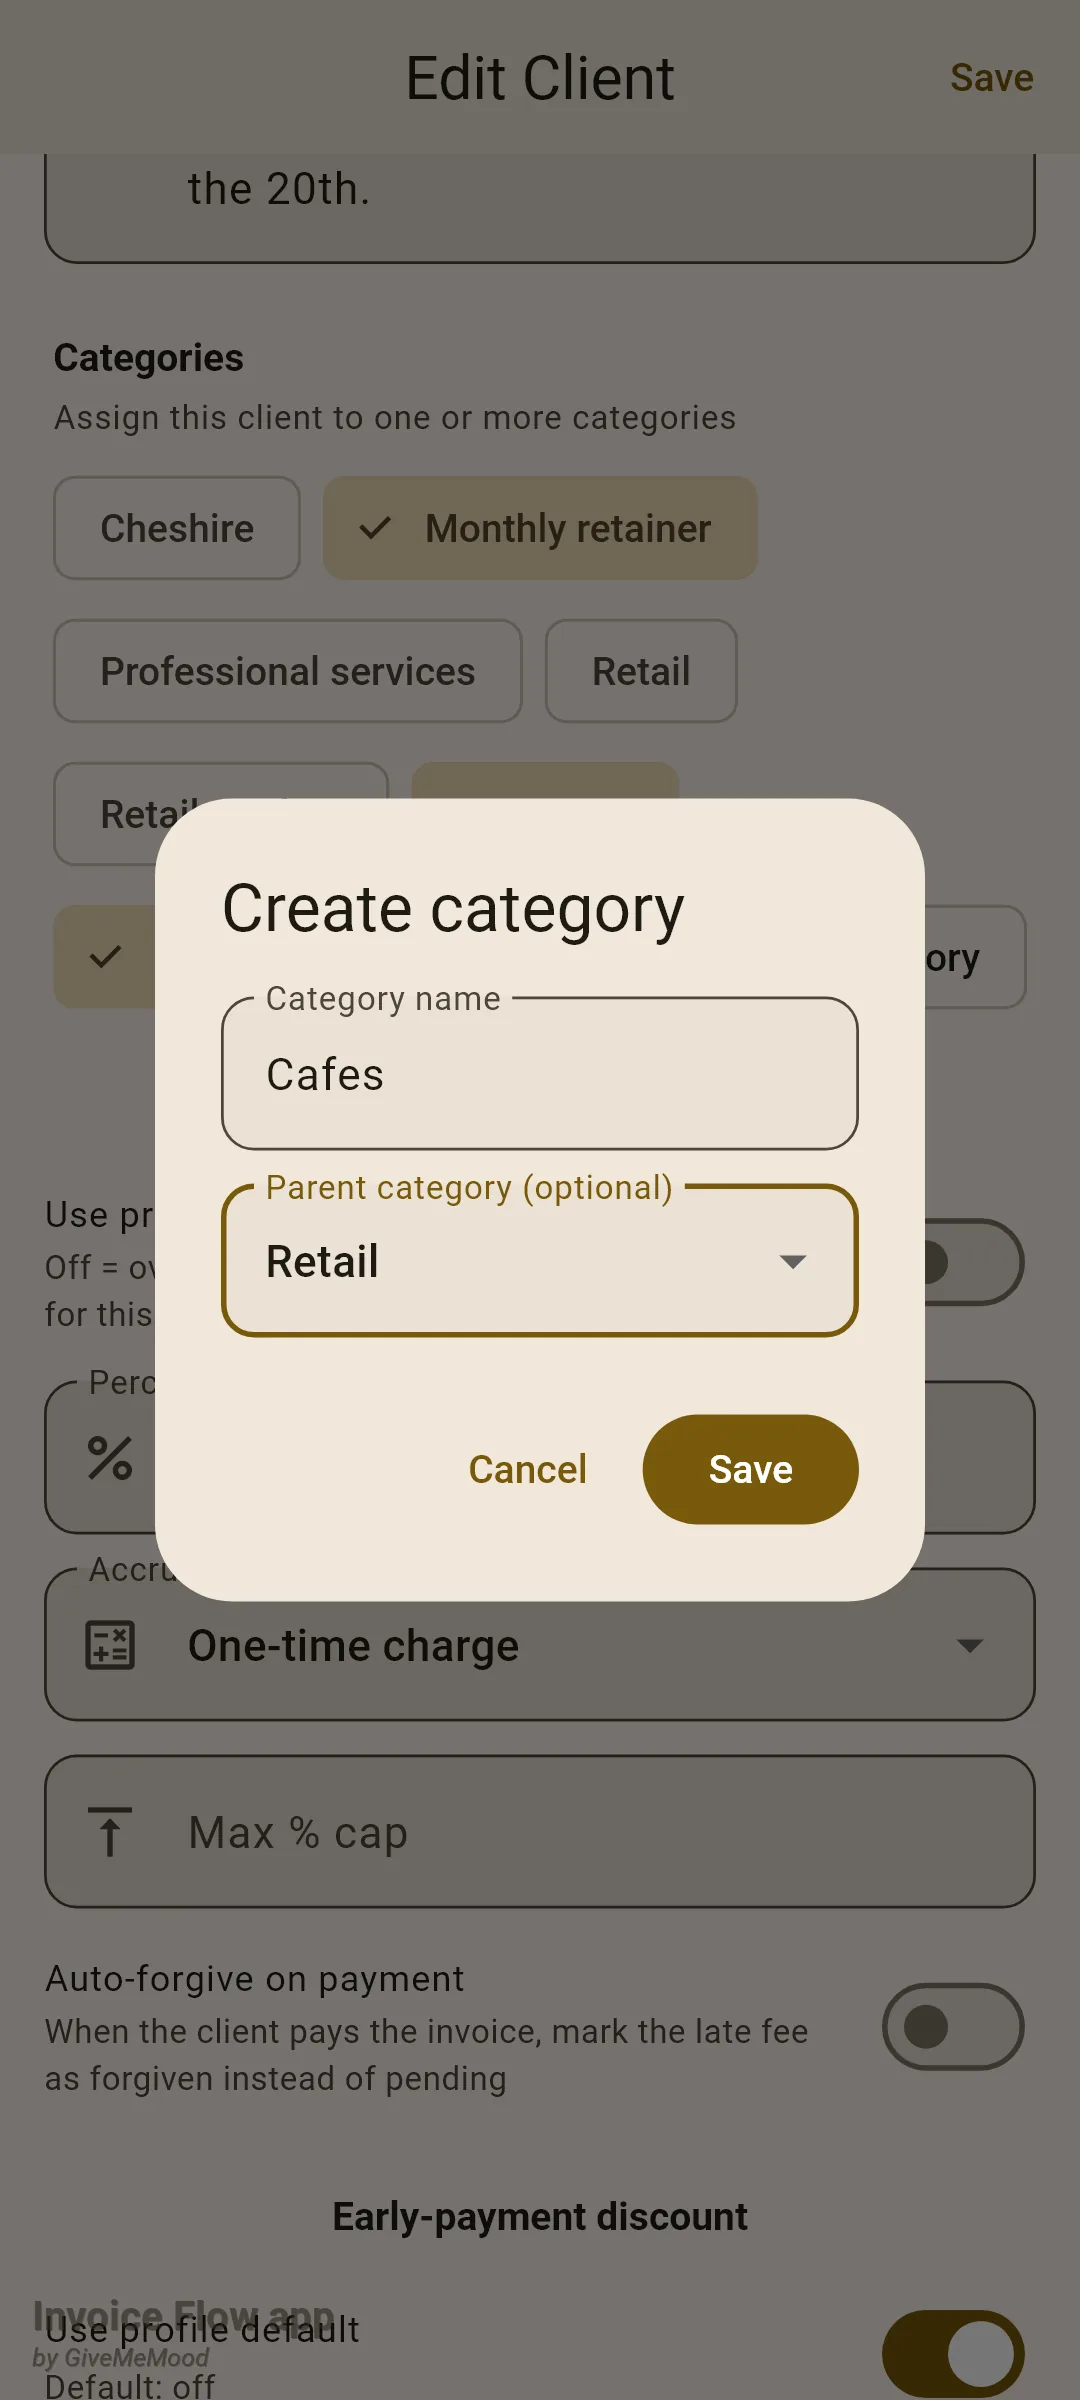
Below the categories, the same editor holds two per-client money settings. Late-fee policy starts with Use profile default switched on; turn it off to enter this client’s own Percent of total, Grace days, Accrual mode (One-time charge, Per day, Per month), Max % cap and Auto-forgive on payment. Early-payment discount works the same way, and its switch subtitle tells you what the profile default currently is. Both are covered in detail in the late-fees guide.
How to manage groups and their members
The Client Groups screen is the other side of the same data. Open it from the shapes icon on the Clients app bar.
- Tap New Client Group at the bottom right. Give it a Name and, optionally, a Description, which is shown as the row's second line.
- Choose a kind from the dropdown labelled Status: Category, Product/Service, Parent company, Region or Custom. The kind only decides the icon on the row (a label, a box, a building, a globe or a hash sign); it does not change how the group behaves.
- If at least one top-level group exists, a Parent category (optional) dropdown lets you nest the new group one level down. Tap Save.
- To add or remove members, tap the group's row. A dialog titled with the group name lists every active client with a checkbox; tick the ones that belong and tap Save. The list you save replaces the previous membership entirely.
- To rename a group, change its kind, description or parent, tap the pencil on its row. The dialog is the same as for a new group.
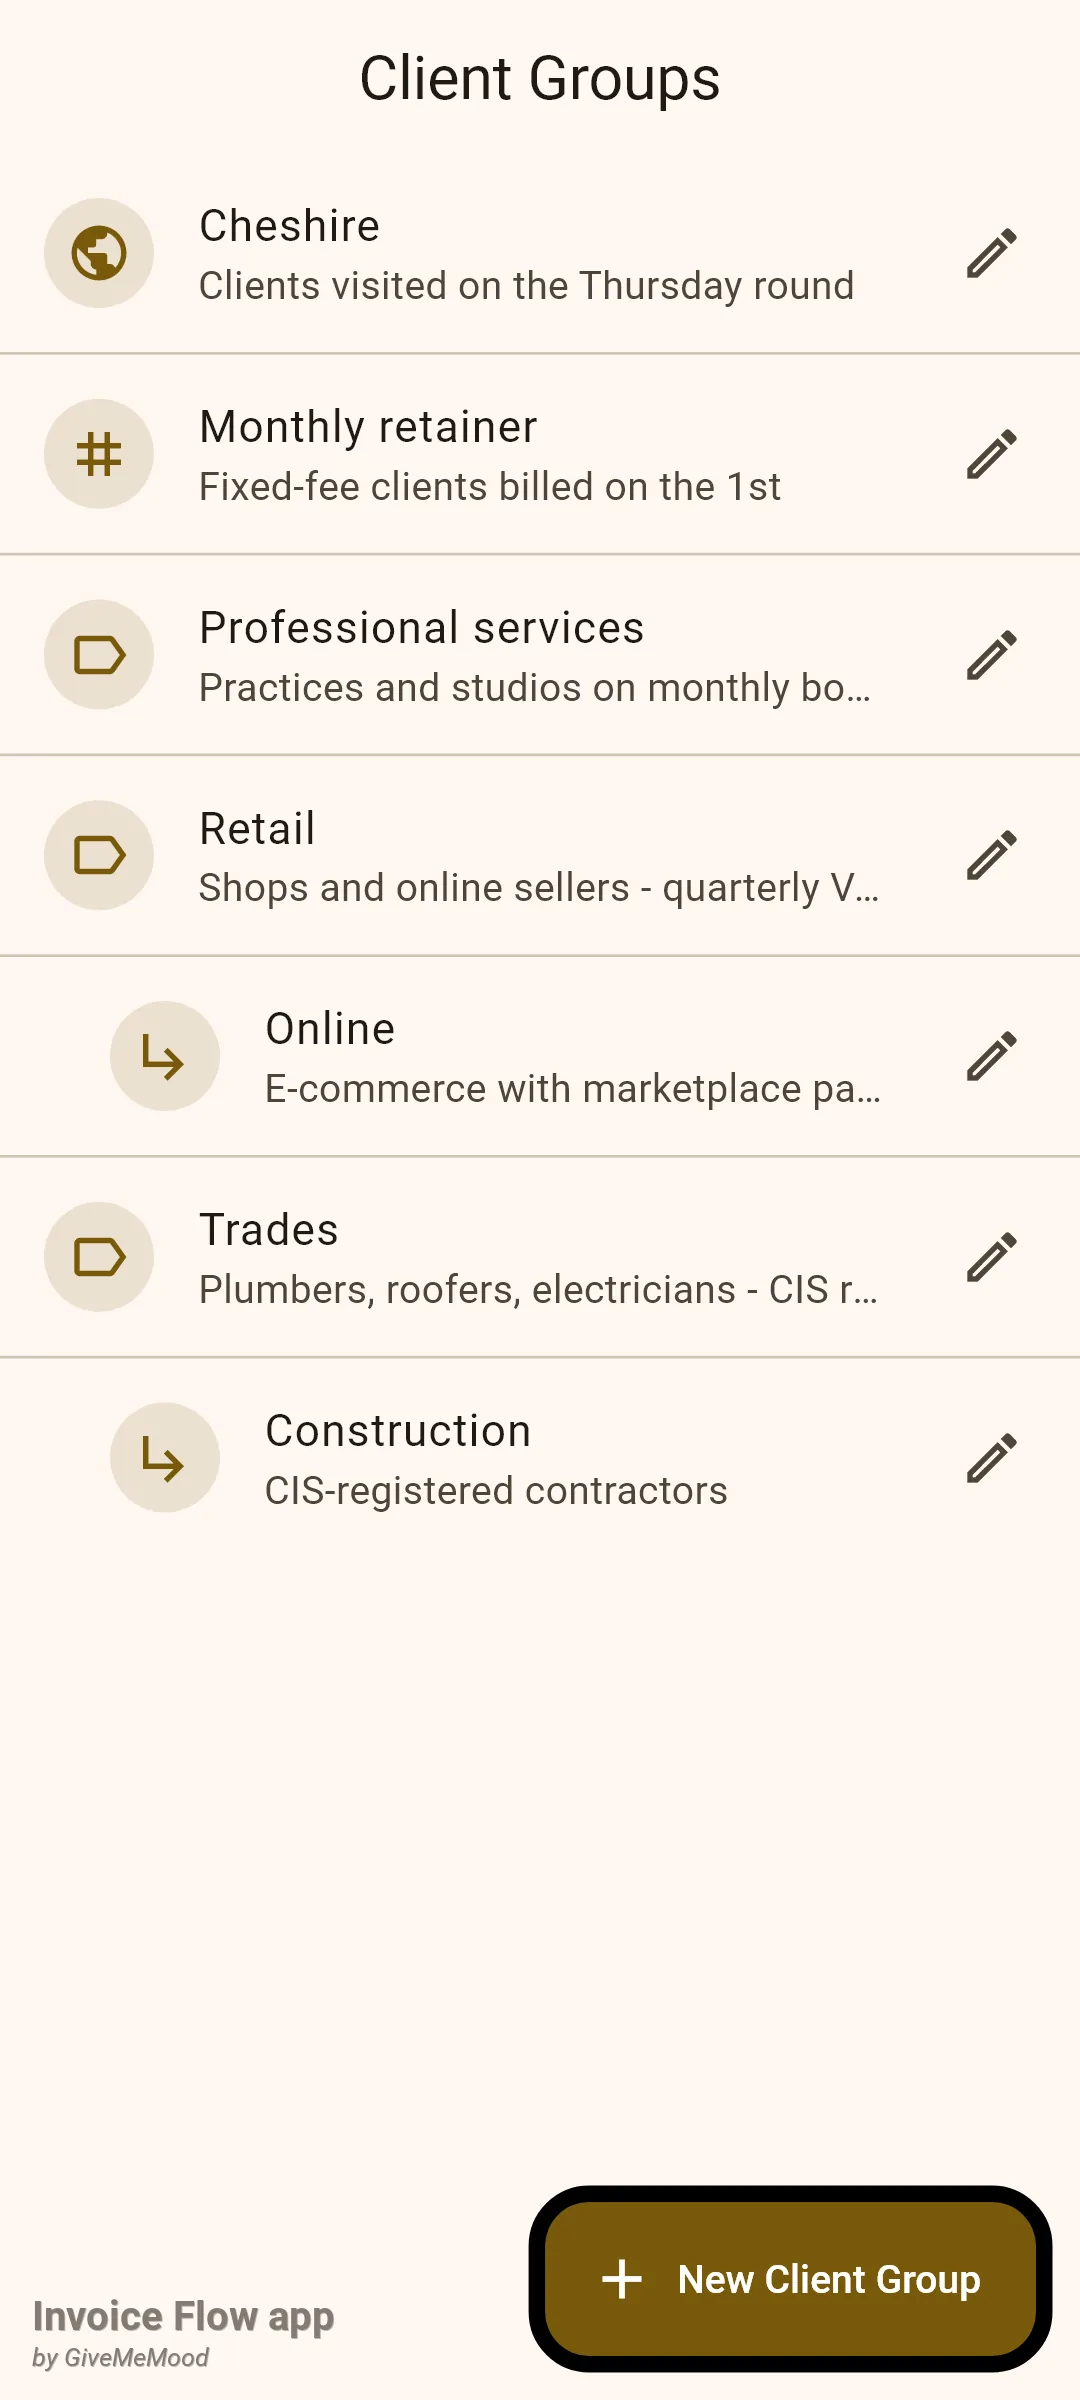
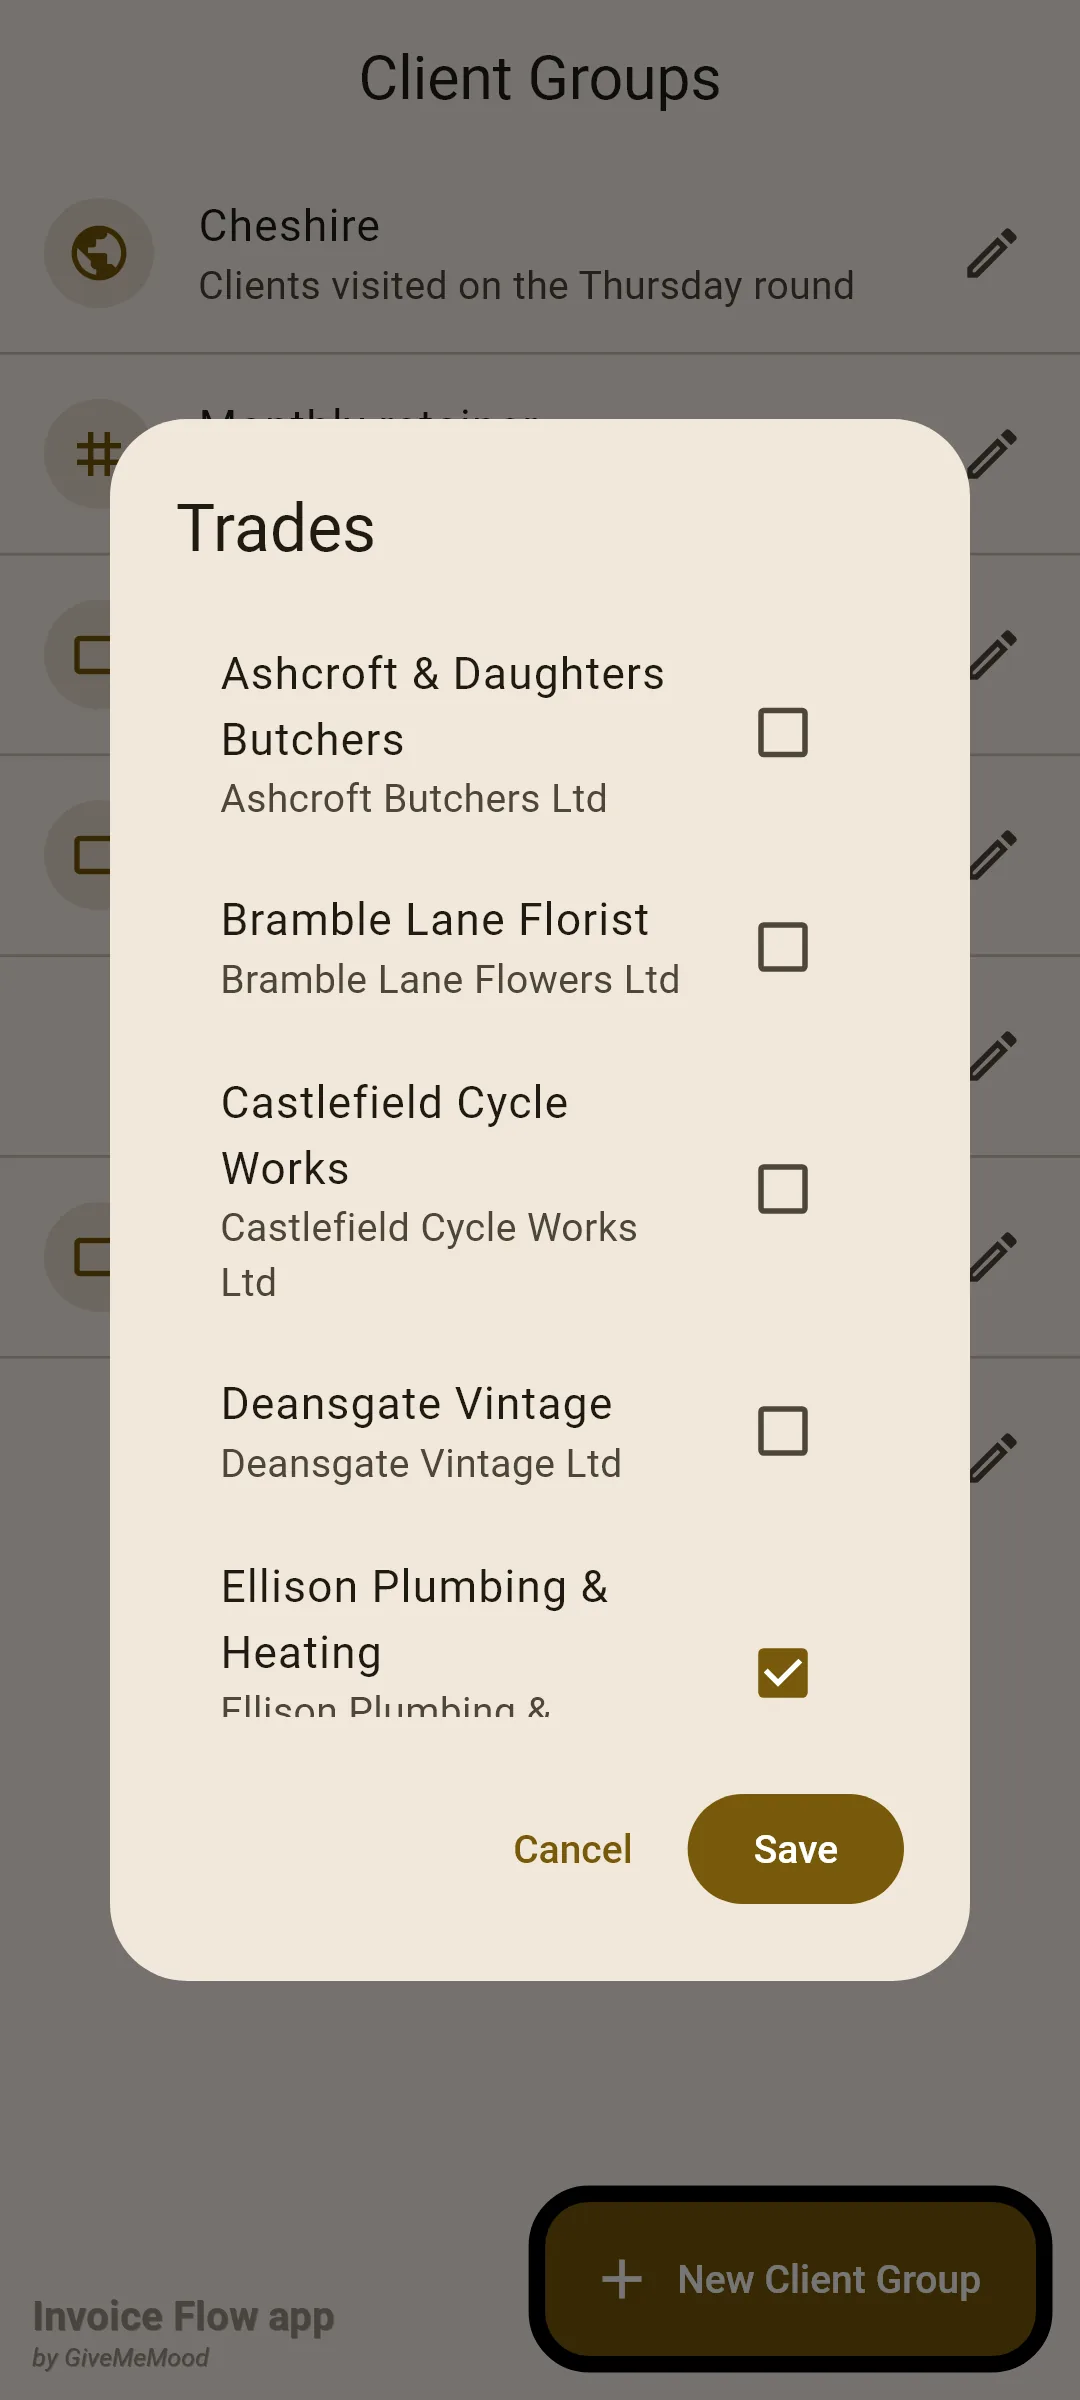
Ticking a client here or selecting a chip in its editor writes the same membership, and the Clients tab updates immediately.
How to find clients by what they have
The funnel icon opens the Filter clients sheet. Unlike the group chips, which are about how you labelled a client, this sheet is about the data attached to it.
- Tap the funnel on the Clients app bar. The sheet slides up to about two thirds of the screen; drag its handle to enlarge it.
- Under Has related data, tap any of Invoices, Estimates, Unpaid invoices, Contracts, Time entries, Projects and Expenses. Selecting several means the client must have all of them.
- Under Attributes, pick a Country (only countries used by at least one client are offered) and, if you keep more than one business profile, a Business profile to show clients that have at least one document under it.
- Switch on Custom late-fee settings to keep only clients whose late-fee policy overrides the profile.
- Expand Additional filters for the switches Has email, Has phone, Has address, Has logo / avatar and Has notes, which are handy for spotting incomplete cards.
- Tap Apply. The funnel icon now shows the number of active conditions. Reopen the sheet and tap Reset, then Apply, to clear everything.
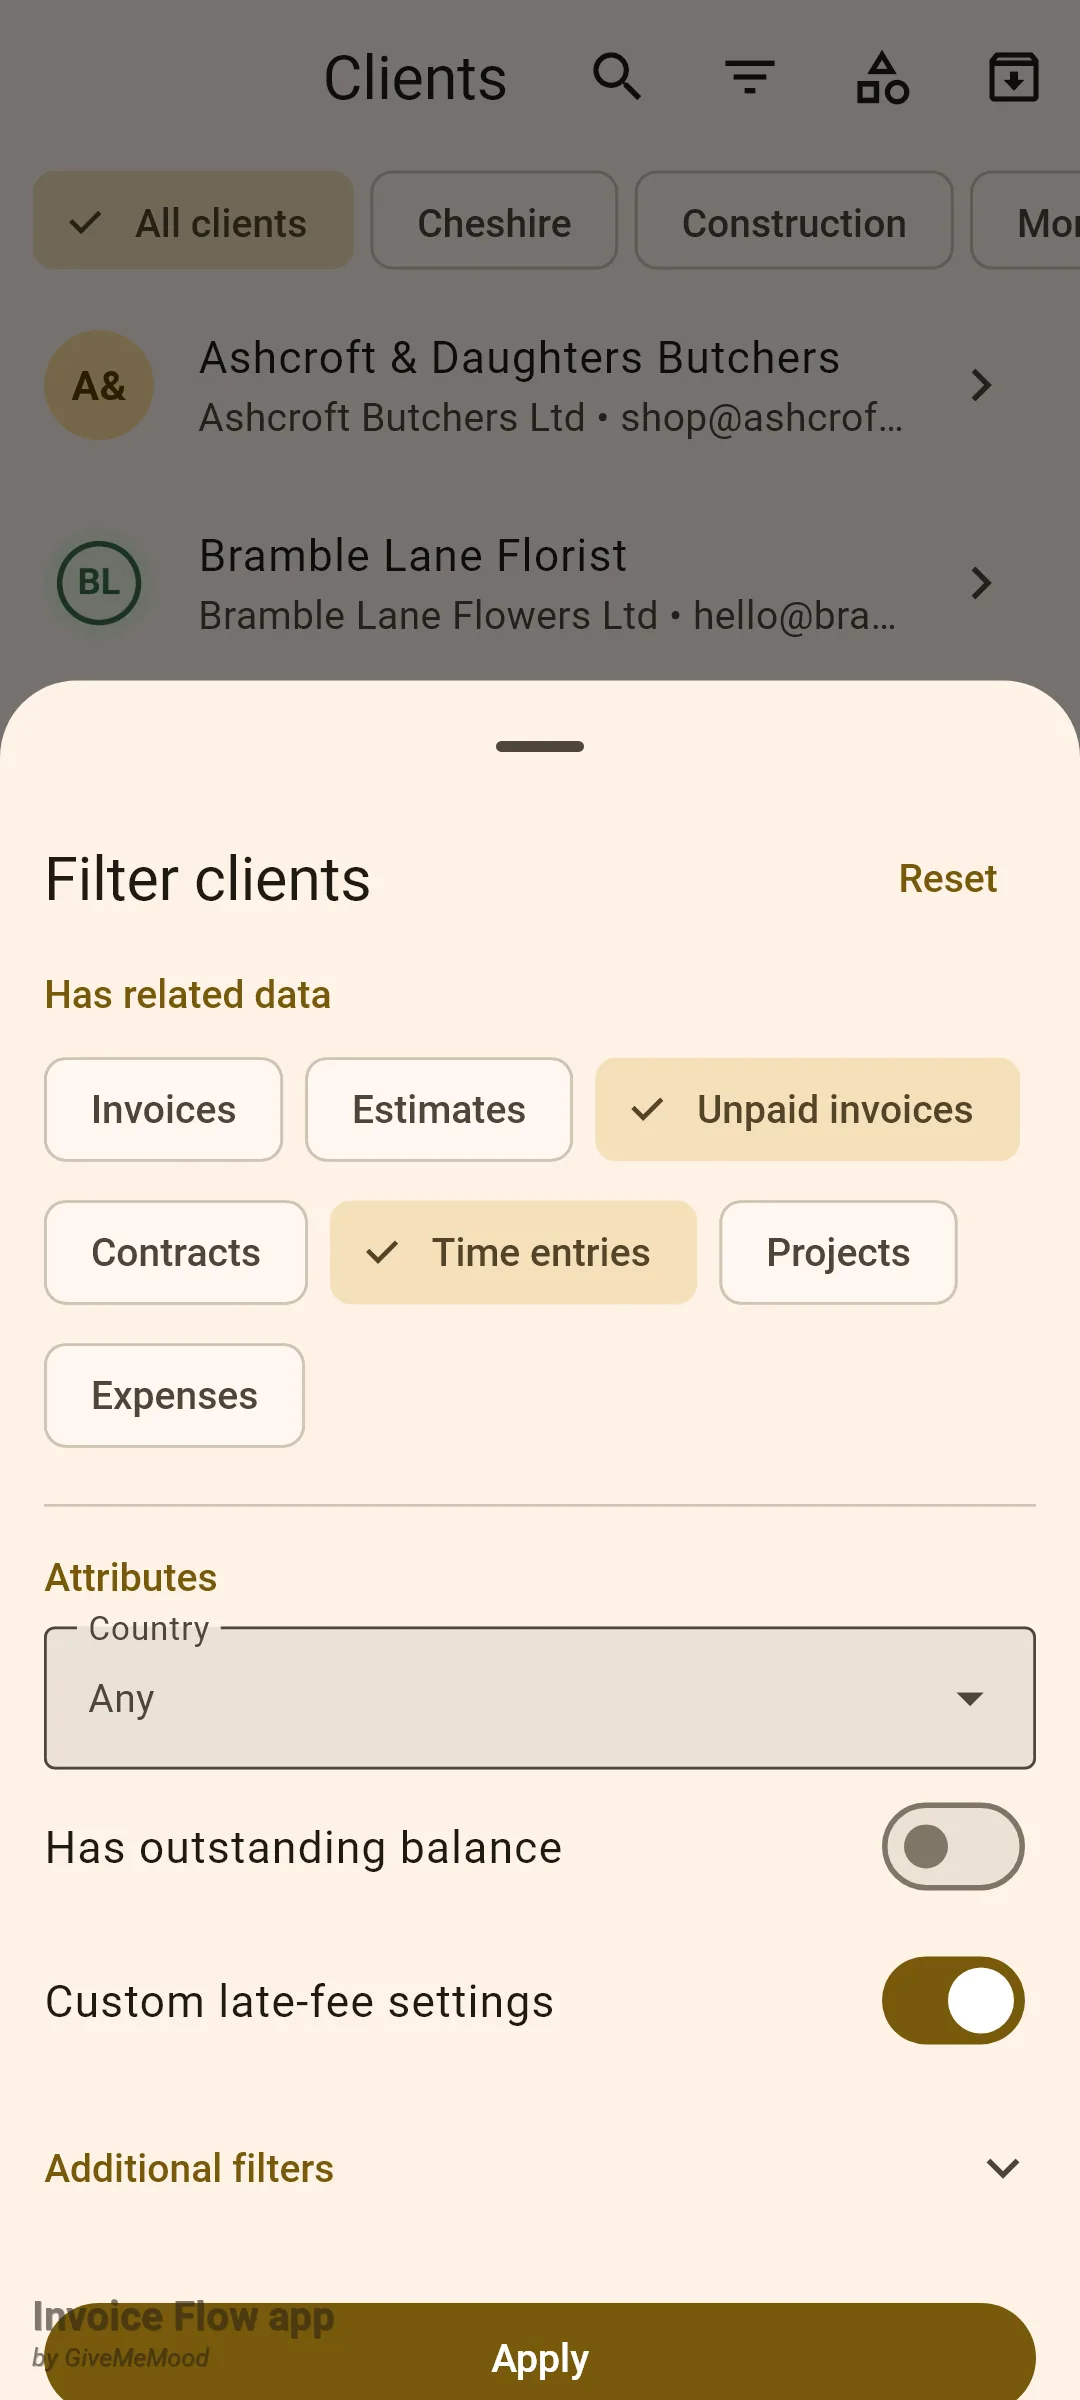
“Unpaid invoices” means an invoice-type document whose status is anything other than Paid or Cancelled, so drafts count too. The related-data chips look at all documents, including archived ones, while the list itself only shows active clients.
What the client detail screen shows
Tap a row to open the client. A tinted header shows the avatar, name and company, and under it a scrollable row of five tabs.
- Info lists Email, Phone, Address and Notes when they are filled in, and always the Added date.
- Documents lists every non-archived document for this client, newest first: invoices, estimates and any other type from the same table. Each row shows the number, the issue date, the total in the document’s currency and a status badge (Draft, Sent, Paid, Cancelled). Tap a row to open the document.
- Projects lists the client’s projects with their status and invoiced total, and has its own small + to start a project already linked to this client.
- Contracts shows contract titles, their start and end dates and a status badge.
- Activity merges expenses (red, with the amount) and time entries (blue, with the duration in hours and minutes) into one list sorted by date.
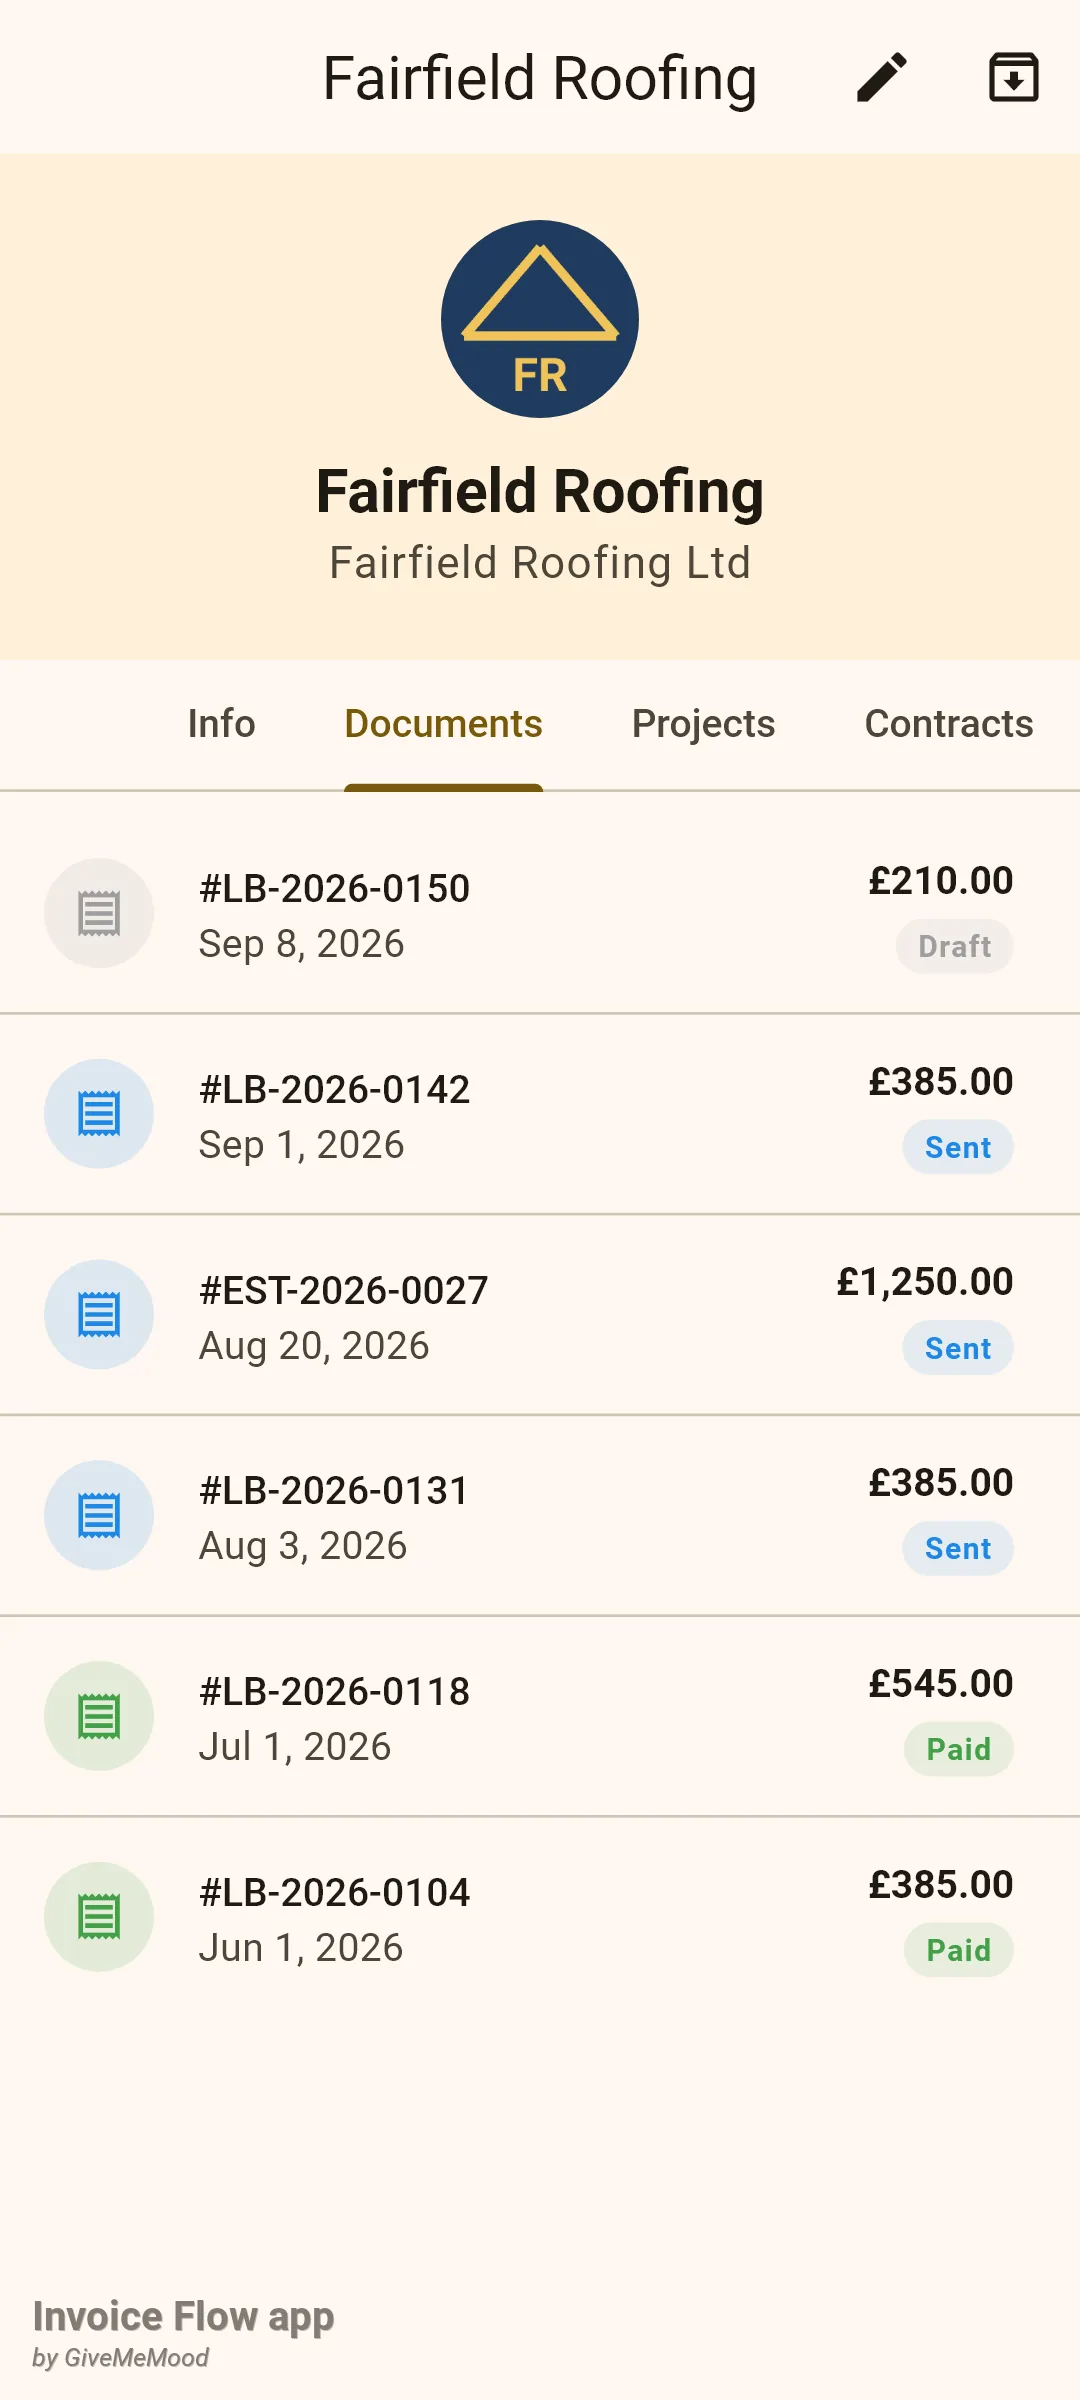
There is no summed balance on this screen. To see what a client owes, read the Sent rows here, or use the status filters on the main Documents tab and the dashboard’s overdue list. The pencil in the app bar opens the editor; the box icon archives the client.
Rules and details
- Required fields. Only Name * is validated (“Name is required”). Every other field is optional; a field left blank is stored as no value, so the Info tab hides it and the “Has …” filters treat it as missing.
- Where clients live. Clients are shared across all business profiles. Categories and groups belong to one profile: the chips in the editor, the strip on the list and the Client Groups screen all show the groups of the profile currently marked as default. Deleting a profile deletes its groups; the clients stay.
- Nesting. Groups nest one level deep. Only top-level groups are offered as parents, and a group cannot be made its own parent. If a parent is ever removed, its sub-categories are promoted to top level rather than lost.
- No delete for groups. The Client Groups screen has no delete action; you can rename a group, change its parent or empty its membership. The Create category dialog ignores Save while the name is blank; the group editor on the Client Groups screen does not check, so a group saved without a name shows up as an empty row.
- Sorting and search. Lists are always sorted by name. Search matches a fragment of the name or the company, not the email. The group chip and the advanced filter are applied on top of the search result, in that order.
- Filter semantics. Every selected condition must hold (AND). The Has outstanding balance switch reads a stored balance column that the app only fills during a backup import; for data entered on the phone it stays at zero, so prefer the Unpaid invoices chip. The Currency dropdown only appears when a client has a preferred currency, which no screen currently sets, so you will normally not see it.
- Per-client overrides. When Use profile default is on, the client’s late-fee columns are stored empty and the business profile’s policy applies. When it is off, each field you leave blank still falls back to the profile individually; the minimum amount and the Include in PDF option are profile-only. Early-payment discount follows the same pattern.
- What the invoice editor uses. From the client card the invoice editor reads the name, company, email, address and country code (for the
{client_country}numbering token), plus the late-fee and discount overrides. Payment terms are pre-filled from the profile, not from the client. - Archive, not delete. Swiping a row or tapping the box icon on the detail screen asks Move to archive? and, on Archive, hides the client together with all of their documents. Both come back from the Archive screen with Restore. Permanent deletion is only offered there, behind two confirmations, and removes the client’s invoices, expenses and time entries in one go.
- What needs Pro. The + button on the list, the empty-state Add Client button, the pencil on the detail screen, the New Client Group button and the + on the Projects tab check your trial or subscription and open the paywall otherwise. Viewing, searching, filtering, editing an existing group, ticking members, archiving and restoring are always available.
- Native pickers. The avatar picker uses the system camera or gallery. The picked image is scaled to 512 pixels and stored as-is; there is no cropping step.