 EN
EN  العربية
  Български
  Čeština
  Dansk
Dansk  Deutsch
  Ελληνικά
  Español
  Suomi
Suomi  Français
  עברית
עברית  हिन्दी
  Bahasa Indonesia
  Italiano
  日本語
日本語  한국어
한국어  Bahasa Melayu
  Nederlands
  Norsk
Norsk  Polski
  Português
  Română
  Русский
  Svenska
  Kiswahili
  ไทย
ไทย  Türkçe
  Українська
  Tiếng Việt
  中文
中文 User guide
Invoice statuses, the Documents list and the change log
Read the Documents list at a glance, move invoices between Draft, Sent, Paid and Cancelled, work on several at once, and trace every edit in the change log.
Once you have more than a handful of invoices, the question is no longer “how do I make one” but “which of these still needs my attention”. The Documents tab answers that with a status badge on every row, quick status chips, a search field, a date range, and a sheet of finer filters. From there you move each invoice through its life: it starts as a draft, becomes sent, and ends up paid or cancelled, with overdue shown along the way whenever a sent invoice passes its due date. Everything below is illustrated with Cedar Ridge Landscaping, a two-crew lawn and irrigation company in Boise, Idaho, that bills around fifteen jobs a month in US dollars.
What you see on the screen
Tap Documents in the bottom navigation. The screen has three layers of controls above the list. At the top right of the app bar sit four icons: a magnifier for search, a calendar for a date range, a funnel labelled Filter documents (a small red counter appears on it when any advanced filter is active), and a box icon that opens the Archive. Below the app bar a segmented control switches between Invoices, Estimates and Contracts; this guide stays on the Invoices segment. Under it runs a row of status chips: All, Draft, Sent, Paid and Overdue.
Each row shows a receipt icon tinted in the status colour, the invoice number, a coloured badge, the client name with the issue date, and the total in bold on the right. Drafts are grey, sent invoices blue, paid ones green, overdue red, and cancelled a darker grey. Two extra decorations can appear. A small pin before the number marks an invoice you have pinned to the list; pinned rows always sit at the top of the All view. When money has been received against an invoice that is not yet fully paid, a thin progress bar with a percentage appears under the client name and the remaining amount is printed in red under the total, for example $720.00 due.
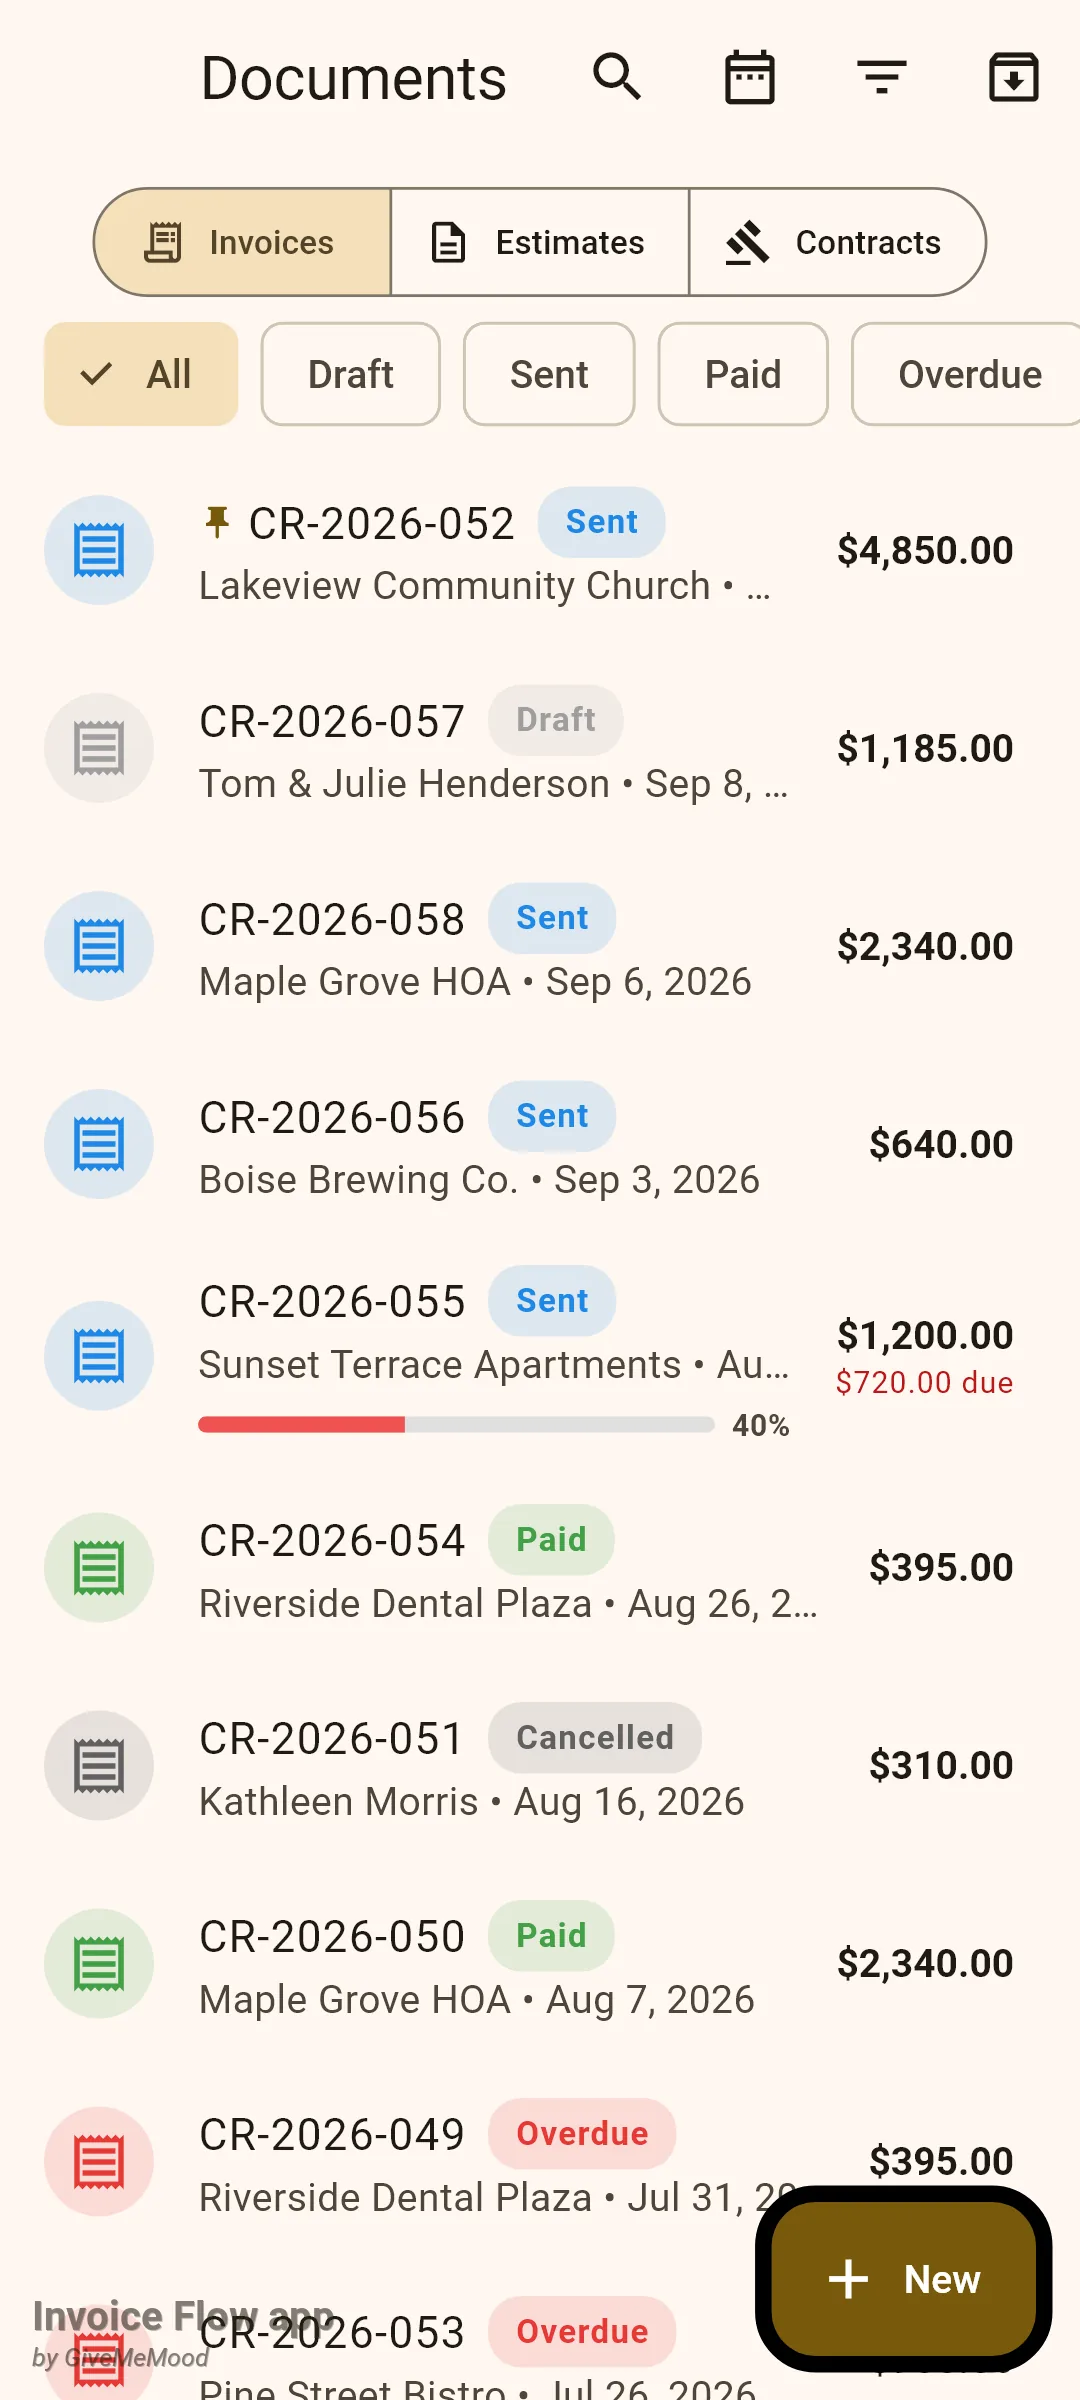
The list is ordered by creation date, newest first, and there is no separate sort menu. Pinning is the only way to force an order of your own, and it works on the All chip only; the status chips show plain chronological order.
Tapping a row opens the invoice detail screen. Its app bar shows the number, an Edited pill when the invoice has a change history, a pencil (drafts) or an eye icon labelled View details (all other statuses), and a three-dot menu. That menu is where every status transition lives. The body repeats the badge and total in a header card, then shows the client, the line items, totals, notes, payment terms and, for sent invoices, the Payments card. A Preview PDF button spans the bottom.
How to find an invoice with chips, search, dates and filters
The controls stack on top of each other, so you can narrow a long list in a few taps. Start with the widest tool and add more only if you need them.
- Tap a status chip such as Overdue. The list immediately drops every row that does not match; tap All to bring them back.
- Tap the magnifier, then type part of a number, client name or note, for example maple. Matching is case-insensitive and updates as you type. The back arrow closes the field and clears the search.
- Tap the calendar icon (Filter by date) and pick a start and end day; confirm with View All. A banner with the range appears above the list; the cross on the banner removes it. The range is compared with the issue date, not the due date.
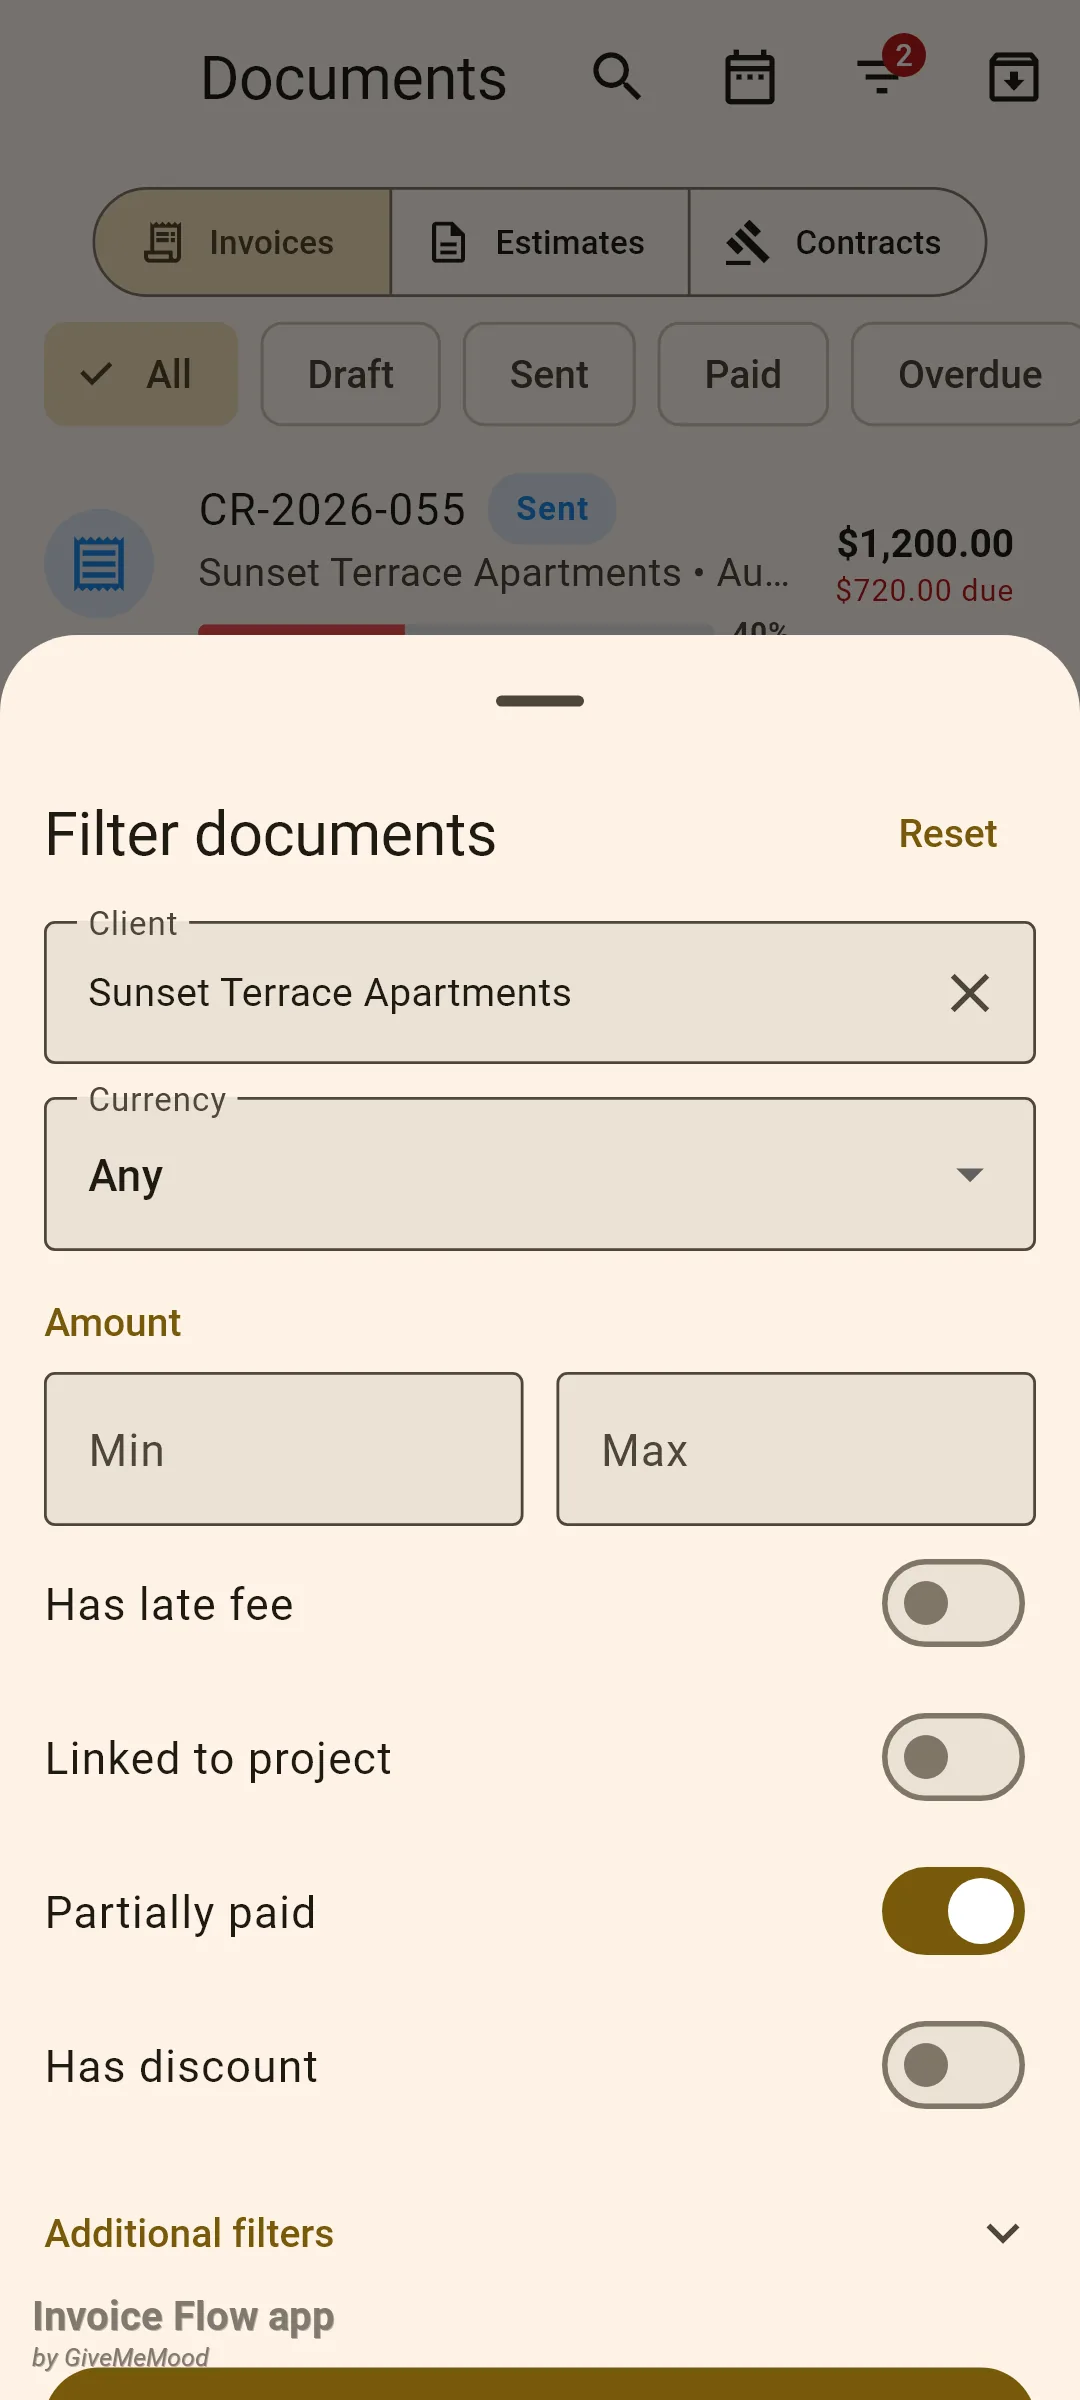
- Tap the funnel (Filter documents). Choose a Client, a Currency, a Min and Max amount, and any of the switches: Has late fee, Linked to project, Partially paid, Has discount.
- Expand Additional filters for Late-fee status, Overdue only, Has tax, Has attachments, Has signature, Has notes, From a recurring schedule and Pinned.
- Tap Apply. The funnel icon now carries a counter with the number of active criteria; open the sheet again and tap Reset to clear them all.
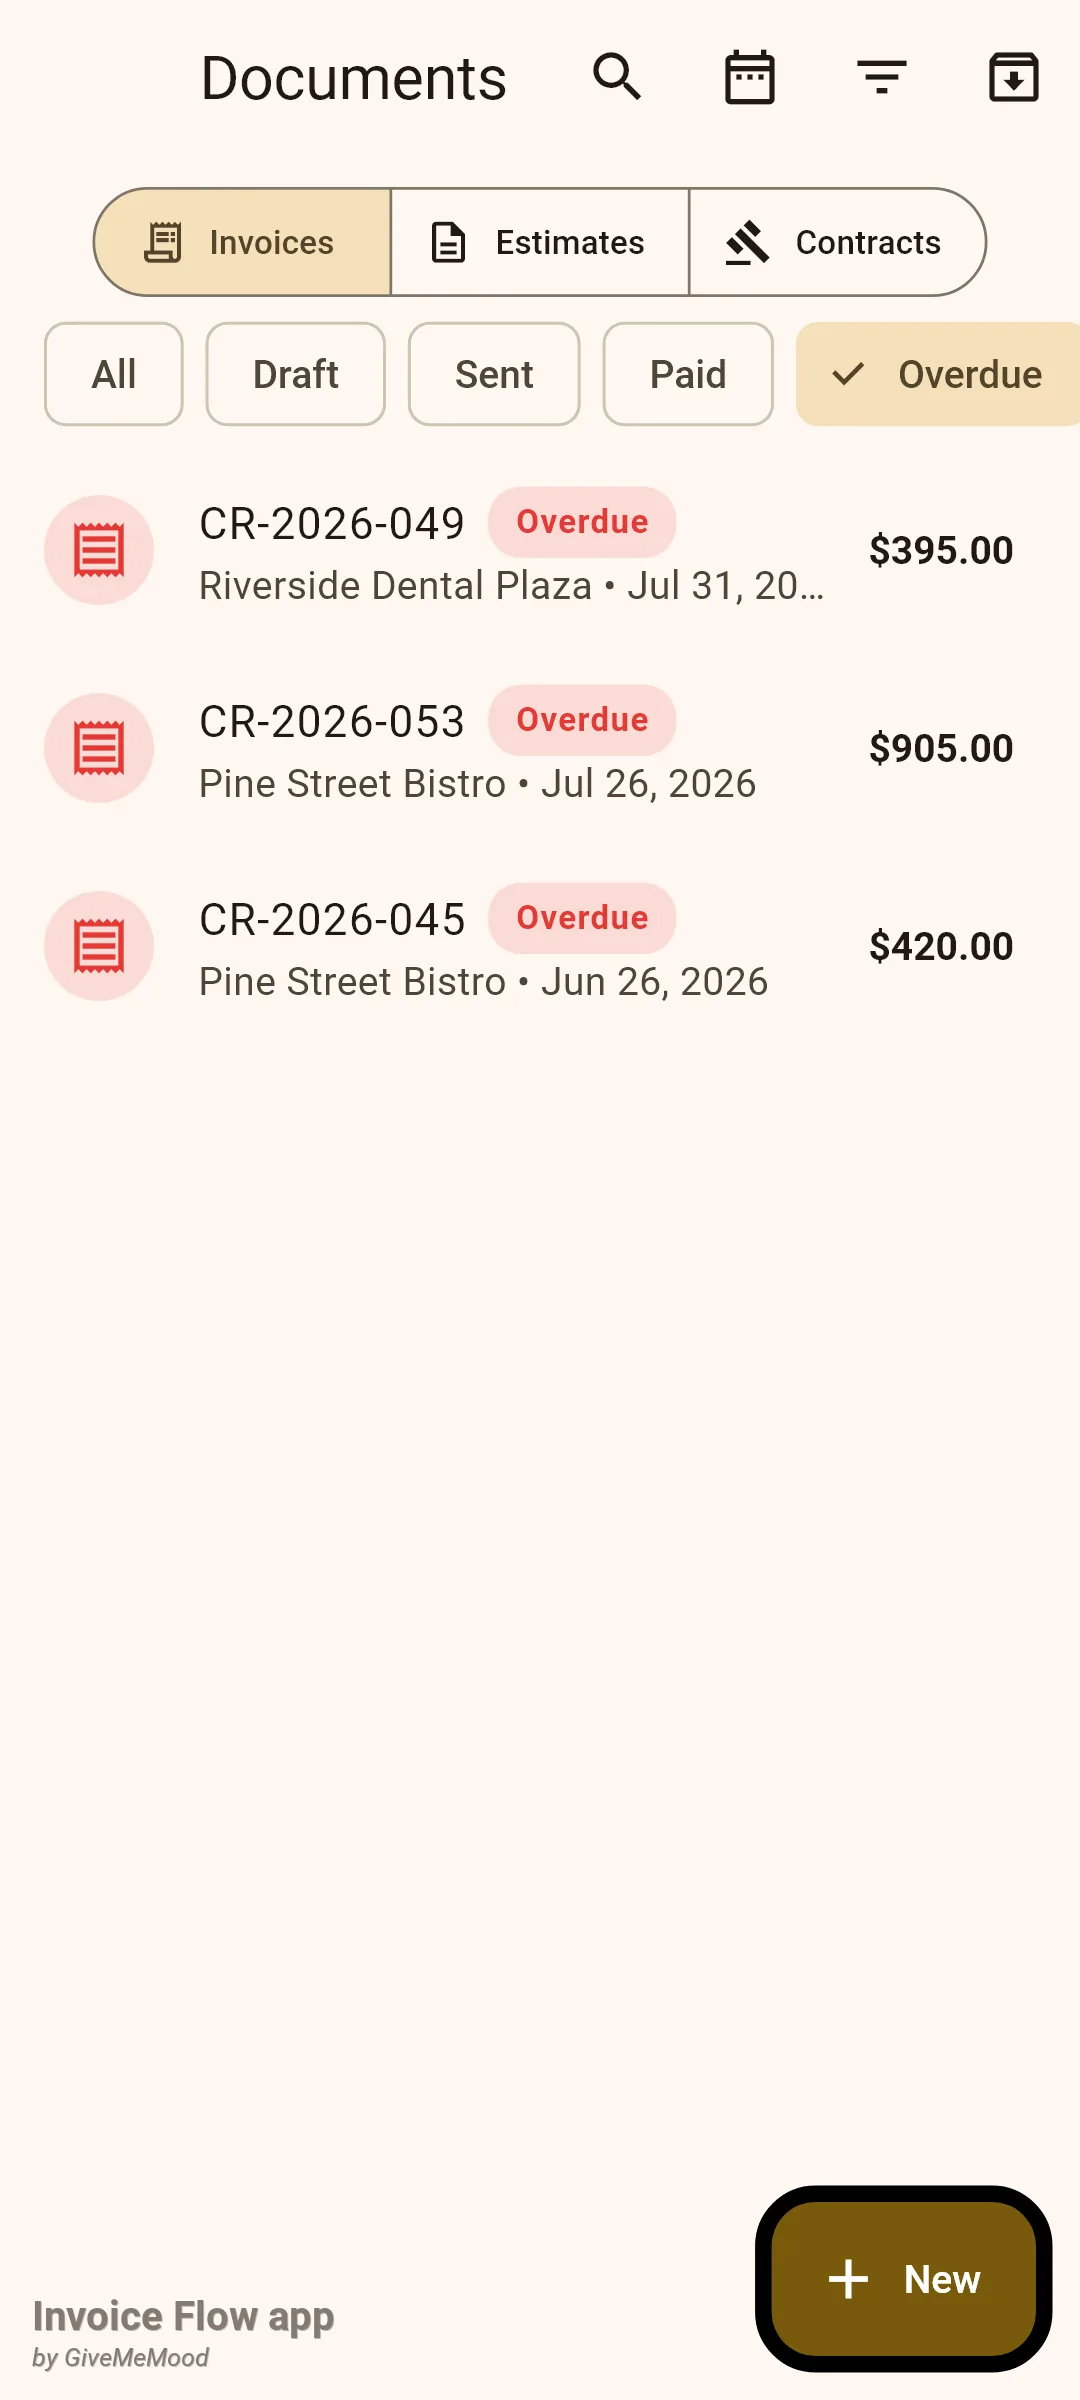
Whichever combination you use, the result on the Invoices segment never includes estimates or archived invoices; those have their own places. If nothing matches, the list shows No results instead of the usual empty-state text.
How to move an invoice through its statuses
Cedar Ridge sends its August maintenance invoice to Maple Grove HOA, waits, and eventually receives a bank transfer. Here is how the invoice’s status follows the real world. Every step happens from the three-dot menu on the invoice detail screen, and every step asks you to confirm.
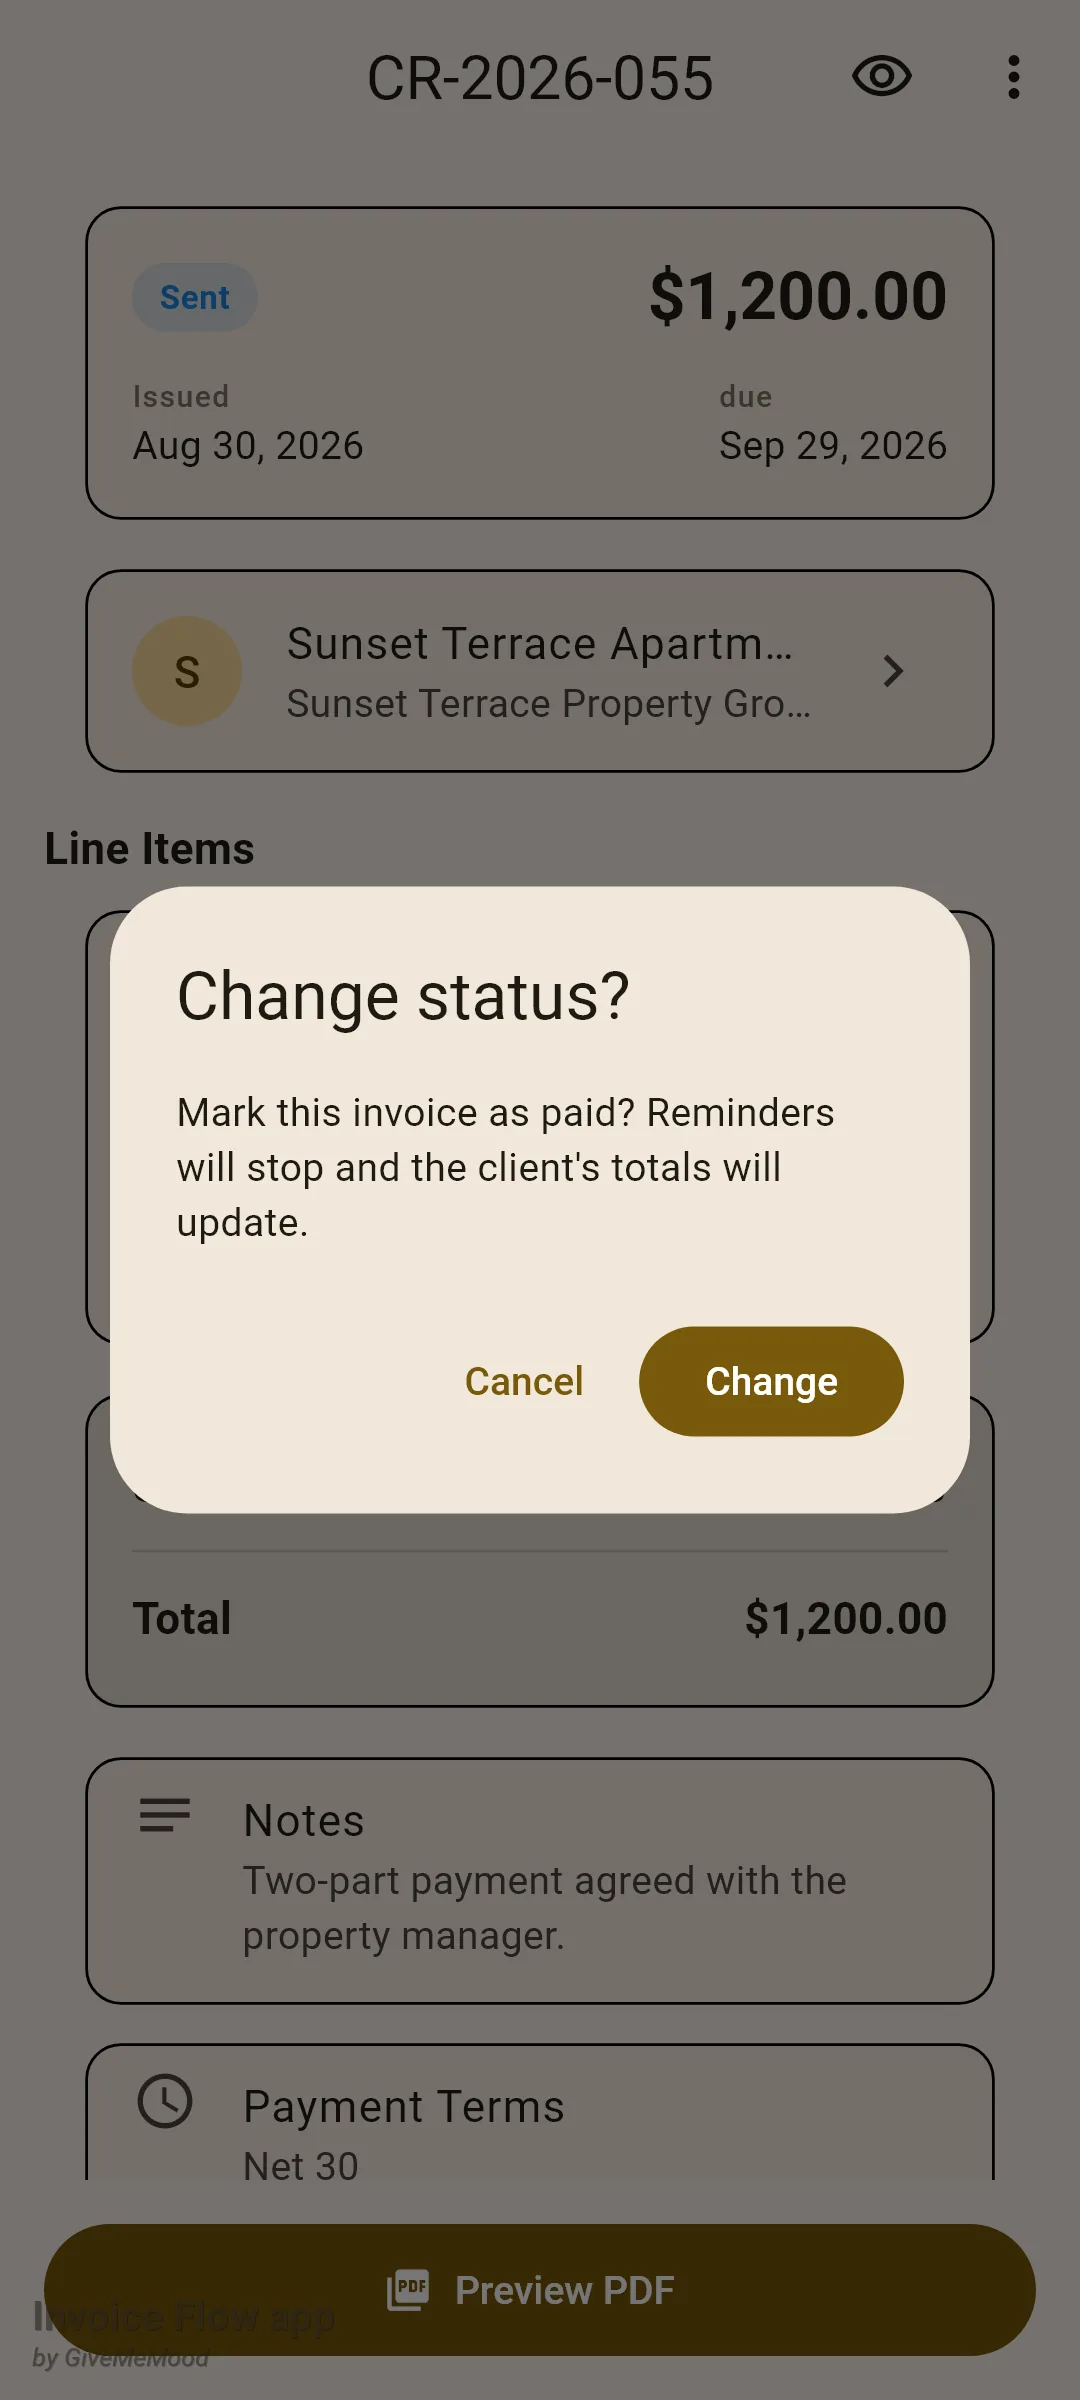
- Open the draft and tap the three-dot menu, then Mark as Sent. Read the Change status? dialog and tap Change. The badge turns blue. The pencil icon in the app bar becomes an eye, because a sent invoice is opened view-only by default.
- When the client pays in full, open the same menu and tap Mark as paid, then Change. Scheduled reminders for this invoice are cancelled, project totals are refreshed if the invoice belongs to a project, and if a late fee was pending you are asked what to do with it.
- If the client pays in parts, do not mark it paid by hand. Use Record on the Payments card instead; the app flips the status to Paid on its own when the balance reaches zero.
- If you marked the wrong invoice, choose Mark as unpaid on a paid invoice (it returns to Sent) or Revert to draft on a sent one (full editing comes back, reminders stop).
- If the job falls through, choose Cancel Invoice. The invoice keeps its number and stays in the list with a grey Cancelled badge; Reactivate later brings it back as a draft.
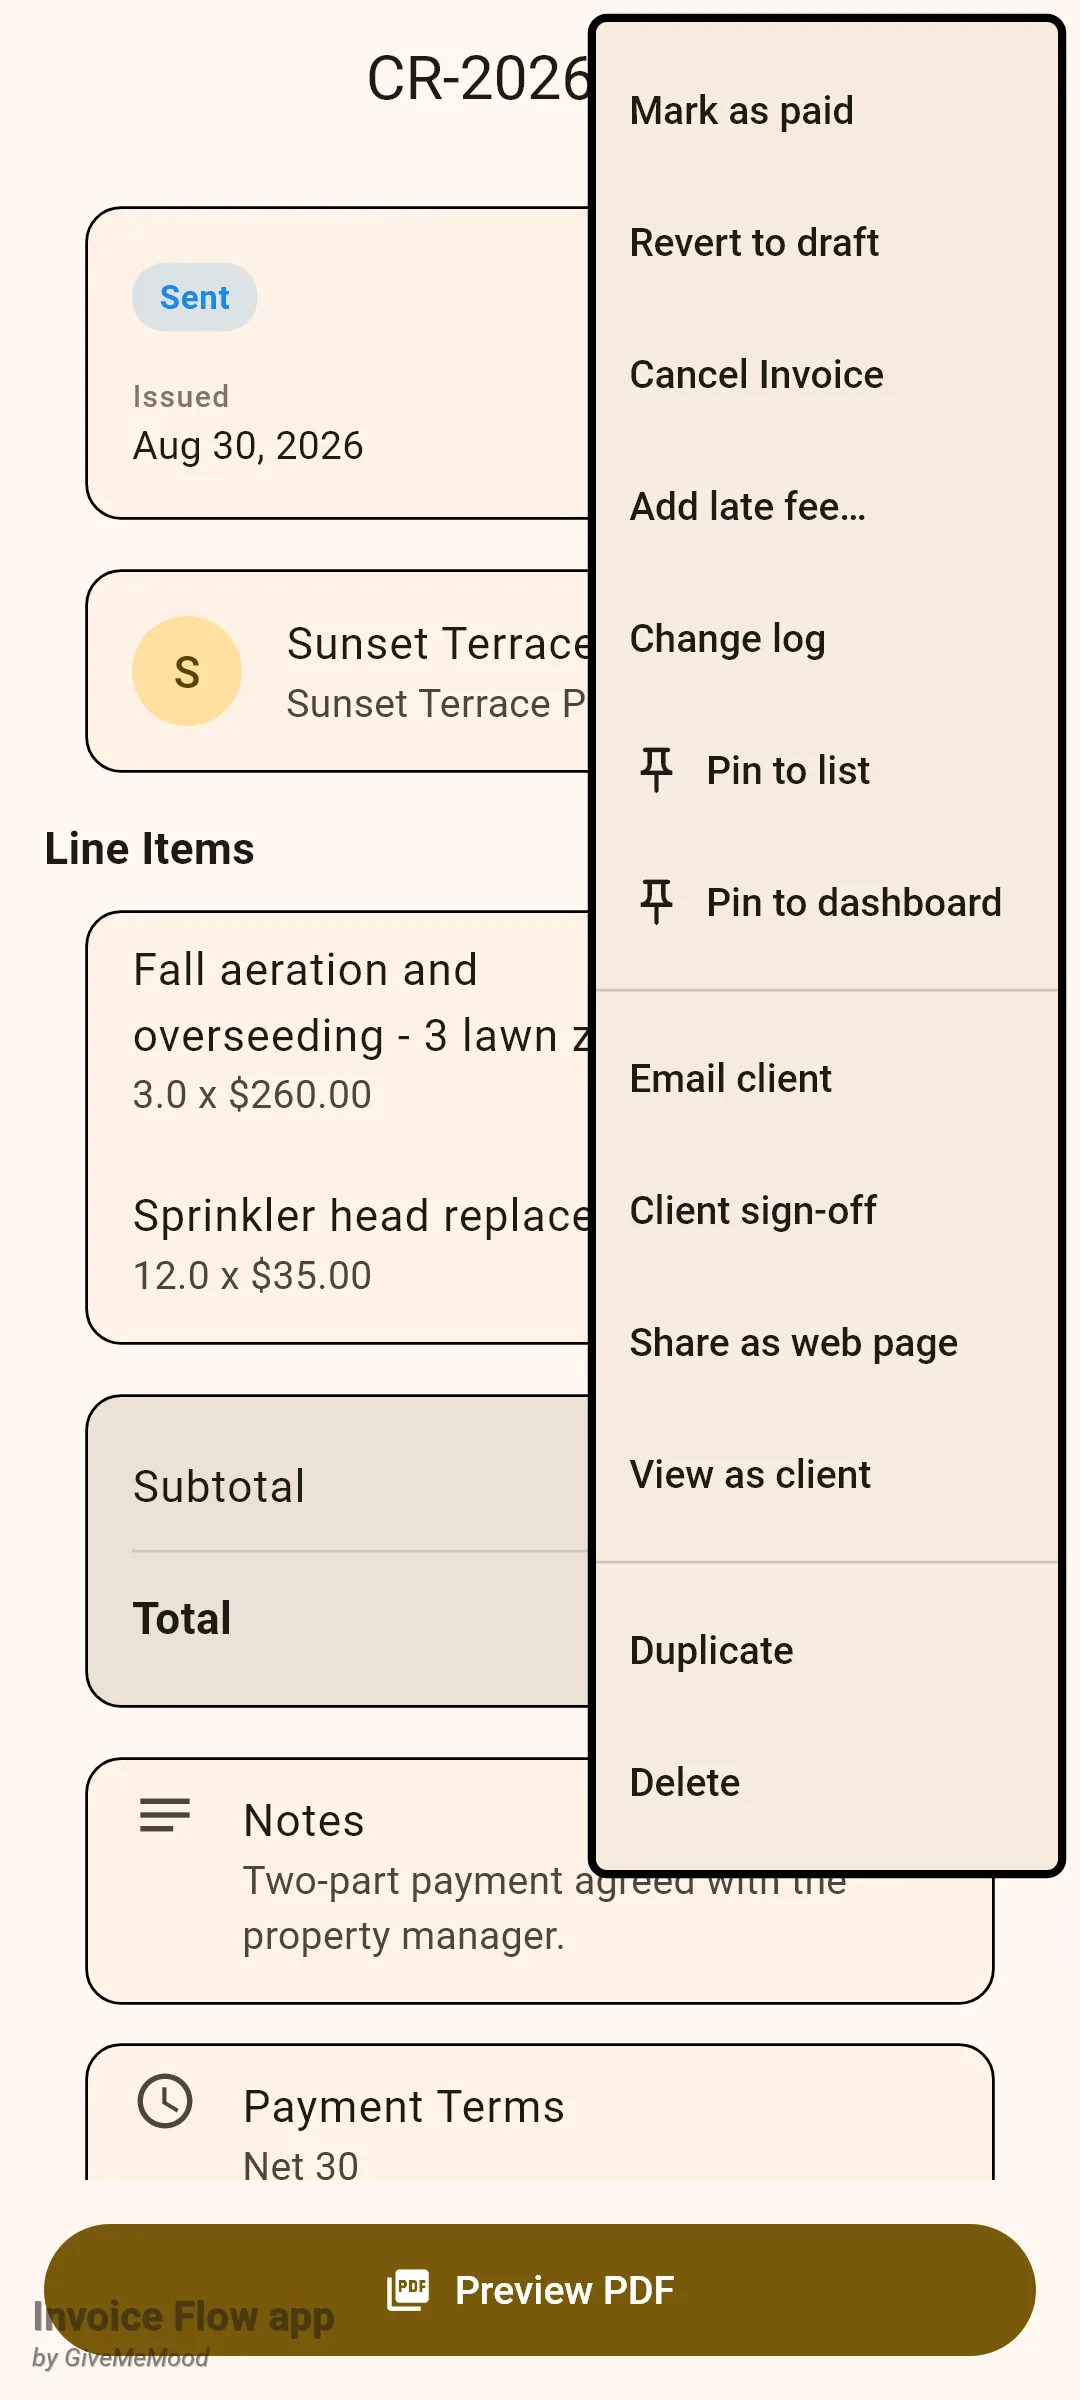
The menu only ever shows transitions that make sense for the current status. A draft offers Mark as Sent; a sent or overdue invoice offers Mark as paid and Revert to draft; a paid one offers Mark as unpaid; a cancelled one offers Reactivate; and Cancel Invoice is available on anything that is not already cancelled.
Overdue is not a status you set. An invoice is shown as overdue when it is in the Sent state and its due date is earlier than today. The moment you mark it paid, or edit the due date into the future, the red badge disappears. That is also why the Overdue chip and the Overdue only filter always agree with the dashboard.
How to act on several invoices at once
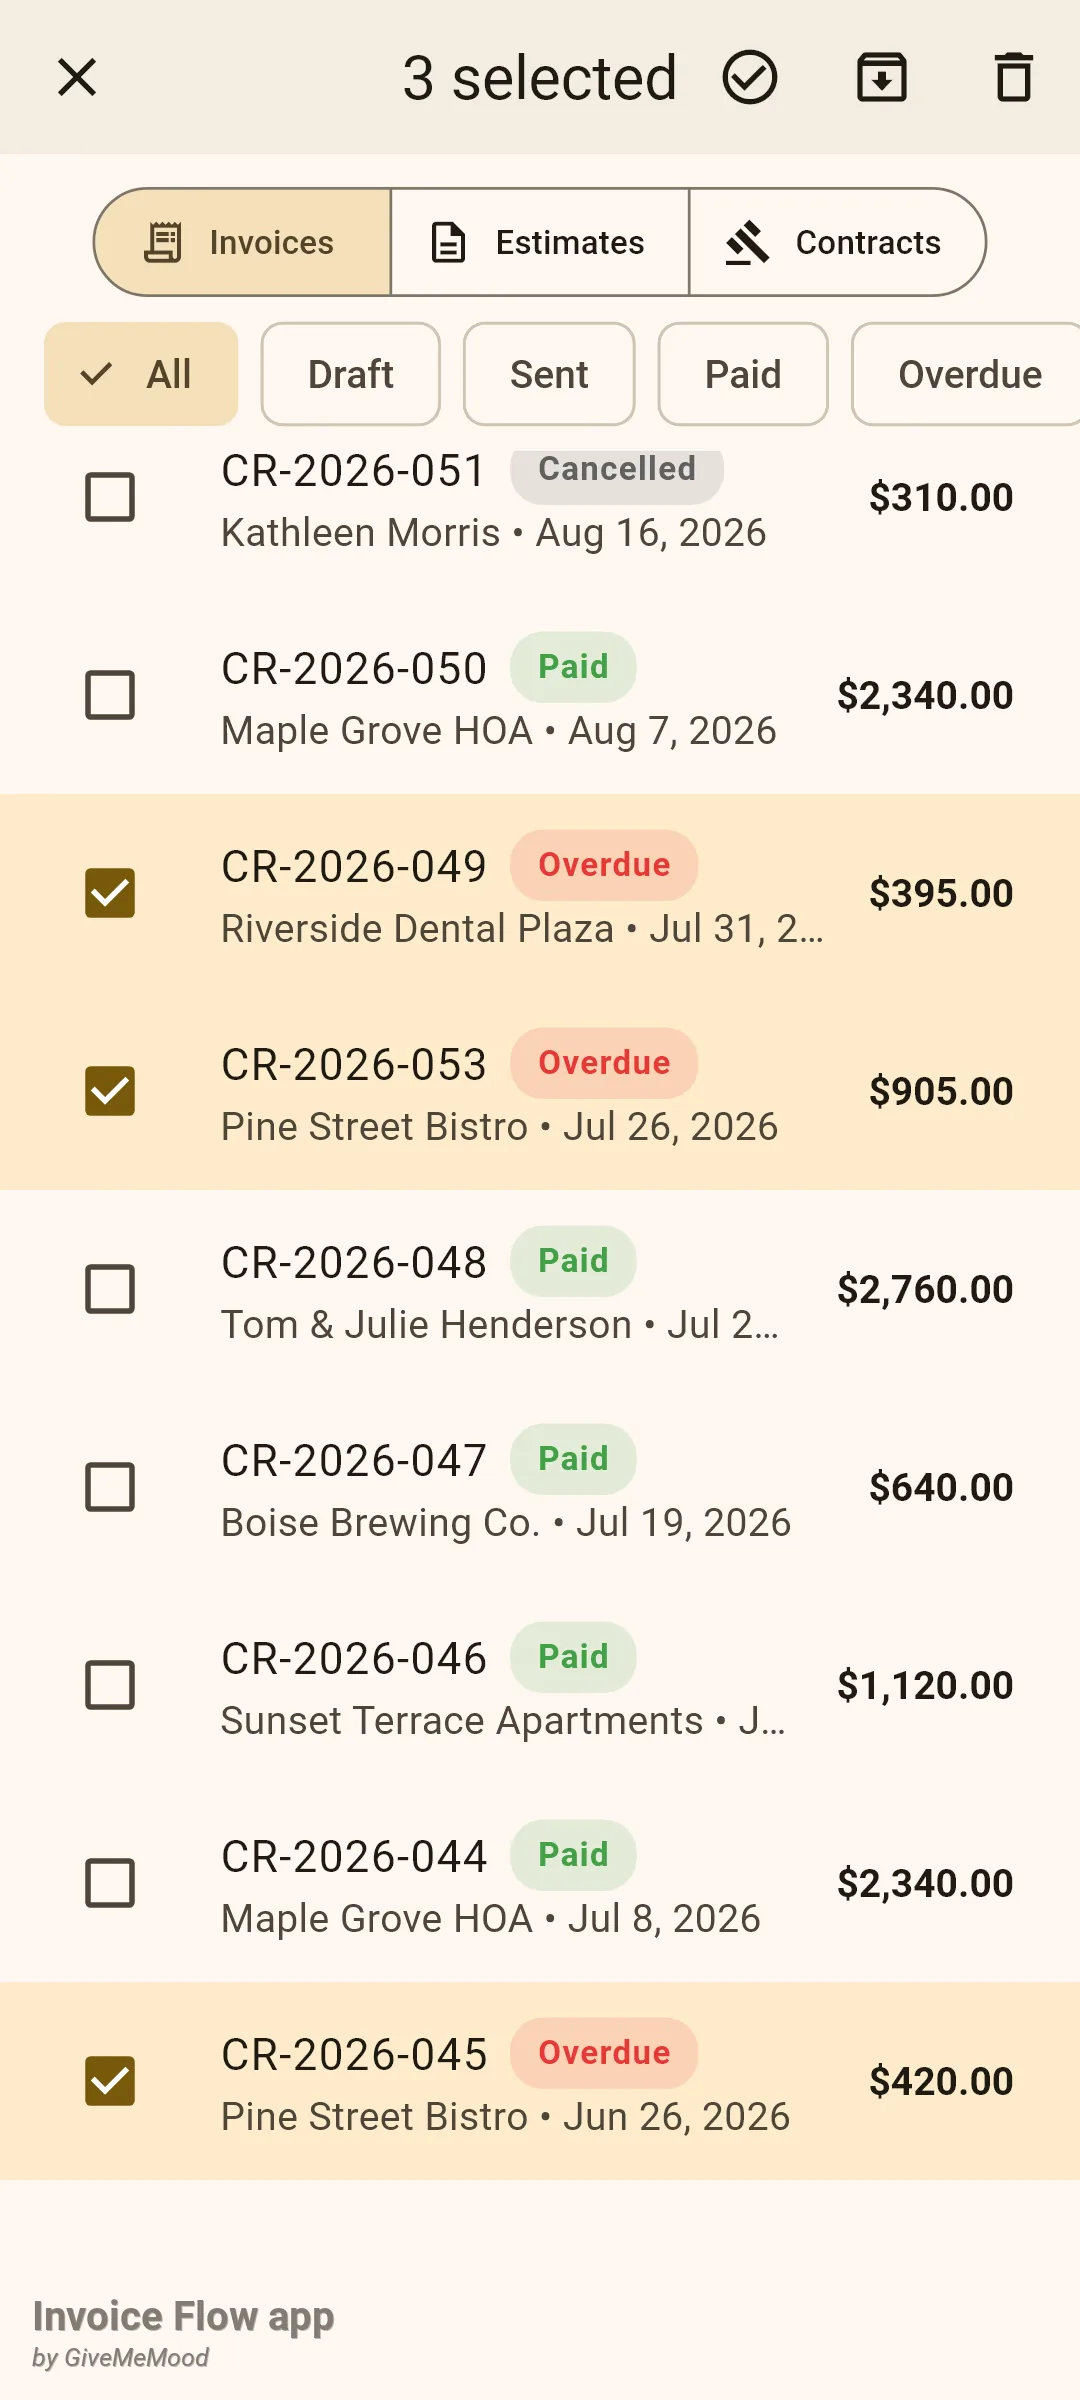
At the end of the month Cedar Ridge chases three overdue invoices and, once the money is in, wants to close them together. Selection mode turns the list into a checklist.
- Long-press any row. A sheet titled with the invoice number appears; tap Select multiple.
- Tap other rows to add or remove them. Checked rows are tinted and the app bar changes to 3 selected with a cross on the left.
- Tap the tick icon (Mark as paid) to set every selected invoice to Paid, the box icon (Archive) to move them to the archive, or the bin (Delete) to remove them.
- Delete asks Delete 3 invoice(s)? and warns that it cannot be undone; the other two actions run at once and show a short confirmation such as 3 marked as paid.
- Tap the cross, or press the device back button, to leave selection mode without doing anything.
The long-press sheet also holds Pin to list / Unpin from list and Pin to dashboard / Unpin from dashboard, so pinning does not require opening the invoice. Swiping a row from right to left is a shortcut for archiving a single invoice; an orange background appears and a Move to archive? dialog asks you to confirm.
How to read the change log and use the archive
Every invoice carries its own history. Open the detail screen and tap the Edited pill next to the number, or choose Change log from the menu.
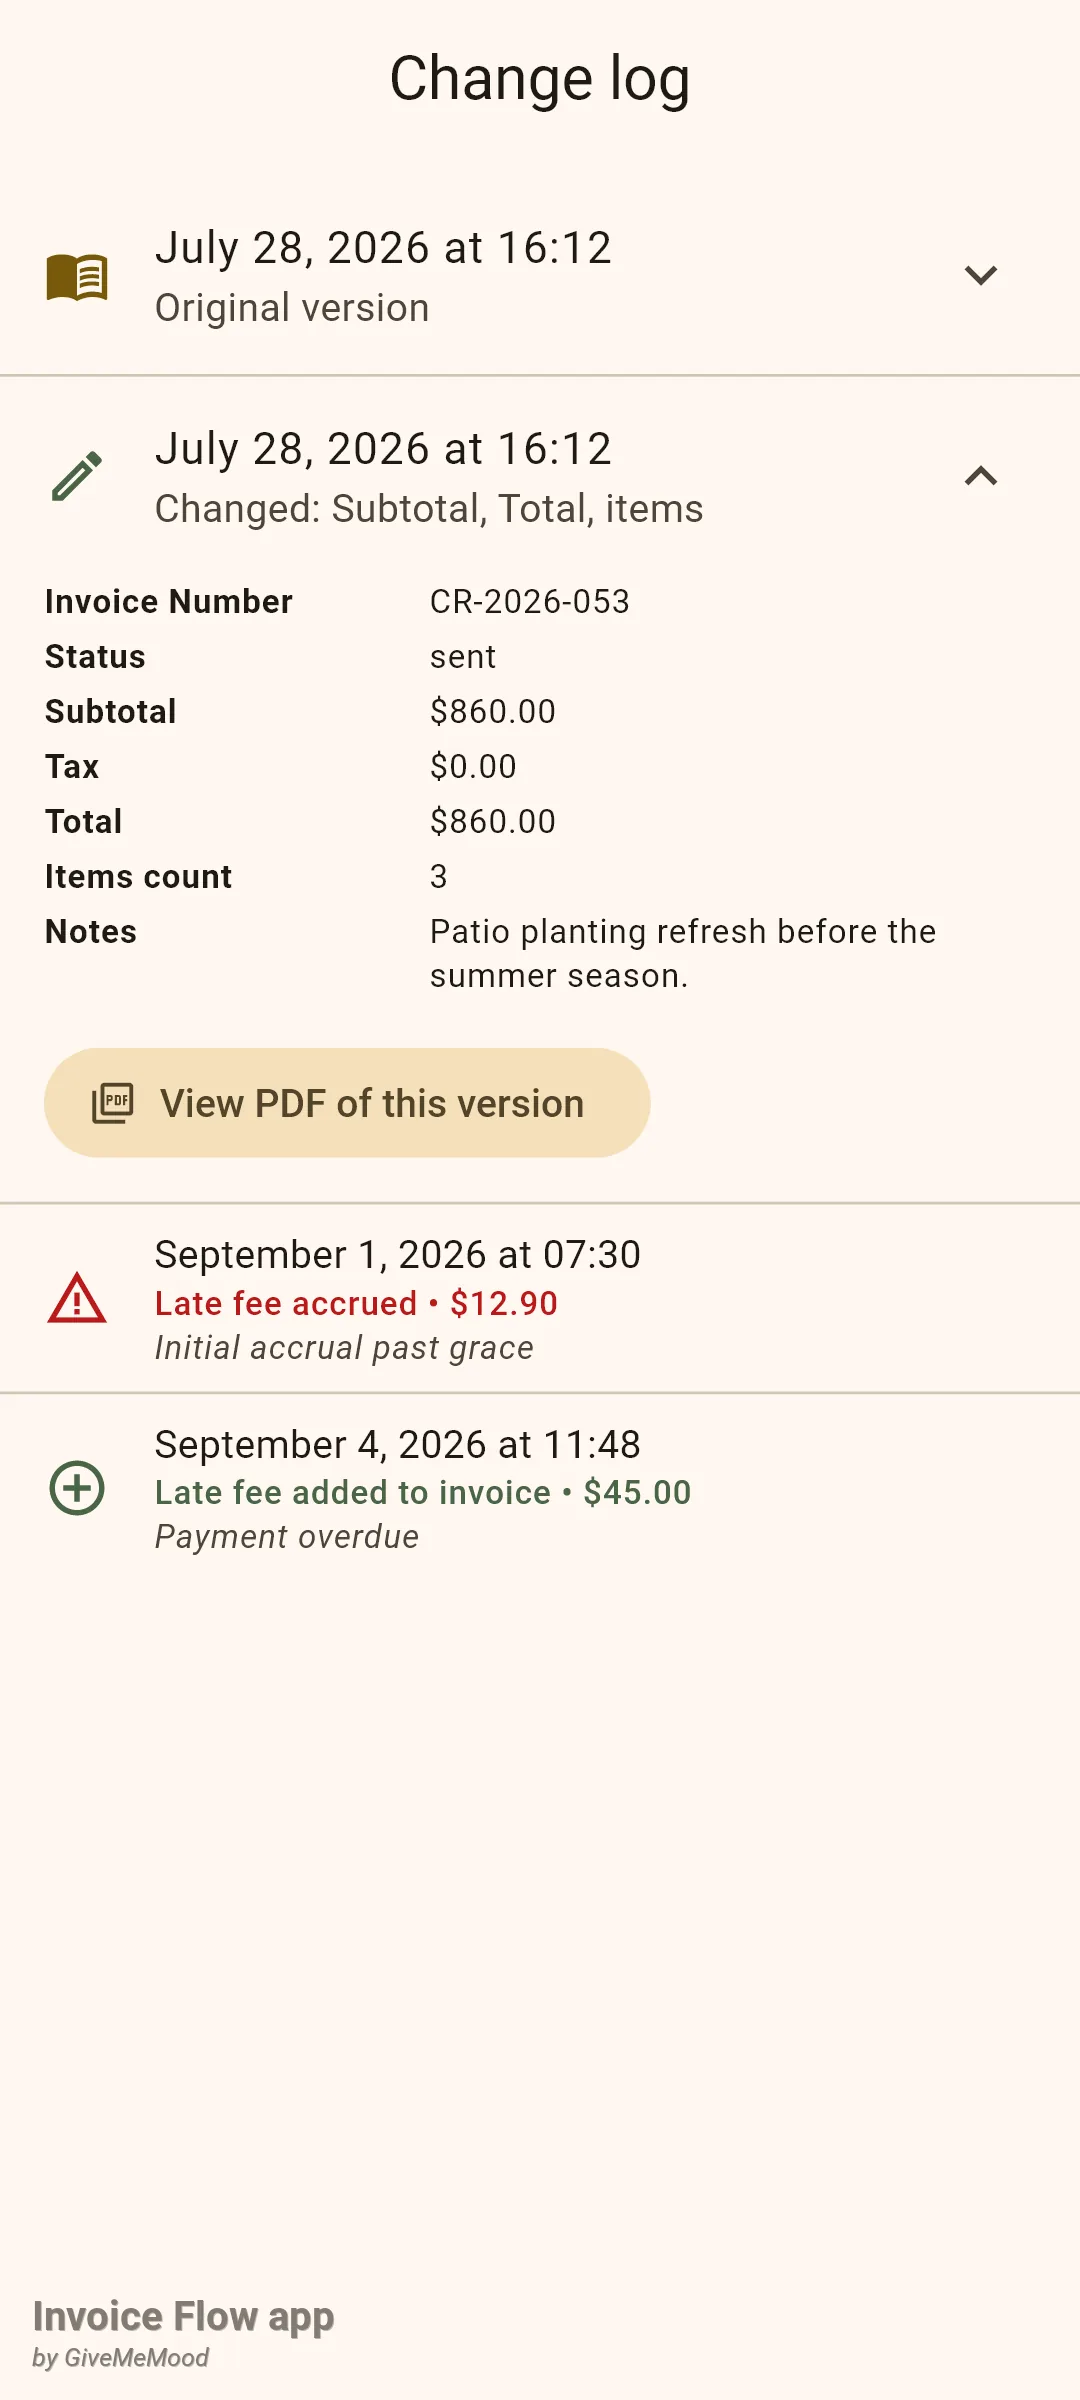
- Read the entries top to bottom; they are in date order. A book icon marks Original version, a pencil marks each editor save with a line such as Changed: Subtotal, Total, items, and late-fee icons mark events like Late fee accrued or Late fee added to invoice with the amount.
- Tap an entry to expand it. You see the number, status, subtotal, tax, total, item count and notes as they were at that moment.
- Tap View original PDF or View PDF of this version to render the document exactly as that version would have printed.
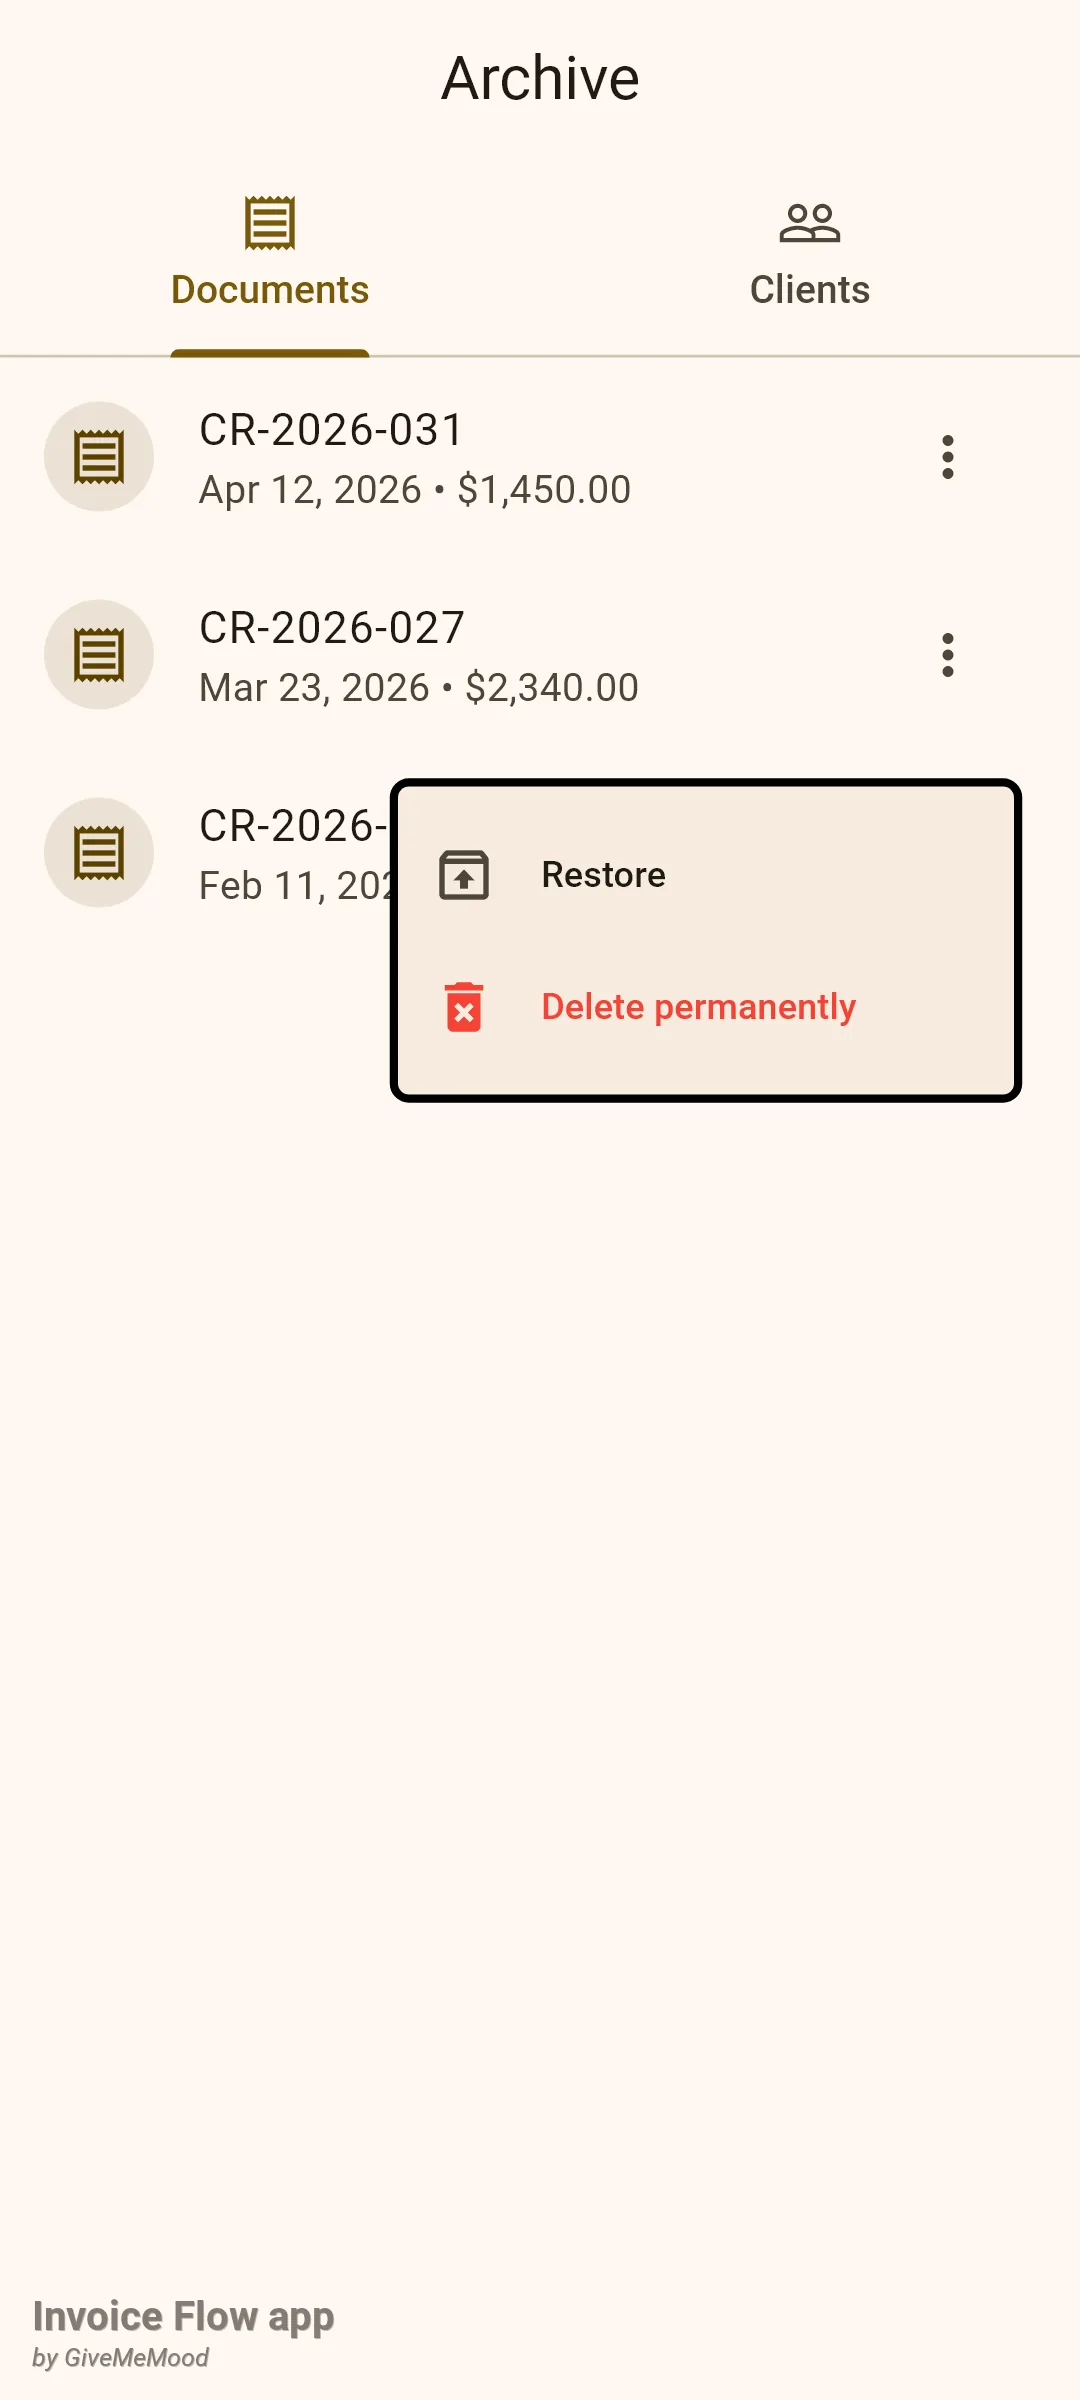
The archive is for invoices you are done with but do not want to delete. Tap the box icon in the Documents app bar to open Archive; the Documents tab lists archived invoices with their issue date and total, most recently archived first.
- Tap the three dots on a row.
- Choose Restore to send it back to the Documents list unchanged, confirmed by a CR-2026-031 restored message.
- Or choose Delete permanently. You must confirm twice: Delete permanently? then Are you sure? with Yes, delete.
Rules and details
| Status | How it is reached | Counts as outstanding | Editable |
|---|---|---|---|
| Draft | New invoice; Revert to draft; Reactivate | No | Yes, pencil icon |
| Sent | Mark as Sent; Mark as unpaid; a payment deleted on a paid invoice | Yes | View-only editor; changes are logged |
| Overdue | Automatic: Sent and due date before today | Yes | Same as Sent |
| Paid | Mark as paid; last payment recorded; bulk Mark as paid | No | Same as Sent |
| Cancelled | Cancel Invoice | No | No, until reactivated |
- A status change from the menu writes the new status and the modification time only. It does not fill the sent or paid date fields; the paid date is set only when a recorded payment closes the balance.
- Bulk Mark as paid changes status only. It does not create a payment row, so the amount paid stays as it was and the client’s ledger does not show a payment. Record the payment on the detail screen when you need an accurate ledger.
- Recording payments is the safer route to Paid: the app sums the payments in the invoice currency, sets the status to Paid when the remaining amount falls to one cent or less, and reverts to Sent if you later delete a payment that reopens a balance.
- Marking an invoice paid can trigger two automatic policies from the business profile: forgiving a still-pending late fee, and granting an early-payment discount if the payment falls inside the offer window.
- The change log records editor saves and late-fee actions. Status changes made from the menu are not written to it, even though the draft-to-sent confirmation mentions the log; only the first editor save after sending creates the Original version entry.
- Archiving is a flag. Archived invoices leave the Documents list, dashboard and client screens, but their numbers stay reserved, so you cannot reuse a number by archiving the old invoice.
- Deleting an invoice removes its items, payments, snapshots and late-fee events, detaches linked time entries and expenses, deletes attached photos, and restocks inventory first if stock automation is on. There is no undo.
- Search covers the invoice number, the client’s name and the notes field. It does not search line-item descriptions.
- Advanced filters apply on top of the chip, the date range and the search, and they only test fields stored on the invoice itself, so they are instant even with hundreds of rows.
- Pinned rows come first only under All. Under Draft, Sent, Paid or Overdue the pin icon is still shown but the order is chronological.
- Status changes, pinning, archiving, restoring, deleting and recording payments work in the free version. Creating a new document, editing, duplicating, emailing, sign-off, web sharing and adding a manual late fee are Pro features.
Tips
Related guides
- Payments and amount due - recording partial payments and how the balance reaches Paid.
- Late fees - what the late-fee card and change-log events mean on an overdue invoice.
- Invoice editor - creating the draft that starts this whole lifecycle.