 EN
EN  العربية
  Български
  Čeština
  Dansk
Dansk  Deutsch
  Ελληνικά
  Español
  Suomi
Suomi  Français
  עברית
עברית  हिन्दी
  Bahasa Indonesia
  Italiano
  日本語
日本語  한국어
한국어  Bahasa Melayu
  Nederlands
  Norsk
Norsk  Polski
  Português
  Română
  Русский
  Svenska
  Kiswahili
  ไทย
ไทย  Türkçe
  Українська
  Tiếng Việt
  中文
中文 User guide
Expenses, receipts and re-billing costs
Log fuel, supplies and other costs by category, attach receipt photos, mark purchases as billable and pull them onto a client invoice in two taps.
The Expenses tool is where you record what your business spends, not what it earns. Each entry is a single purchase with an amount, a category, a date and, if you want, a vendor, a client, a tax amount, a note and a photo of the receipt. The screen sums the current month by category, so you can see at a glance whether fuel or supplies is eating your margin, and it keeps a separate flag for costs you intend to pass on to a client. Those billable costs can be turned into invoice line items straight from the expense list or from inside the invoice editor.
This guide follows Tessa Quinn, who runs Paws on Wheels Mobile Grooming out of a van in Austin, Texas. Her September so far: three tank-fulls of fuel, a booking-app subscription, door hangers, lunch, a phone plan, and two purchases at a vet supply store that were made on behalf of a kennel and a daycare and need to be charged back to them.
What you see on the screen
Open the Tools tab and look in the Productivity section for the orange Expenses card. The dashboard also gets you there: the Expense quick-action chip and the Expenses This Month card both open the same screen.
The app bar reads Expenses and carries two controls: a calendar icon (Date range) and a To Invoice button. Under it sits the summary card for the current month, then a row of filter chips, then the list of expenses, newest first. A round + button in the bottom-right corner adds a new expense.
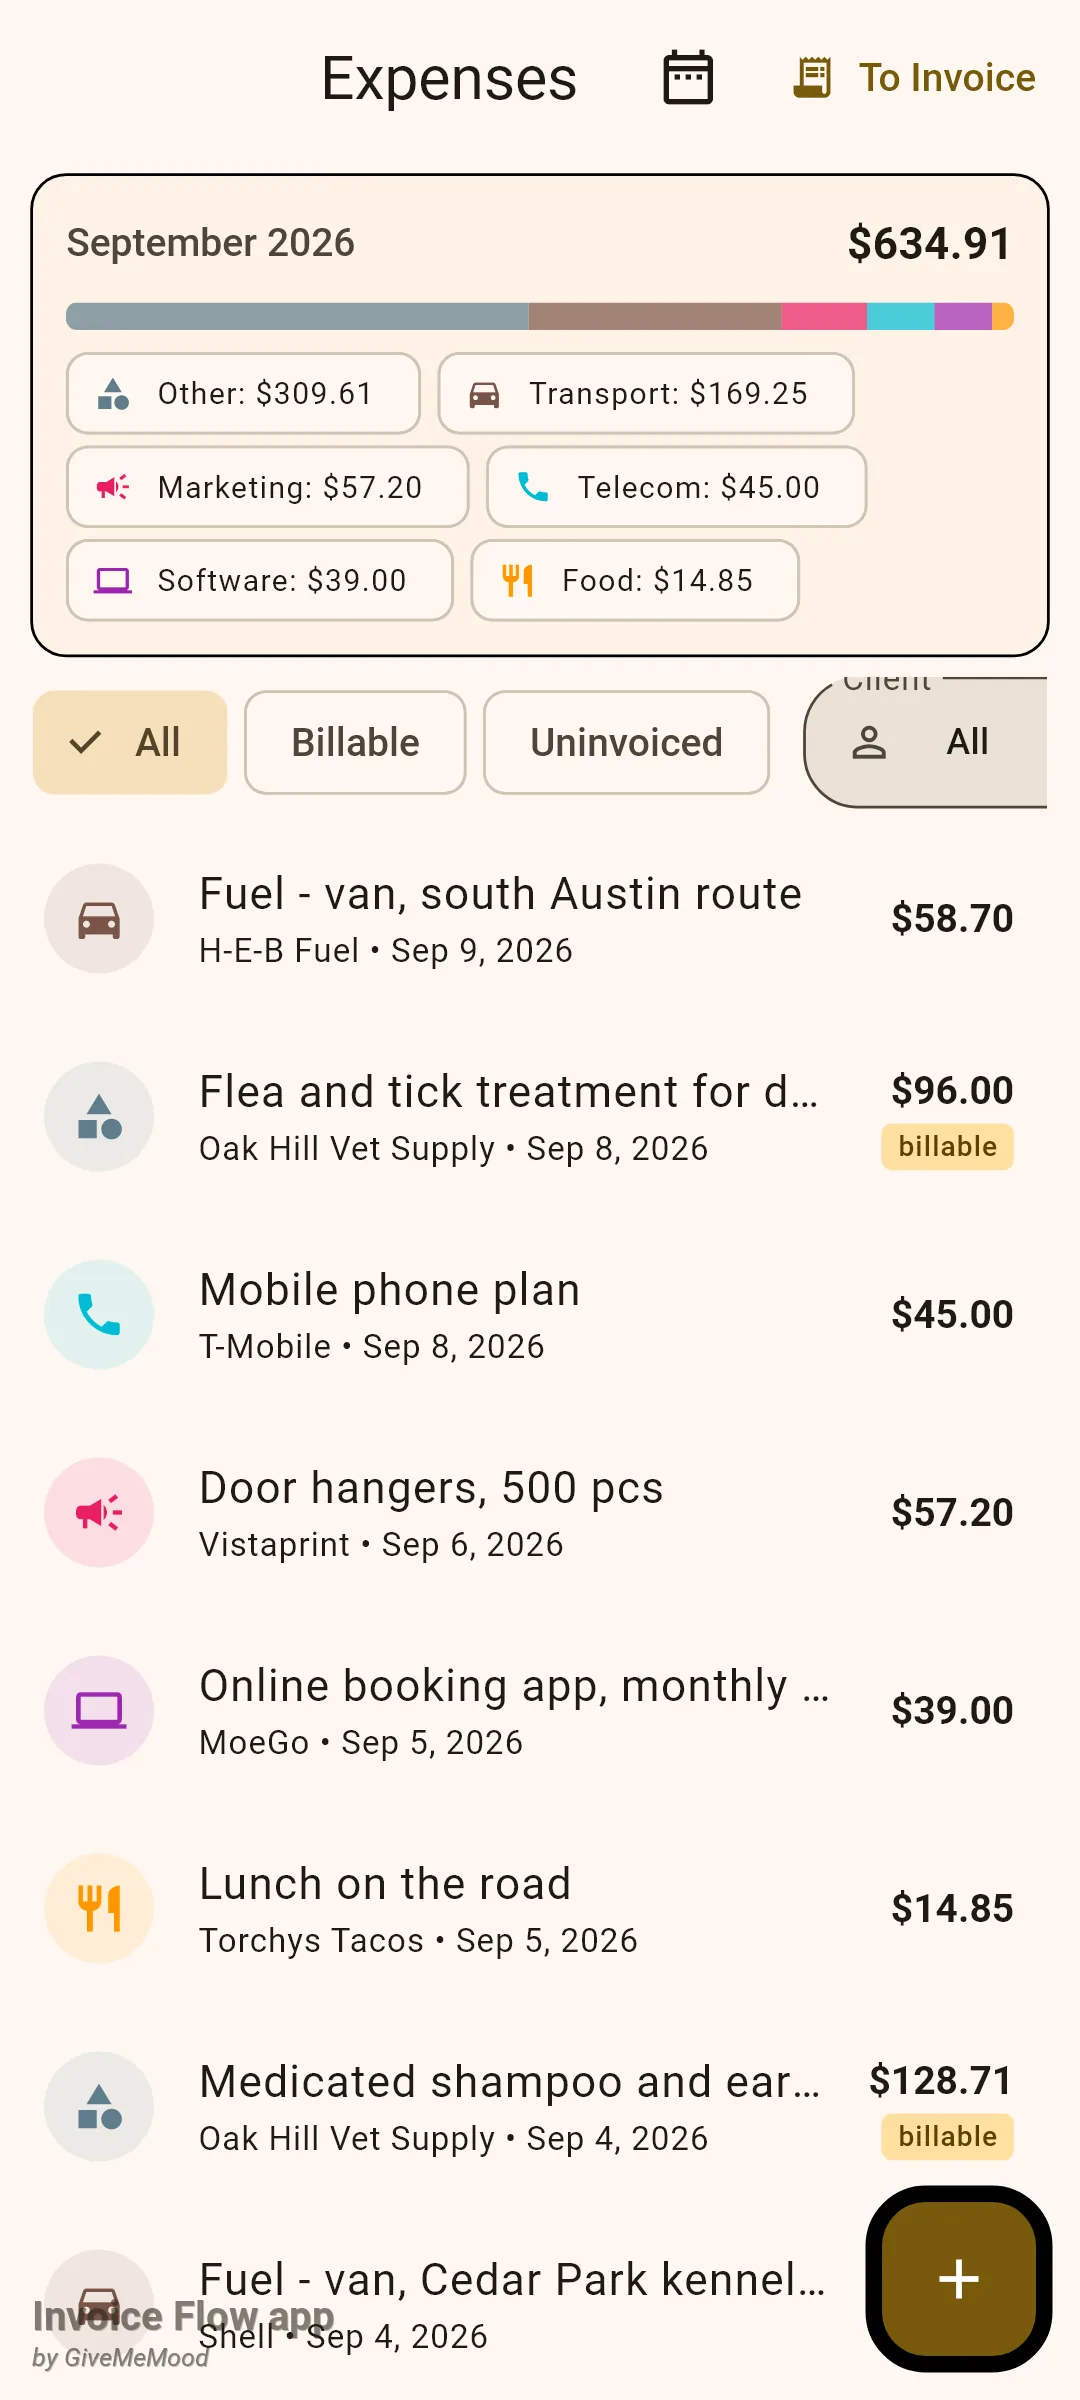
The summary card is titled with the month (September 2026 for Tessa) and shows the grand total on the right. Below it a thin bar is split into coloured segments, one per category, in proportion to the money spent, and a set of chips repeats the same numbers as text: Other: $309.61, Transport: $169.25 and so on. Each category has a fixed icon and colour: a plane for Travel, cutlery for Food, a building for Office, a laptop for Software, a handset for Telecom, a car for Transport, a megaphone for Marketing and a shapes icon for Other.
Every row in the list uses the category icon as its avatar. The title is your description, the second line is the vendor and the date separated by a dot, and the right-hand side shows the amount. Expenses you flagged as billable get a small billable tag under the amount. There is no detail page for an expense; everything happens through a long-press on the row.
How to log an expense
Tessa has just filled the van before a run to Round Rock. Adding the fuel takes less than a minute.
- Tap the + button on the Expenses screen. The New Expense sheet slides up.
- Type the total in Amount. The Currency box next to it defaults to USD; change it if the receipt is in EUR, GBP, RUB, JPY or CAD.
- Enter a Description such as "Fuel - van, Round Rock route". Amount and description are the only two required fields.
- Pick a Category. The sheet starts on Other; Tessa chooses Transport for fuel.
- Tap the date row (subtitle Expense date) if the purchase was not today.
- Fill in Vendor so the row is easy to recognise later.
- Leave Client on None for an overhead cost, or pick the client the purchase was made for.
- Switch on Billable only if you plan to charge this cost to that client.
- Optionally add a Tax amount (the tax portion in money, not a rate) and Notes.
- Tap Add. The sheet closes and the new row appears at the top of the list.
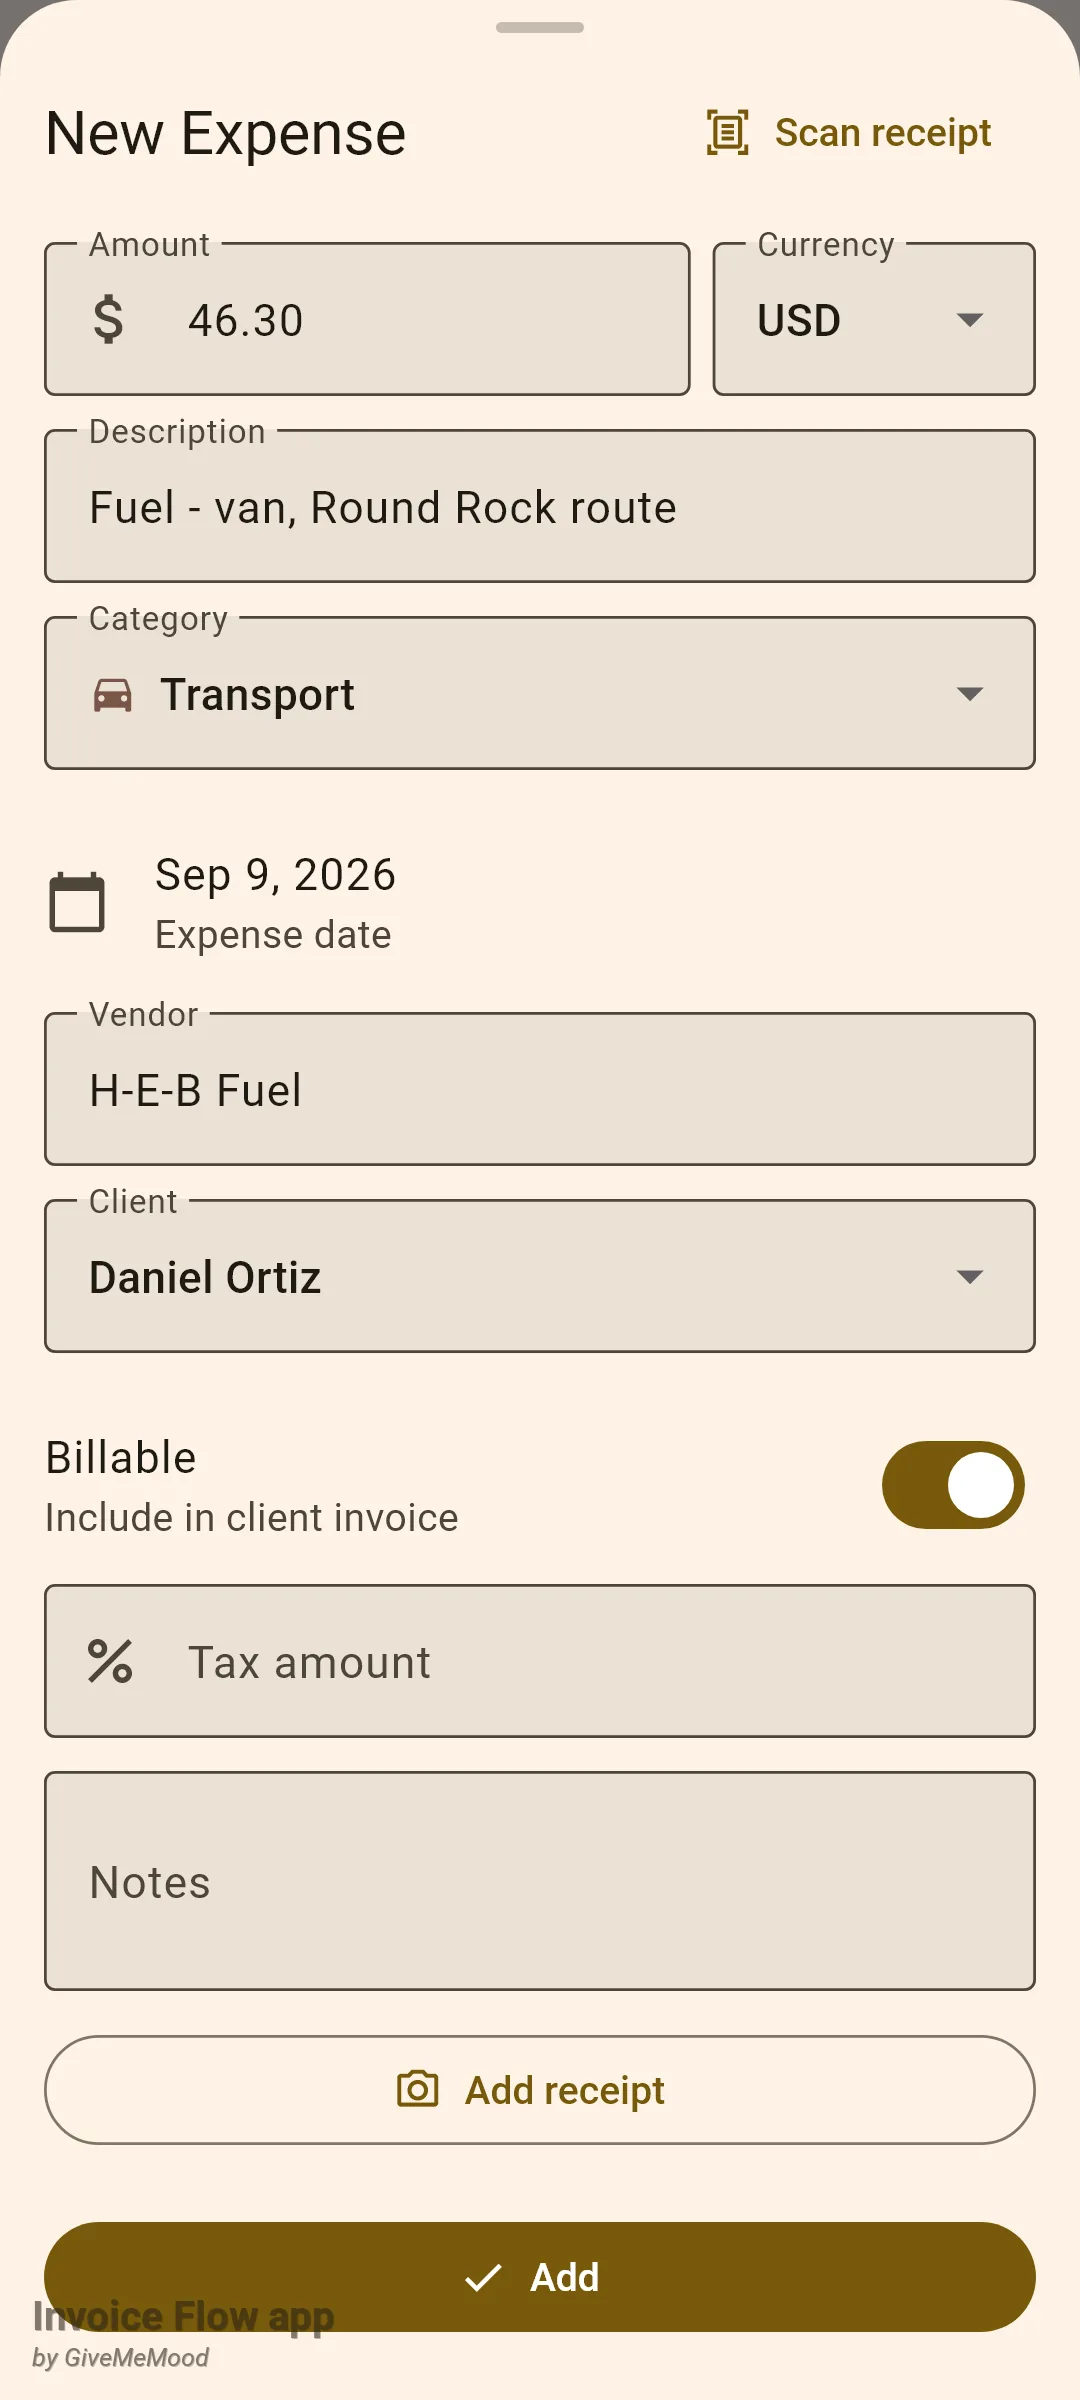
The sheet is a bottom sheet, so you can drag it down to abandon the entry. If you tap Add with the amount empty or non-numeric, the field shows Required or Invalid number and nothing is saved.
How to attach a receipt photo
A photo lives with the expense and is stored inside the app, so you can throw the paper away. Tessa keeps the Oak Hill Vet Supply receipt because she will be charging that purchase to Cedar Park Kennels and wants proof to hand.
- In the New Expense or Edit Expense sheet, scroll to the bottom and tap Add receipt.
- Choose Camera to photograph the slip now or Gallery to pick a photo you already took.
- Once the picture is chosen the button changes to Receipt attached and a preview strip appears below it.
- Tap Add (or Save when editing) to keep the photo with the expense.
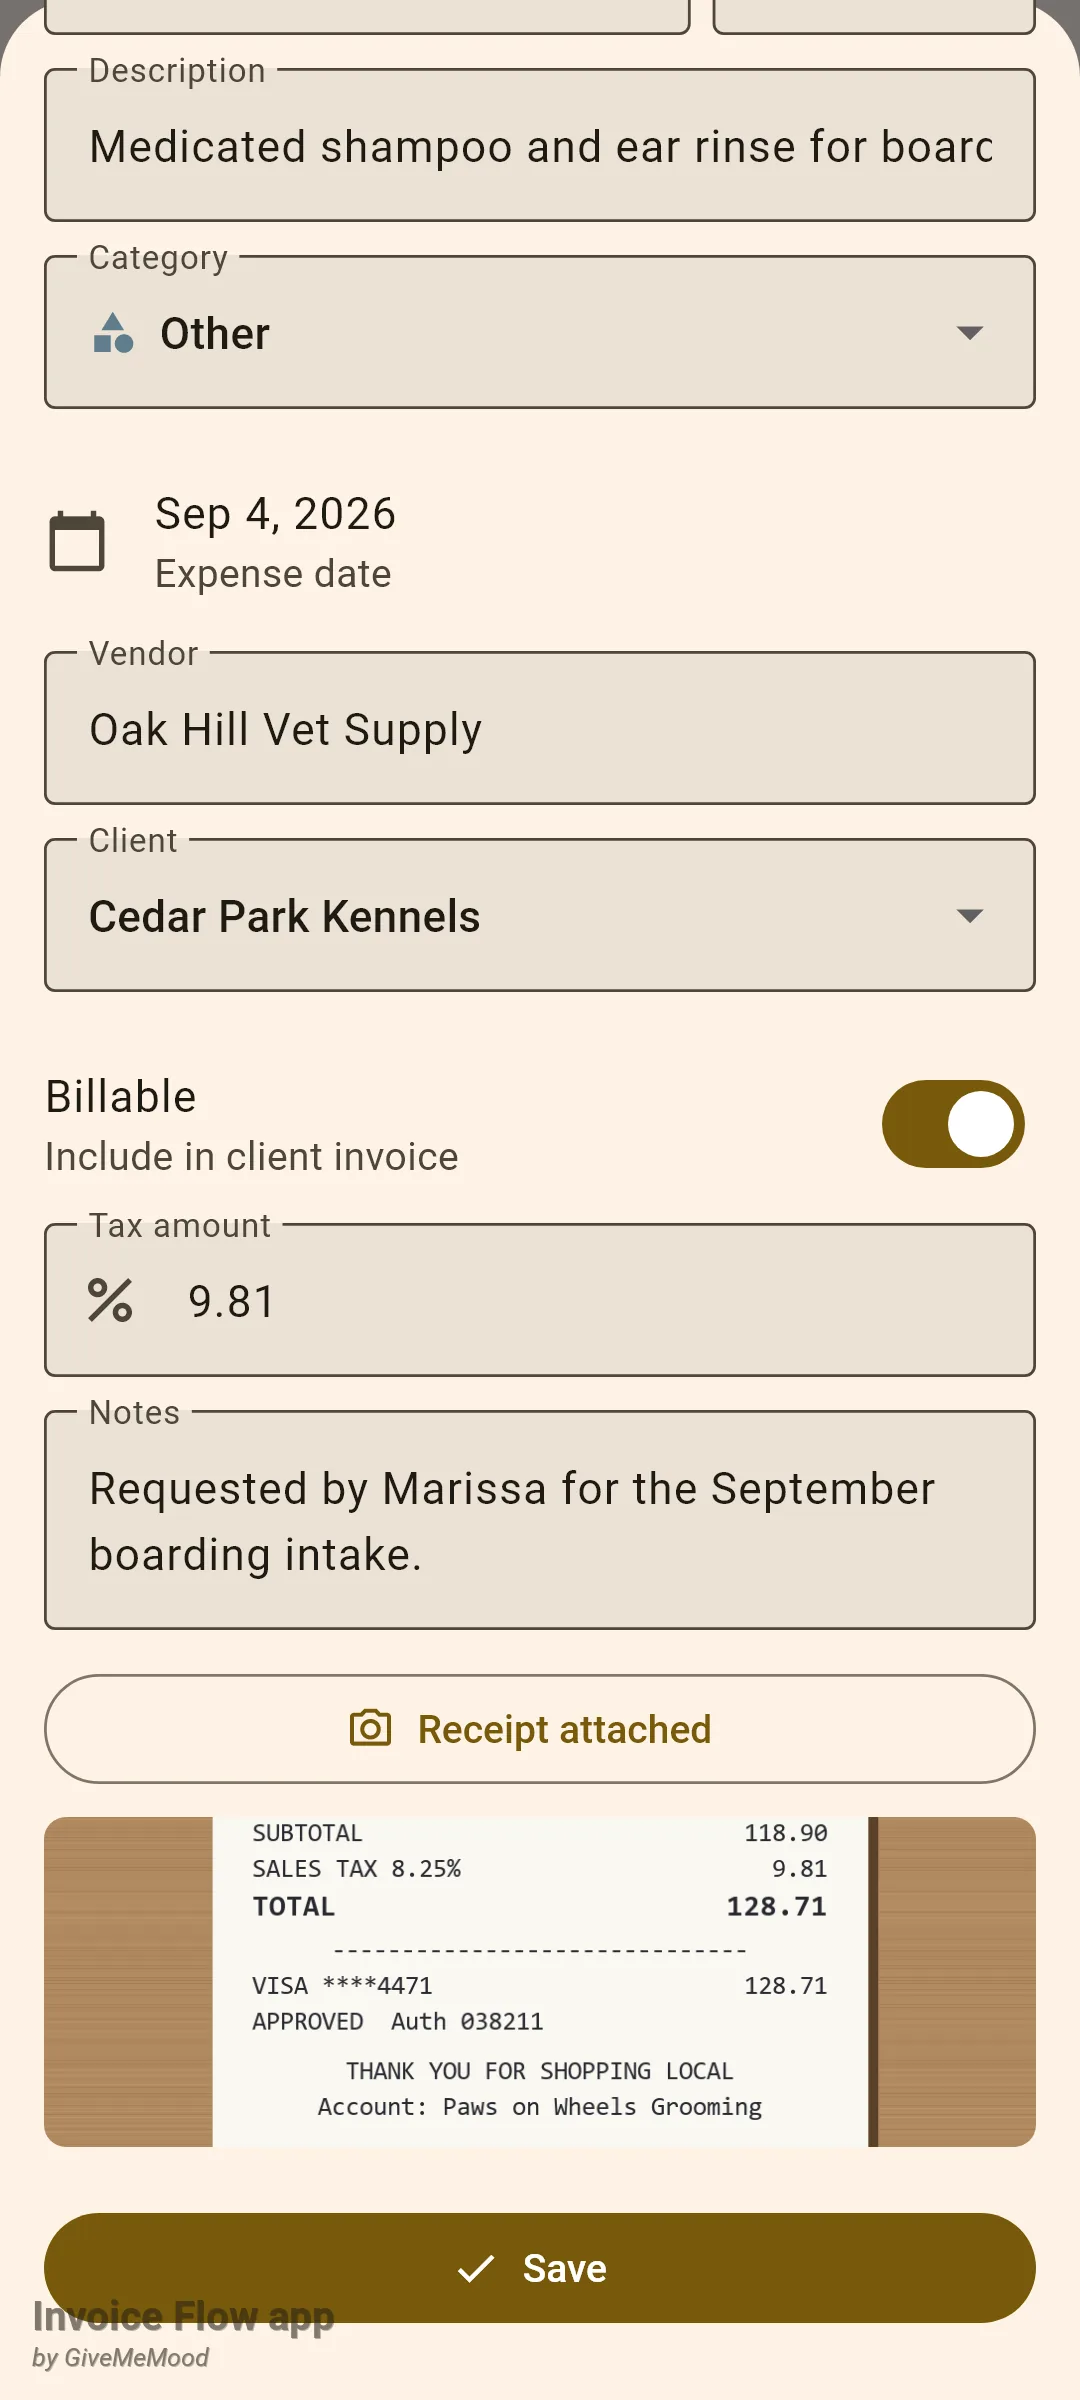
The preview is a fixed-height strip that crops the middle of the picture, so a tall receipt shows only its central part; the whole image is still kept. The picture is copied into the app’s own storage at the moment you pick it, and it is deleted again when you replace it with another photo or delete the expense.
How to scan a receipt to pre-fill the amount and date
The Scan receipt button in the top-right corner of the New Expense sheet opens a separate screen that reads the printed text on a receipt and tries to find the total and the date. This part of the app uses the phone camera and on-device text recognition, so it only works on a real Android device; the screenshot below shows the screen as it opens, before a photo is taken.
- Tap + on the Expenses screen, then tap Scan receipt at the top of the sheet.
- On the Scan receipt screen tap Take photo, or Pick from gallery for an existing picture.
- Wait for the spinner. The screen then shows the photo, a Detected values block with Amount and Date (or Not detected), and an expandable Raw OCR text section you can read to check what the recogniser saw.
- Tap Use to copy the detected amount and date into the sheet, or Retake to try another picture.
- Back in the sheet, fill in the description and category as usual, and tap Add receipt if you also want the photo stored.
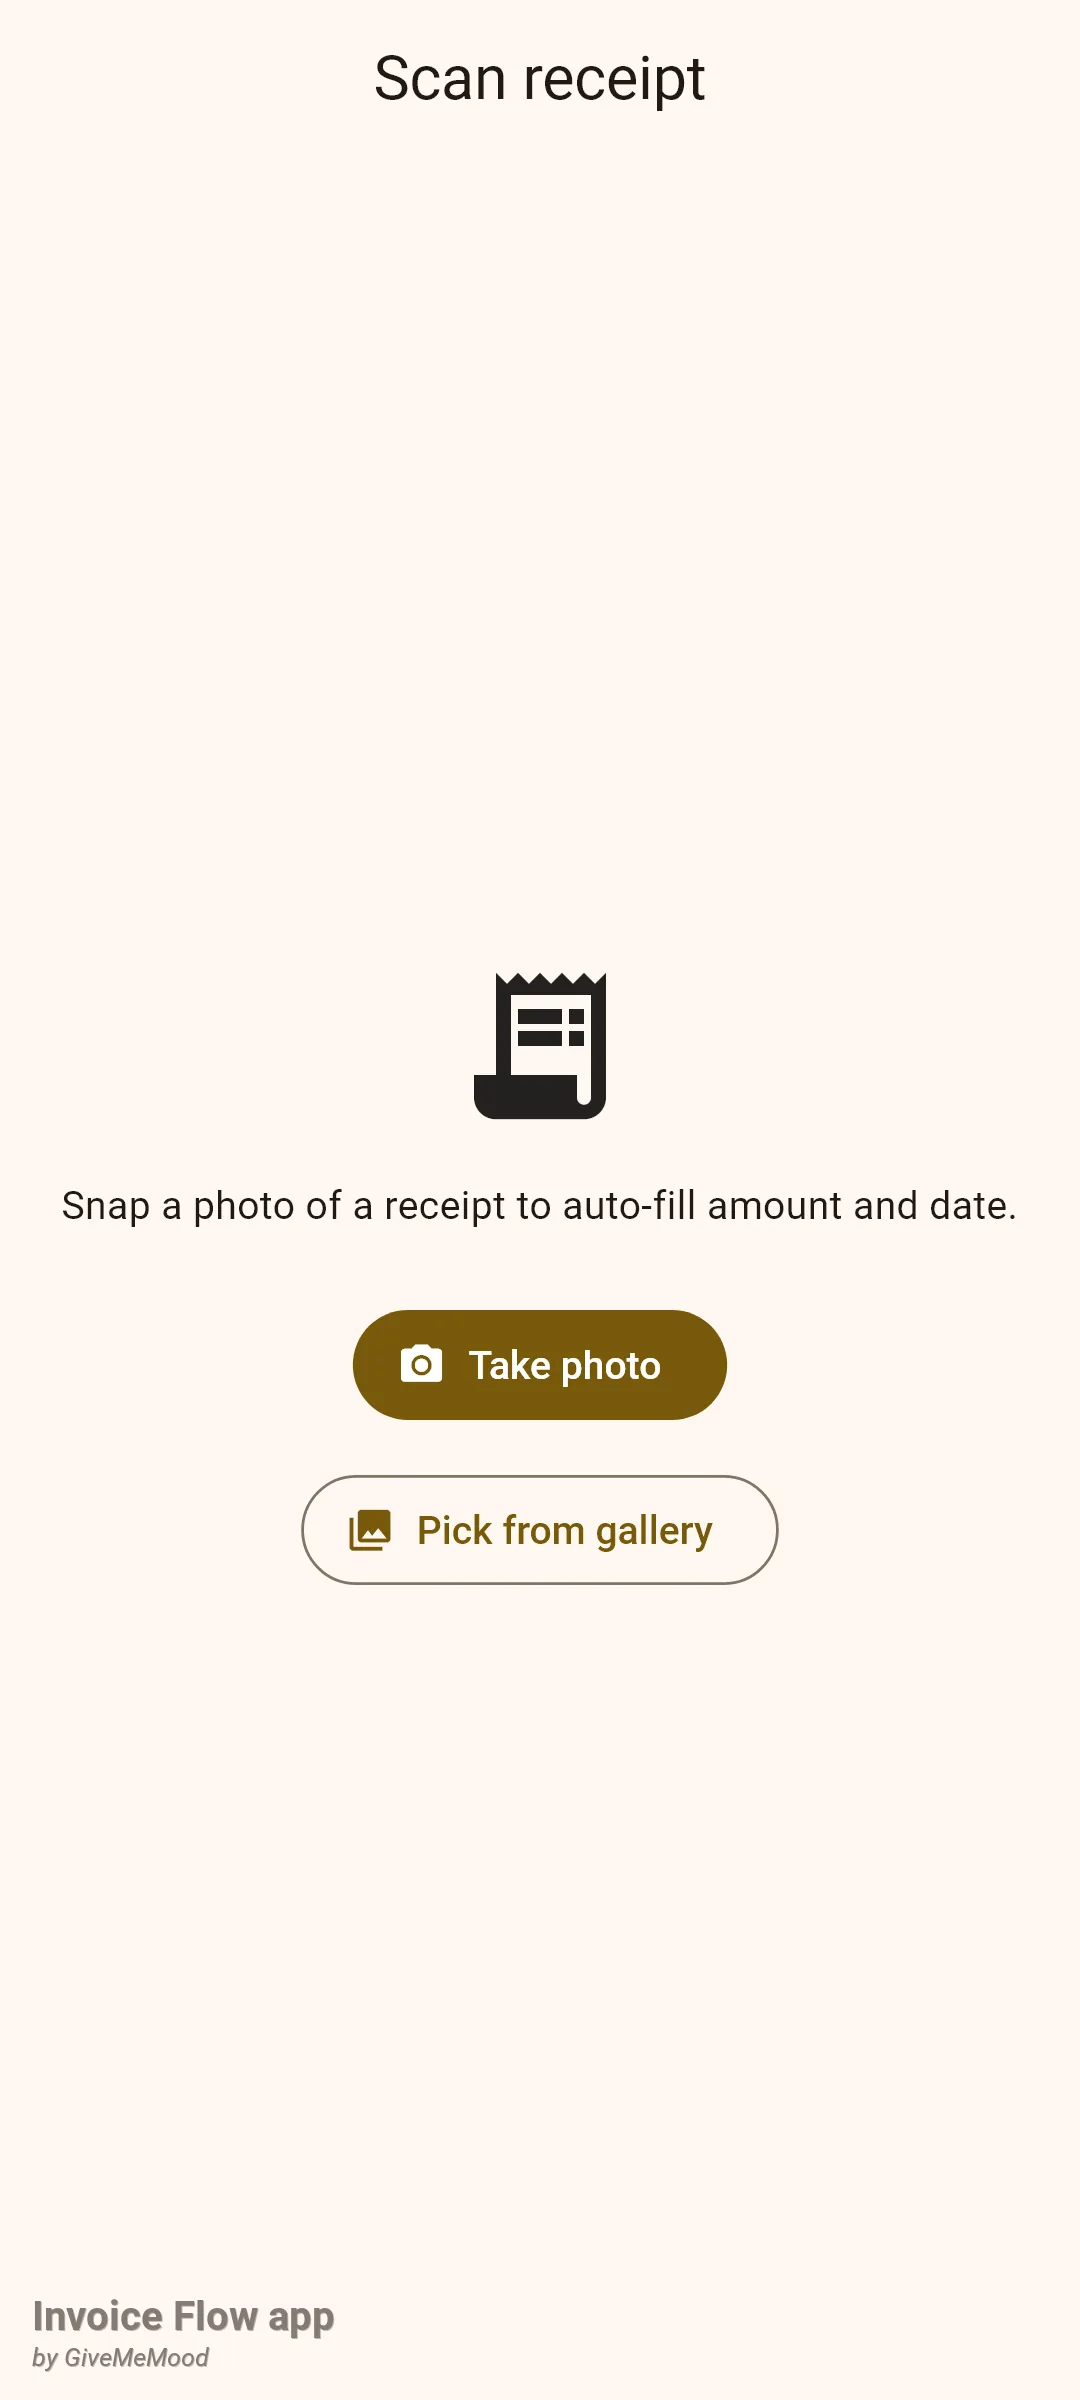
The scanner is a shortcut for typing, nothing more. It fills only the amount and the date; the photo it used is not attached to the expense, and the button is not offered when you edit an existing expense so that it cannot overwrite figures you already entered.
How to review spending by category and period
Tessa wants to know how much of September went into the van. The summary card doubles as a filter.
- Tap the Transport: $169.25 chip (or the matching segment of the bar). The segment thickens, the chip is outlined, and the list shrinks to that category.
- Tap the same chip again to clear the category filter.
- Use the All, Billable and Uninvoiced chips under the card to narrow by billing state, and the Client dropdown at the end of that row to show one client's expenses.
- To look at another period, tap the calendar icon (Date range) in the app bar, pick a start and end date and confirm. A banner with the range appears under the app bar and the summary card switches from the month name to that range; tap the banner's close icon to return to the current month.
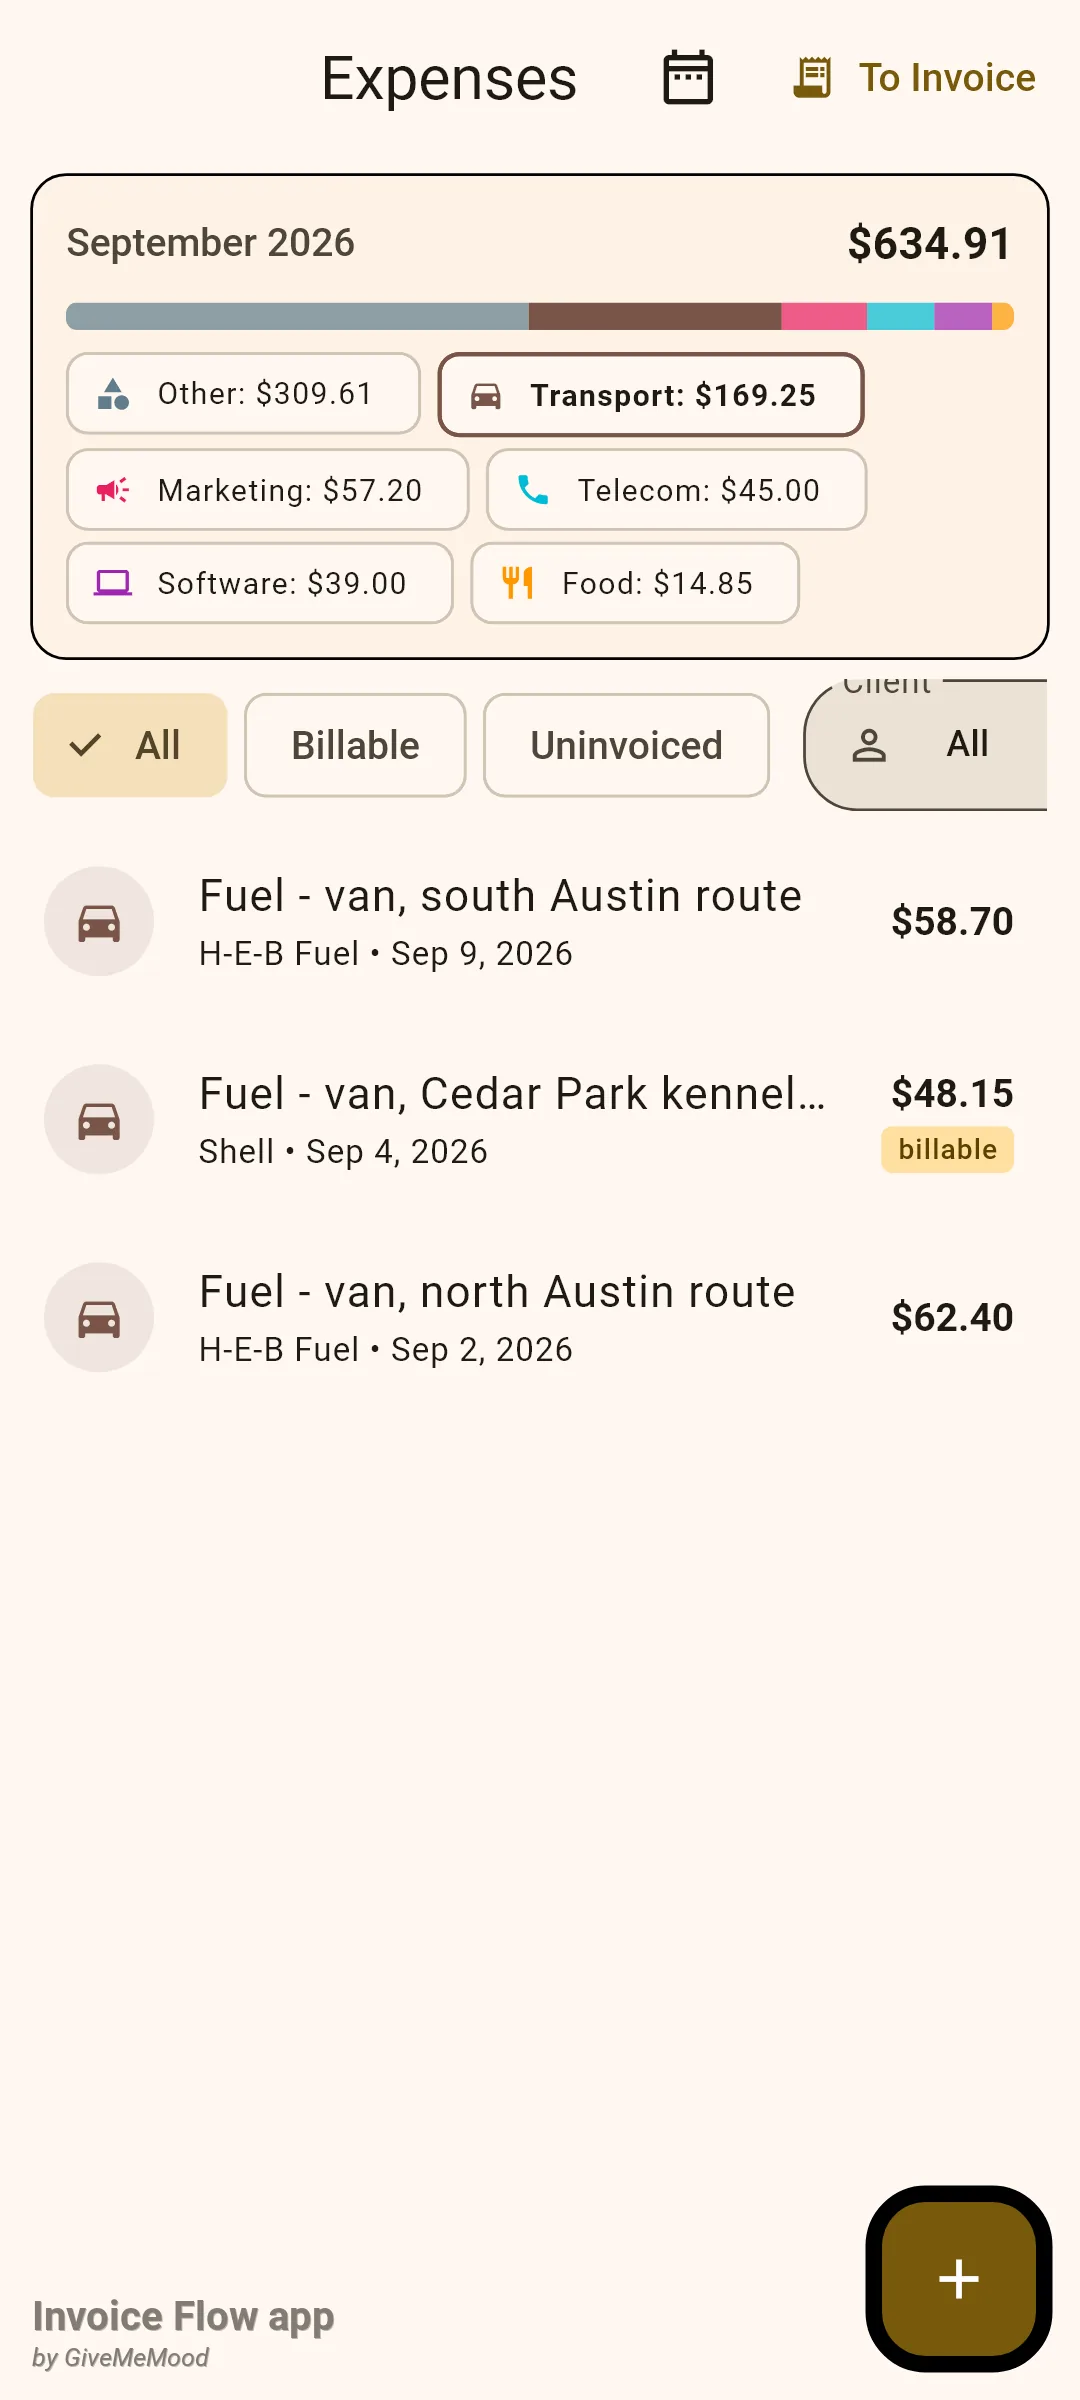
Filters stack: billing chip, client, date range and category all apply at once to the list. The summary card follows the billing chip, the client and the date range but ignores the category you tapped, which is why the total and all the chips stay visible while the list is filtered.
How to bill an expense to a client
A billable expense is an ordinary expense with the Billable switch on. Nothing is charged until you put it on an invoice, and there are two ways to do that. Both only offer expenses that are billable and have not been invoiced yet, so the same cost can never be charged twice.
From the expense list:
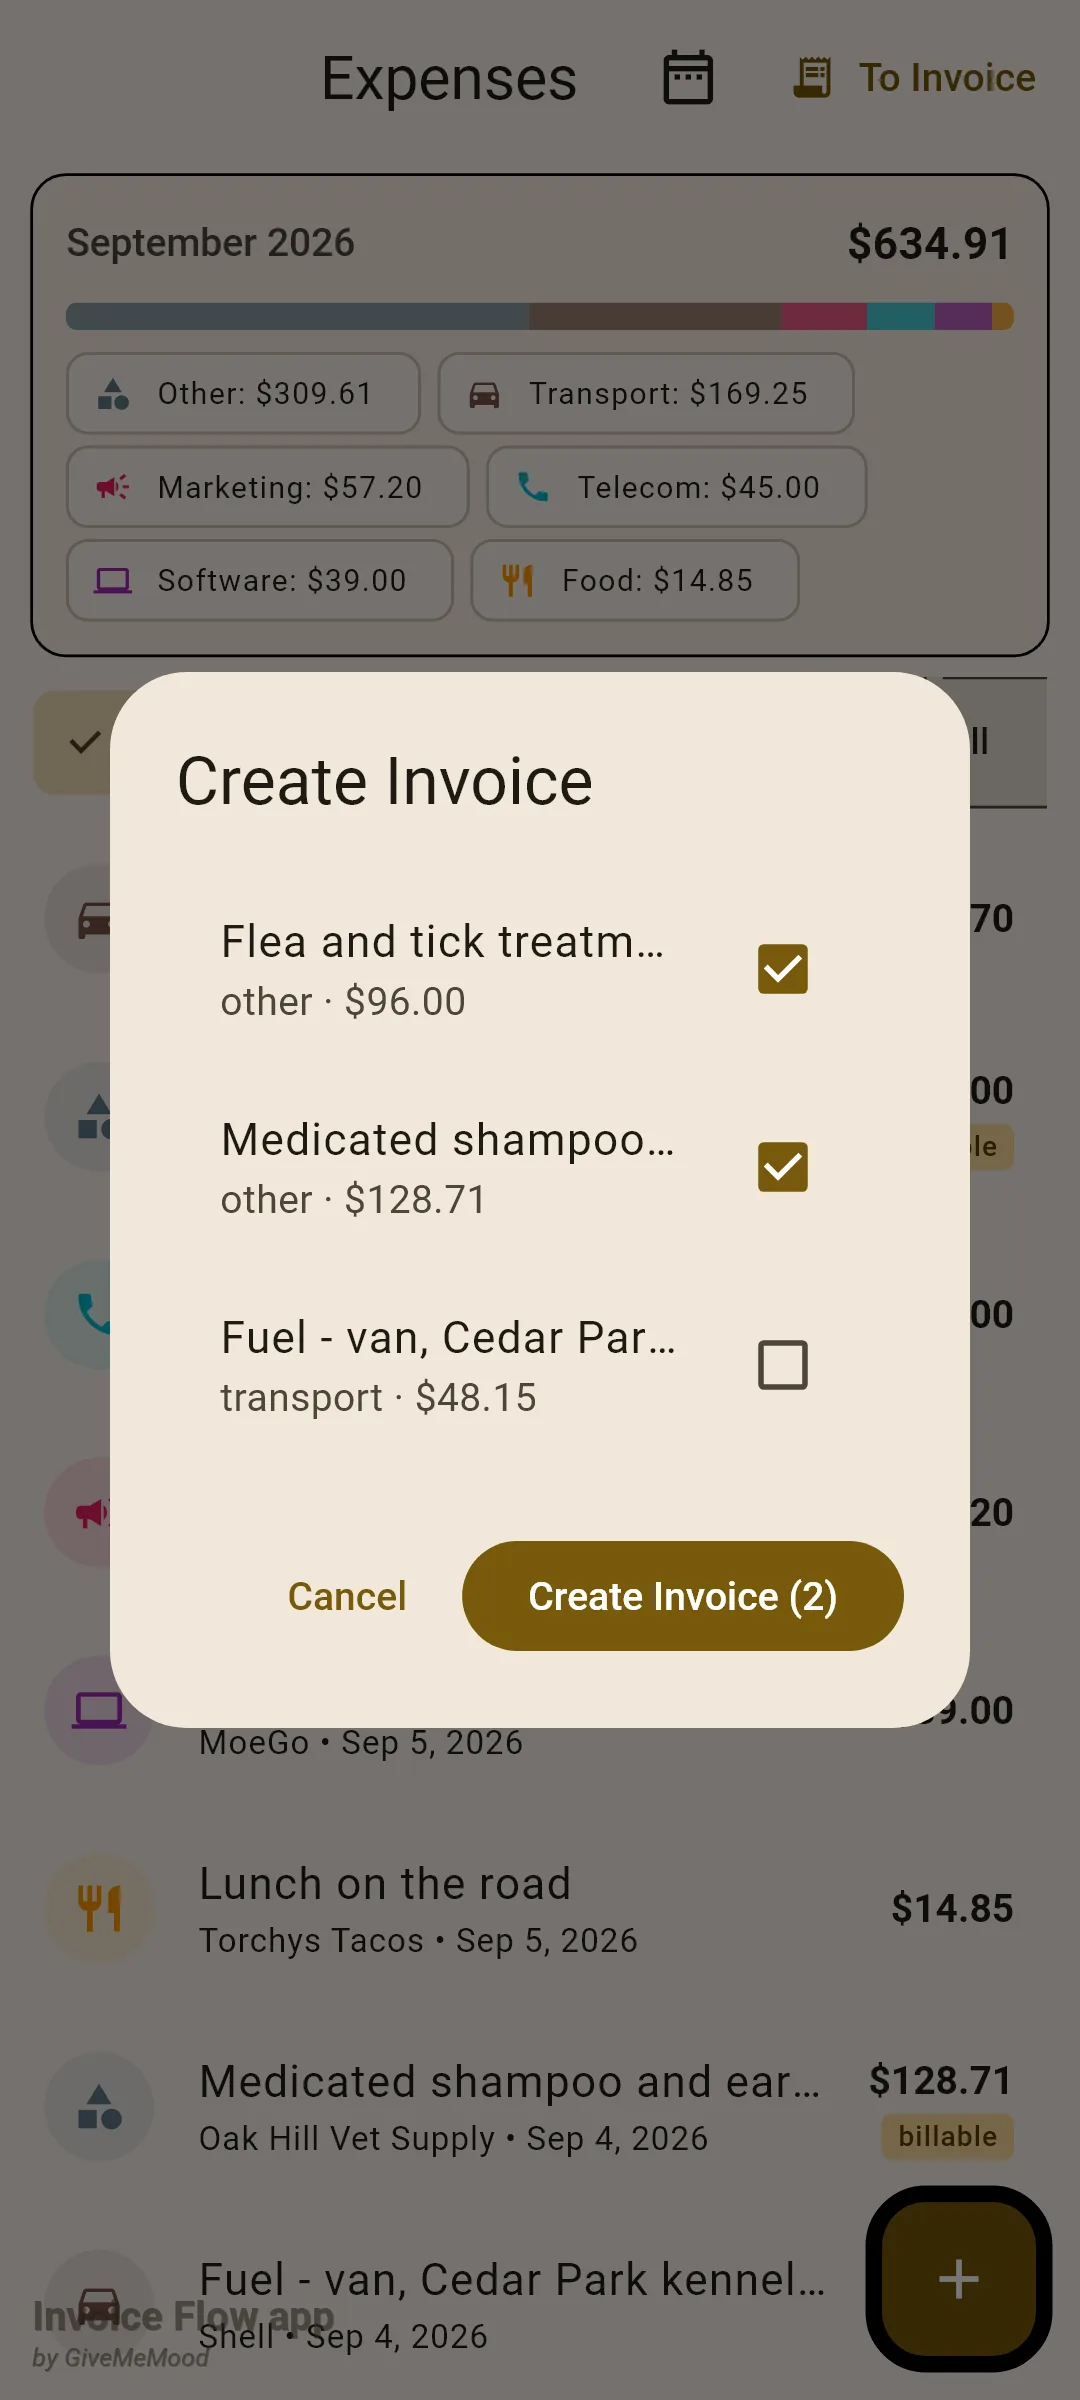
- Tap To Invoice in the app bar. A Create Invoice dialog lists every billable, uninvoiced expense with its category key and amount.
- Tick the expenses to charge. The button at the bottom counts them: Create Invoice (2).
- Tap that button. A new invoice opens with one line item per expense, and if all the ticked expenses belong to the same client that client is already selected.
- Finish the invoice as usual and tap Save. Only now are the expenses marked as invoiced.
From inside the invoice editor, which is handier when you are already writing the client’s invoice:
- Open a new or draft invoice and select the client.
- Scroll to Line Items and tap the Expenses chip next to Product / Service and Time.
- In the Add Expenses dialog, tick the costs to include and tap Add (2).
- Adjust the new lines if needed (for example add a handling markup to the unit price) and save the invoice.
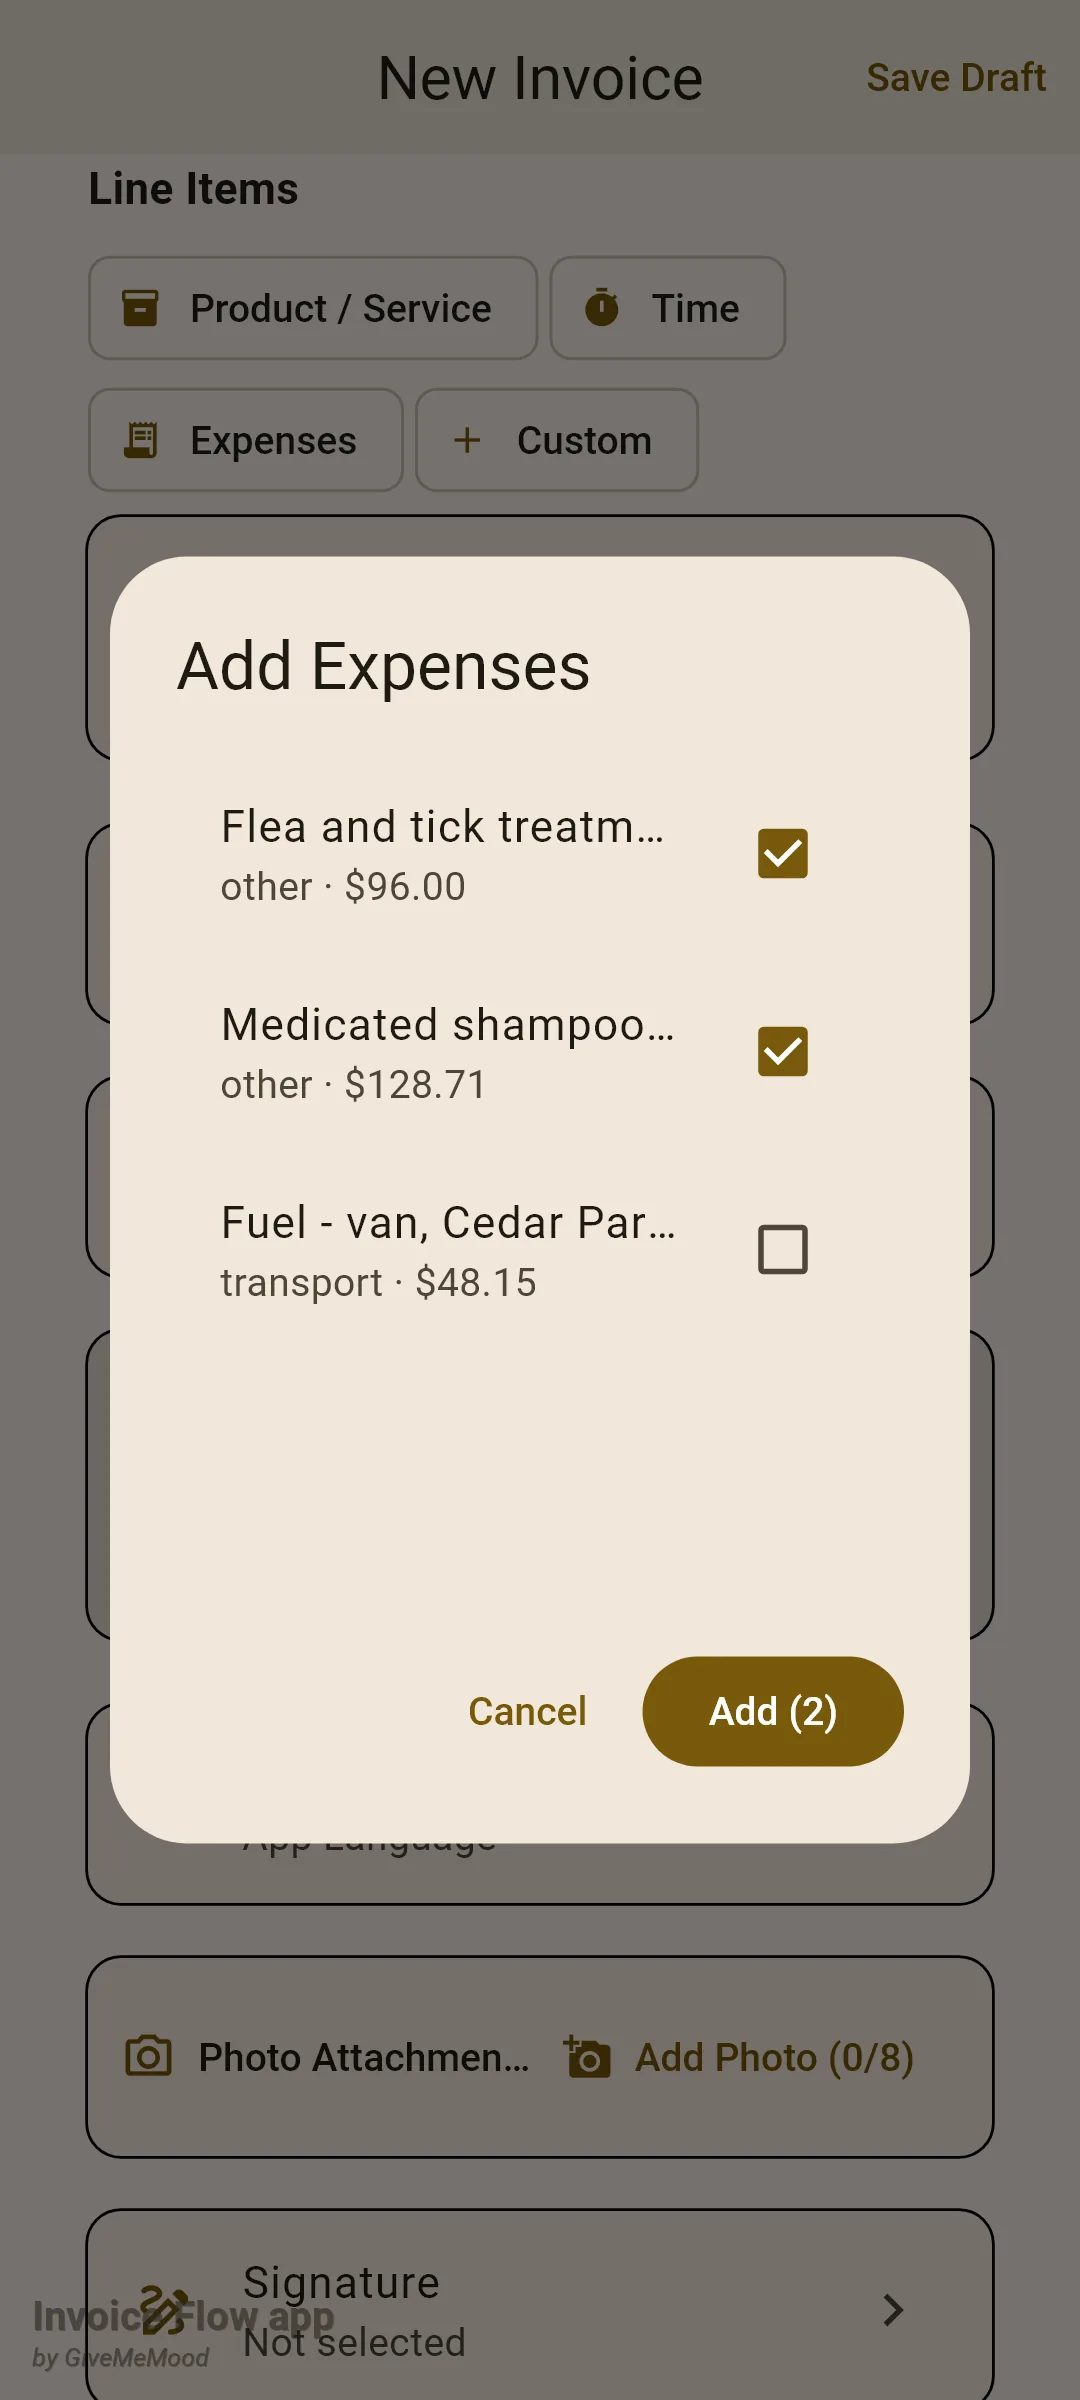
The editor’s picker is stricter about clients: with a client selected it shows only expenses assigned to that client or to no client. If nothing matches you get a message such as No expenses for this client (3 for others) rather than an empty dialog.
Each expense becomes a line with quantity 1, unit item, and the expense amount as the unit price. If you recorded a tax amount, the line’s tax rate is derived from it (tax divided by amount); otherwise the line has no tax. Tessa’s $128.71 purchase with $9.81 tax therefore lands as a line taxed at 7.62 percent, because the receipt total already includes the tax. If you would rather charge the pre-tax price and let the invoice add tax, edit the line after adding it.
Rules and details
- Adding a new expense, editing one, and the final step of To Invoice are Pro features; on the free plan these open the paywall. Viewing, filtering, toggling billable, and deleting work on every plan.
- Amount must be a number and Description must not be blank. Everything else is optional; a blank vendor or note is stored as nothing, and a blank tax amount becomes 0.
- A new expense starts with category Other, currency USD, today’s date, no client and Billable off. The currency does not follow your business profile’s default; check it if you do not bill in dollars.
- The expense date picker allows dates from 2020 up to one year ahead. The date-range picker in the app bar runs from 2020 to the end of next year and opens on the current month.
- There are eight fixed categories; you cannot add your own. Use Other plus a clear description for anything else.
- The summary card shows only expenses dated in the current calendar month unless a date range is set, and it hides itself when there is nothing to show. All amounts on the card are printed in the currency of the first expense in the list, so mixing currencies in one month gives a misleading total; the rows themselves always show their own currency.
- The category names inside the Create Invoice and Add Expenses dialogs appear as lower-case keys (other, transport) rather than the labels used elsewhere.
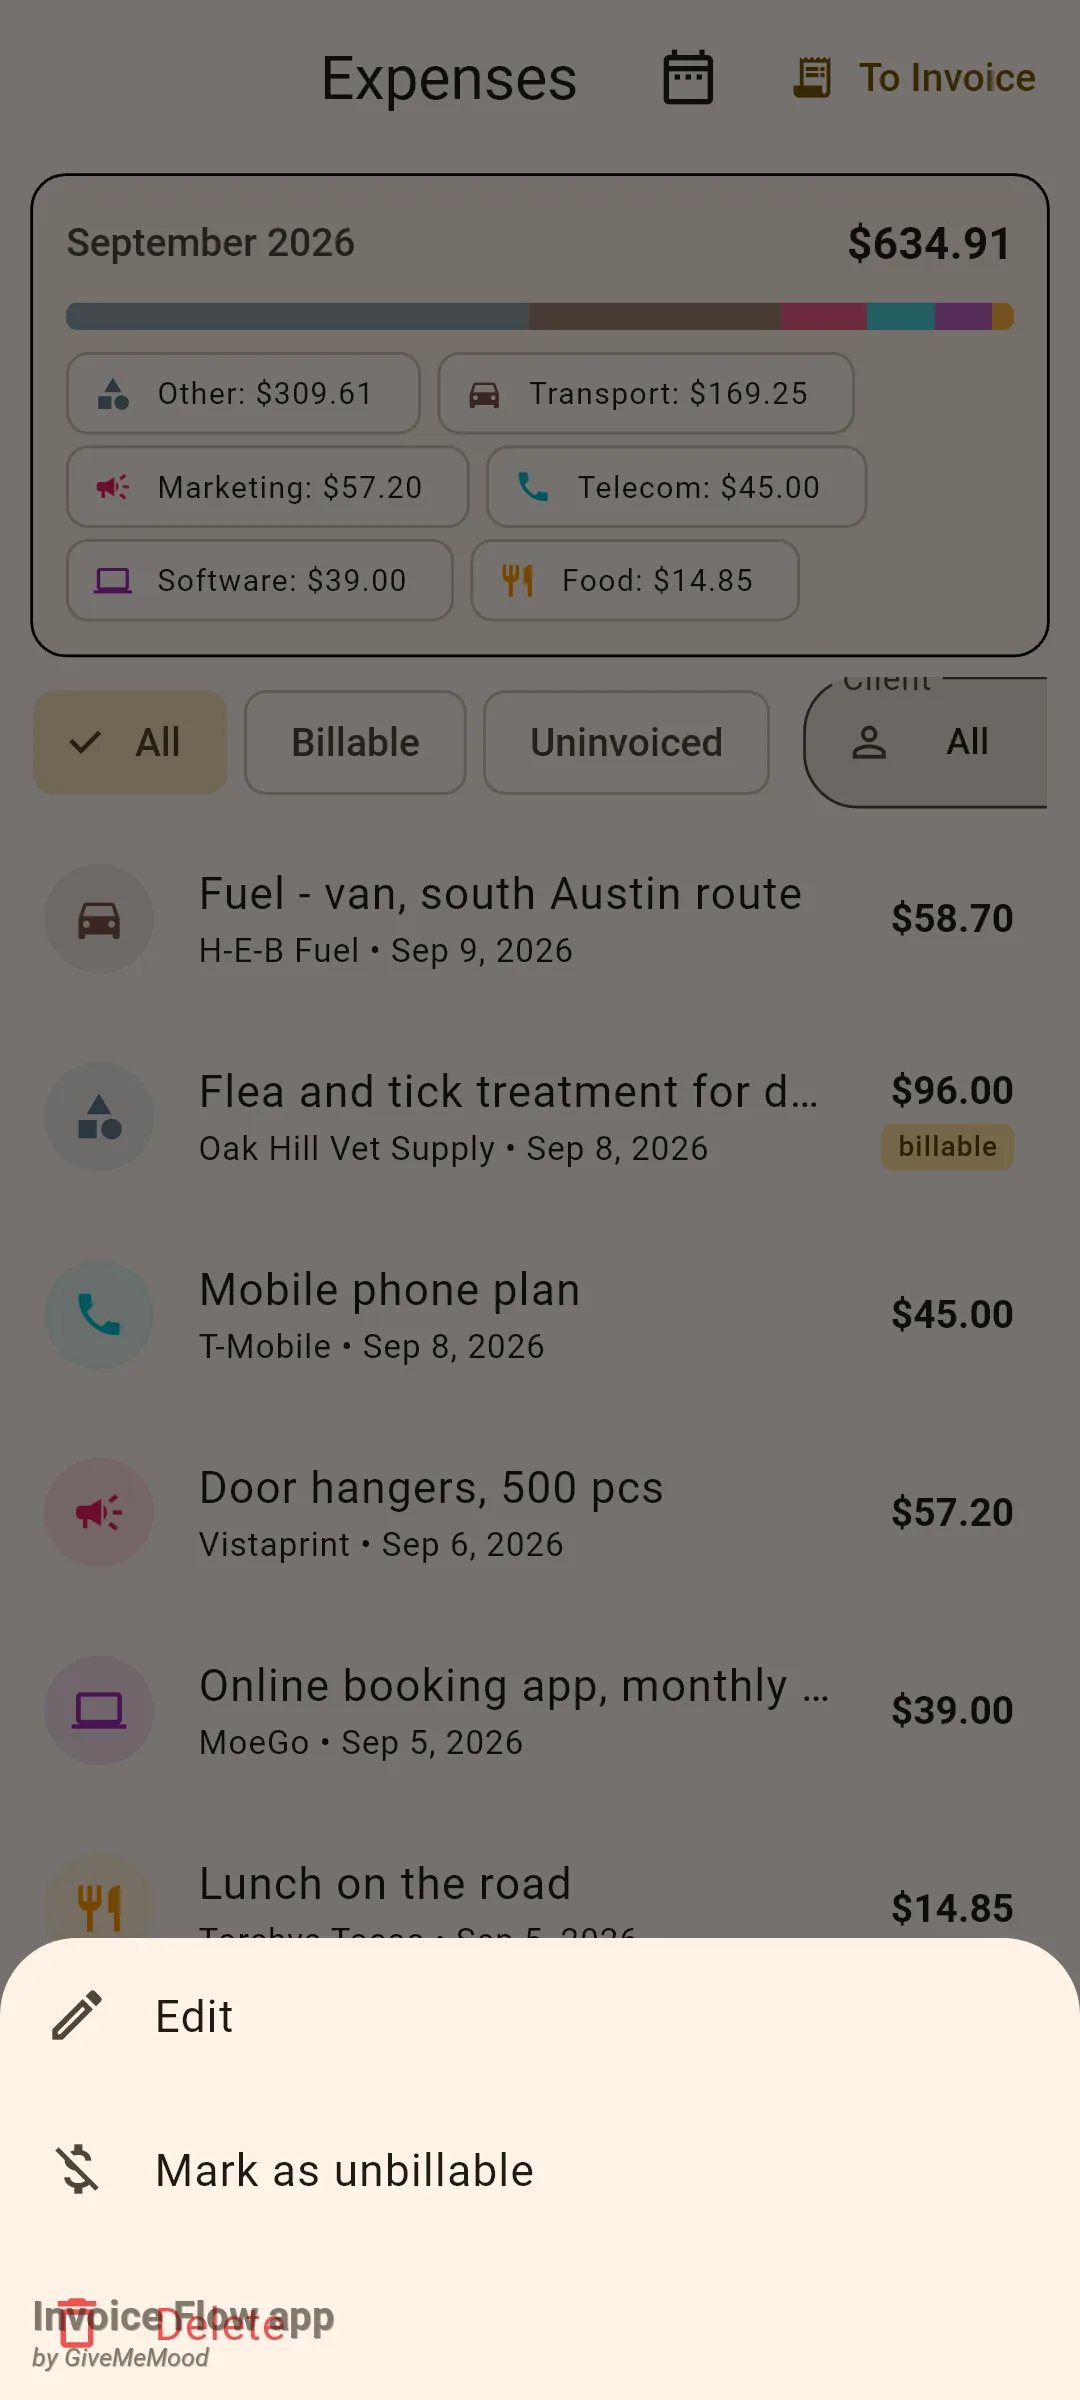
- Long-press a row for Edit, Mark as billable / Mark as unbillable and Delete. Toggling billable applies immediately without confirmation. Tapping a row does nothing.
- Swiping a row from right to left also deletes it, after a Delete expense? confirmation. Deleting removes the receipt photo from storage as well. There is no undo.
- An invoiced expense keeps a link to the invoice and disappears from both pickers, but stays in the list. The Uninvoiced chip shows what is still open. Deleting the invoice later does not reset the flag.
- Amounts are copied onto the invoice as they are. An expense in EUR added to a USD invoice is not converted.
- The receipt scanner recognises Latin-script text only; receipts printed in Cyrillic or other scripts will not yield an amount. It takes the last money-looking figure on the slip as the total and the first plausible date, and accepts both 1,234.56 and 1.234,56 formats.
- There is no export or report for expenses on this screen. The Analytics tool includes an Expense Breakdown card and a profit view that subtract expenses from revenue.
Tips
Related guides
- Invoice editor for what happens to the line items after you add expenses.
- Time tracker for billing hours the same way you bill costs.
- Analytics, dashboard and reports for the Expense Breakdown and profit cards.