 EN
EN  العربية
  Български
  Čeština
  Dansk
Dansk  Deutsch
  Ελληνικά
  Español
  Suomi
Suomi  Français
  עברית
עברית  हिन्दी
  Bahasa Indonesia
  Italiano
  日本語
日本語  한국어
한국어  Bahasa Melayu
  Nederlands
  Norsk
Norsk  Polski
  Português
  Română
  Русский
  Svenska
  Kiswahili
  ไทย
ไทย  Türkçe
  Українська
  Tiếng Việt
  中文
中文 User guide
Set up your business profile
Fill in the profile that prints on every invoice, add a second profile for another business, and duplicate one so you never retype logos and terms.
Your business profile is the “From” side of every document Invoice Flow produces. The name, company, address, contact details, tax number, logo and signature you enter here are what your client sees in the header and footer of each invoice, estimate or delivery note. The same profile also carries the working defaults for new documents: which currency is preselected, how invoices are numbered, which payment terms appear under the total, and what happens when an invoice goes overdue.
You meet this form twice. The first time is on the very first launch, right after the welcome page, where the app asks you to set up your business before it opens the dashboard. After that the same form lives under Settings, and you come back whenever a phone number changes, you get a new logo, or you register for VAT. If you run more than one business, or you invoice under two trading names, you can keep several profiles side by side and pick one per invoice.
This guide follows Elena Marsh, a Bristol photographer. Her main profile is Marsh Light Photography, which bills in pounds and prints her studio address, two email addresses and a VAT number on every invoice. Her second profile, Marsh Print Studio, sells framed prints from a workshop across town and has its own numbering.
What you see on the screen
Open the Settings tab in the bottom navigation. The first tile shows the active profile: its square logo (or initials), the profile name and the company name. Tapping it opens Edit Business Profile for the default profile. Below it, the tile Business Profiles with the subtitle Manage your business profiles opens the list of all profiles, which is where you add, duplicate, delete and switch the default.
The editor is one long scrolling form. From top to bottom:
- The logo row: a square slot on the left and a wide slot on the right, each with a small dropdown above it and an Add or Change button below it. The square mark is used as the profile avatar inside the app; the wide one is what most PDF templates print in the header.
- Signature, a white box that opens a drawing pad when tapped.
- Your Name * and Company Name. The name is the only required field on the whole form.
- Emails, Phones, Addresses, Tax IDs and Website & socials. Each is a list: an Add … button on the right, and one card per entry with a drag handle on the left and a close button on the right. Address and tax-ID cards also carry a Primary address star and a Primary — pre-selected on new invoices hint.
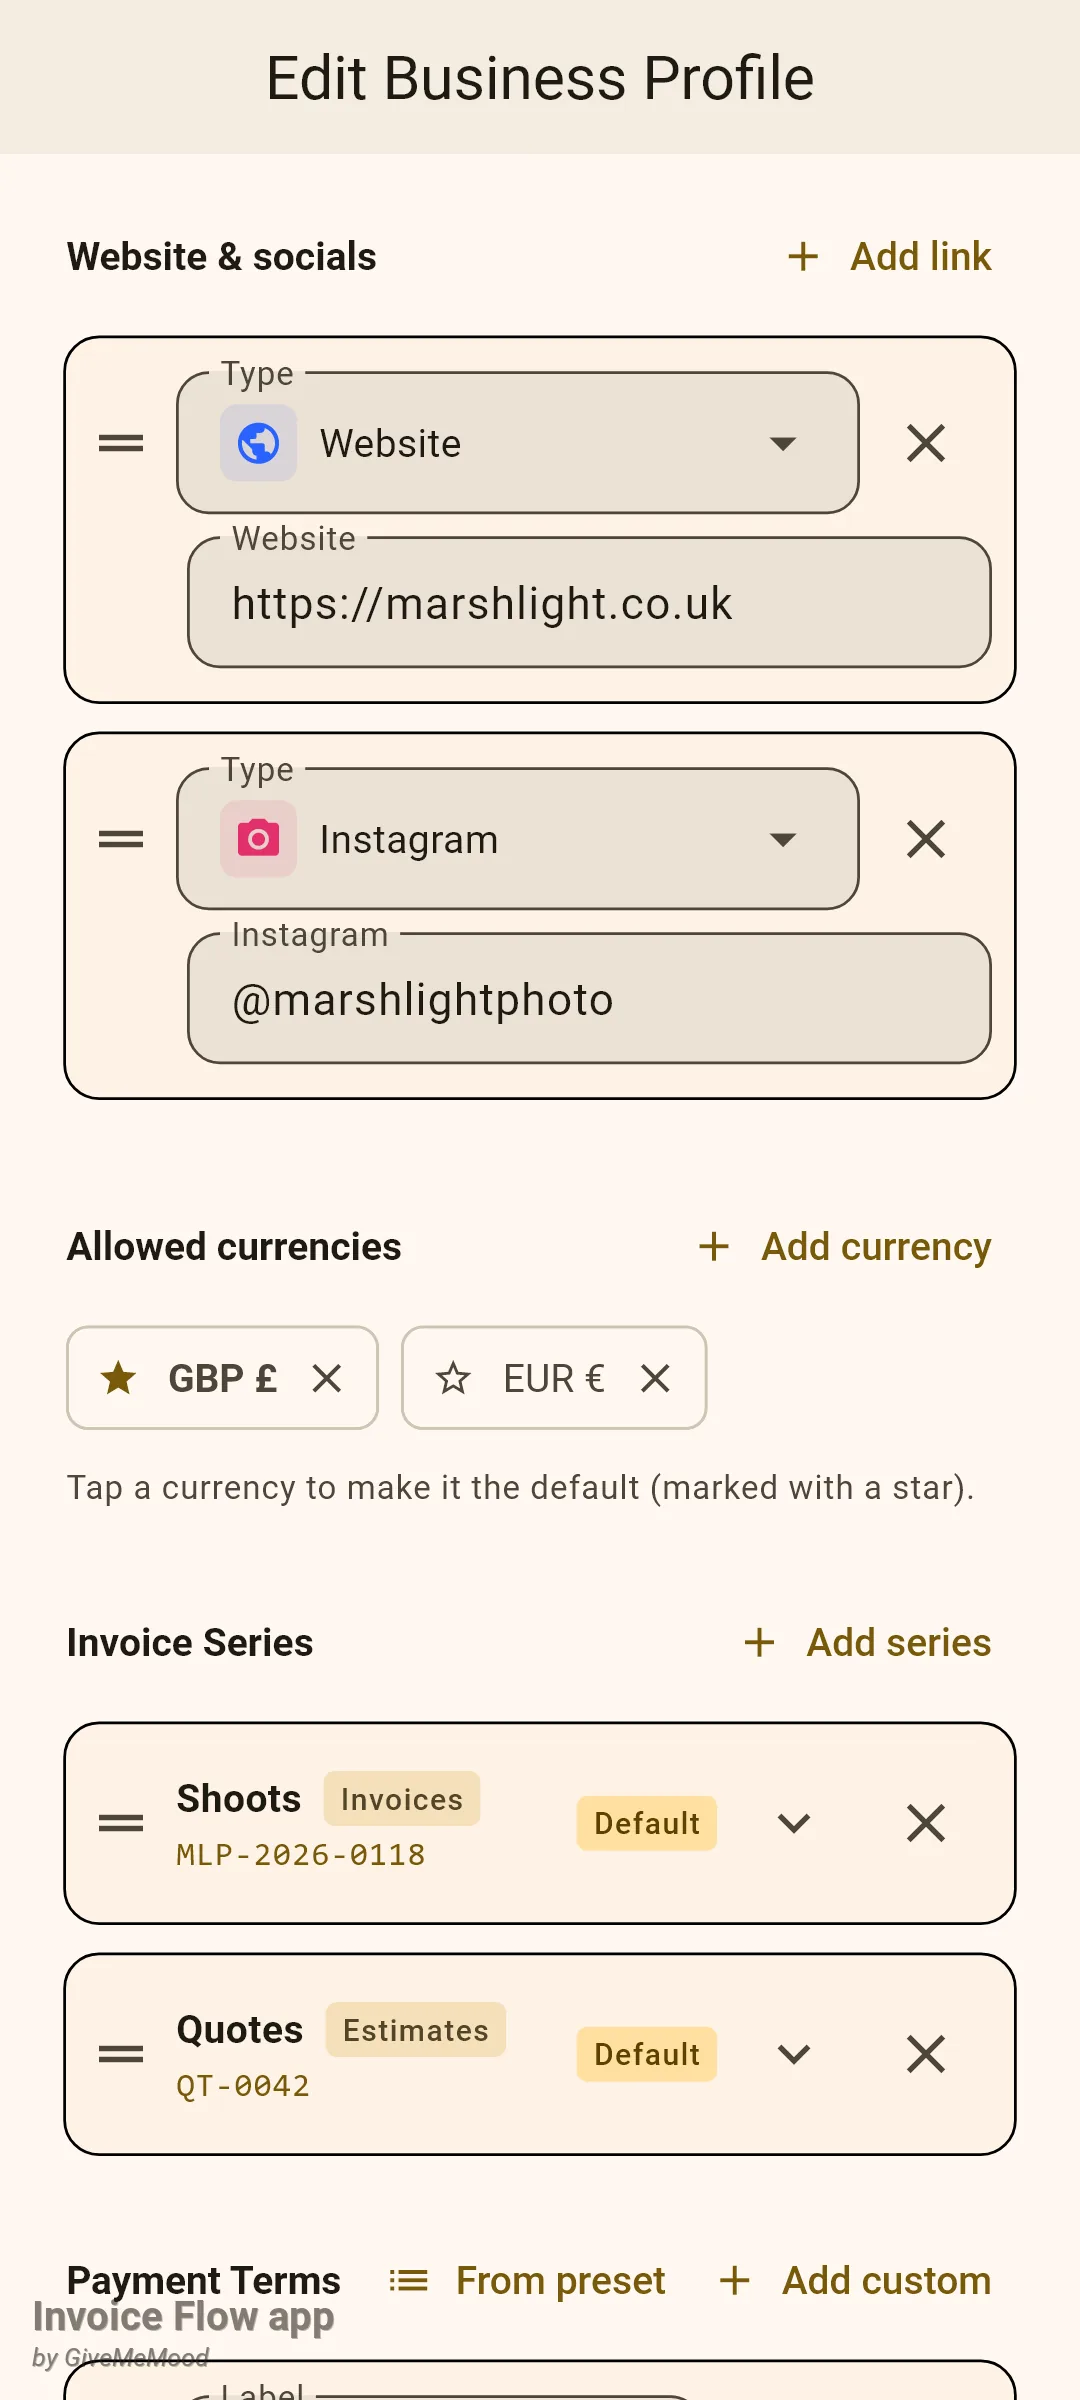
- Allowed currencies with chips and an Add currency button.
- Invoice Series with collapsible cards for invoice and estimate numbering.
- Payment Terms with From preset and Add custom.
- Late-fee policy and Early-payment discount.
- Save Changes and Back at the bottom. On first launch the buttons read Continue and Skip for now instead.
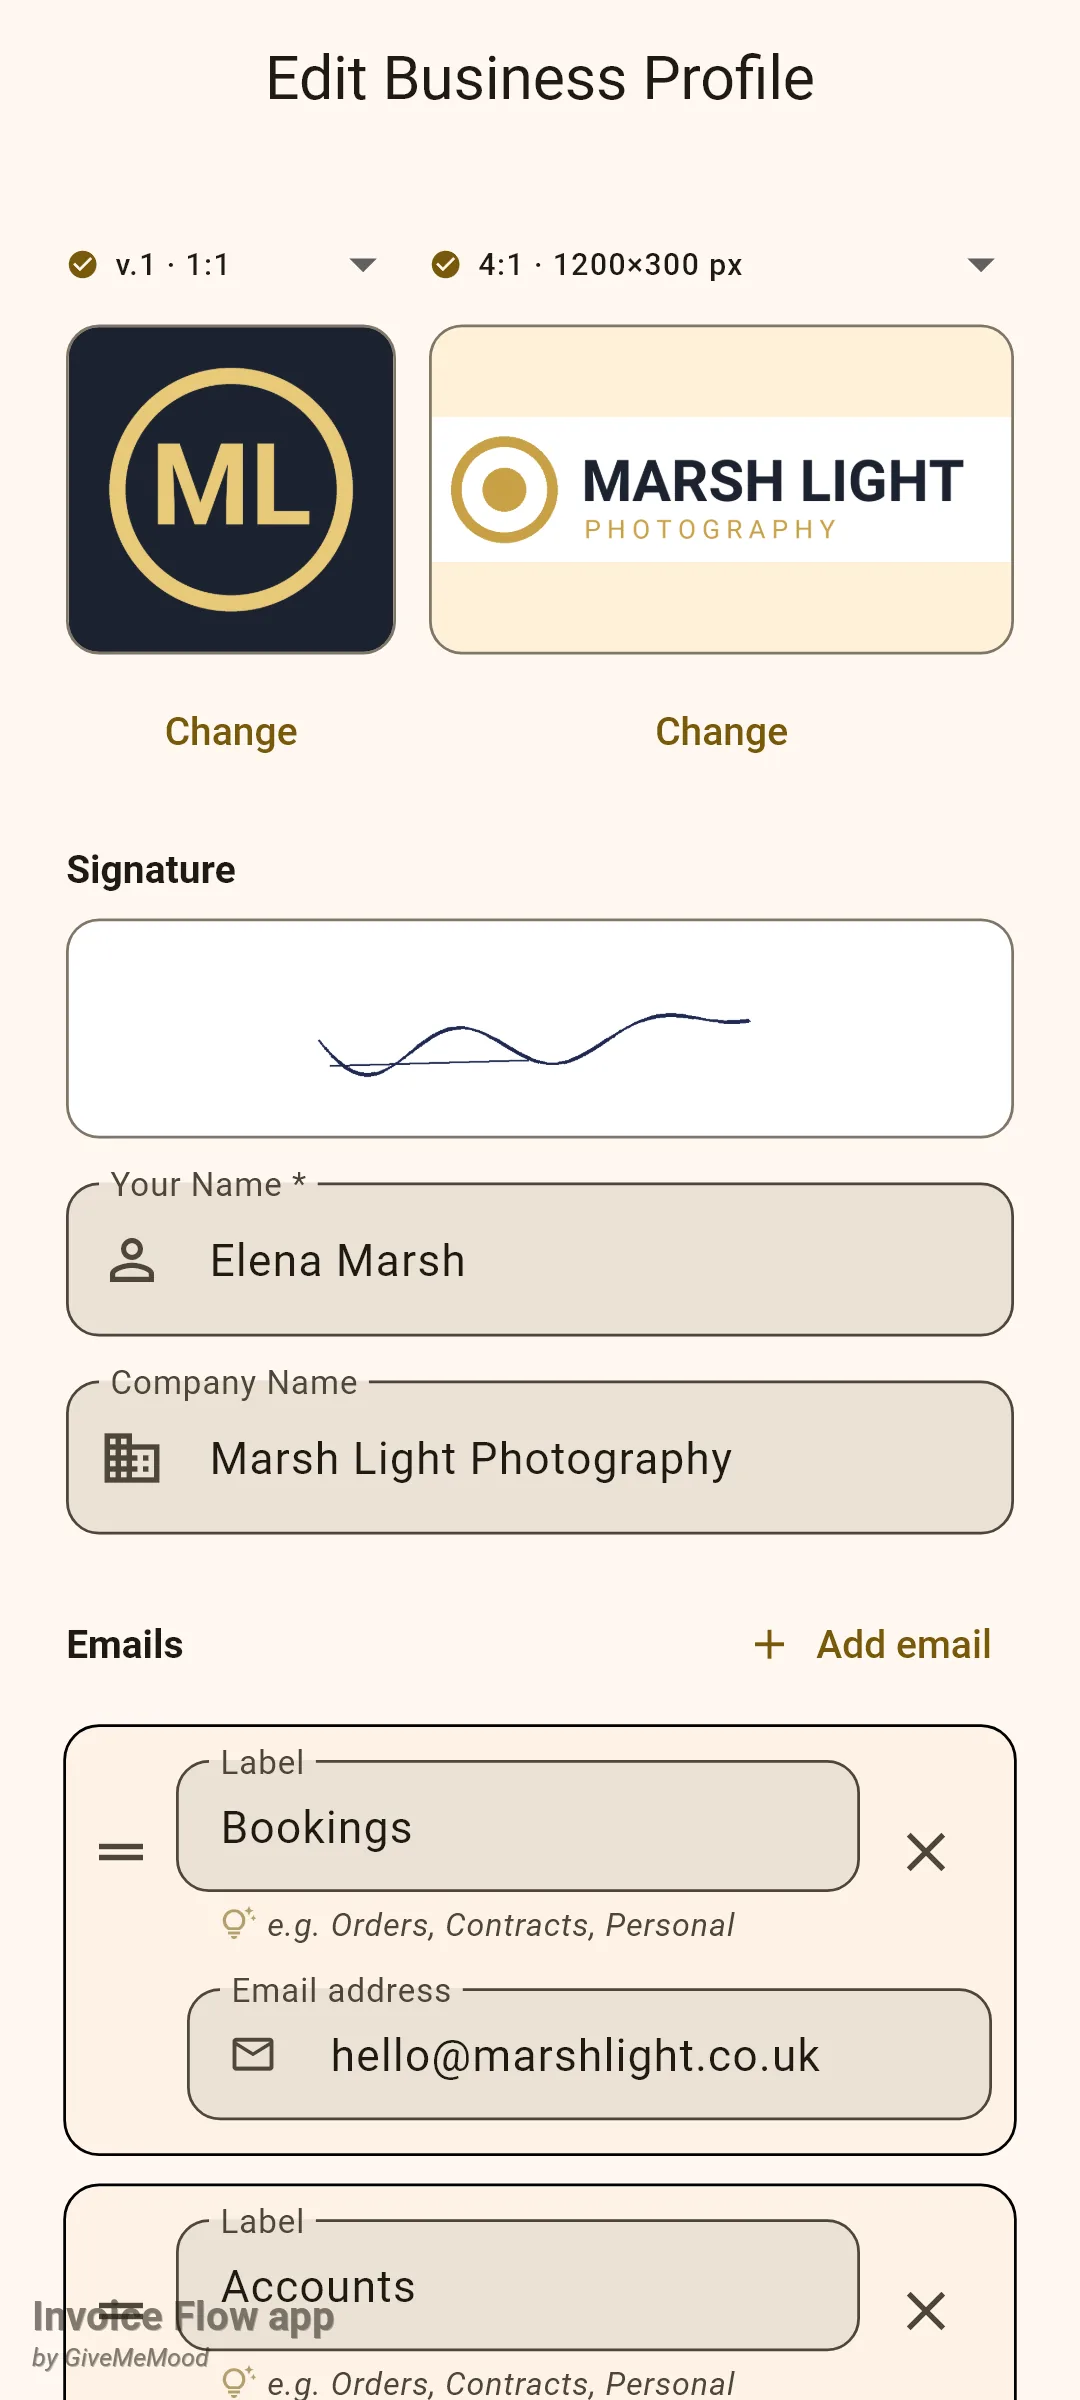
How to fill in the profile that prints on your invoices
- Open Settings and tap the profile tile at the top, or go to Business Profiles and tap the profile you want to edit.
- Enter Your Name *. Enter Company Name if you trade under a business name; templates print the company when it is set and fall back to your name when it is empty.
- Tap Add email. Type a short Label such as Bookings or Accounts and the Email address. Add a second row if you want a separate accounts inbox on the invoice.
- Tap Add phone and fill Label and Phone number the same way.
- Tap Add address. Give it a Label (Studio, Office, Warehouse), pick the Country from the searchable list, then fill Street, the city, region and postal code fields. The field names and example hints change with the country you picked, so a UK address shows Town/City, County and Postcode.
- Tap Add Tax ID, choose the type from the searchable list (VAT for the United Kingdom, EIN, ABN and so on) and type the Number. Choose OTHER if your registration is not listed and give it a Custom label that will be printed as-is.
- Tap Add link, pick a Type (Website, Instagram, LinkedIn, WhatsApp and others) and paste the address or handle.
- Scroll to the bottom and tap Save Changes. A short "Profile saved" message confirms the write and the editor closes.
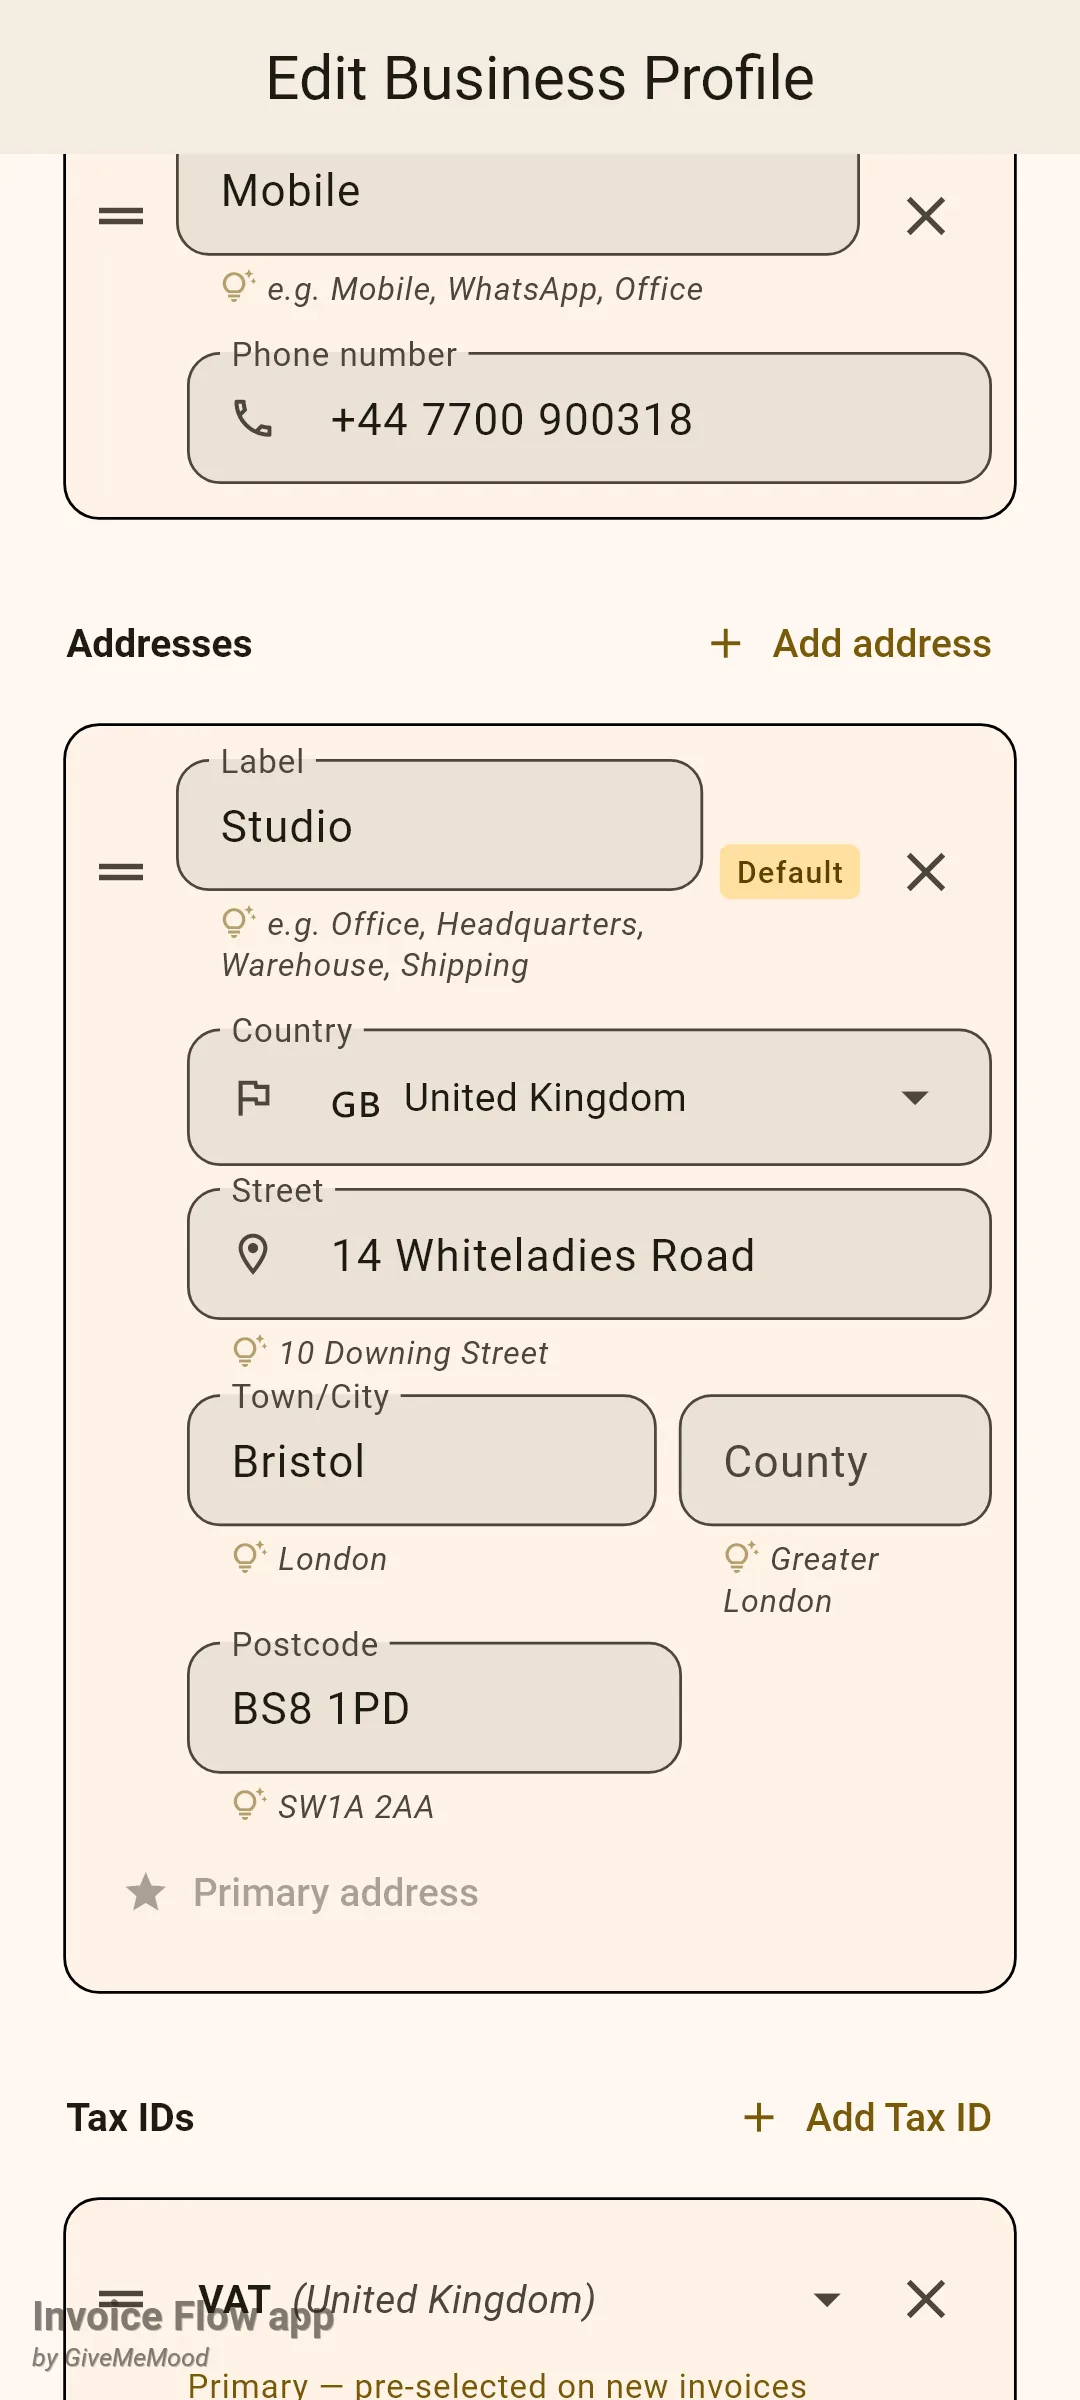
The order of the rows matters. When you have several emails, phones or addresses, the first row in each list (or the one with the star for addresses) is what the app treats as primary: it is written to the classic single-value fields that older templates and exports read, and it is preselected when you create a new invoice. Drag rows by their handle to reorder them.
How to set the defaults for new documents
The lower half of the form does not print anything by itself; it decides what a fresh invoice starts with.
- Under Allowed currencies, tap Add currency and pick each currency you invoice in. Tap a chip to move the star to it; the starred currency becomes the default for new invoices and is also stored as the profile's base currency.
- Leave the list empty if you want the full currency picker available on every invoice. With one or more chips, the invoice editor only offers those.
- Under Invoice Series, open the card for invoices. Set Series name, Invoice Prefix and Start counting from. Under Number template choose a preset such as
{prefix}-{YYYY}-{SEQ:0000}, or switch to Custom and use the Token reference button to see every available token. - Set Reset counter to Every year if you want numbering to restart in January; the card preview shows the next number the series will issue.
- Repeat for the estimates series. Tap Add series if one business needs two numbering streams, for example shoots and print orders.
- Under Payment Terms, tap From preset and pick one of the ten built-in texts (Due on receipt, Net 7 through Net 90, 50% upfront, End of month), or tap Add custom and write your own Label and Body. Star the one you use most; it is placed on every new invoice.
- Optionally set a Late-fee policy (percent, grace days, accrual mode) and an Early-payment discount. Both stay dormant while the percent is zero.
- Tap Save Changes.
How to add a second business profile
Several profiles are useful when you invoice from two trading names, keep a personal and a company profile, or want separate numbering for two lines of work.
- Open Settings and tap Business Profiles.
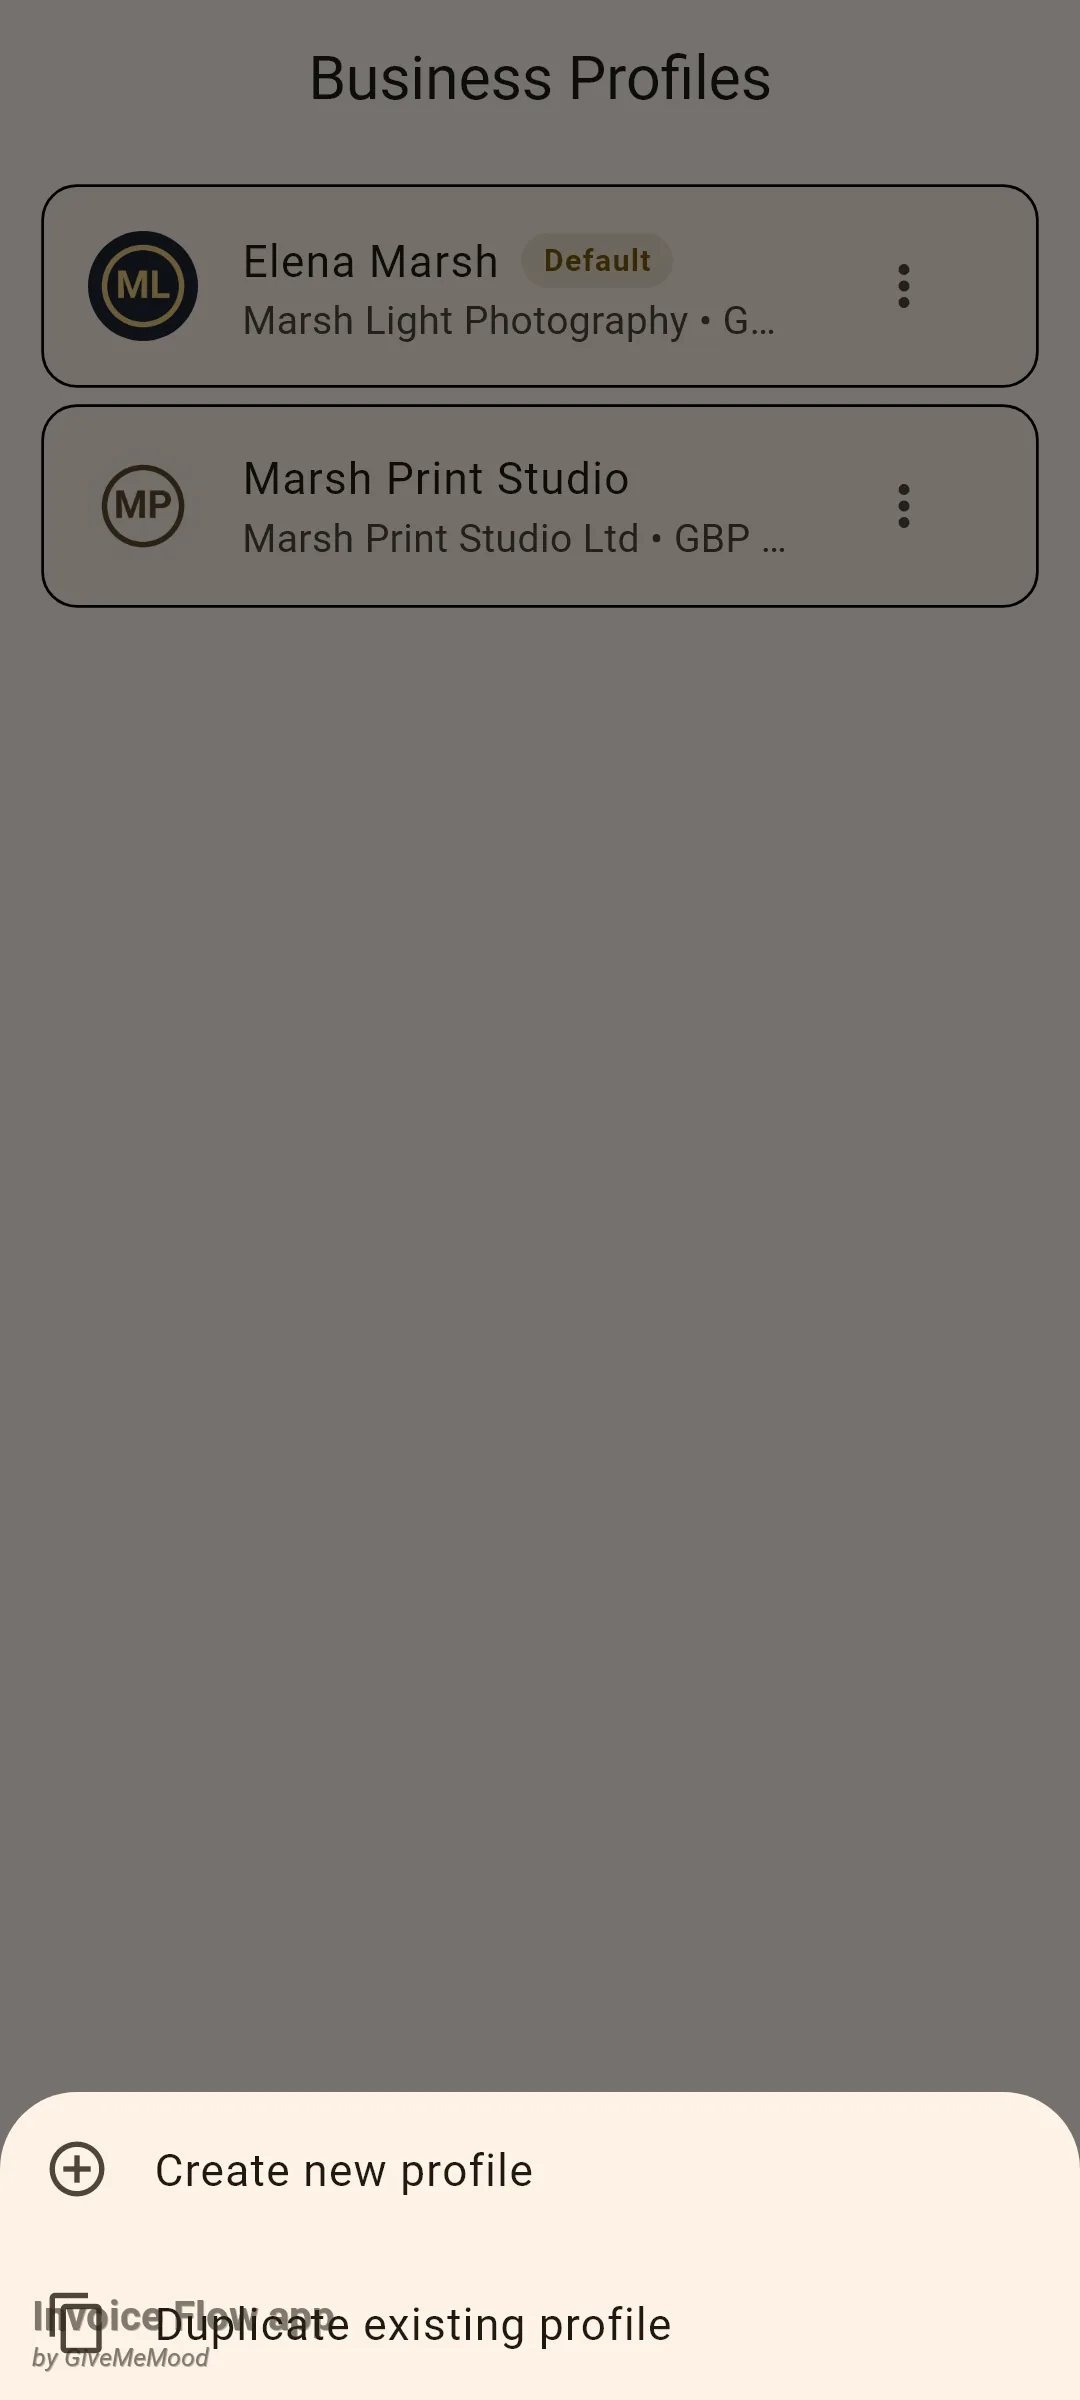
- Tap the + button in the bottom-right corner. If you already have at least one profile, a sheet slides up with two choices.
- Tap Create new profile to start from a blank form. The new form comes with two ready-made numbering series, INV for invoices and EST for estimates, both starting at 1.
- Fill in the form as described above and tap Save Changes. The app bar of this editor reads New Profile instead of Edit Business Profile.
- Back in the list, open the three-dot menu on the new card to find Edit Business Profile, Set as Default and Delete.
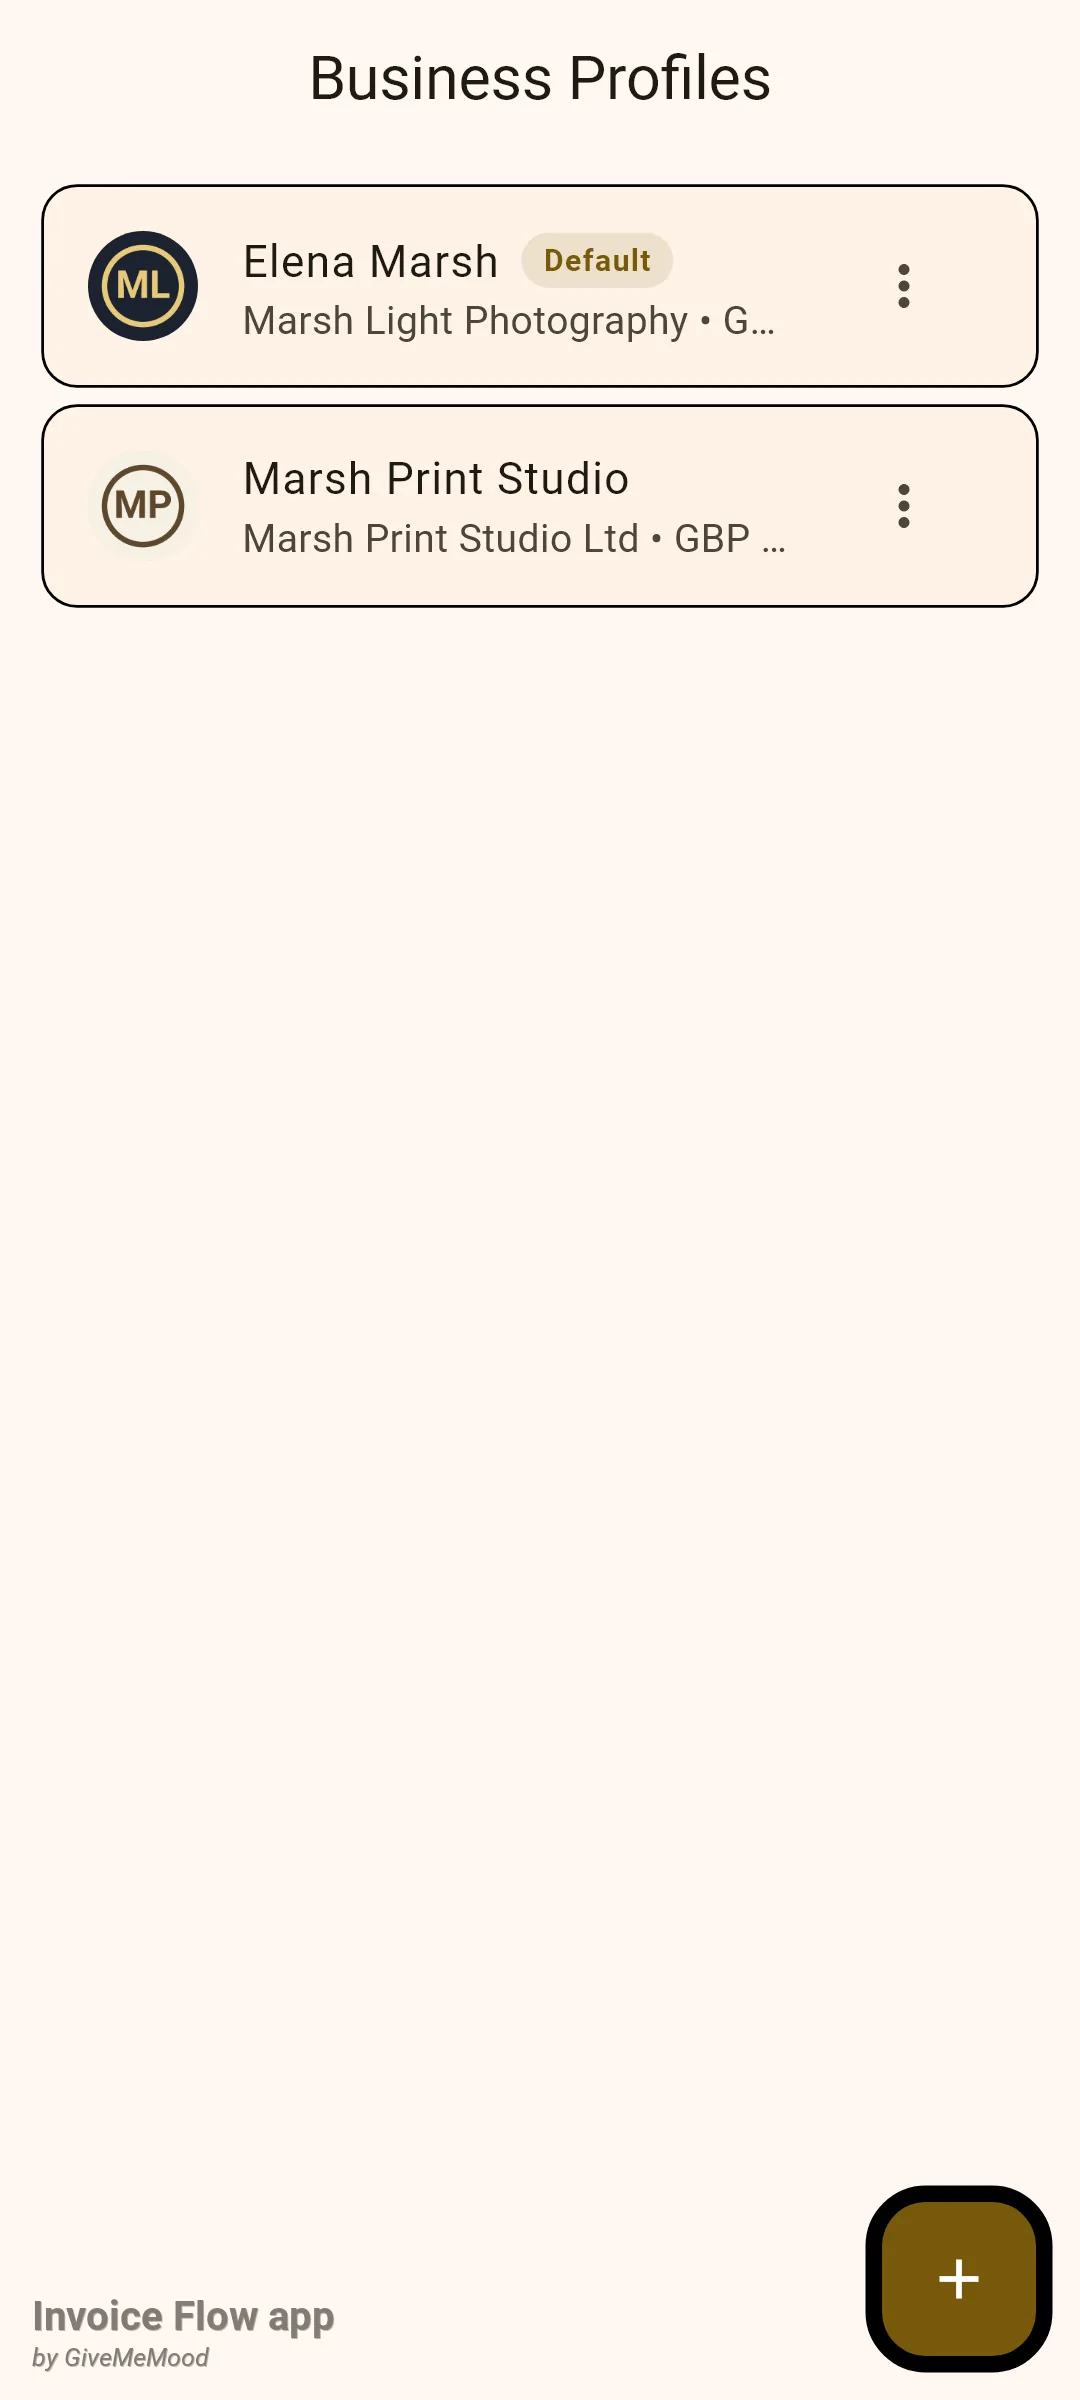
The list shows each profile’s name, a Default pill on the active one, and a subtitle with the company, the default currency and the invoice prefix. Profiles are sorted alphabetically by name, not by which one is default, so give each profile a name you can tell apart at a glance. Elena keeps her own name on the photography profile and uses the trading name for the print studio.
When you create a new invoice, the editor shows a Business Profile tile near the top. With one profile it is read-only. With two or more it gets a chevron and opens a Select profile picker; the document then takes its logo, header details, currency, numbering series and payment terms from the profile you chose. Once an invoice has been saved, its profile can no longer be switched from the editor.
How to duplicate a profile instead of retyping it
Duplicating is the fastest way to set up a second trading name that shares most details with the first.
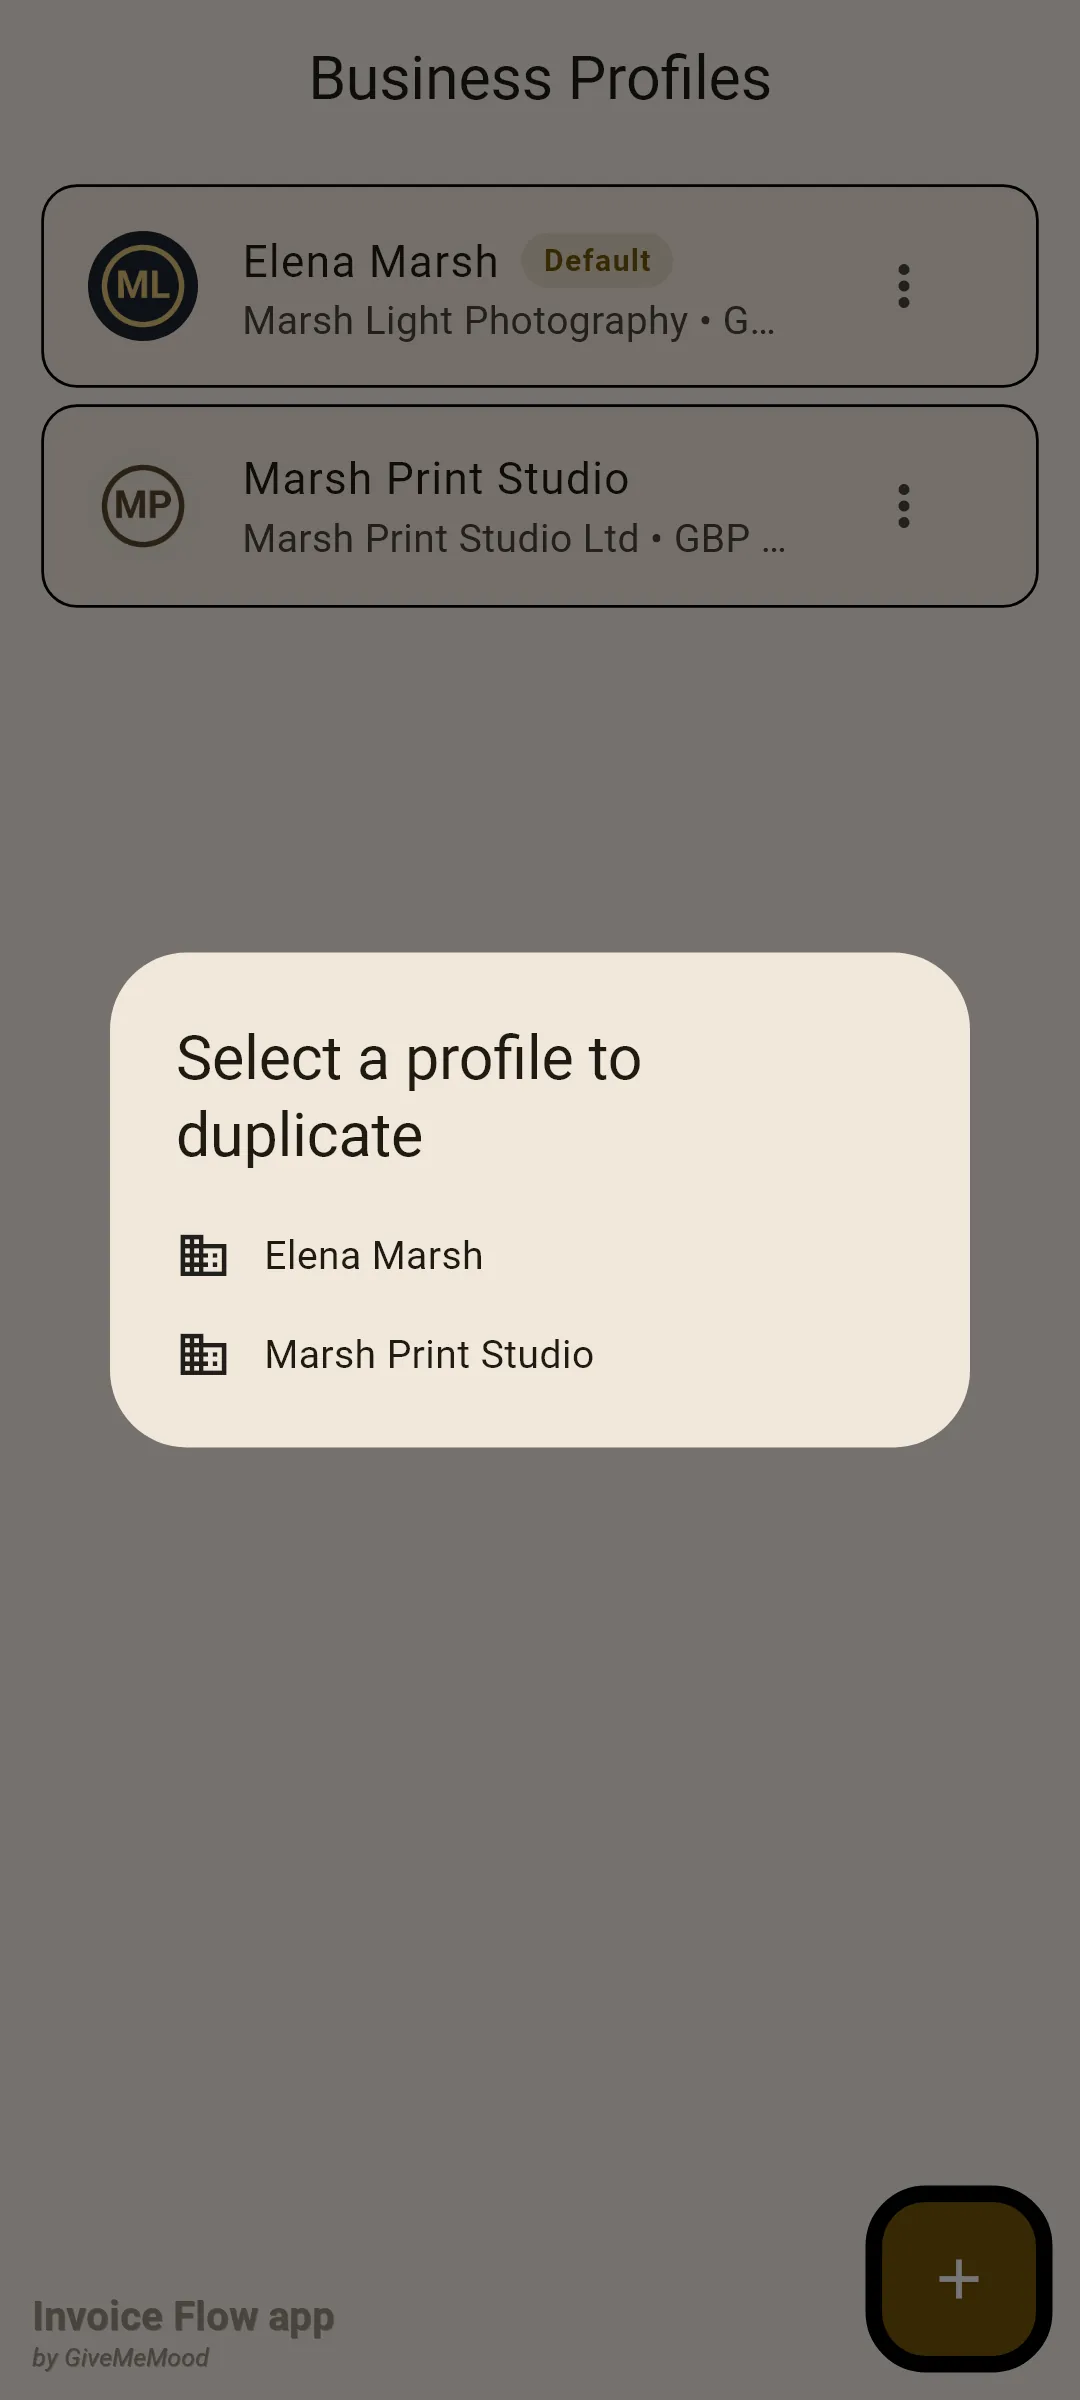
- On Business Profiles, tap + and choose Duplicate existing profile.
- In the Select a profile to duplicate dialog, tap the source profile.
- The New Profile editor opens already filled in with the source's name, company, logos, emails, phones, addresses, tax IDs, links, currencies, series and payment terms. The signature is deliberately left empty, because a signature is linked to one profile.
- Change what differs: usually the name, the company, the invoice prefix and perhaps the address. Rename the series and reset Start counting from if the copy should not continue the original's numbering.
- Tap Save Changes. The copy is saved as a separate row; the source profile is untouched.
What the client sees
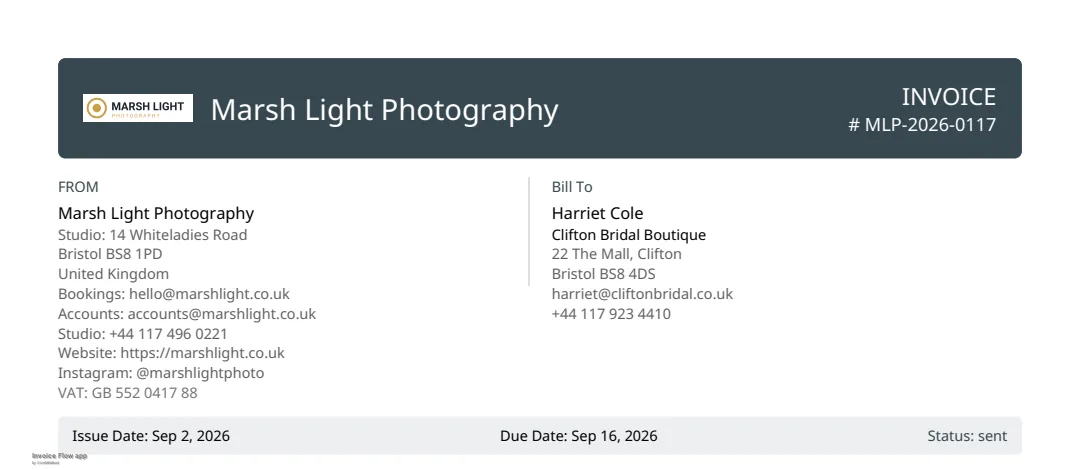
Everything above ends up in the document header. On the Professional template the wide logo and company name sit in the dark band, the FROM block lists the labelled address with its country line, the labelled emails and phones, the website and Instagram lines, and the VAT number, and the saved signature appears above Authorized Signature at the bottom. Other templates arrange the same data differently, but the source is always the profile plus whatever rows you selected for that particular invoice.
Rules and details
- Required fields. Only Your Name * is validated; leaving it blank shows “Name is required”. Everything else may stay empty. On first launch, Skip for now saves a profile named “My Business” so the app can open, and you can rename it later.
- Save button. When editing, Save Changes is greyed out until you change something. A duplicated profile starts with the button enabled because the copy has not been written yet. On first launch Continue is always enabled.
- Leaving without saving. If you press Back with unsaved edits, an Unsaved Changes dialog asks you to Stay or Leave; leaving discards the edits.
- Default profile. The profile created during onboarding becomes the default. Later profiles are only promoted to default when no default exists yet, so adding a second profile never silently demotes your working one. Use Set as Default on the list to switch.
- Deleting. You cannot delete the only profile, and you cannot delete the current default; the app shows “Cannot delete the only profile” or “Cannot delete the default profile. Set another profile as default first.” Deleting any other profile asks for confirmation and removes its emails, phones, addresses, links, tax IDs, payment terms, series and client groups with it. Invoices already issued keep their own copy of the header details.
- Default currency. When the Allowed currencies list has entries, the starred one (the first in the list) is saved as both the default and the base currency. With an empty list the previously saved currency stays, USD on a brand-new profile.
- Numbering. An empty series name is saved as “Default” and an empty template falls back to
{prefix}-{SEQ:0000}. The first invoice series and first estimate series are also mirrored into the classic prefix and counter fields that older parts of the app read. - Signature. Removing a signature asks twice, and the removal is only applied when you save. The signature box shows a signature linked from the Signatures screen when the profile has none of its own.
- Payment terms. A term with an empty label is stored as “Default”. The starred term’s body is what new invoices print under the total.
- Late fee and early discount. These are profile-wide defaults; clients can override the late-fee percent, grace days, mode, cap and auto-forgive setting individually. Minimum amount and Include in PDF are profile-only. Early discount days default to 7.
- What needs Pro. Opening the profile editor from Settings, tapping a profile in the list, and the + button are gated by the trial or subscription and open the paywall otherwise. Viewing the list, Set as Default and Delete are always available.
- Screens you cannot see here. The logo slots open the system photo picker and the signature box opens a drawing pad; both are native screens and are covered in the logo and signature guides.