 EN
EN  العربية
  Български
  Čeština
  Dansk
Dansk  Deutsch
  Ελληνικά
  Español
  Suomi
Suomi  Français
  עברית
עברית  हिन्दी
  Bahasa Indonesia
  Italiano
  日本語
日本語  한국어
한국어  Bahasa Melayu
  Nederlands
  Norsk
Norsk  Polski
  Português
  Română
  Русский
  Svenska
  Kiswahili
  ไทย
ไทย  Türkçe
  Українська
  Tiếng Việt
  中文
中文 User guide
Your first invoice in five minutes
Go from a fresh install of Invoice Flow to a paid invoice by setting up your business, adding a client, building a two-line invoice and sharing the PDF.
You have installed Invoice Flow and someone owes you money. This guide takes you the shortest way from an empty app to a paid invoice, touching each screen only as far as you need it today. Every step points to a longer guide for the day you want more, so you can skim now and come back later.
The walkthrough follows Maya Reyes, a freelance photographer in Austin, Texas. She just finished a half-day brand shoot for Bluebonnet Bakery and wants to bill Dana Ortiz, the owner, for the session and thirty edited images, a total of $690. The whole flow, from first launch to a green Paid badge, is six screens.
What you see on the screen
On first launch the app opens a welcome page with a Get Started button and a language button in the top-right corner. Tapping Get Started brings you to a form titled Set Up Your Business. Once that form is saved, the app lands on the dashboard, and from then on four tabs sit along the bottom of the screen: Dashboard, Documents, Clients and Settings. Everything in this guide happens on the middle two tabs.
The Clients tab holds your customer cards and a + button. The Documents tab holds your invoices and estimates, a New button that asks which document type you want, and, once an invoice exists, a row per document that opens its detail screen. The detail screen is the hub for a finished invoice: it shows the status badge, the client, the line items, a Payments card, and a full-width Preview PDF button at the bottom, which is where sharing lives.
How to set up your business on first launch
Maya only needs a name to get going; everything else on this form can wait.
- Tap Get Started on the welcome page. If the app is in the wrong language, tap the language button in the corner first and pick yours.
- On Set Up Your Business, type your name in Your Name *. This is the only required field on the whole form; the trading name goes into Company Name.
- Scroll down and tap Add email, Add phone and Add address to enter the contact lines you want printed on your invoices. An address only appears on the PDF if you add at least one here.
- Under Allowed currencies tap Add currency and pick the currency you bill in; the first one you add becomes the default. Maya chooses USD.
- Scroll to the bottom and tap Continue. If you would rather fill this in later, tap Skip for now; the app saves a profile called My Business that you can edit under Settings.
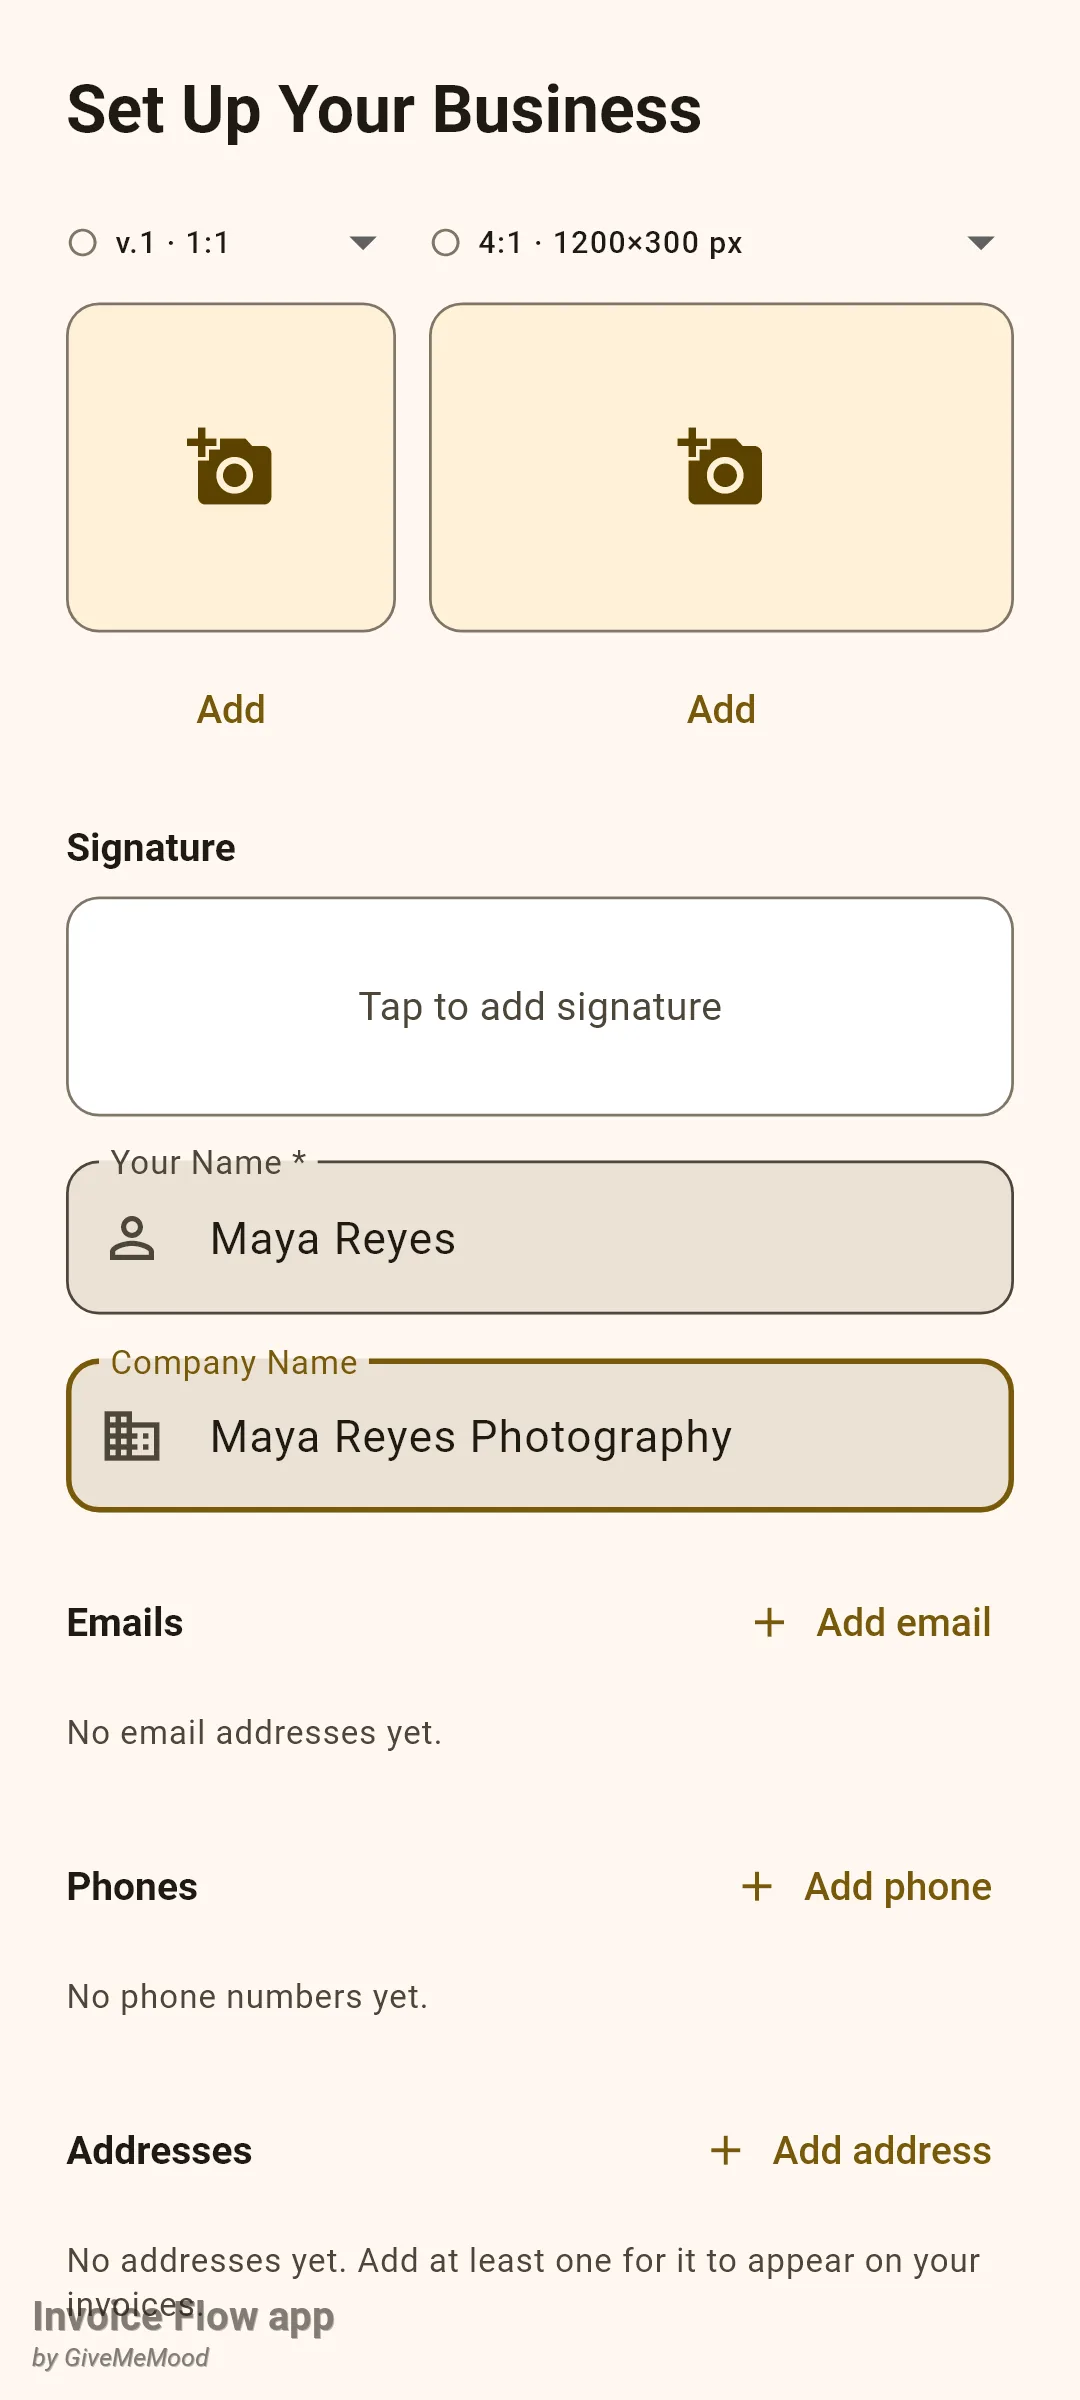
Two things happen quietly when you tap Continue: the profile becomes your default business profile, and a seven-day trial of the full feature set starts, so you can save, share and print without buying anything today. The form also gives you two numbering series, INV for invoices and EST for estimates, which is why the first invoice is numbered INV-0001 without any setup. Logos, tax IDs, payment-term presets and late-fee defaults all live on this same form; the guide on setting up your business profile covers them field by field.
How to add your first client
You can create a client from inside the invoice editor, but doing it first keeps the invoice step short.
- Open the Clients tab and tap +, or the Add Client button in the empty list.
- On New Client, type the person's name in Name *. Like the business form, this is the only required field.
- Fill in Company, Email and Phone. The email is what the send screen proposes later, and the company prints under the name in the Bill To block.
- Tap the Country tile, type the first letters into Search country... and pick the country. The country adjusts the address hint and, for many countries, unlocks tax preset chips in the invoice editor.
- Type the street address in Address and tap Save in the top-right corner.
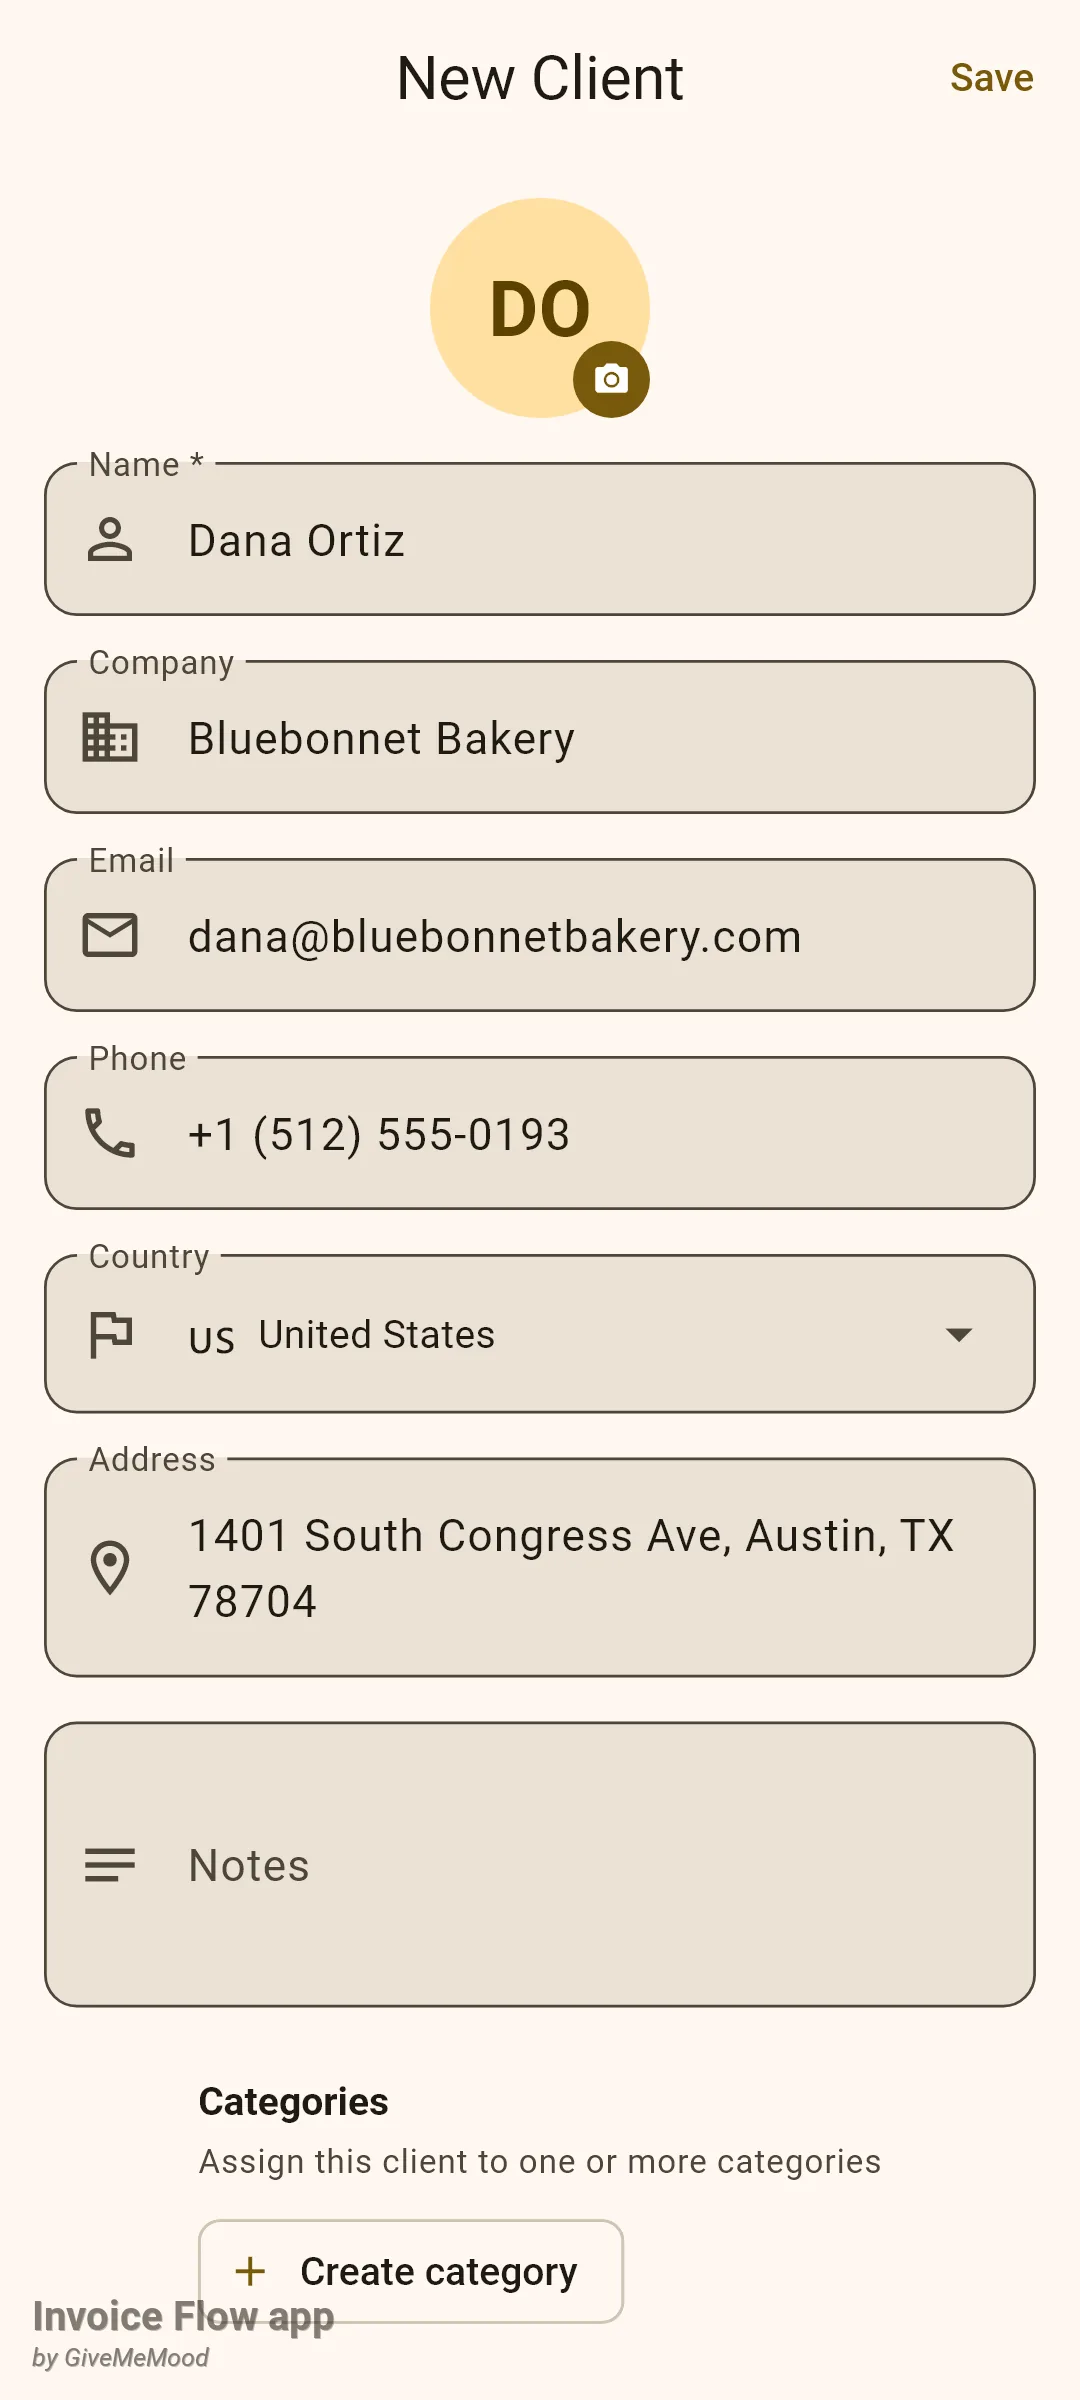
The round avatar at the top takes a photo or logo if you want one, and the Categories section further down lets you tag clients once you have more than a handful. Both are optional. See clients, categories and client groups for the full card, including per-client late-fee terms.
How to create the invoice with two line items
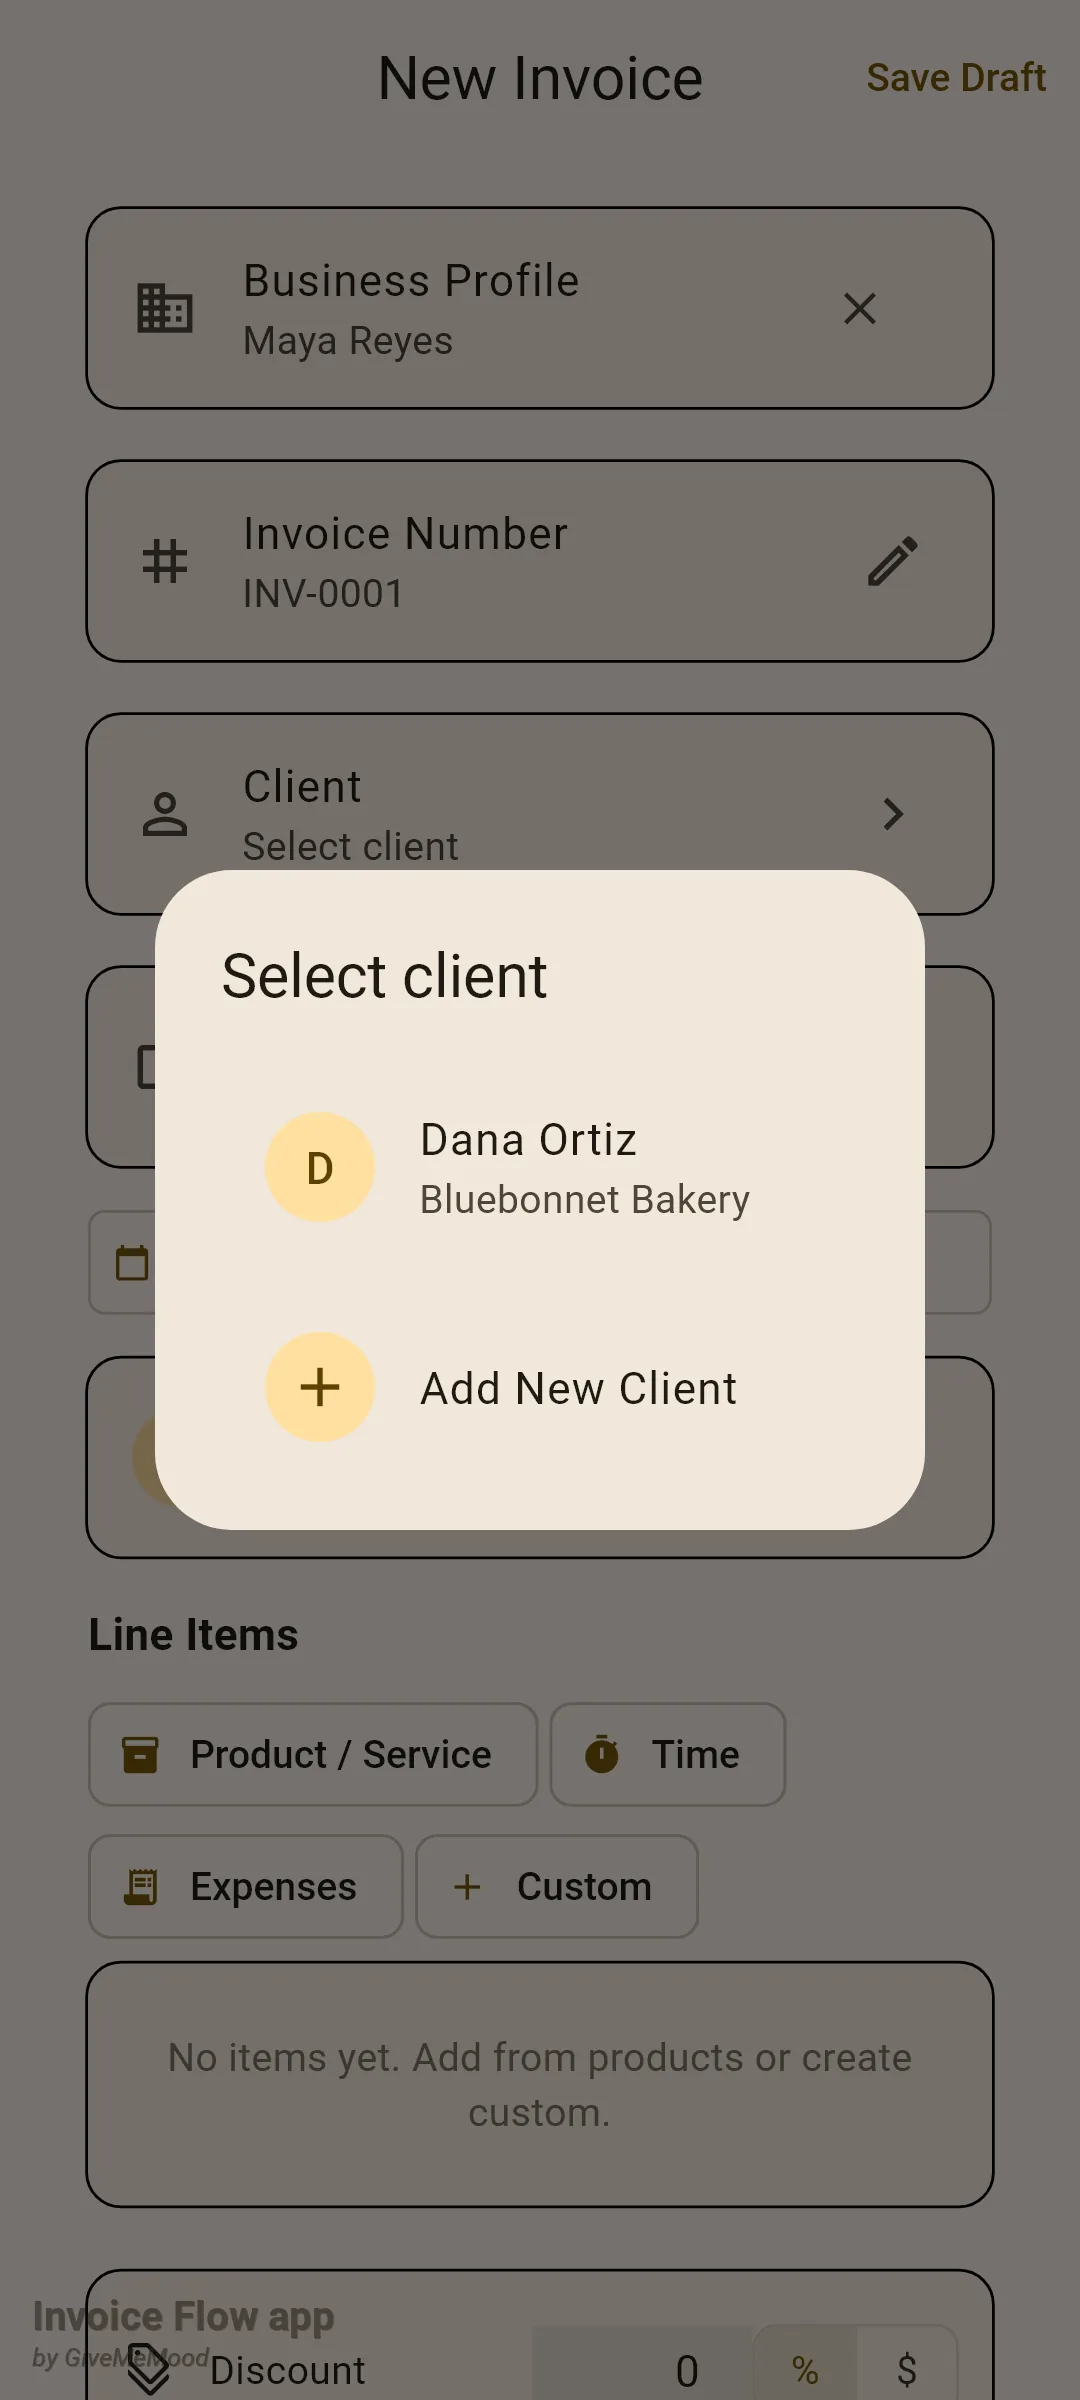
- Open the Documents tab, tap New and choose Invoice from the Choose document type sheet. The editor opens as New Invoice with your profile, the number INV-0001, today's date, a due date 30 days out and your currency already in place.
- Tap the Client card and pick the client in the Select client dialog. If you skipped the previous section, the last row, Add New Client, opens the client form from here.
- Check the Due date box. Maya's terms are 14 days, so she taps it and picks two weeks from today instead of the default 30 days.
- In the Line Items section tap Custom. A card #1 appears. Type what you did in Item, set Qty and Price. For the shoot, Maya writes the session description, quantity 1, price 450.
- Tap Custom again for the second card and enter the edited images: quantity 30, price 8. The amount on each card and the totals card below update as you type.
- If sales tax applies, type the rate into the % field of each card, or tap one of the tax preset chips above the items to apply a rate to every line at once. Leave it empty for no tax.
- Scroll down to Payment Terms. It is prefilled from your profile if you saved terms there; otherwise type them now, for example how and by when you expect payment.
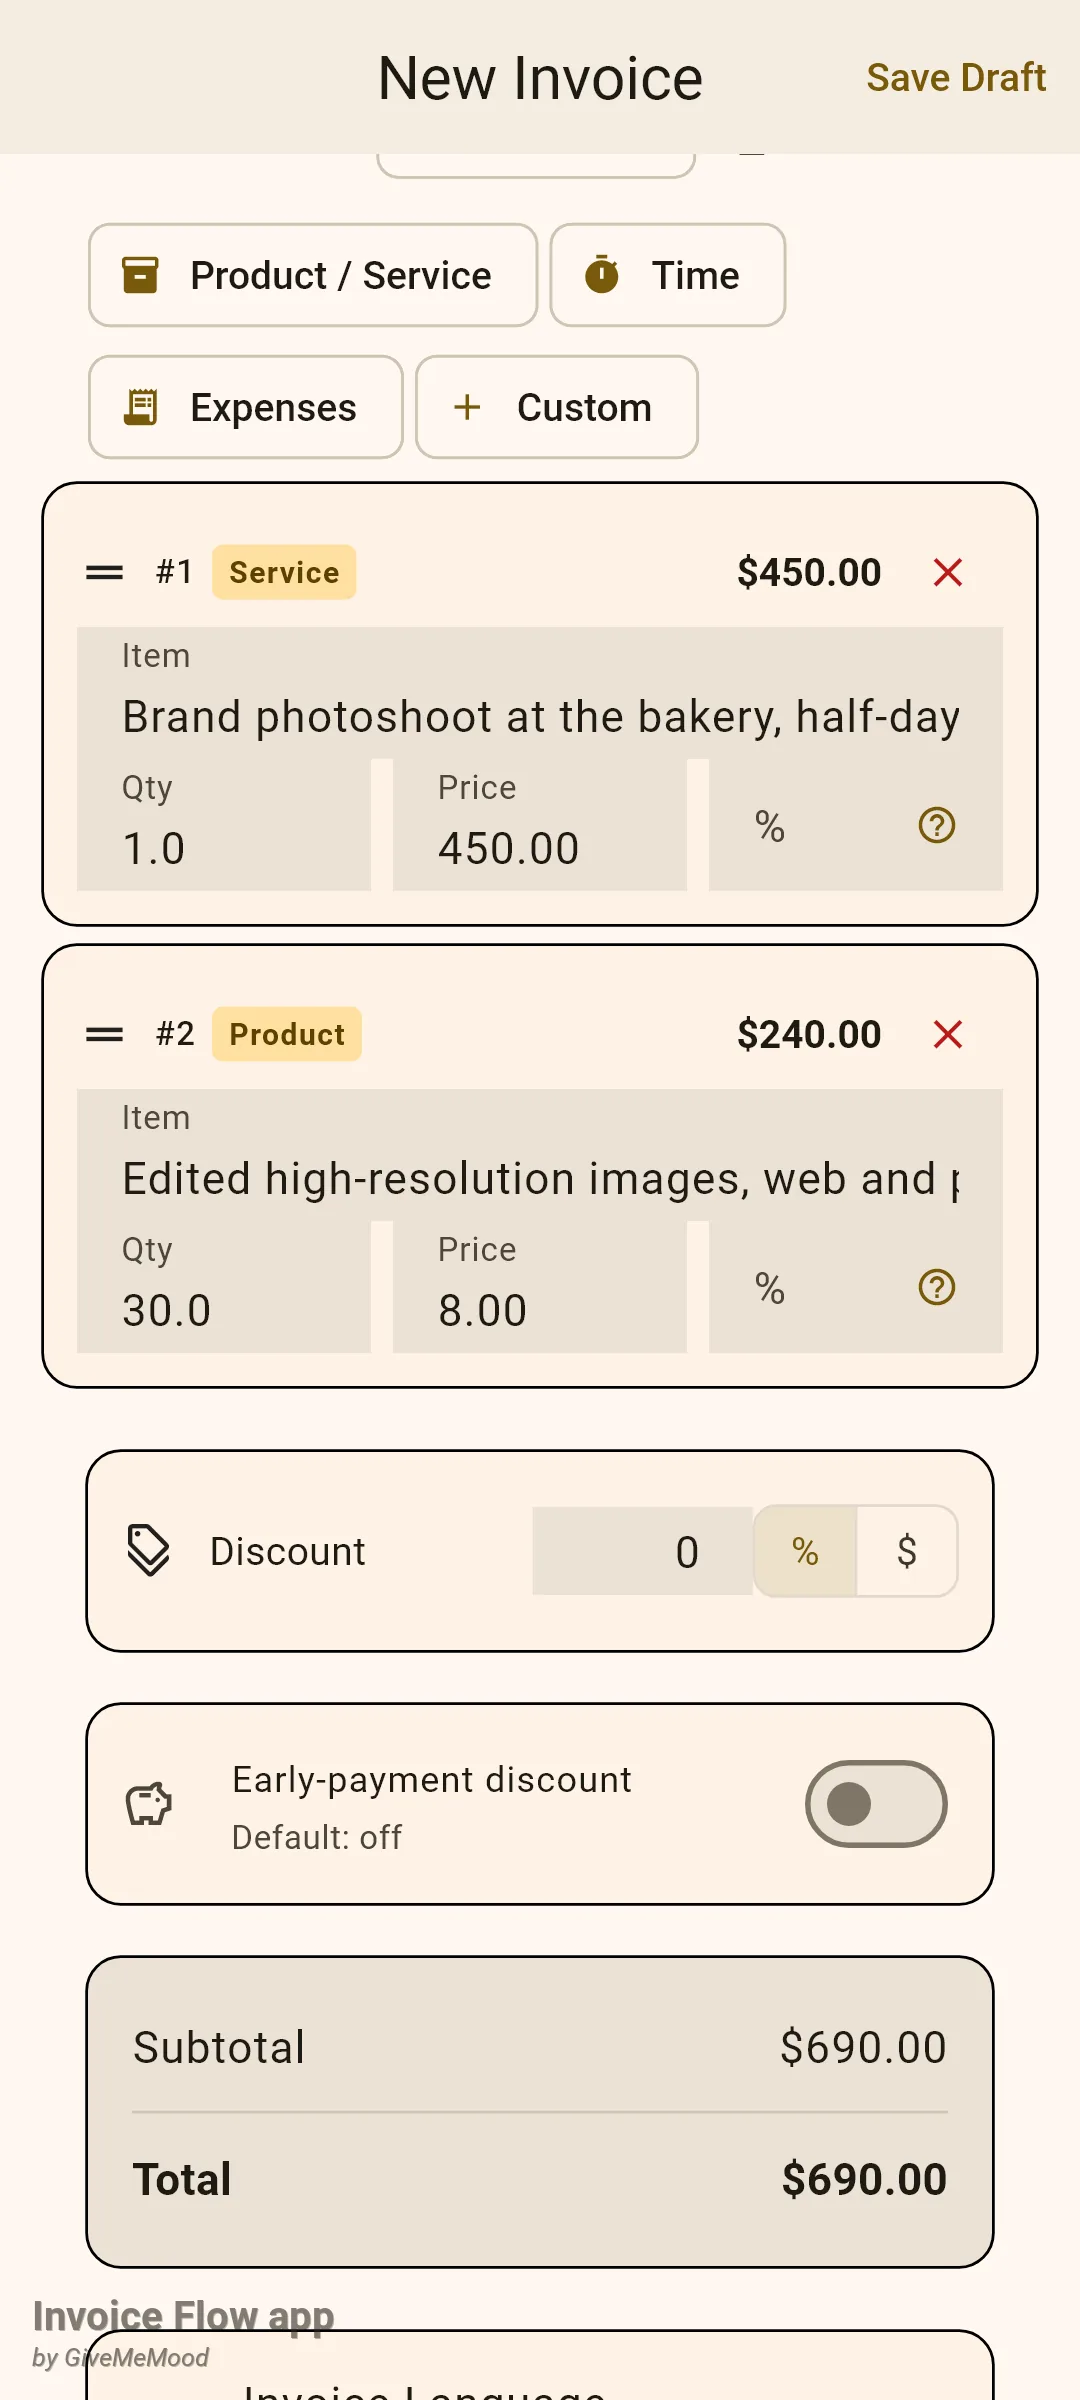
The Product / Service chip opens your saved product library instead of a blank card, and the Time and Expenses chips pull in tracked hours and receipts, all of which are empty on a fresh install. The invoice editor guide walks through every card on this form, including discounts, photo attachments and which profile details to print.
How to pick a template and preview the PDF
The template decides how the PDF looks; the content is the same whichever you pick.
- Still in the editor, scroll to the card Select Template. Its subtitle shows the current choice, Clean — ocean on a new install.
- Tap it. Under Design, tap one of the twelve layouts; Maya picks Creative, which has an accent sidebar. Under Color Palette tap a colour if you want something other than the template's default. Tap Save in the top-right corner to return.
- Tap the full-width Save button at the bottom of the editor (or Save Draft in the top bar). The invoice is stored as a draft and its detail screen opens.
- On the detail screen tap Preview PDF. The page renders exactly as your client will receive it; pinch to zoom in on the details.
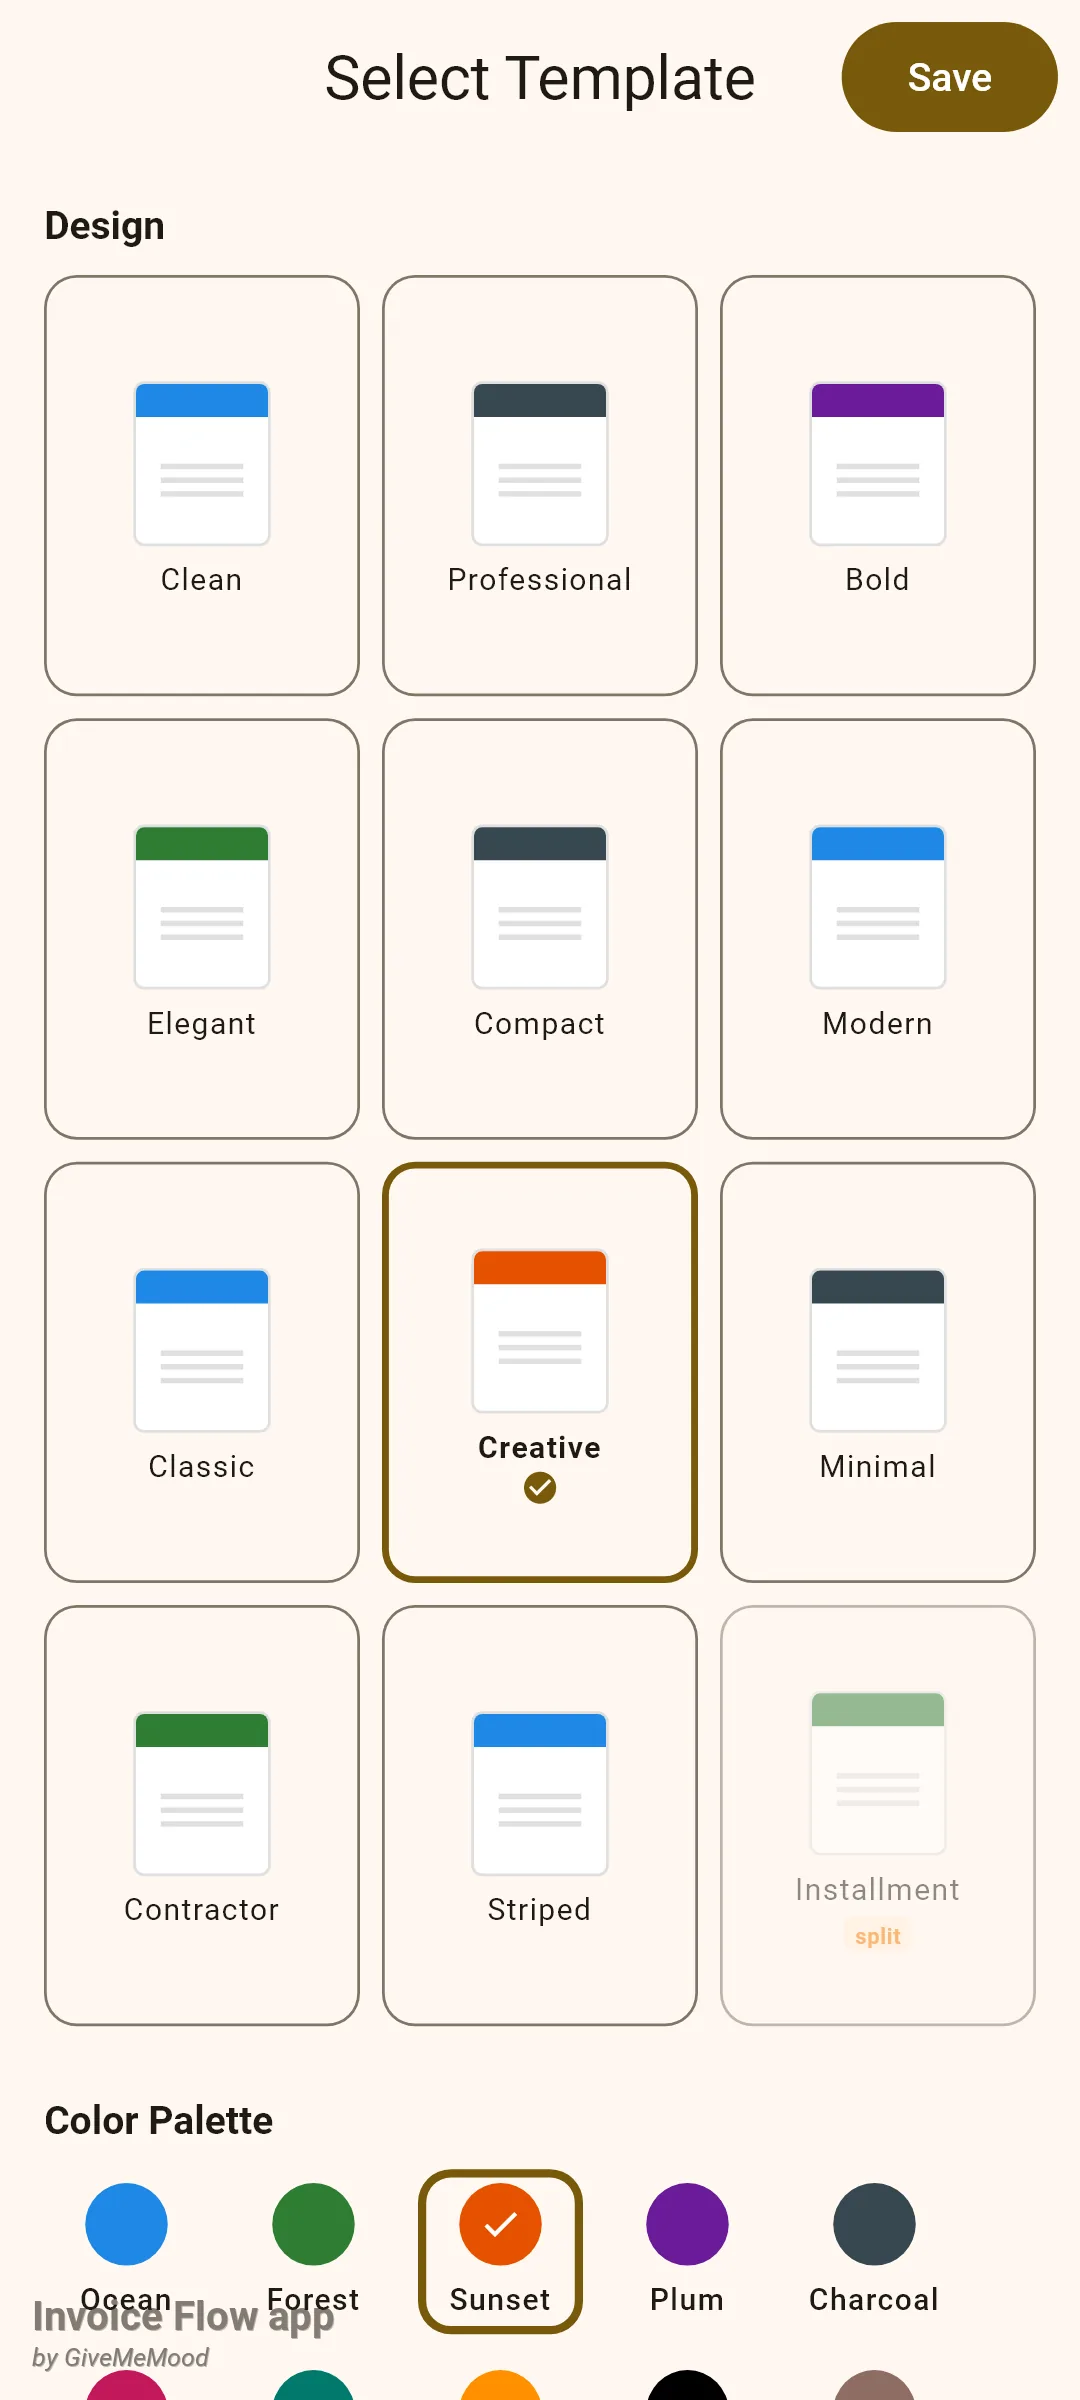
There is no wrong choice here, and you can change the template on a draft as often as you like. The Installment template is dimmed because it is built for split-payment schedules, which this invoice does not have. Palettes, custom colours and fonts are explained in PDF templates, palettes and fonts.
How to share the invoice and mark it sent
- On the preview screen, tap the ⋮ menu in the top-right corner and choose Share & Mark as Sent. This menu item only exists while the invoice is still a draft.
- Pick the app you want to send with from the Android share sheet: your email client, WhatsApp, Drive, anything that accepts a PDF file. The subject and a short message naming the invoice and your company are filled in for you.
- Come back to Invoice Flow. The status badge now reads Sent and a snackbar confirms Invoice marked as sent.
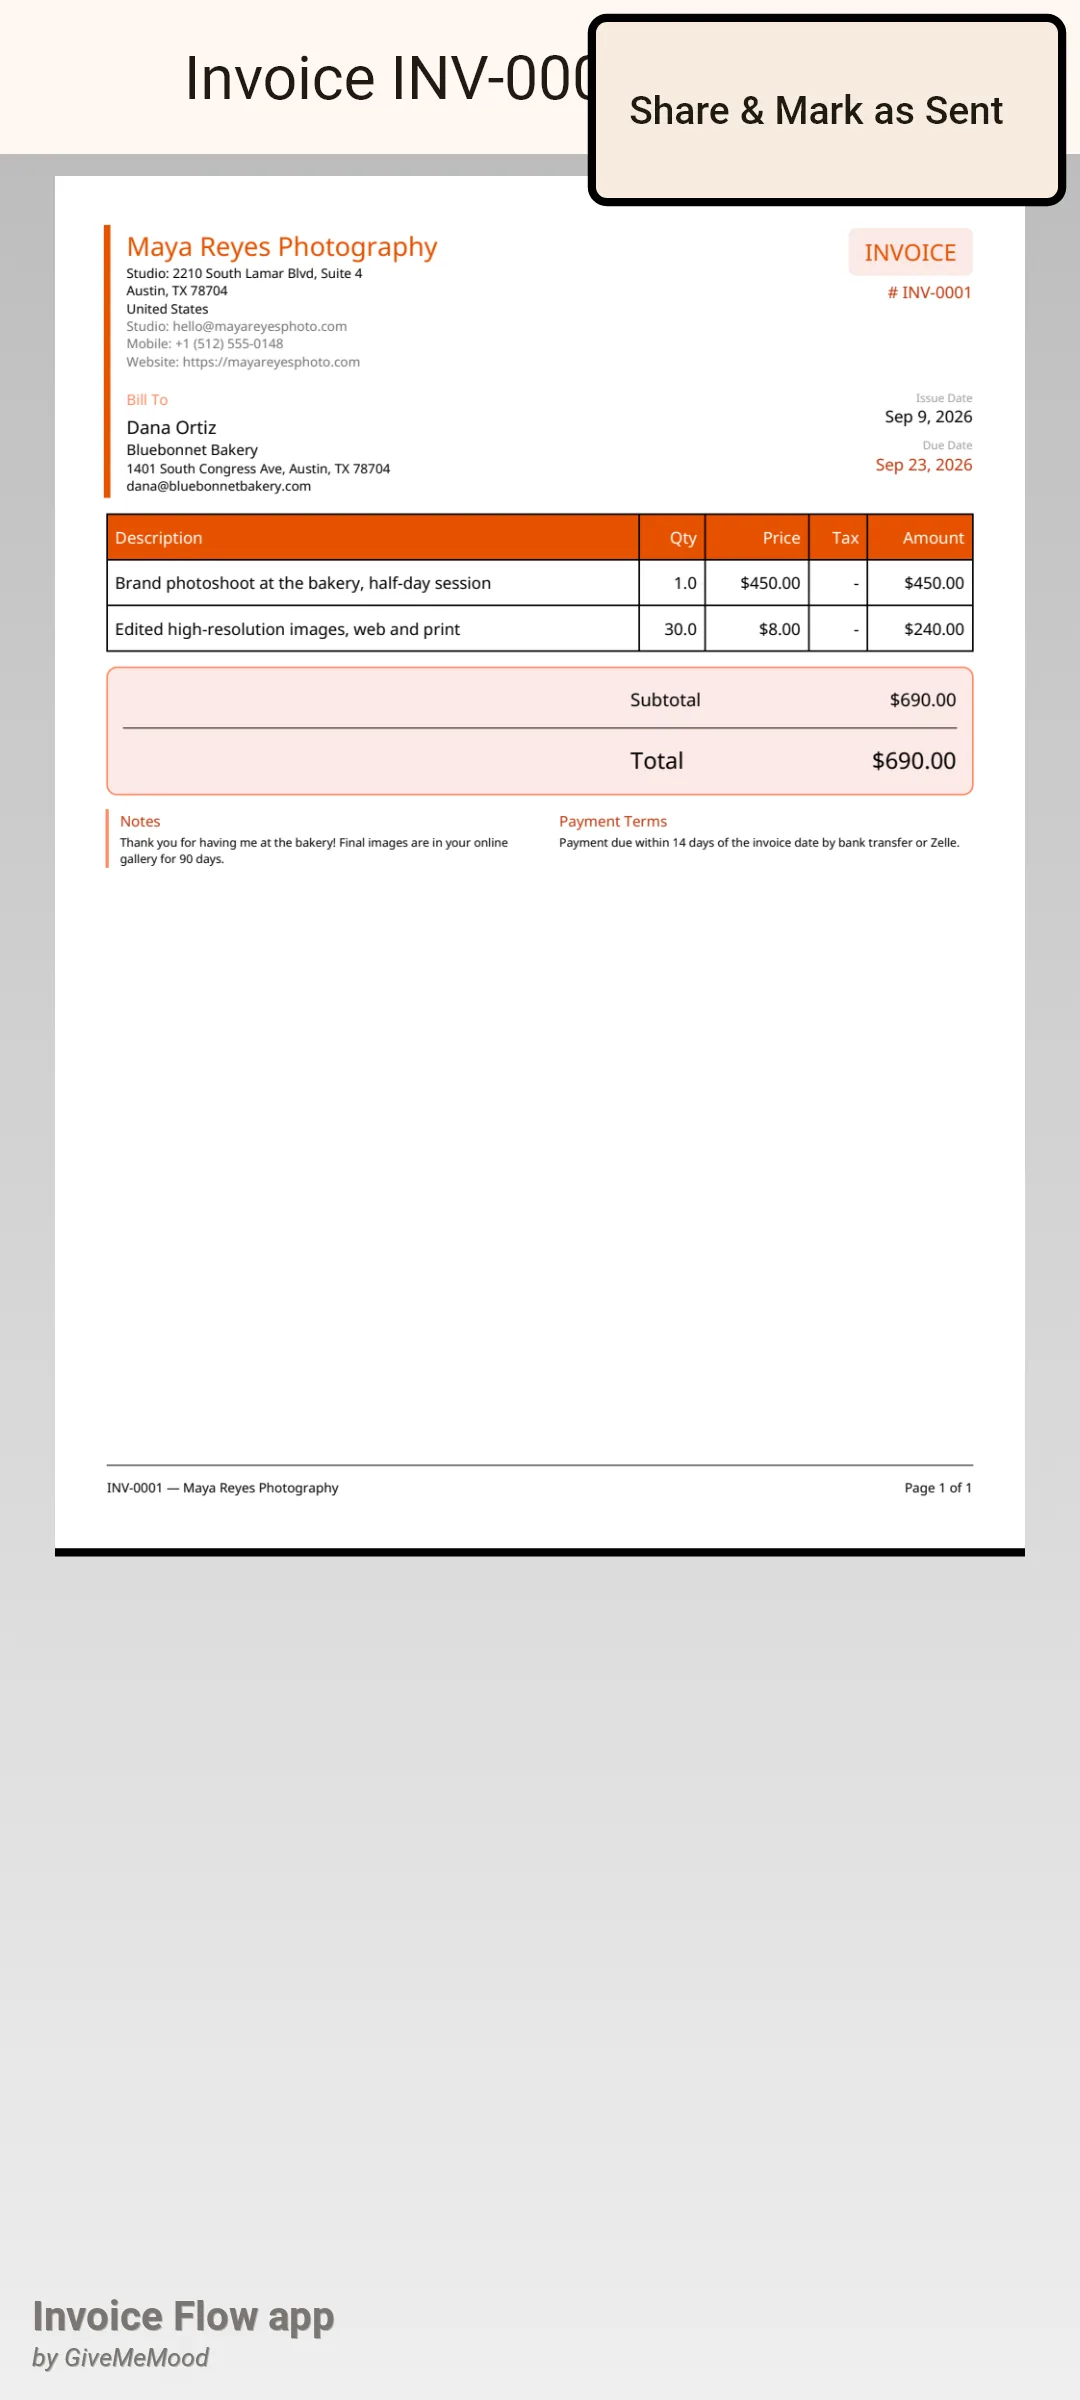
If you want to share the file without changing the status, use the share icon in the top bar instead; the invoice stays a draft and you can mark it sent later from the ⋮ menu on the detail screen. The detail screen’s own menu also offers Email client, which opens the in-app send screen addressed to the email you saved on the client card; see sending invoices by email for templates and attachments.
How to record the payment
Nine days later Dana pays by Zelle. Recording the payment both keeps a ledger and flips the status.
- Open the Documents tab and tap the invoice to open its detail screen.
- Scroll down to the Payments card and tap Record.
- In the Record Payment dialog the Amount is already filled with the remaining balance, here the full $690. Change it only for a partial payment.
- Pick the Payment Method, adjust the date if the money arrived earlier, and type the transaction ID into Reference Number so you can match it to your bank statement later.
- Tap Save Payment. Because nothing is left to pay, the invoice becomes Paid on its own and the progress bar turns green.
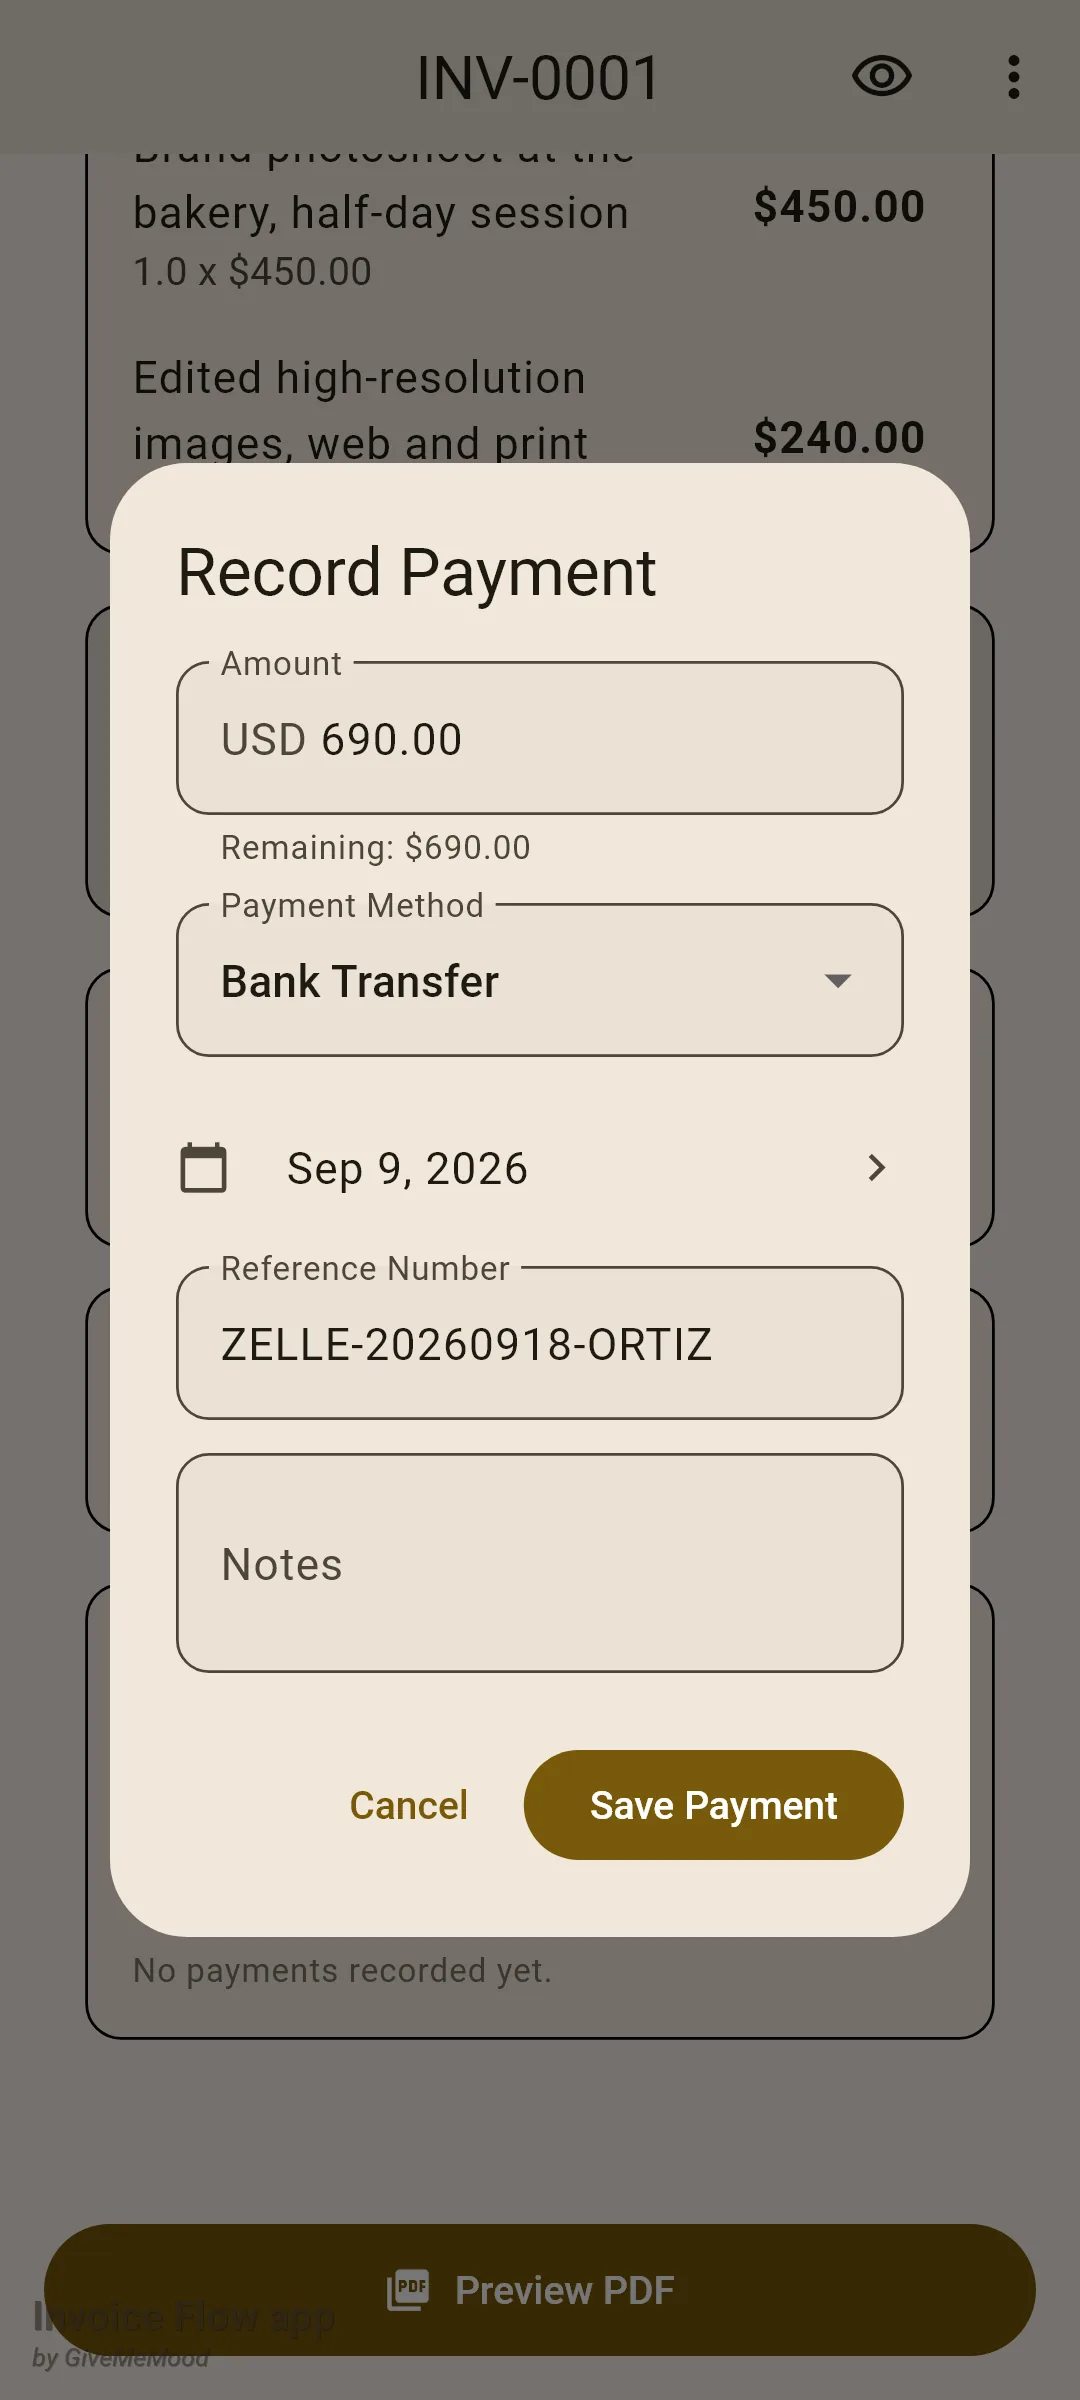
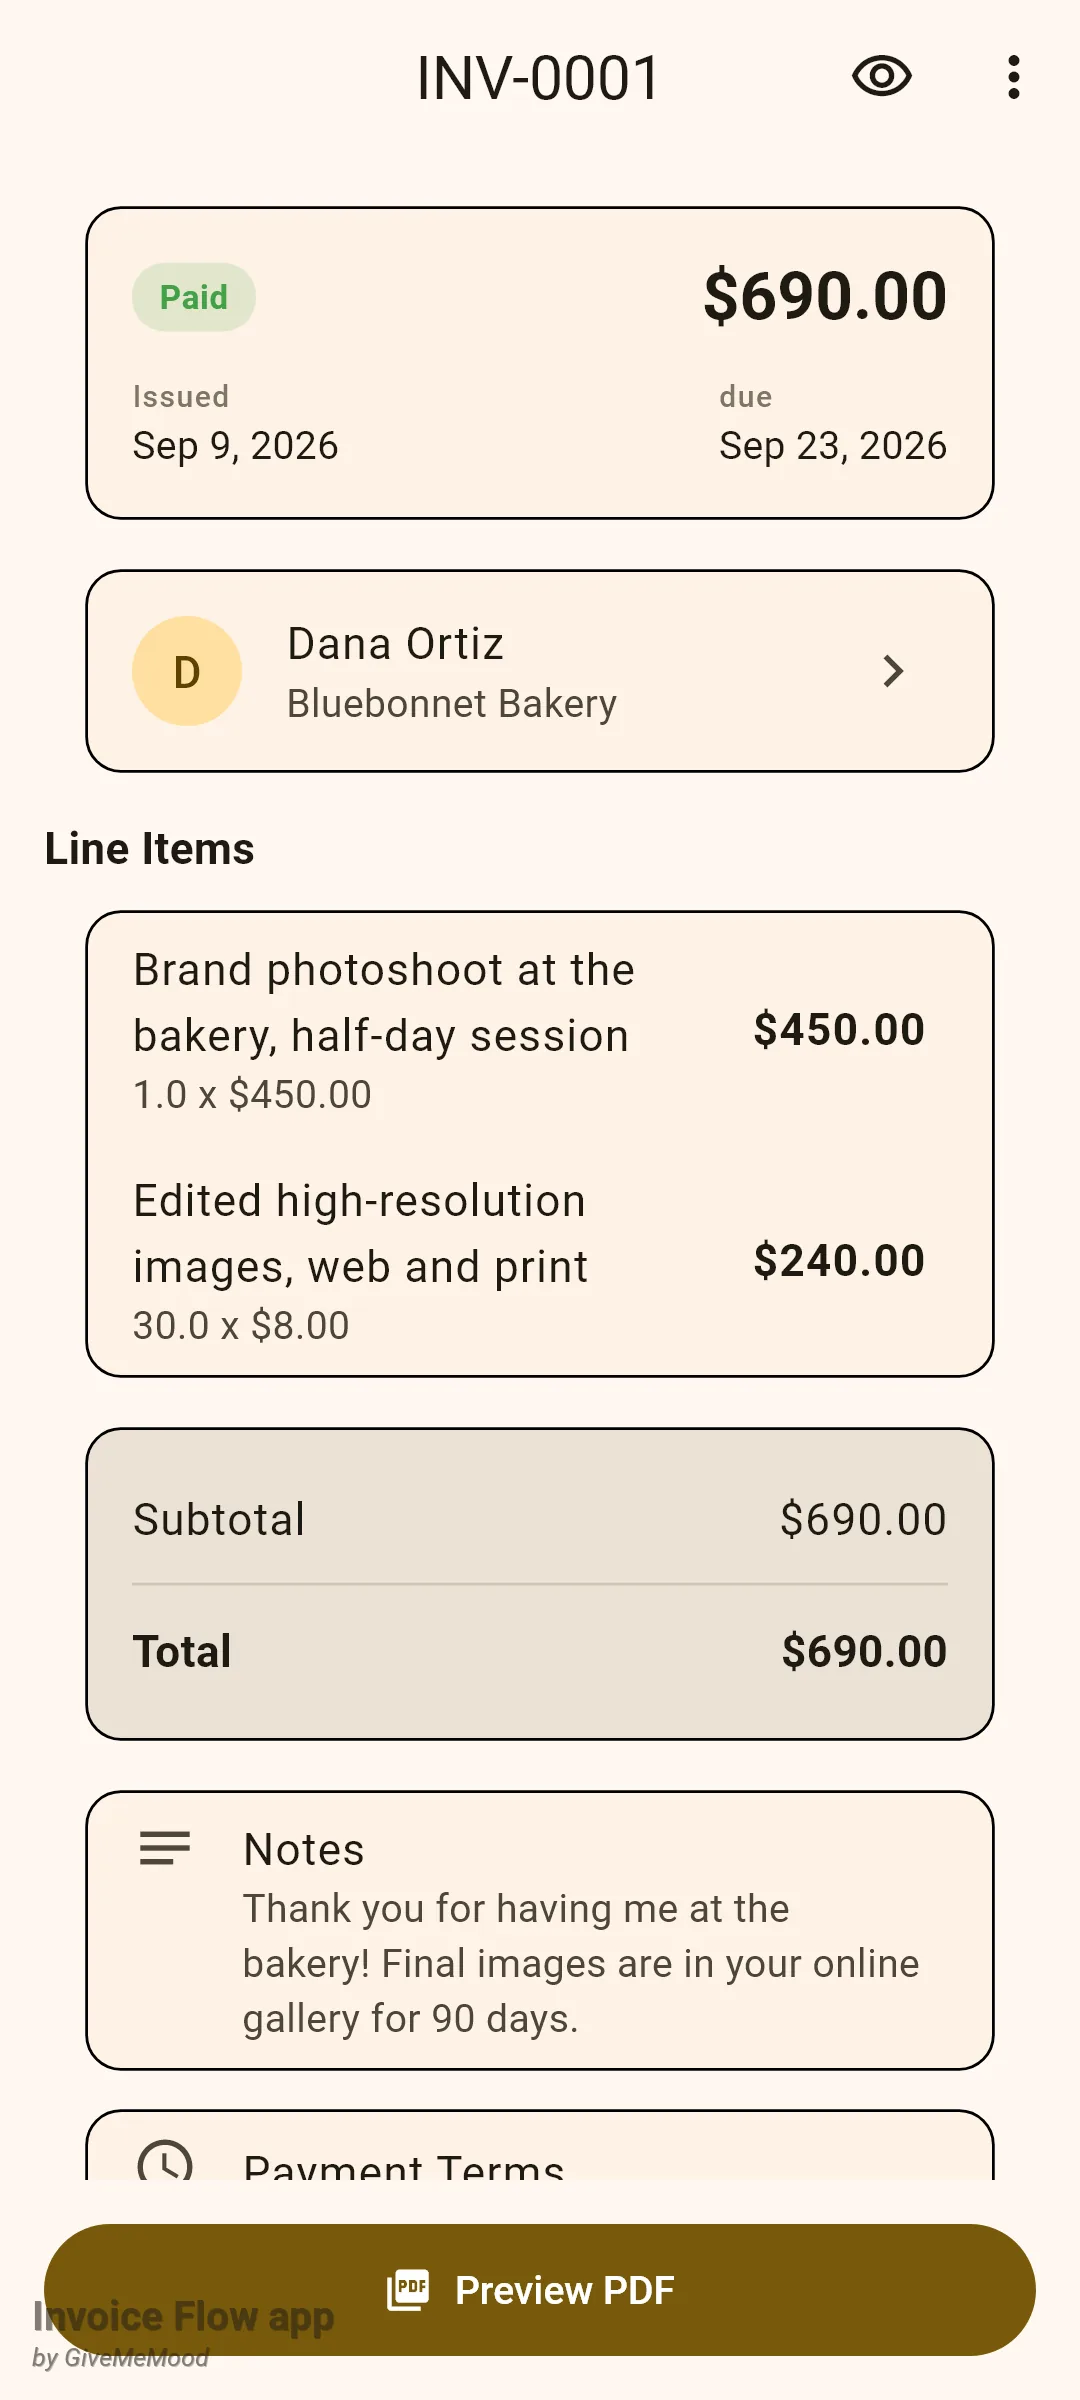
If you would rather not keep a ledger, the ⋮ menu on a sent invoice has a plain Mark as paid entry. It changes the badge and stops reminders but records no amount, so the Payments card will still show the full balance as remaining. For deposits, instalments and corrections, read payments, partial payments and amount due.
Rules and details
- The business name is the only required field on the setup form, and the client name is the only required field on the client form. Everything else is optional and can be filled in later from Settings or the client card.
- Finishing the setup form starts a seven-day trial. During the trial and on a Pro subscription you can save invoices, create clients, and print or share PDFs. Without either, those actions open the subscription screen; viewing and previewing stay free.
- A new invoice takes the default profile, its default invoice series, the series or profile currency, today’s issue date and a due date 30 days later. Changing the issue date to a day after the current due date pushes the due date forward by 30 days again.
- Saving always stores the invoice as a draft, whether you use Save Draft in the top bar or Save at the bottom. Saving is blocked with a snackbar if no client is selected (Please select a client) or there are no line items (Add at least one line item), and each line needs a description.
- Line amounts are quantity times price rounded to cents; tax is applied per line from the % field; a discount, if you enter one, is taken before tax. A line whose quantity cannot be parsed counts as 1, a price that cannot be parsed counts as 0.
- Invoice numbers come from the profile’s numbering series and are unique per profile. If you type your own number and it collides with an existing one, the app bumps the counter and retries.
- Share & Mark as Sent shares first and then sets the status, so a cancelled share sheet leaves the invoice a draft. Once an invoice is sent, opening it from the detail screen shows a read-only view; to change it, revert it to draft from the ⋮ menu or duplicate it.
- Recording a payment sets the invoice to Paid only when the remaining balance drops to a cent or less, and only for payments in the invoice’s own currency. Deleting that payment later reopens the balance and puts the status back to Sent.
- An invoice that is Sent and past its due date is displayed as Overdue automatically; nothing needs to be scheduled.
- Everything shown here is stored on the phone. Back the data up from Settings before you switch devices.
Tips
Related guides
- Set up your business profile - logos, tax IDs, numbering series, payment-term presets and second profiles.
- The invoice editor - every card of the form, from tax presets to photo attachments.
- Payments, partial payments and amount due - deposits, instalments and what the client sees.