 EN
EN  العربية
  Български
  Čeština
  Dansk
Dansk  Deutsch
  Ελληνικά
  Español
  Suomi
Suomi  Français
  עברית
עברית  हिन्दी
  Bahasa Indonesia
  Italiano
  日本語
日本語  한국어
한국어  Bahasa Melayu
  Nederlands
  Norsk
Norsk  Polski
  Português
  Română
  Русский
  Svenska
  Kiswahili
  ไทย
ไทย  Türkçe
  Українська
  Tiếng Việt
  中文
中文 User guide
Sending invoices by email
Write reusable email templates with placeholders, send the text from your mail app or over SMTP, attach the PDF through the share sheet and mark the invoice as sent.
Emailing an invoice in Invoice Flow is two separate actions, and understanding that split is the whole trick. The first action produces the words: a subject line and a body built from a template, with the client’s name, the invoice number, the total and the due date filled in automatically. The second action produces the file: the PDF that the client will actually open, forward to accounts payable and pay against. The app does the first through Email client on the invoice’s menu and the second through the share button on the PDF preview. Nothing in the app sends the PDF and the templated text together in one message, so this guide is honest about which button does what, and shows a sensible way to combine them.
The example business is Willow & Root Yoga Studio in Portland, Oregon. Its owner, Hannah Whitfield, runs on-site lunchtime classes for corporate clients and invoices each of them once a month in US dollars. Every invoice goes to an accounts-payable mailbox rather than a person, so a consistent subject line that includes the invoice number matters more than a friendly tone.
What you see on the screen
Three screens are involved.
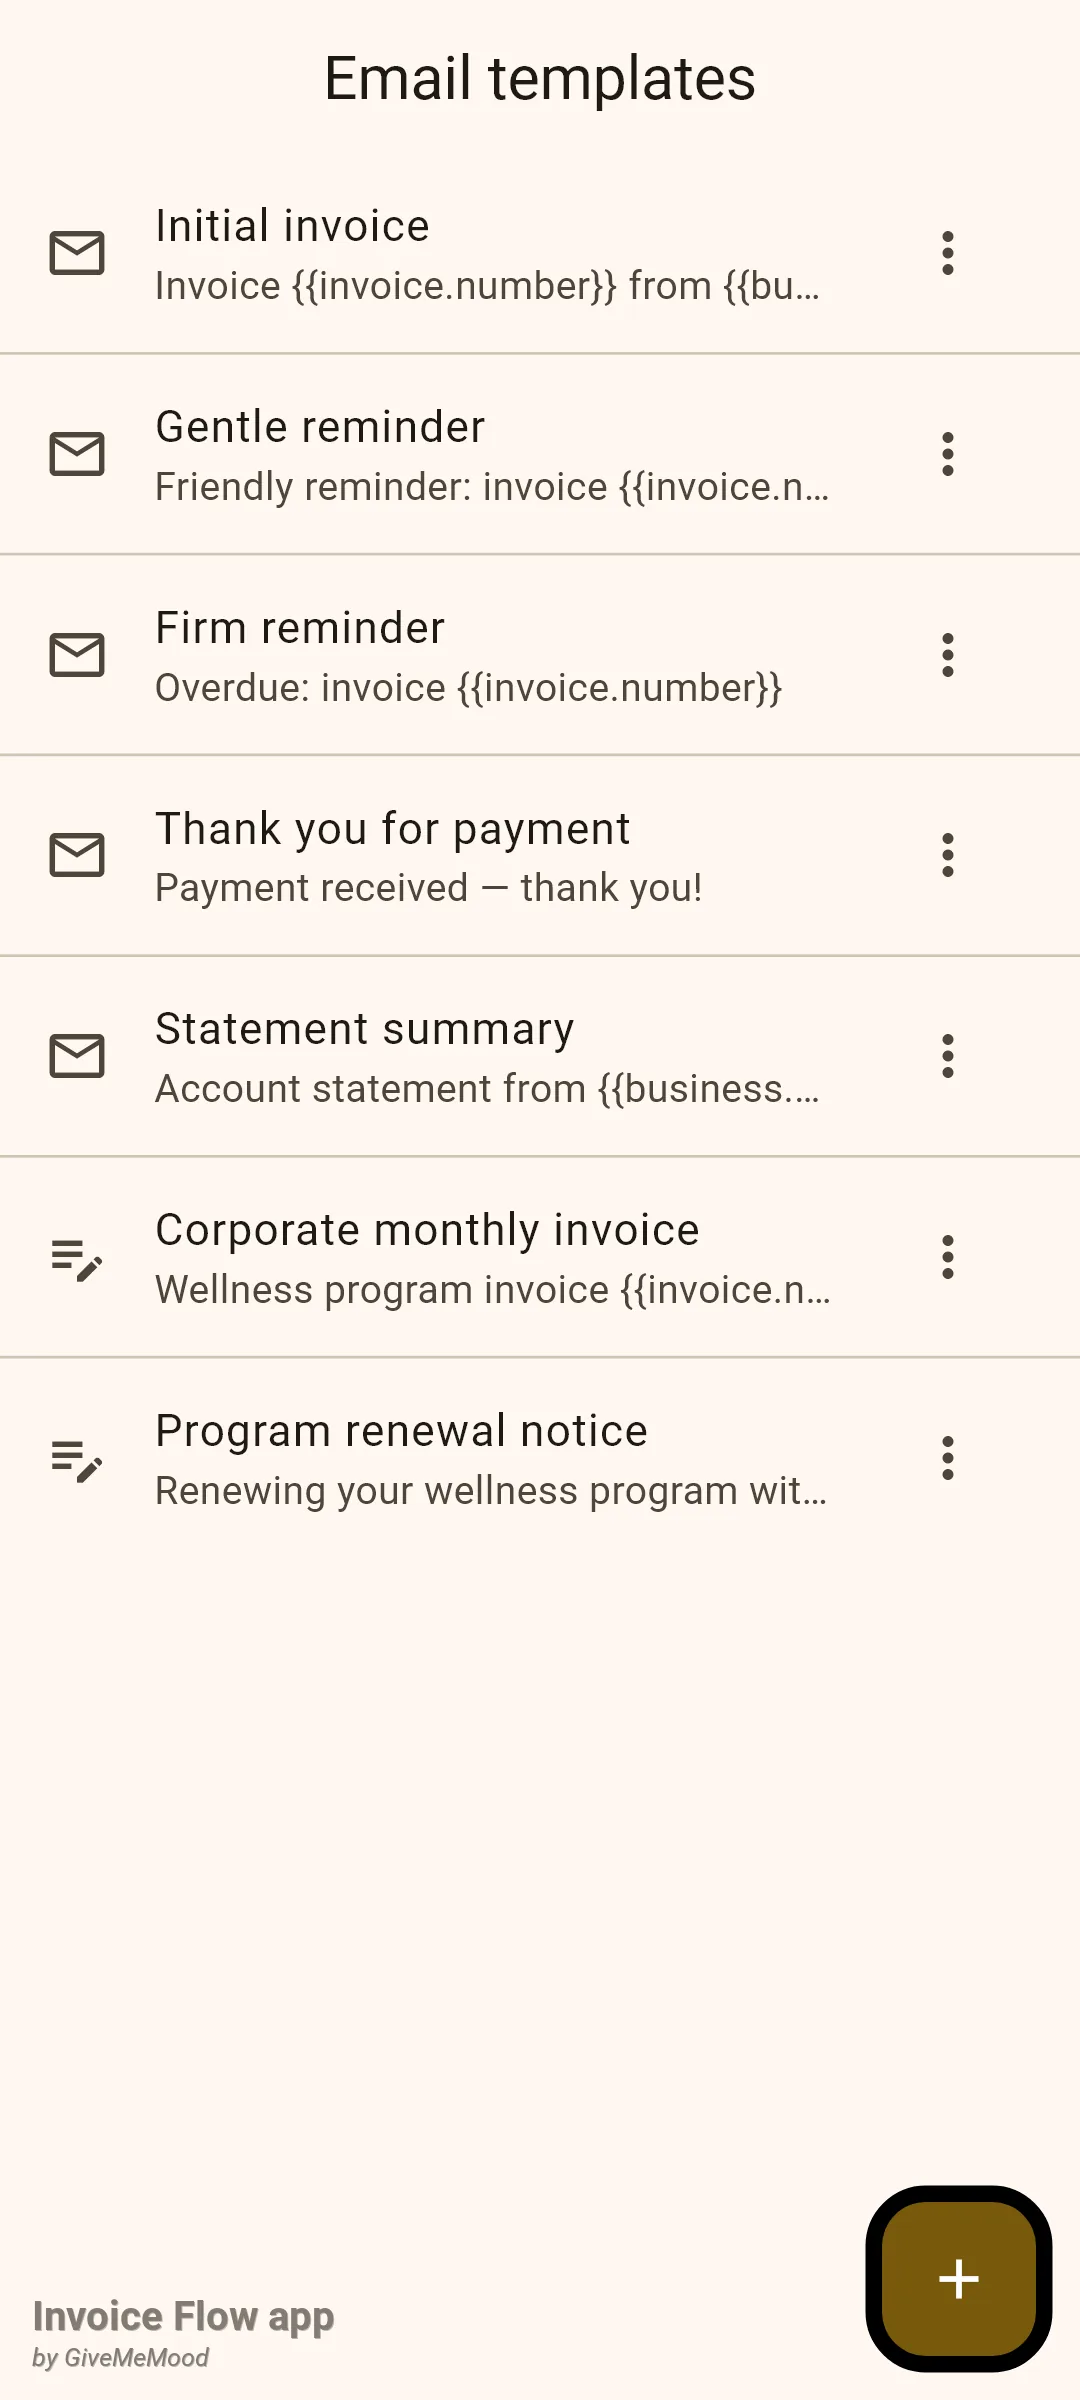
The templates live under Settings, in the Invoice Settings section, behind the tile Email templates (subtitle “Subject + body presets for client emails”). The screen is a plain list: an envelope icon marks the five built-in templates, a pencil-on-lines icon marks the ones you created, and every row shows the template name with its subject underneath. Each row has a three-dot menu with Duplicate and Delete, and a + button in the corner starts a new template.
Right below it in the same settings section sits Email sending (subtitle “Choose how invoice emails are sent”). This is where you pick between System mail app (mailto) and SMTP server (auto-send), and where the SMTP host, port and credentials go if you choose the second option.
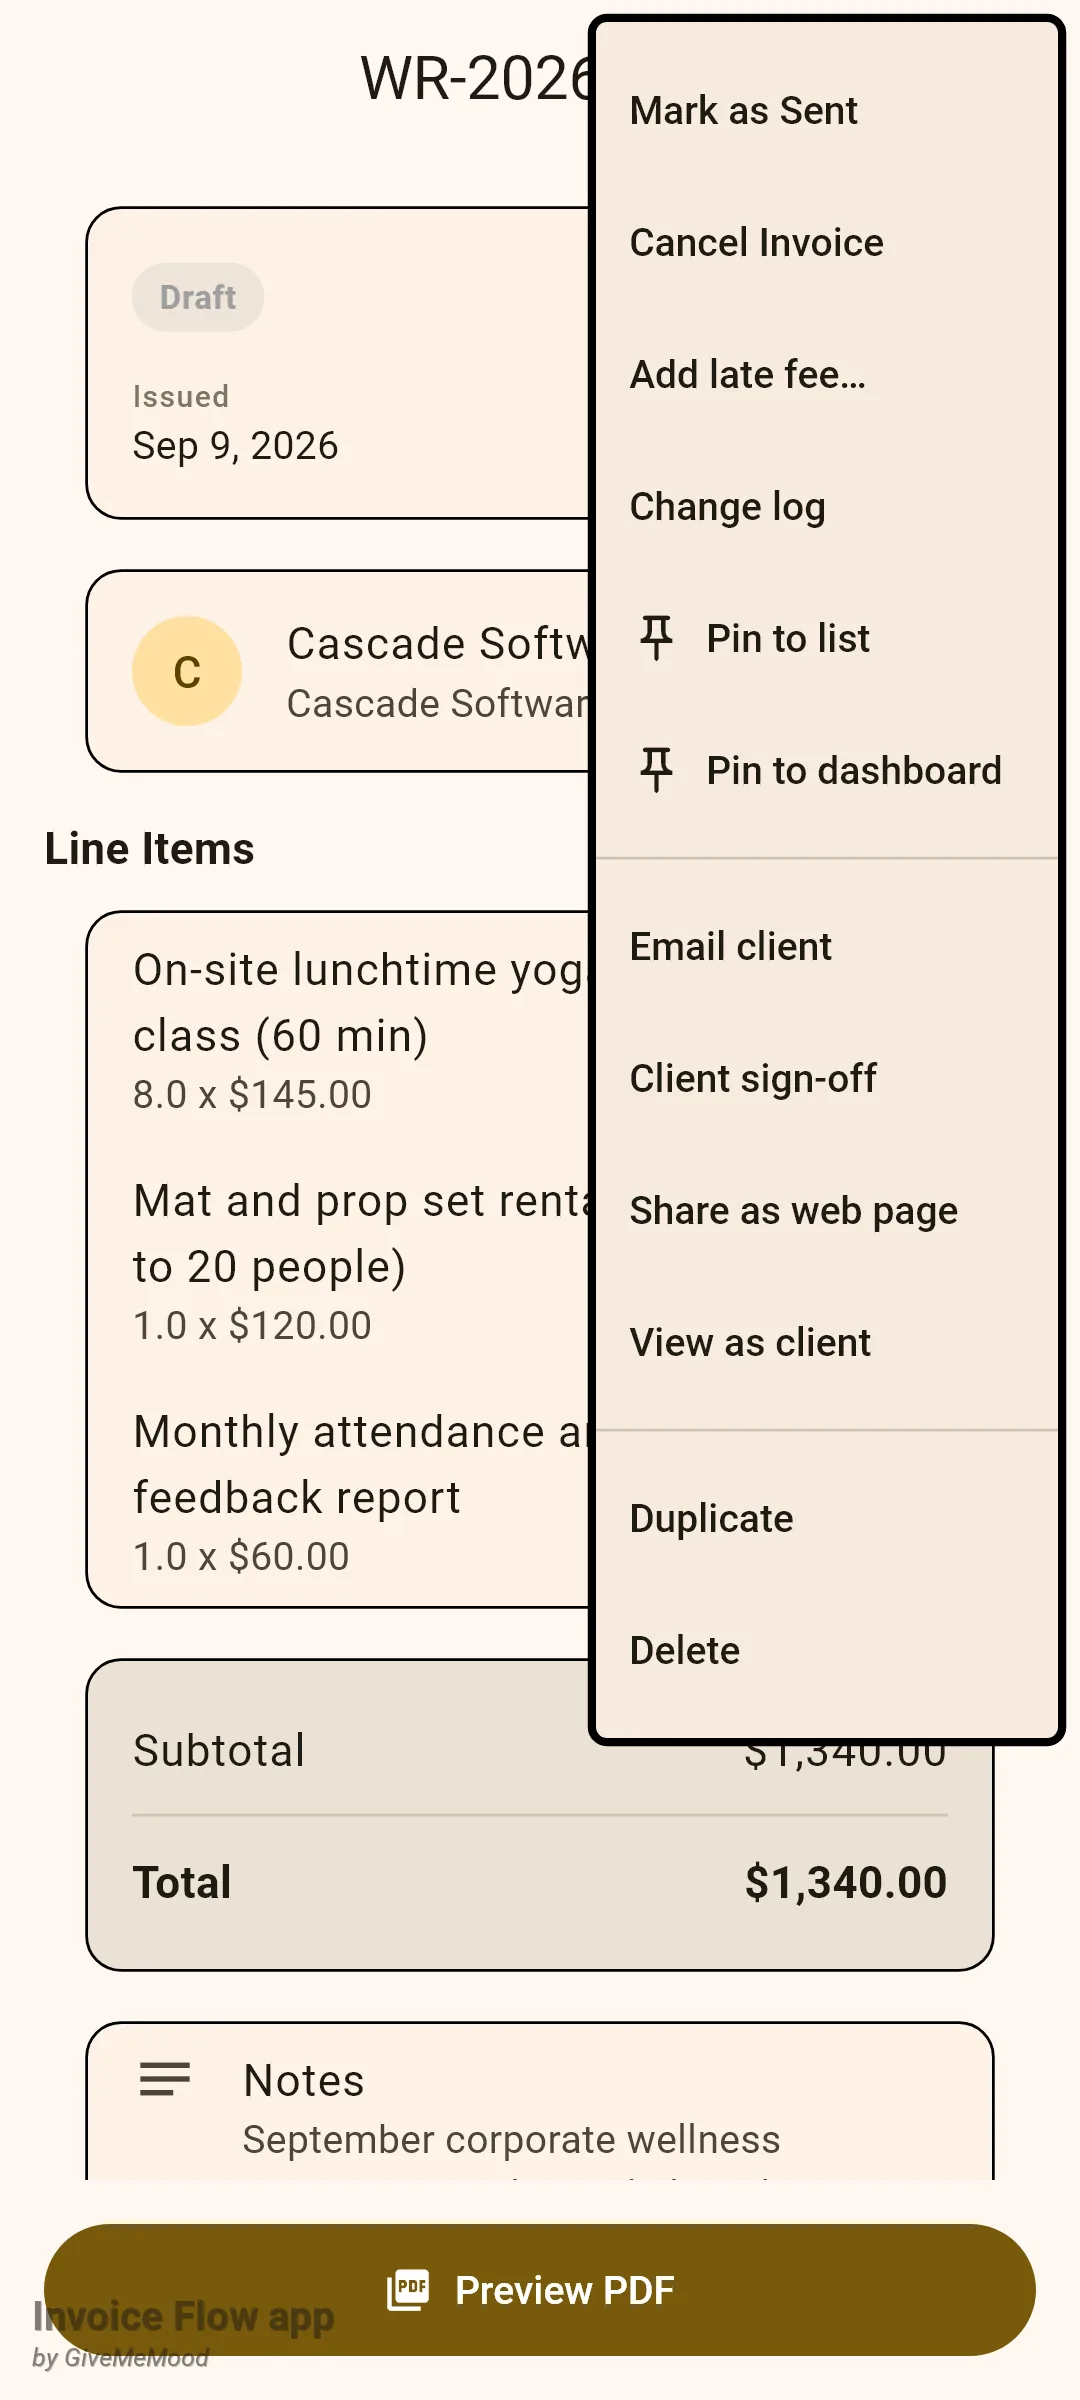
The third screen is the invoice itself. Open the Documents tab, tap an invoice, and use the three-dot menu in the top-right corner. The second group of that menu contains Email client and Share as web page. For a draft, the very first item is Mark as Sent. At the bottom of the invoice, the wide Preview PDF button opens the PDF viewer, whose app bar holds the print icon, the share icon and, for drafts only, a menu with Share & Mark as Sent.
How to write a template with placeholders
The built-in templates are fine for a first send, but Hannah wants a subject that a corporate mailroom can file without opening the message, and a body that lists the sessions. Editing a template is a Pro feature; opening the list is not.
- Open Settings, scroll to Invoice Settings and tap Email templates.
- Tap + to start from scratch, or tap an existing row to change it in place.
- Type a Template name. It only appears in the app's own lists, never in the email.
- Type the Subject. Put the cursor where the invoice number should go and tap the invoice.number chip under Insert variable.
- Tap into Body and write the message, inserting chips such as client.name, invoice.total, invoice.dueDate and invoice.items as you go.
- Turn on Live preview to see the result with sample values, then tap Save.
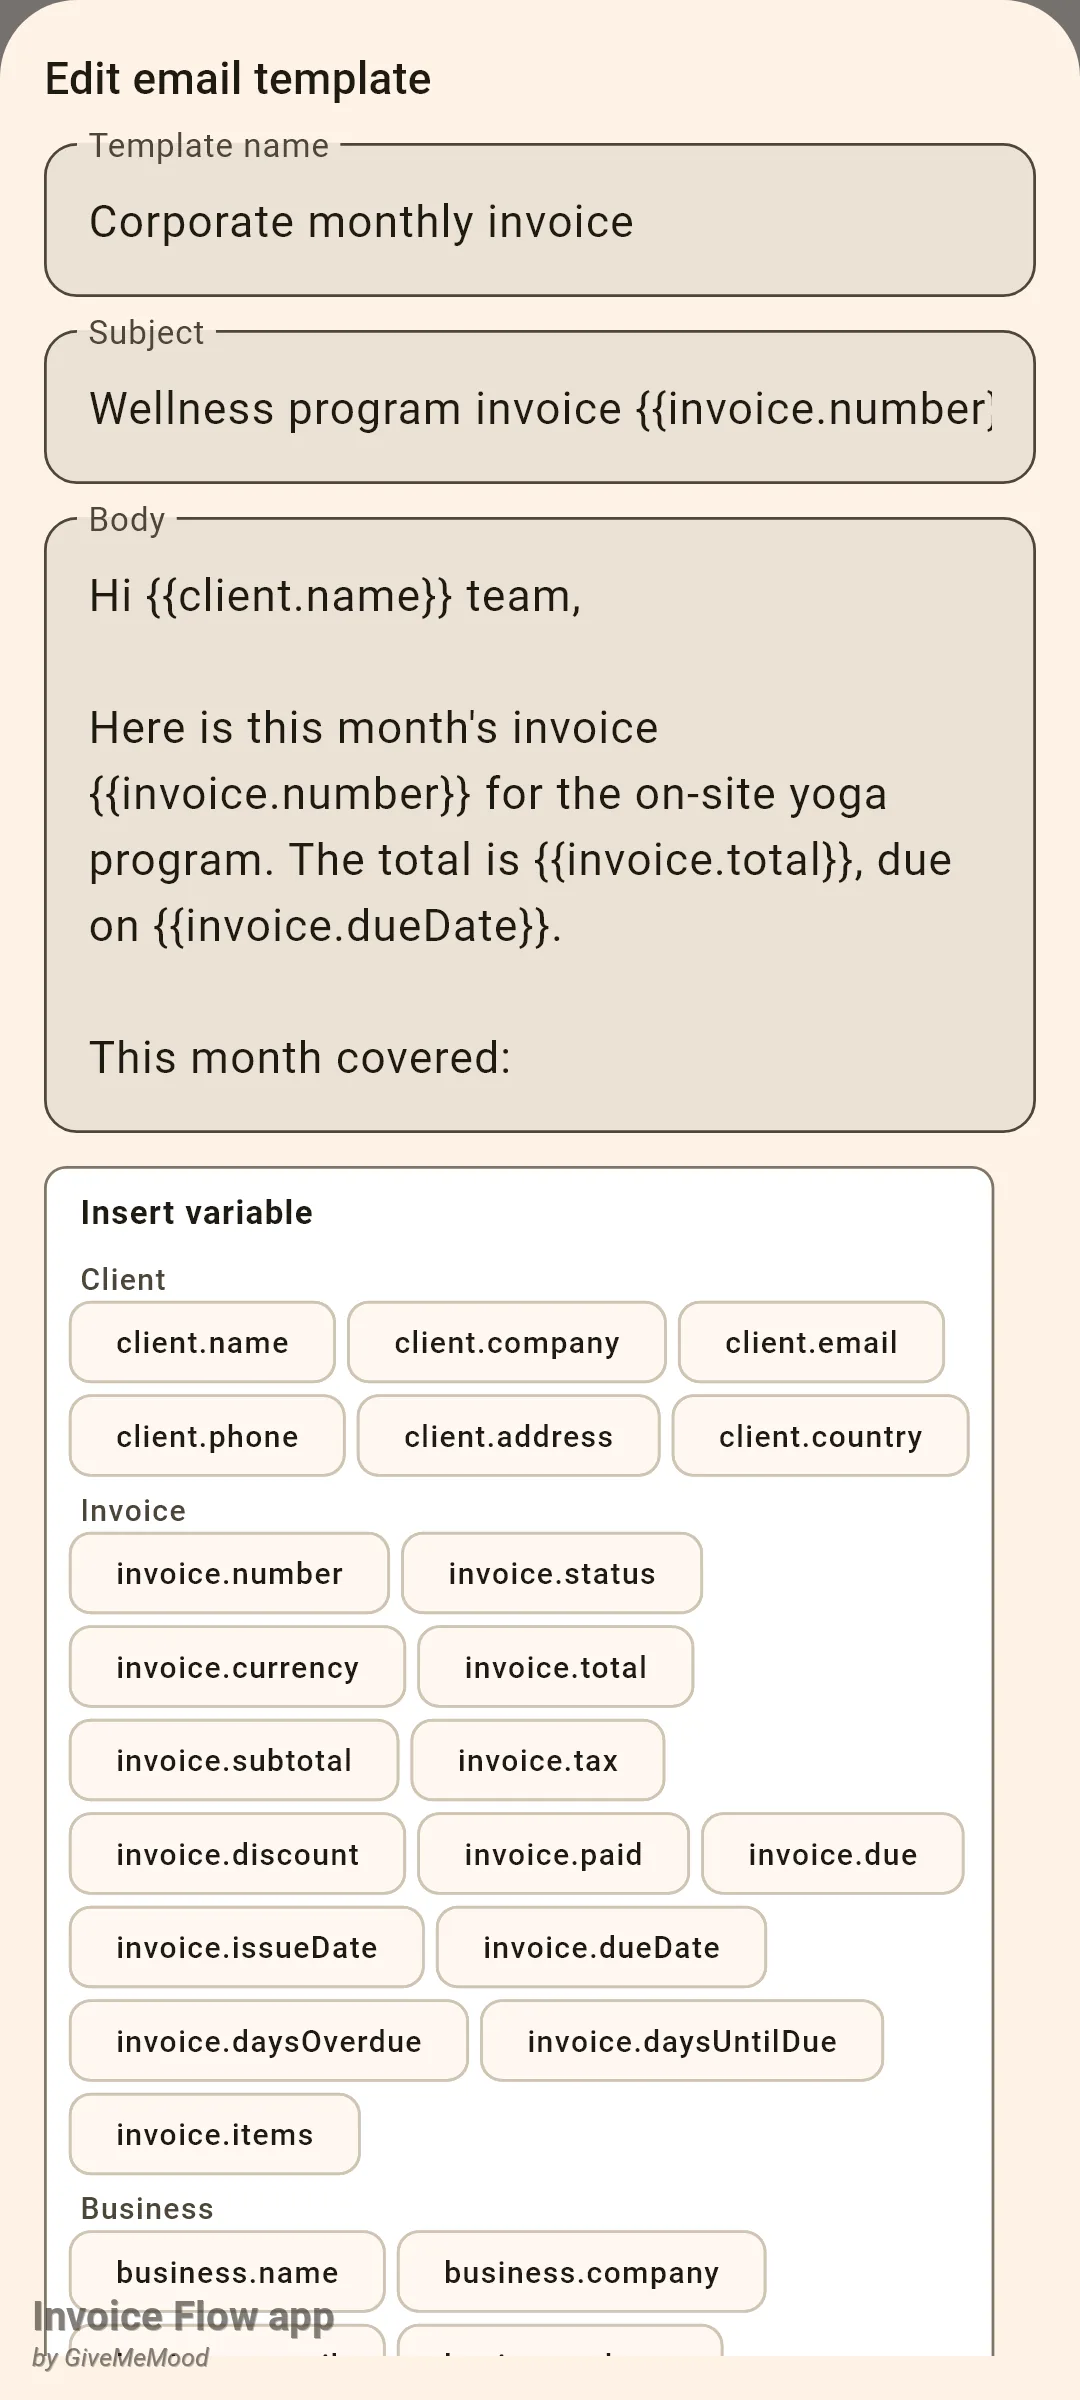
A placeholder is the chip label wrapped in double curly braces, so tapping client.name types {{client.name}}. The chip lands in the field that most recently had focus; if you have not tapped either field yet, it goes into the body. You can also type the braces by hand. The picker groups the available values into Client, Invoice, Business and Other:
| Group | Placeholders |
|---|---|
| Client | client.name, client.company, client.email, client.phone, client.address, client.country |
| Invoice | invoice.number, invoice.status, invoice.currency, invoice.total, invoice.subtotal, invoice.tax, invoice.discount, invoice.paid, invoice.due, invoice.issueDate, invoice.dueDate, invoice.daysOverdue, invoice.daysUntilDue, invoice.items |
| Business | business.name, business.company, business.email, business.phone, business.address, business.website, business.taxId |
| Other | lateFee.accrued, today |
Money placeholders are formatted in the invoice’s currency, dates use the app’s short date format, and invoice.items expands into a bullet list with one line per item showing the description, quantity and unit price. invoice.due is the amount still owed, not the due date; the date is invoice.dueDate.
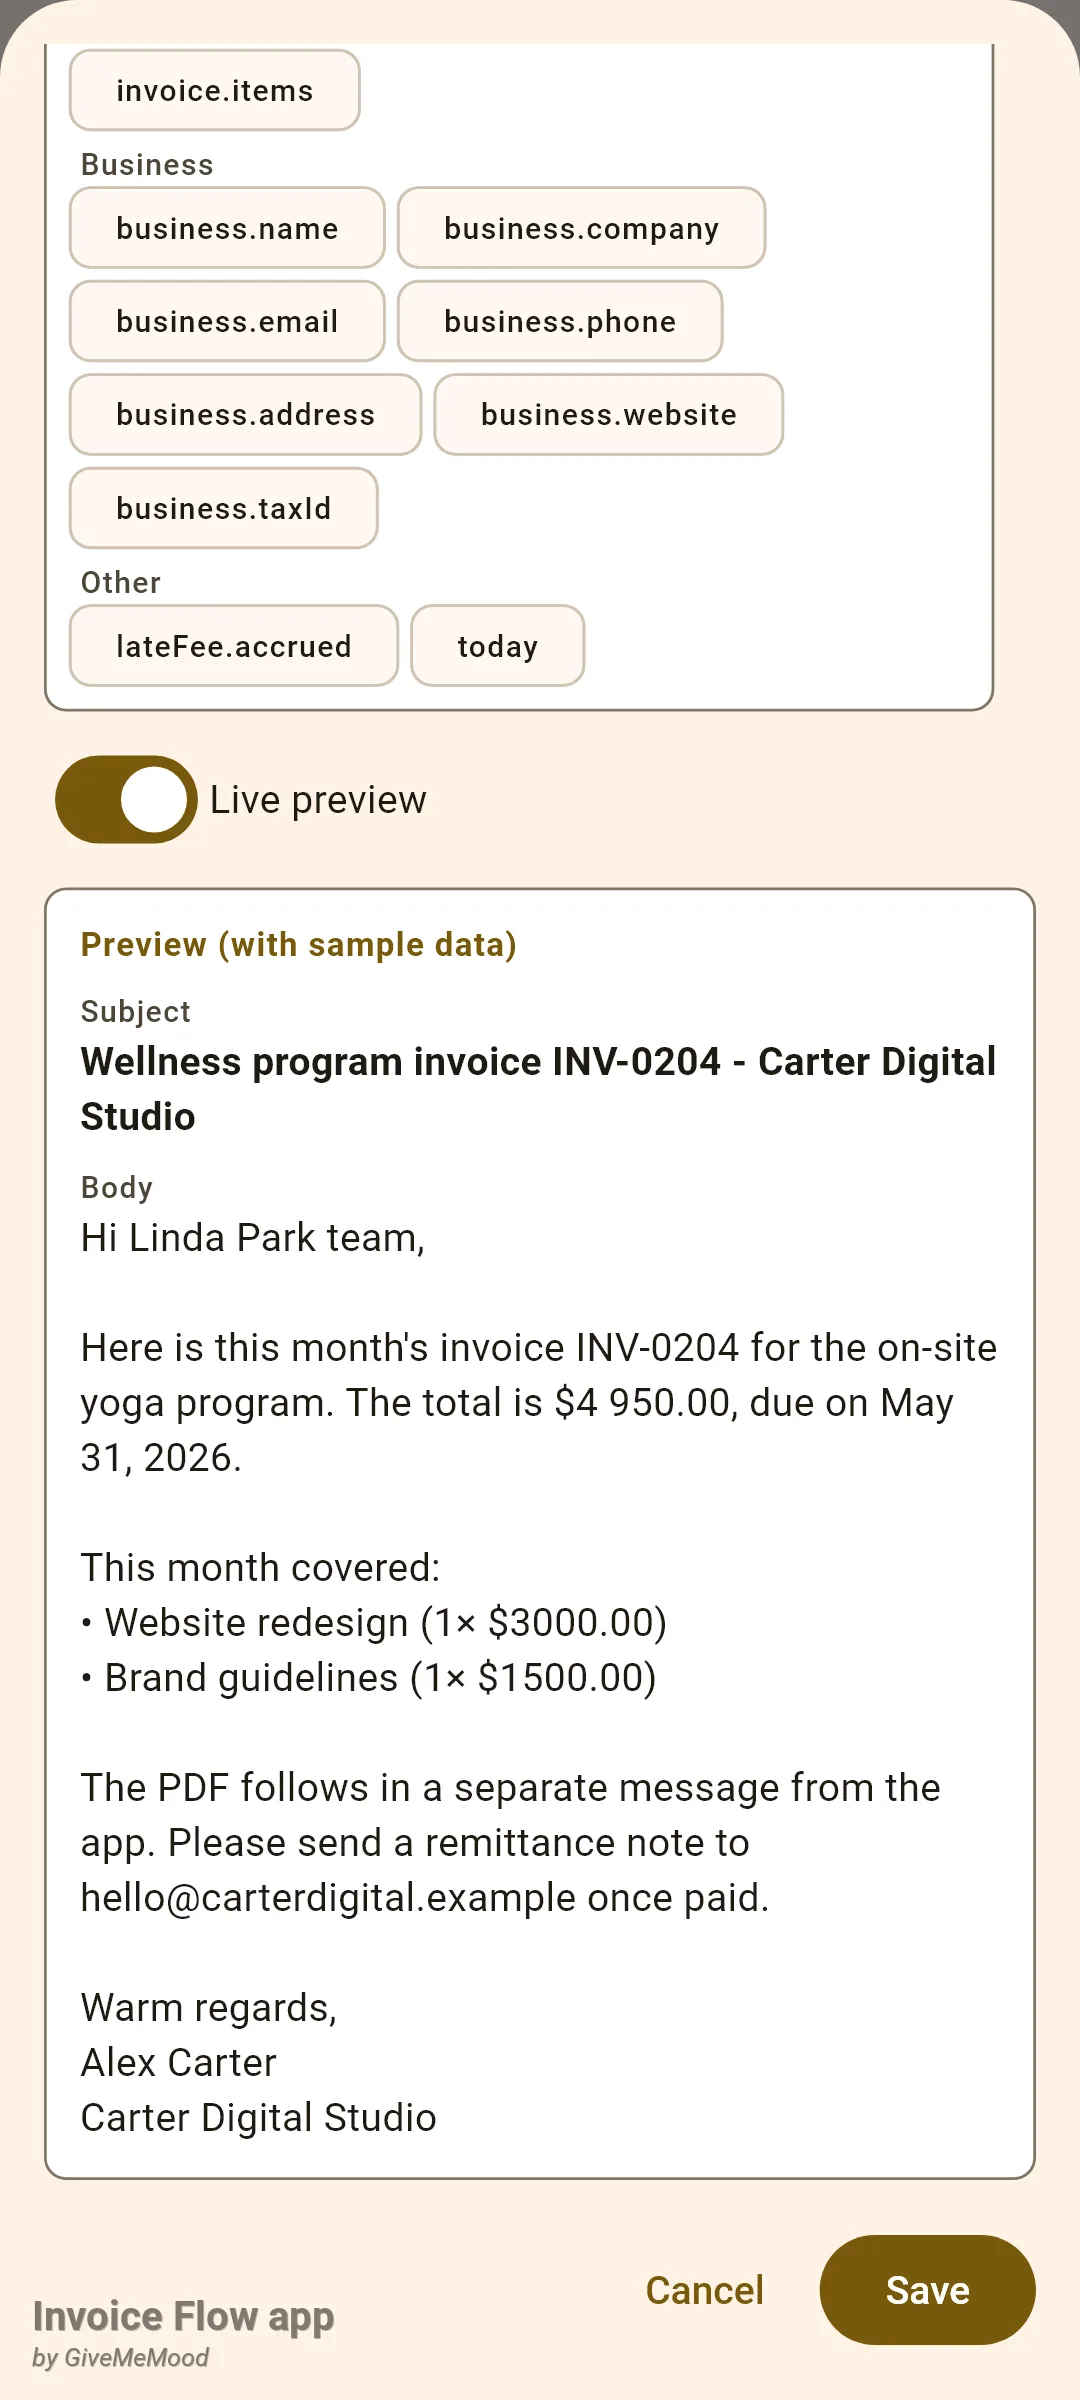
The preview is deliberately generic. It substitutes a fixed sample client, “Linda Park” at “Riverstone Capital”, invoice “INV-0204” for “$4 950.00”, and a sample business called “Carter Digital Studio”. Your own name and totals only appear at sending time, when the template is rendered against a real invoice.
How to email the text from the invoice
With the template saved, sending the message takes four taps. This path sends words only; the PDF is covered in the next section.
- Open the invoice from the Documents tab.
- Tap the three-dot menu in the top-right corner and choose Email client.
- In the Choose a template sheet, tap the template you want.
- If your sending method is the system mail app, the compose window of your mail app opens with the recipient, subject and body filled in; review it and tap its own Send button. If your method is SMTP, the app sends immediately and shows Email sent.
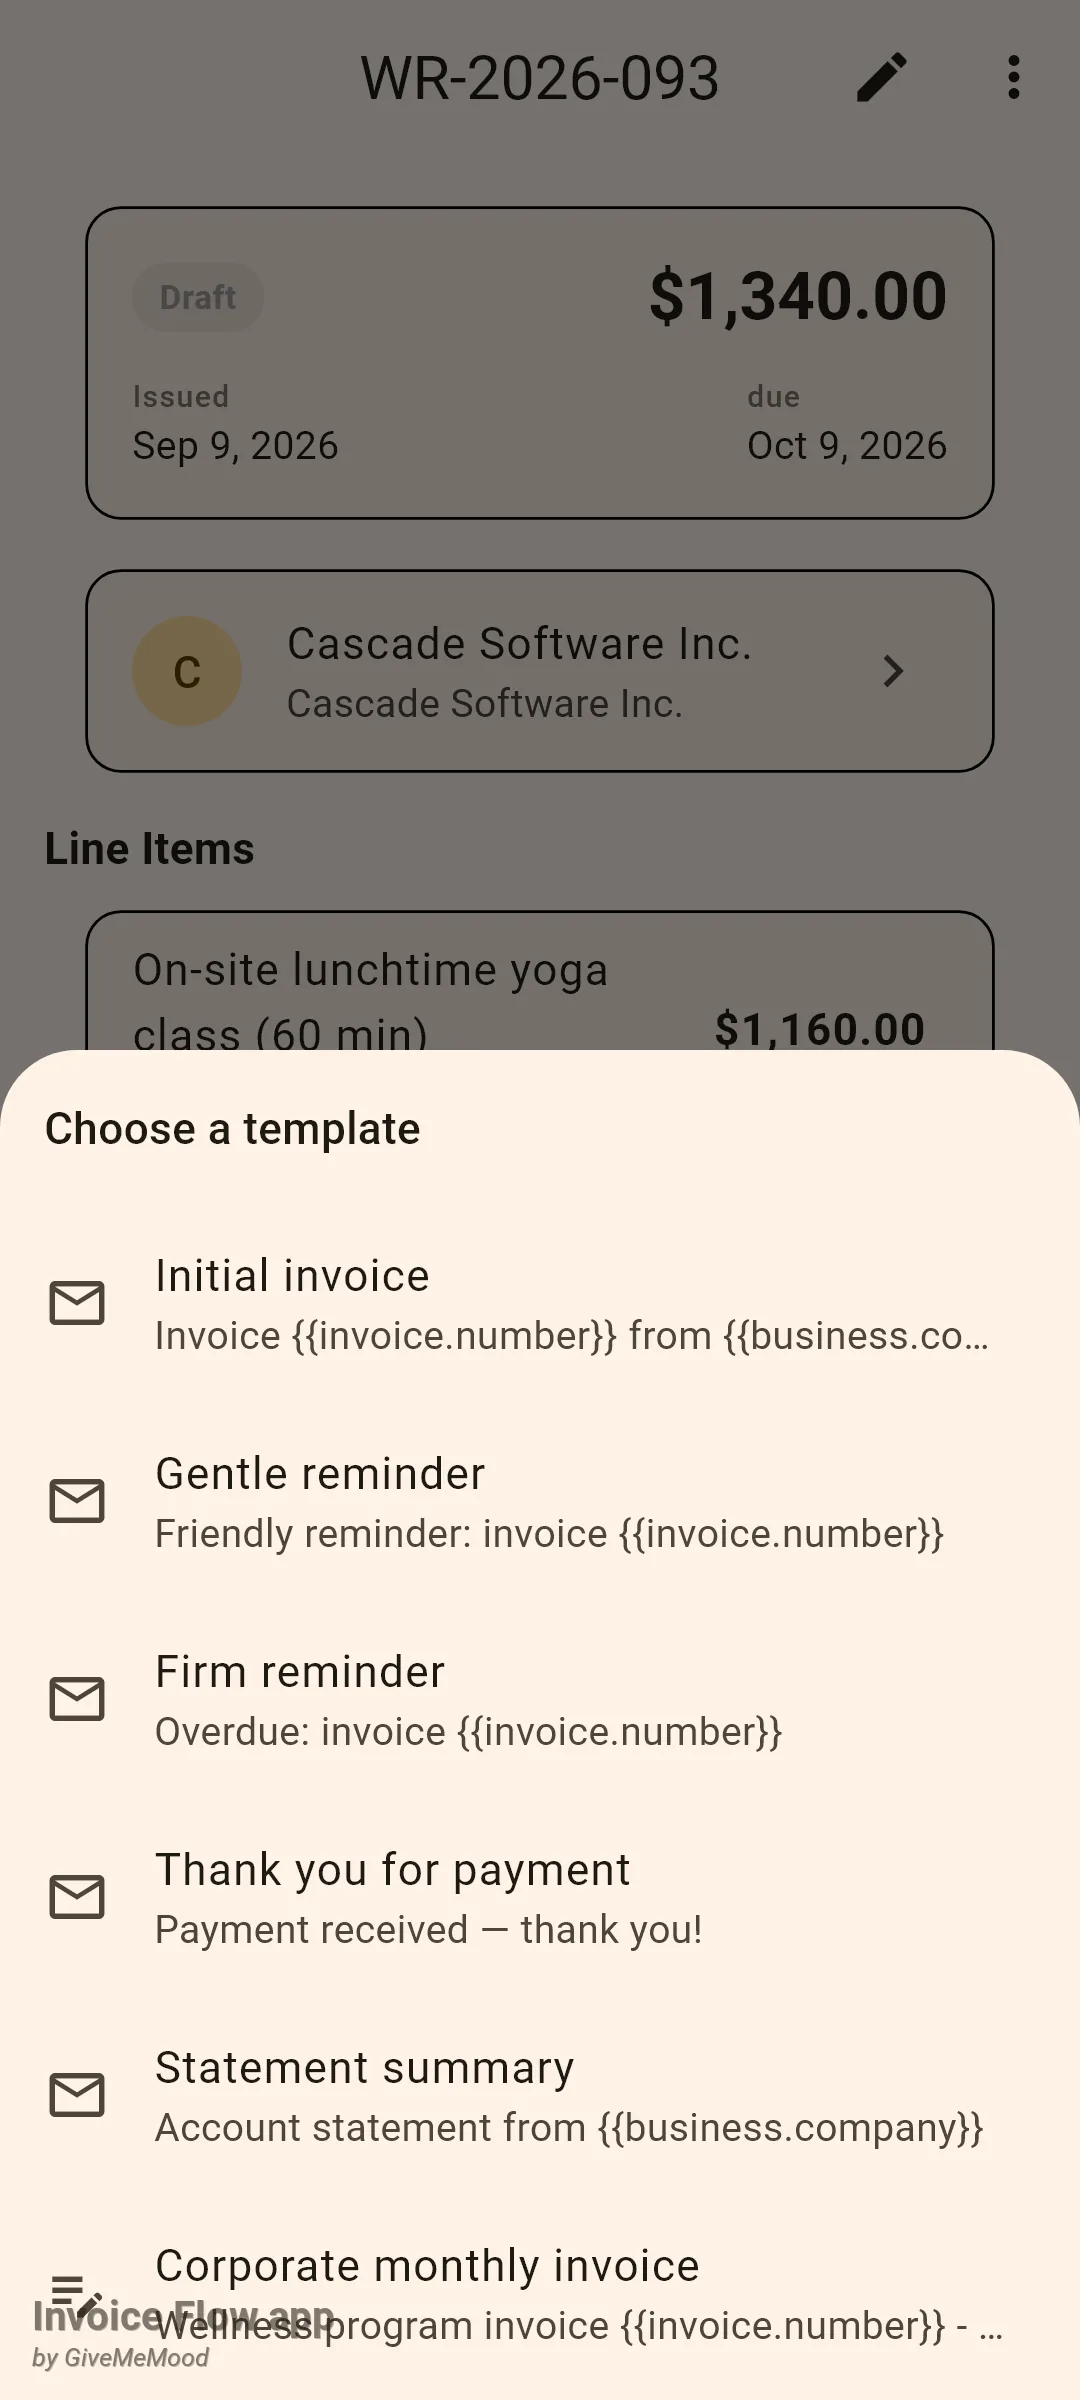
The recipient is always the email address on the client record. If that field is empty, the app stops with the message Client has no email address before the template sheet even opens, so add the address to the client first. If the template list is empty because you have never opened the templates screen, the five built-ins are created on the spot.
How to send the PDF and mark the invoice as sent
The file goes out through the Android share sheet from the PDF preview. Any target that accepts files works: Gmail, Outlook, WhatsApp, Drive, or a company messaging app.
- On the invoice, tap Preview PDF at the bottom and wait for the document to render.
- For a draft, tap the three-dot menu in the preview's app bar and choose Share & Mark as Sent. For an invoice that is already sent, tap the share icon instead.
- Pick your mail app in the Android share sheet. The PDF is attached, the subject reads "Invoice WR-2026-091 from Willow & Root Yoga Studio", and the body is a short "please find attached" note. Add the recipient and send from there.
- Back in the app, a draft shared this way shows Invoice marked as sent and its status badge changes from Draft to Sent.
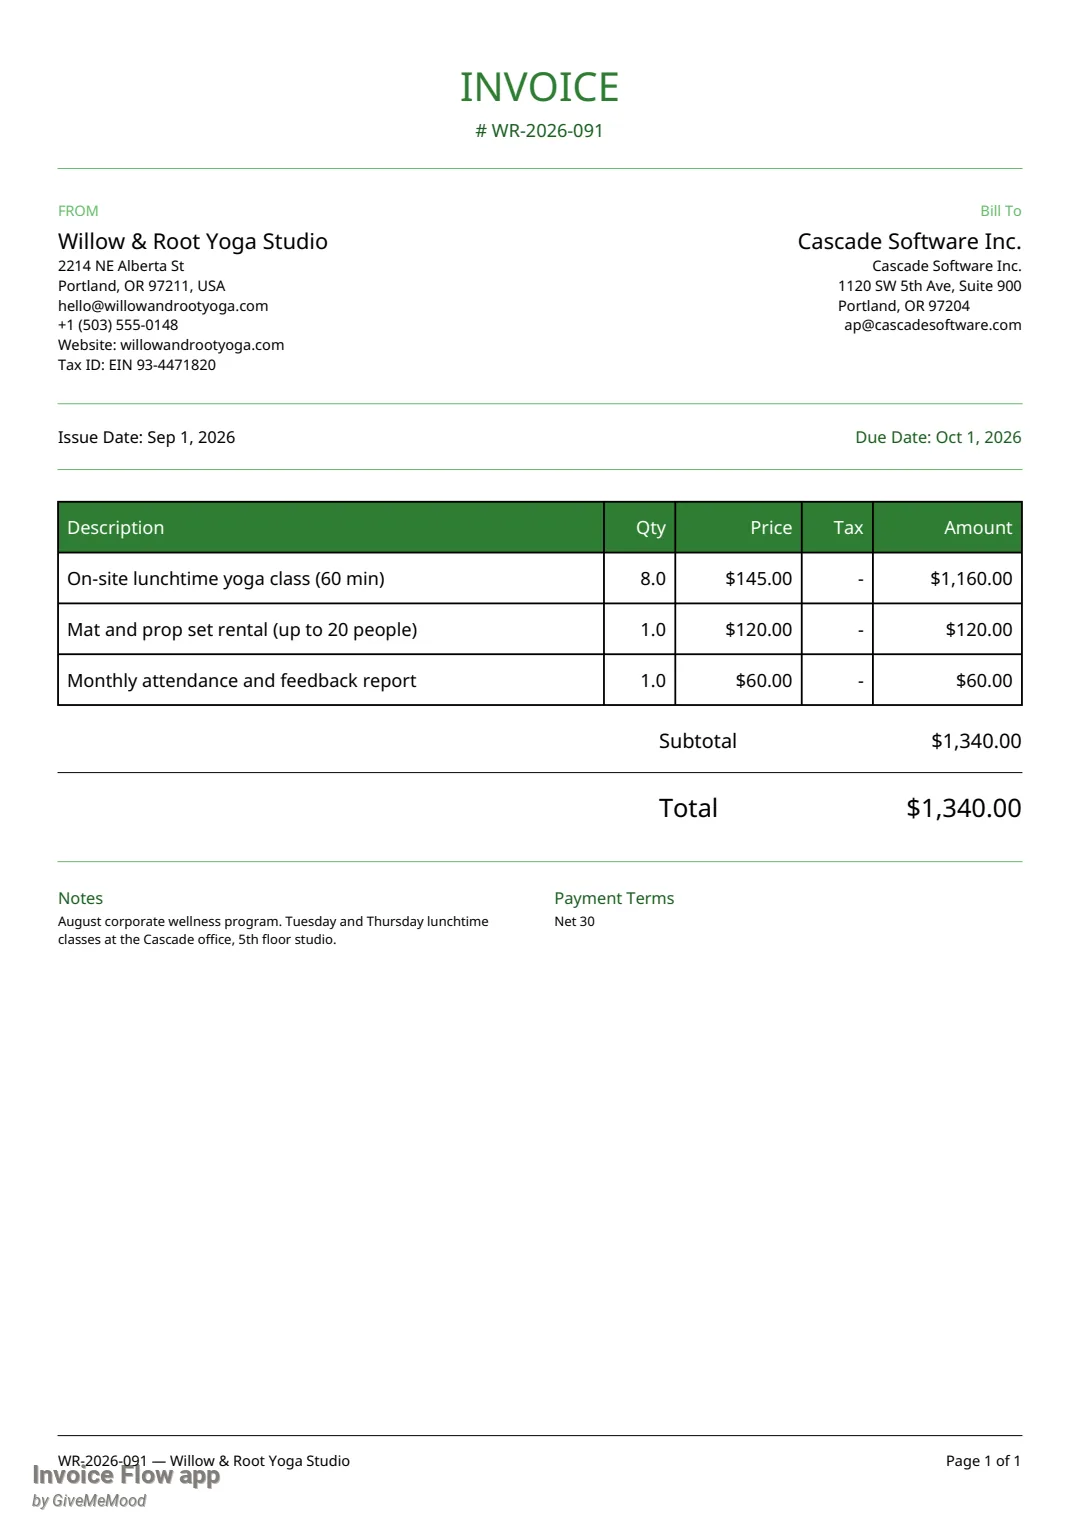
The share sheet does not read your email templates. Its subject and body are fixed app strings that take the invoice number, your company name and the client’s name. So the practical routine for a corporate client is: share the PDF first from the preview (which also flips the draft to Sent), then, if you want the fuller templated message with the item list, follow up with Email client. Or simply paste the templated text into the compose window that the share sheet opened, since your mail app is the same in both cases.
Marking as sent is a status change and nothing else. It does not record a date, an address or a copy of the message anywhere you can see; the change log entry is the only trace. Conversely, sending through Email client never touches the status, so an invoice you emailed from a draft stays a draft until you either use Share & Mark as Sent or choose Mark as Sent from the invoice menu and confirm the Change status? dialog.
How to switch to SMTP sending
The default method opens your mail app, which is the right choice for most people: you see the message before it goes, your provider handles delivery, and you can attach the PDF in the same window. SMTP makes sense only if you routinely send from the app and do not want the compose step.
- Open Settings and tap Email sending.
- Select SMTP server (auto-send). The form unfolds below the two radio buttons.
- Enter Host (for Gmail, smtp.gmail.com), leave Port at 587, and fill Username and Password. For Gmail and Outlook the password must be an app password generated in your account's security settings, not your normal login.
- Fill From address and From name; these are what the client sees in the From line.
- Keep STARTTLS on for port 587, or turn on SSL/TLS for a provider that requires port 465. Turning one on switches the other off.
- Tap Test connection (sends to your own address). The app saves the form first, then emails a short test message to the From address and reports SMTP works or SMTP test failed with the server's reason.
- Tap Save.
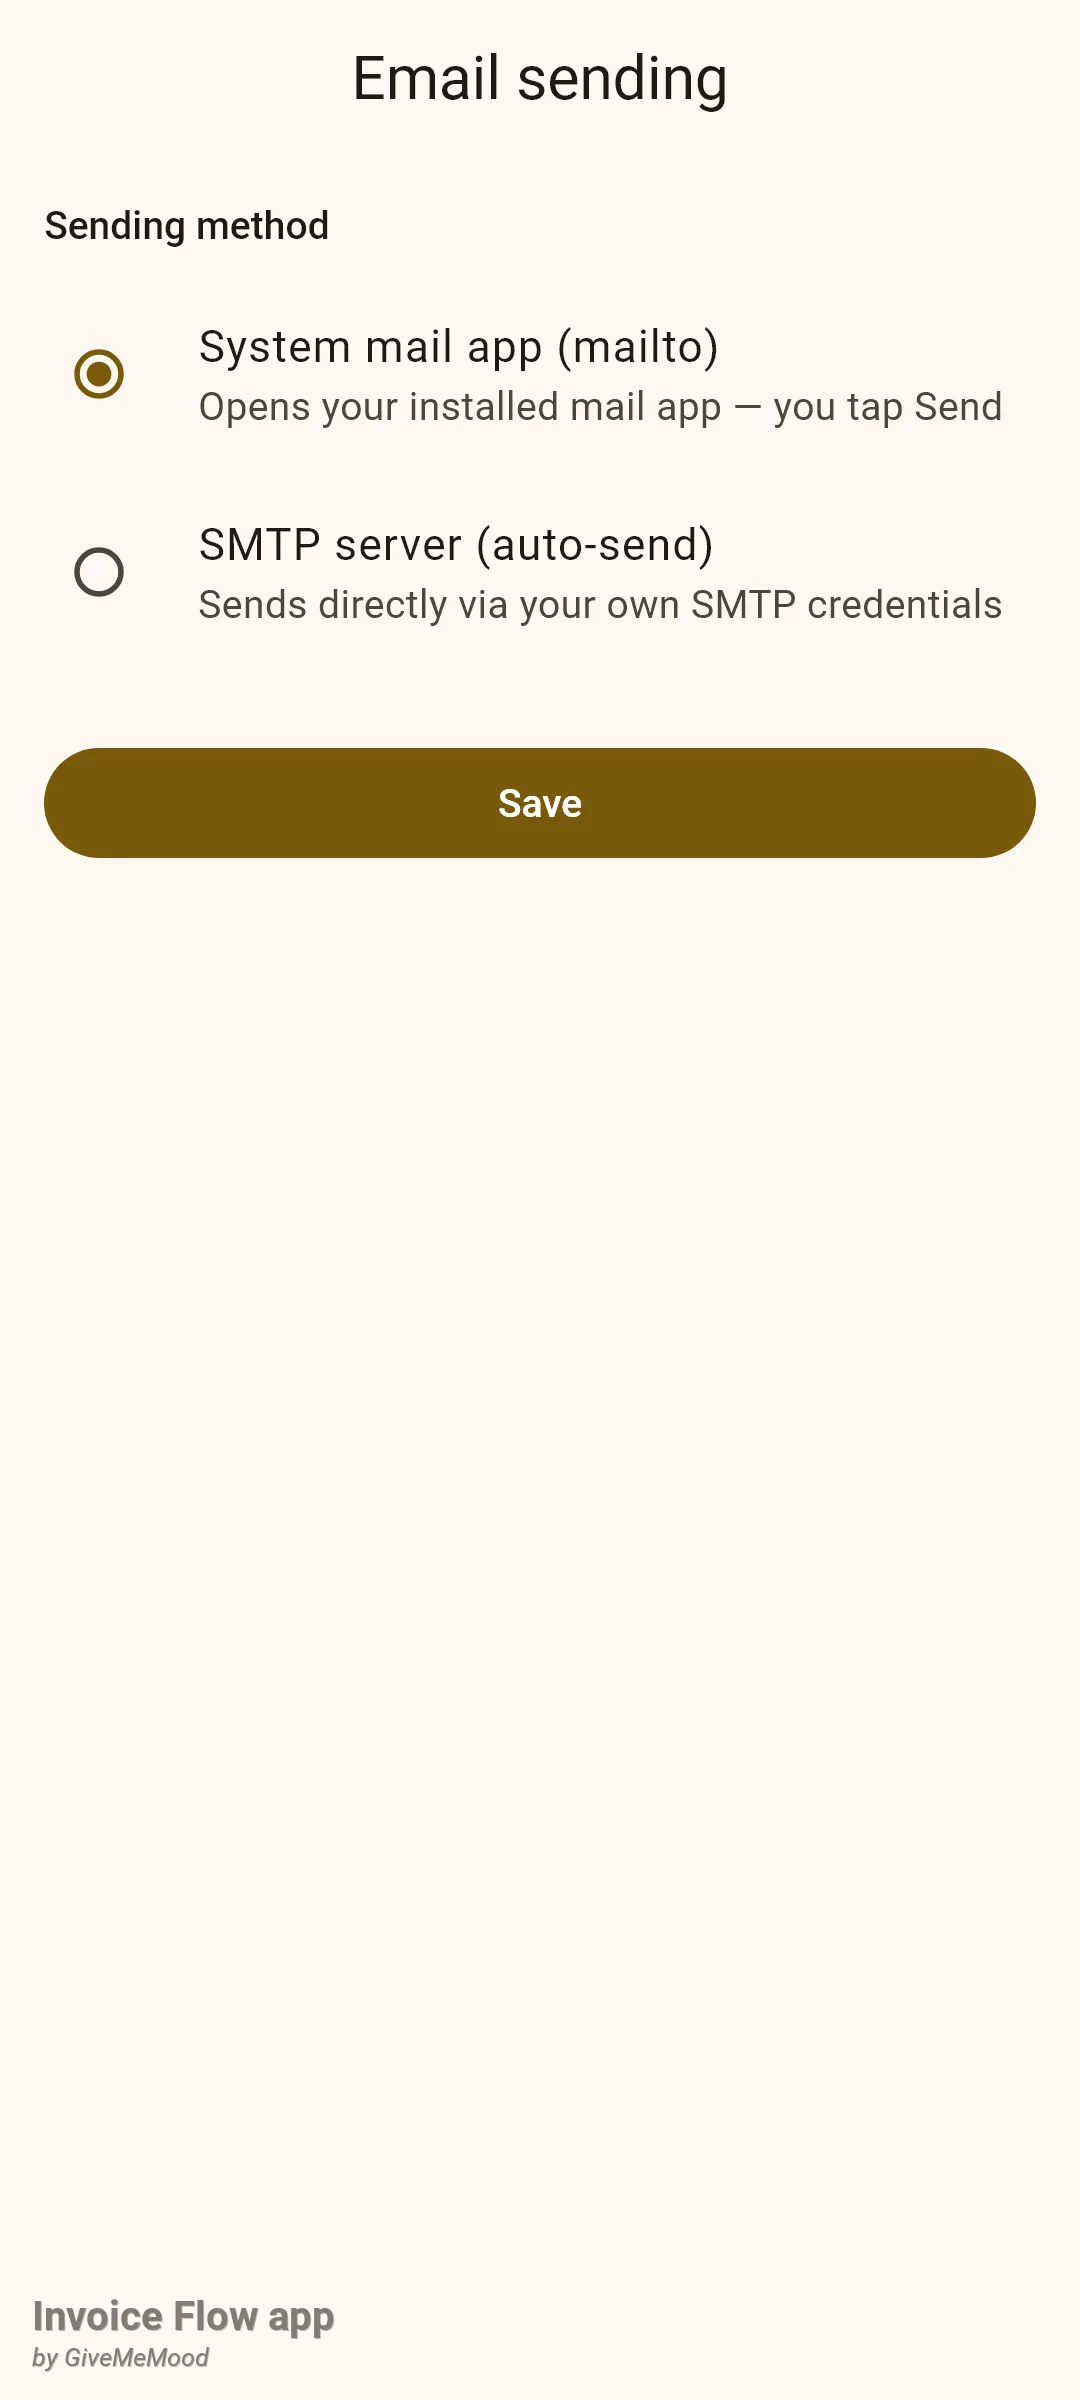
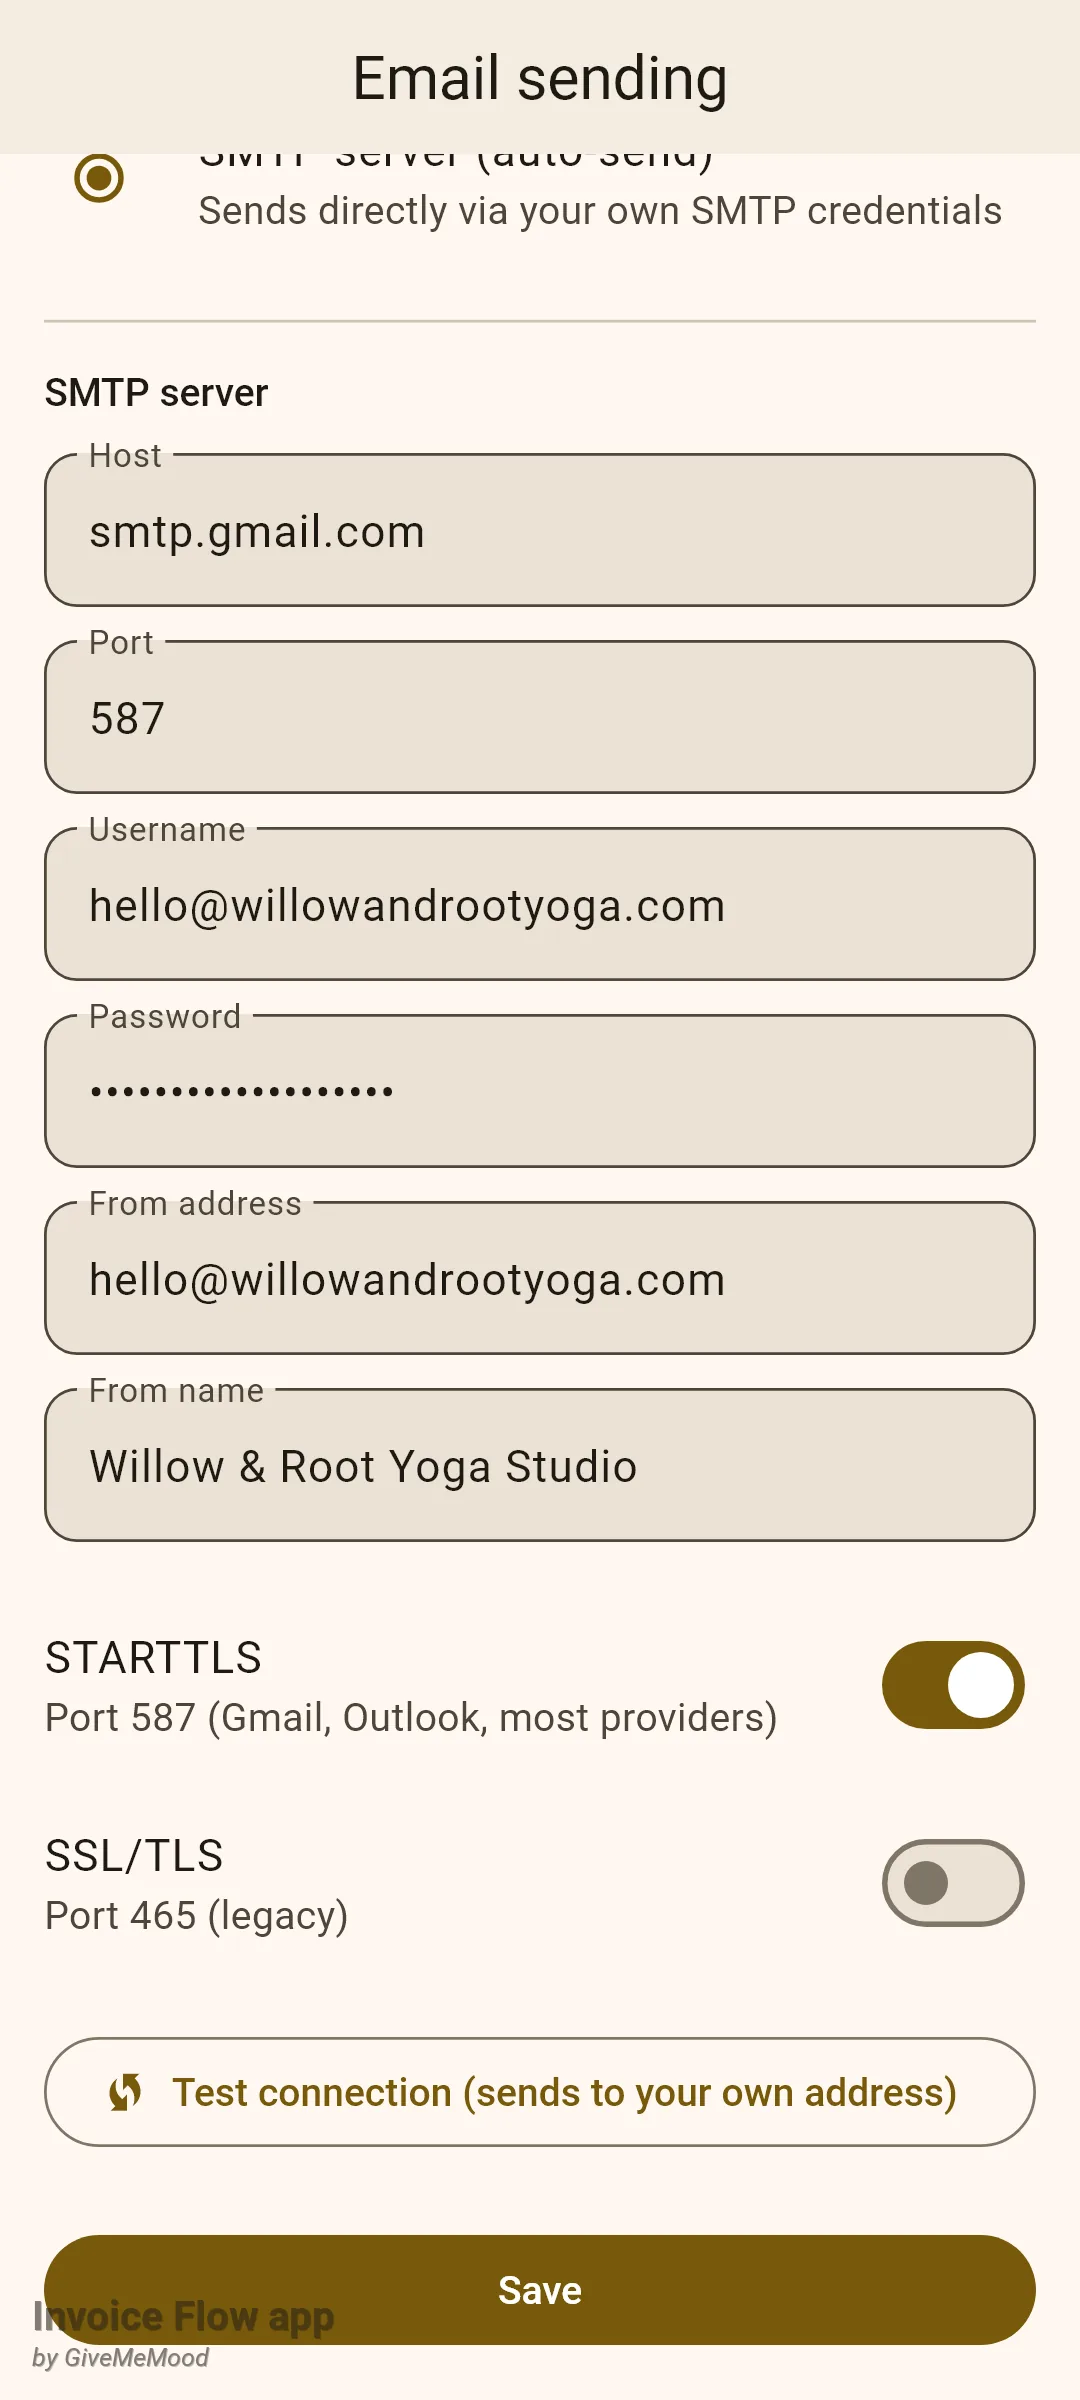
Once SMTP is saved, Email client no longer opens anything. Tapping a template in the picker sends straight away, and the only feedback is the green Email sent bar or a red Failed to send email bar with the error text. There is no outbox and no retry queue, so if the bar is red, fix the settings and send again.
Rules and details
- Templates need a name and a subject; the body may be empty. Saving with either required field blank shows Fill in required fields and keeps the sheet open.
- Unknown placeholders are left exactly as typed. A misspelt
{{client.nmae}}reaches the client as literal text, which is why the live preview is worth a glance before saving. invoice.daysOverdueandinvoice.daysUntilDuenever go below zero; whichever does not apply shows 0.lateFee.accruedis blank unless the profile has a late-fee percentage, the invoice is past its grace period and money is still owed; it is a fresh calculation from the invoice total, not the amount already added to the invoice.- The five built-in templates are English only. You can edit them in place and they stay built-in; Duplicate creates an editable copy named “(copy)” as a custom template. Delete on a built-in hides it rather than removing it, and there is no screen to bring a hidden built-in back. Delete on a custom template removes it immediately, with no confirmation.
- Templates are shared across all your business profiles. The picker under Email client shows every visible template regardless of which profile the invoice belongs to.
- Creating, editing and duplicating templates, Email client, Share as web page and sharing or printing the PDF are Pro features and redirect to the paywall without an active trial or subscription. Deleting a template and the Email sending screen itself are not gated.
- SMTP settings are stored on the device: the host, port, username, from fields and the two switches in app preferences, the password in Android’s encrypted storage. On later edits, leaving Password blank keeps the stored one. A port that cannot be parsed falls back to 587.
- The app refuses to send SMTP mail without encryption. With both STARTTLS and SSL/TLS off, the connection is rejected rather than sending your password in clear text.
- Test connection saves the form before testing, so whatever is in the fields becomes your saved configuration even if the test fails.
- Automation rules that mention sending an email do not use either method; they create an in-app alert for you to act on.
- Share as web page is a third option on the same menu: a dialog with Include payment QR and Include payment buttons switches, both on by default, then the share sheet with a self-contained HTML file. Like the PDF share, it carries fixed text, not your template.
Tips
Related guides
- PDF preview, share and editor covers the preview screen, printing and the built-in PDF editor in more depth.
- Invoice statuses, list and history explains what Sent, Overdue and Paid mean and how the change log records status changes.
- Reminders and automation rules shows the scheduled reminders that flag overdue invoices for follow-up.