 EN
EN  العربية
  Български
  Čeština
  Dansk
Dansk  Deutsch
  Ελληνικά
  Español
  Suomi
Suomi  Français
  עברית
עברית  हिन्दी
  Bahasa Indonesia
  Italiano
  日本語
日本語  한국어
한국어  Bahasa Melayu
  Nederlands
  Norsk
Norsk  Polski
  Português
  Română
  Русский
  Svenska
  Kiswahili
  ไทย
ไทย  Türkçe
  Українська
  Tiếng Việt
  中文
中文 User guide
Payment reminders and automation rules
Switch on local payment reminders, choose how many days before and after the due date they arrive, and understand what automation rules can and cannot do today.
Chasing money is the least enjoyable part of running a small business, and the part most easily forgotten. Invoice Flow tackles it in two layers. The first is a set of local payment reminders that the app schedules on your phone for every unpaid invoice: one before the due date, one on the day, one after. They need no server, no account and no network. The second layer is a rule builder under Automation Rules, where you describe a trigger and an action, and an engine that runs a sweep every time the app starts.
This guide follows Ledger & Lane Accounting, a two-partner bookkeeping practice in Manchester that bills clients in pounds on 14-day terms. The partners want a nudge three days before each invoice falls due and a firm chase a week after it is missed. As it happens, those are exactly the values the app ships with, so most of the work is confirming the setup and knowing which notification to expect when.
The guide is also frank about one thing: the rule editor and the rule engine are, in the current version, not wired to each other. You can build, save, switch and delete rules, and the article shows how, but the scheduled reminders are what will actually reach you. Details are in the rules section below.
What you see on the screen
Both features live under the Settings tab, in the section headed AUTOMATION. The tile Notifications (subtitle “Reminders, updates, promos”) opens the notification preferences. The tile Automation Rules (subtitle “Automate your workflows”) opens the rule list.
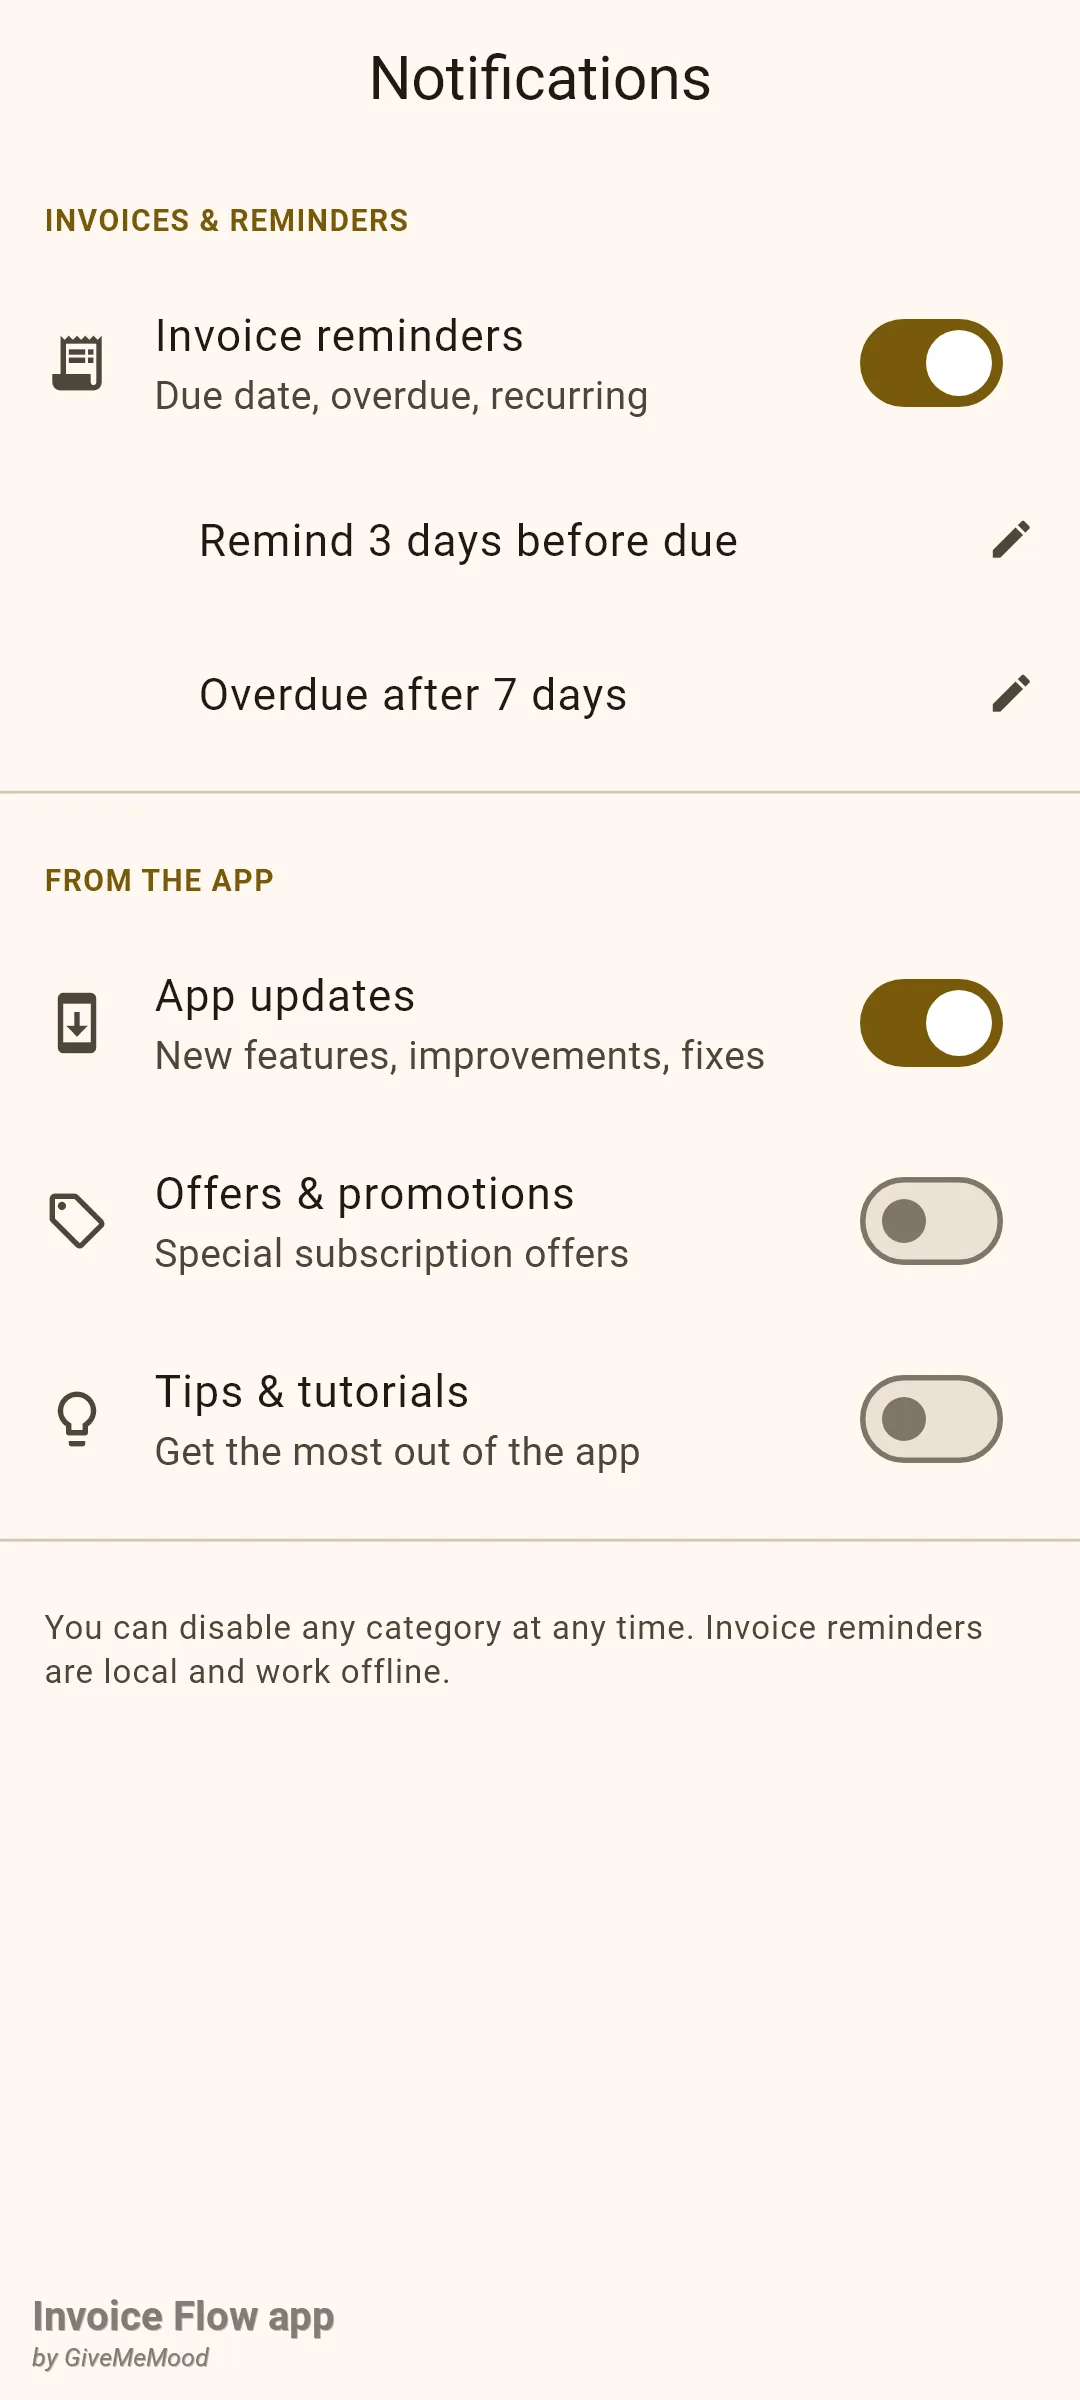
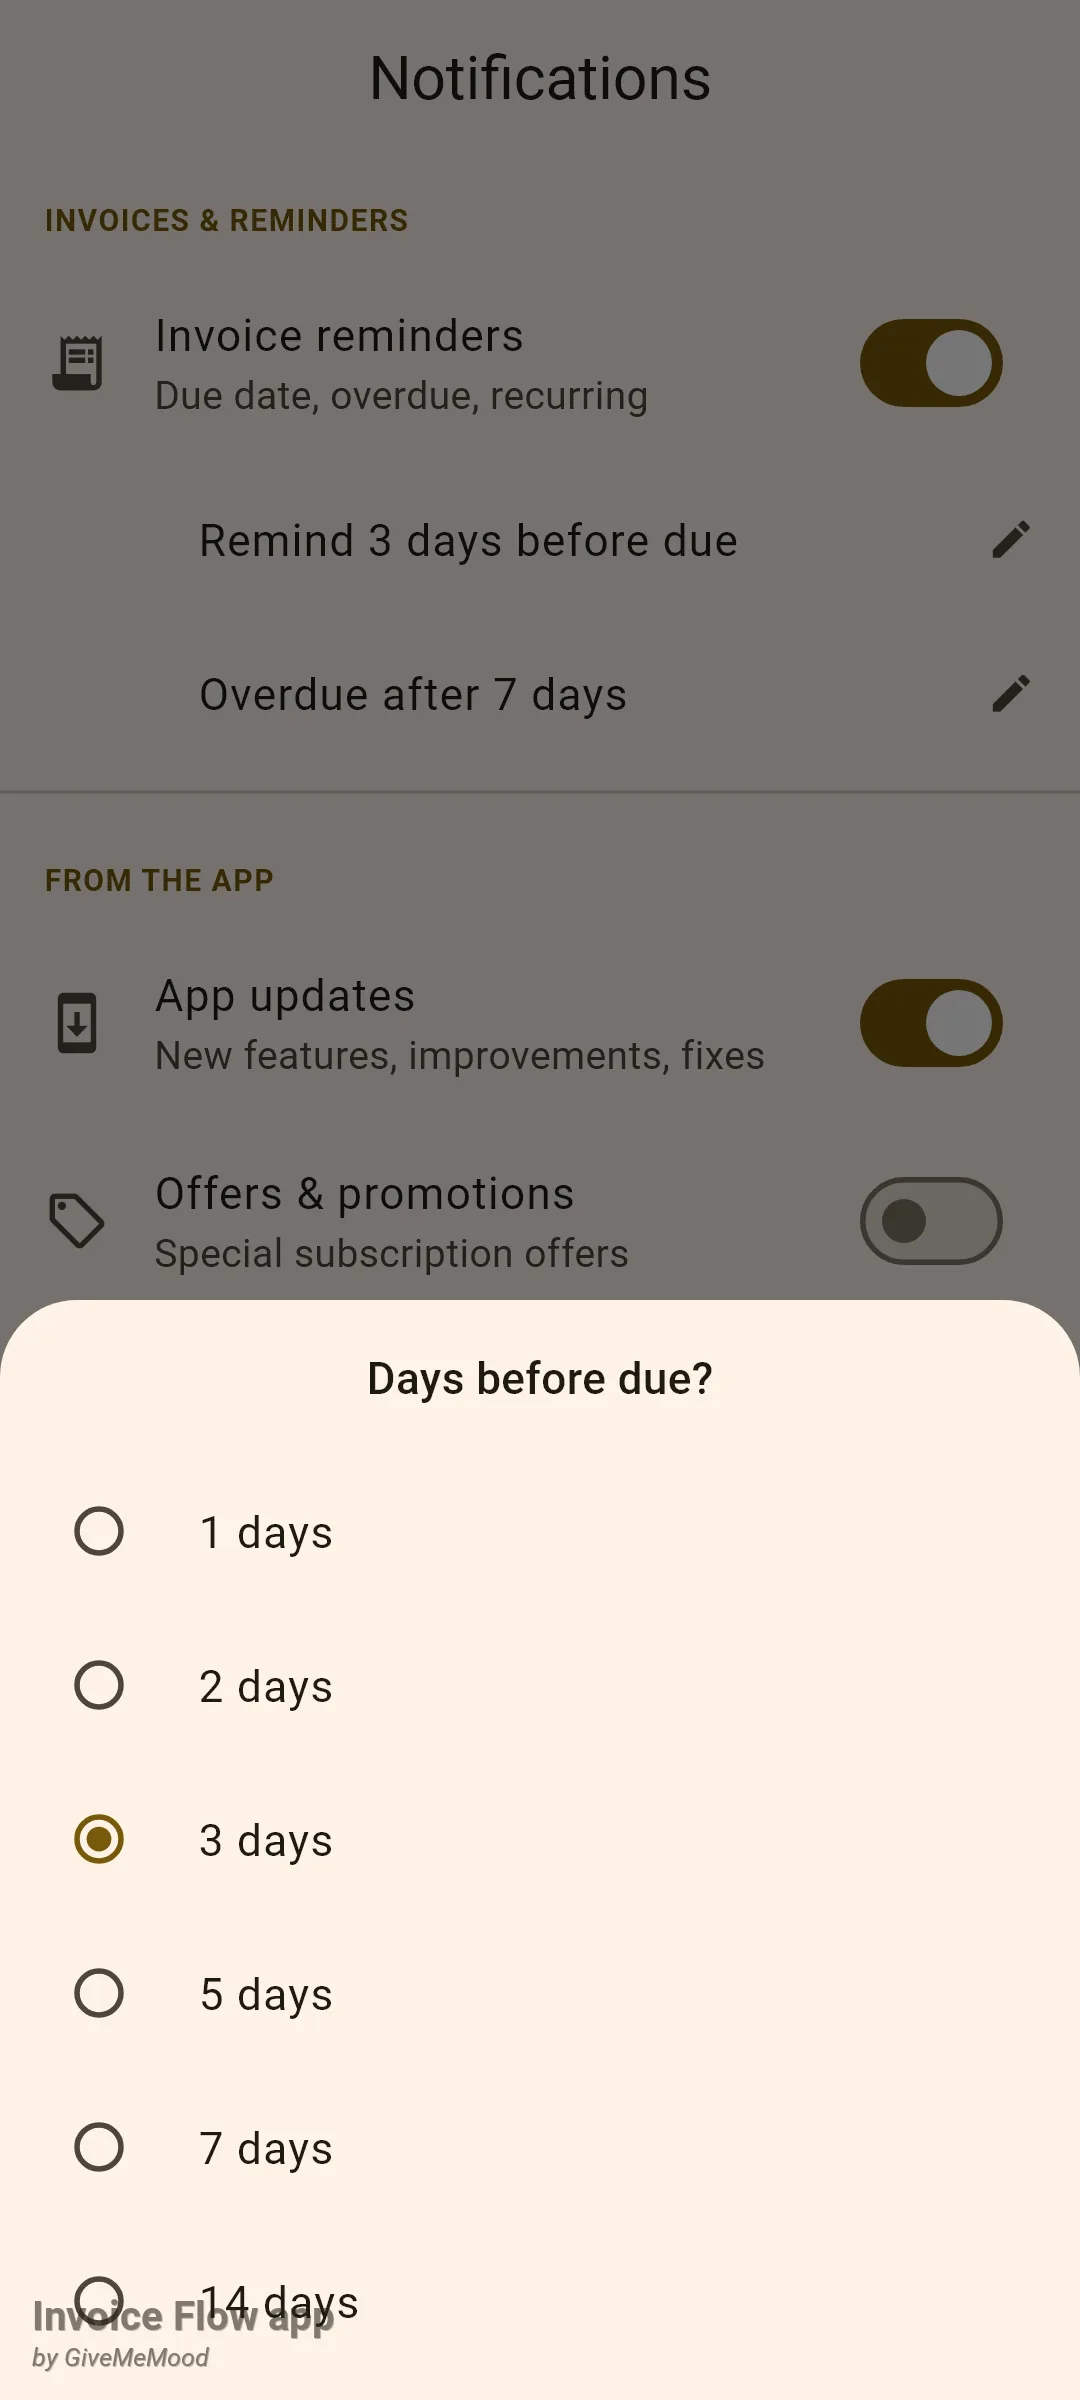
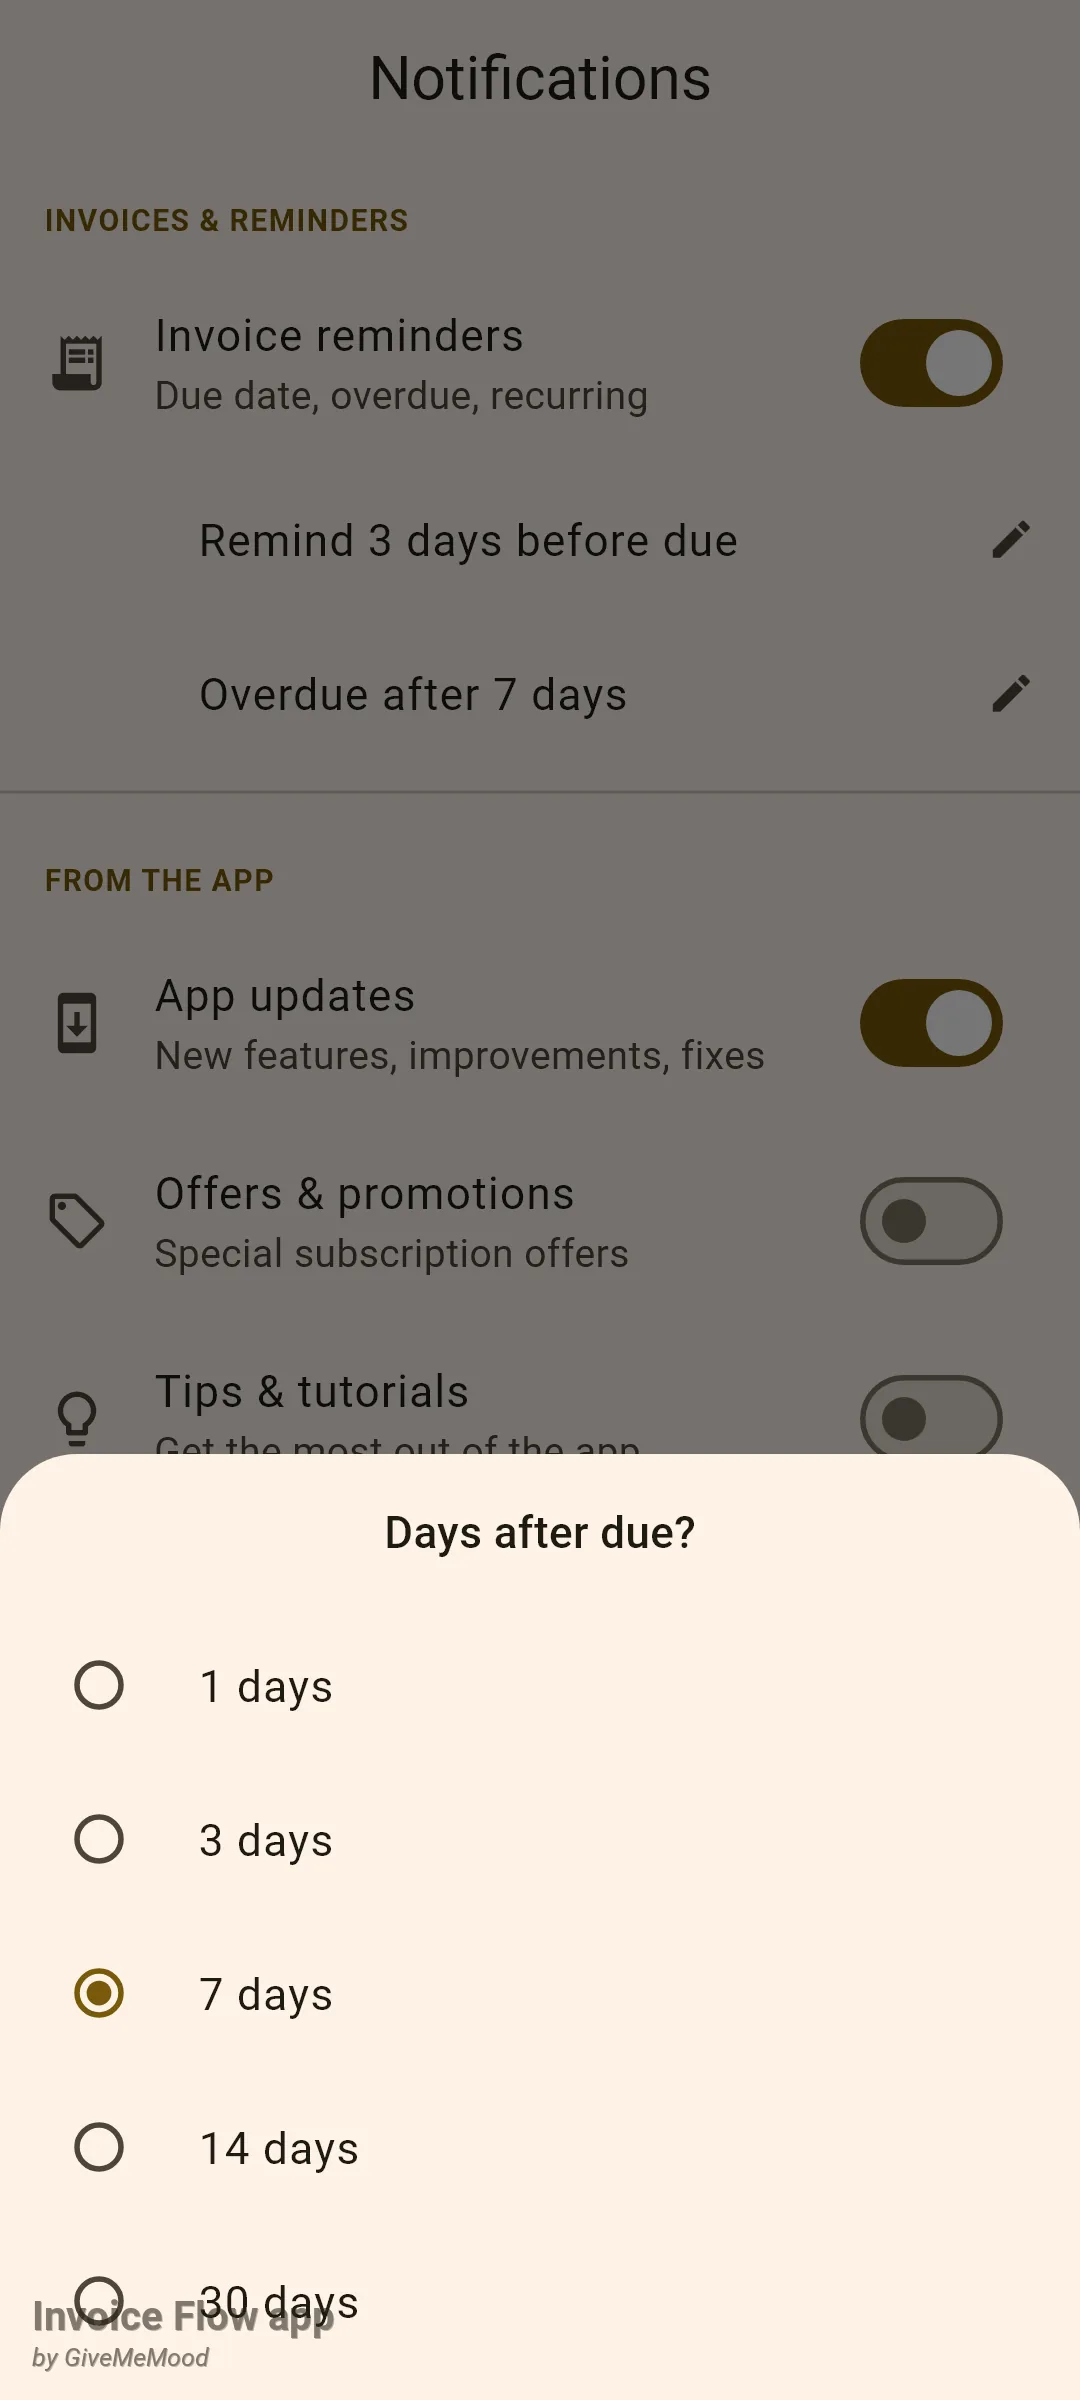
The Notifications screen has two groups. Under INVOICES & REMINDERS there is a single switch, Invoice reminders, with the subtitle “Due date, overdue, recurring”. While it is on, two indented rows appear underneath: Remind 3 days before due and Overdue after 7 days, each with a small pencil icon. Under FROM THE APP are three more switches: App updates, Offers & promotions and Tips & tutorials. A footer reminds you that invoice reminders are local and work offline.
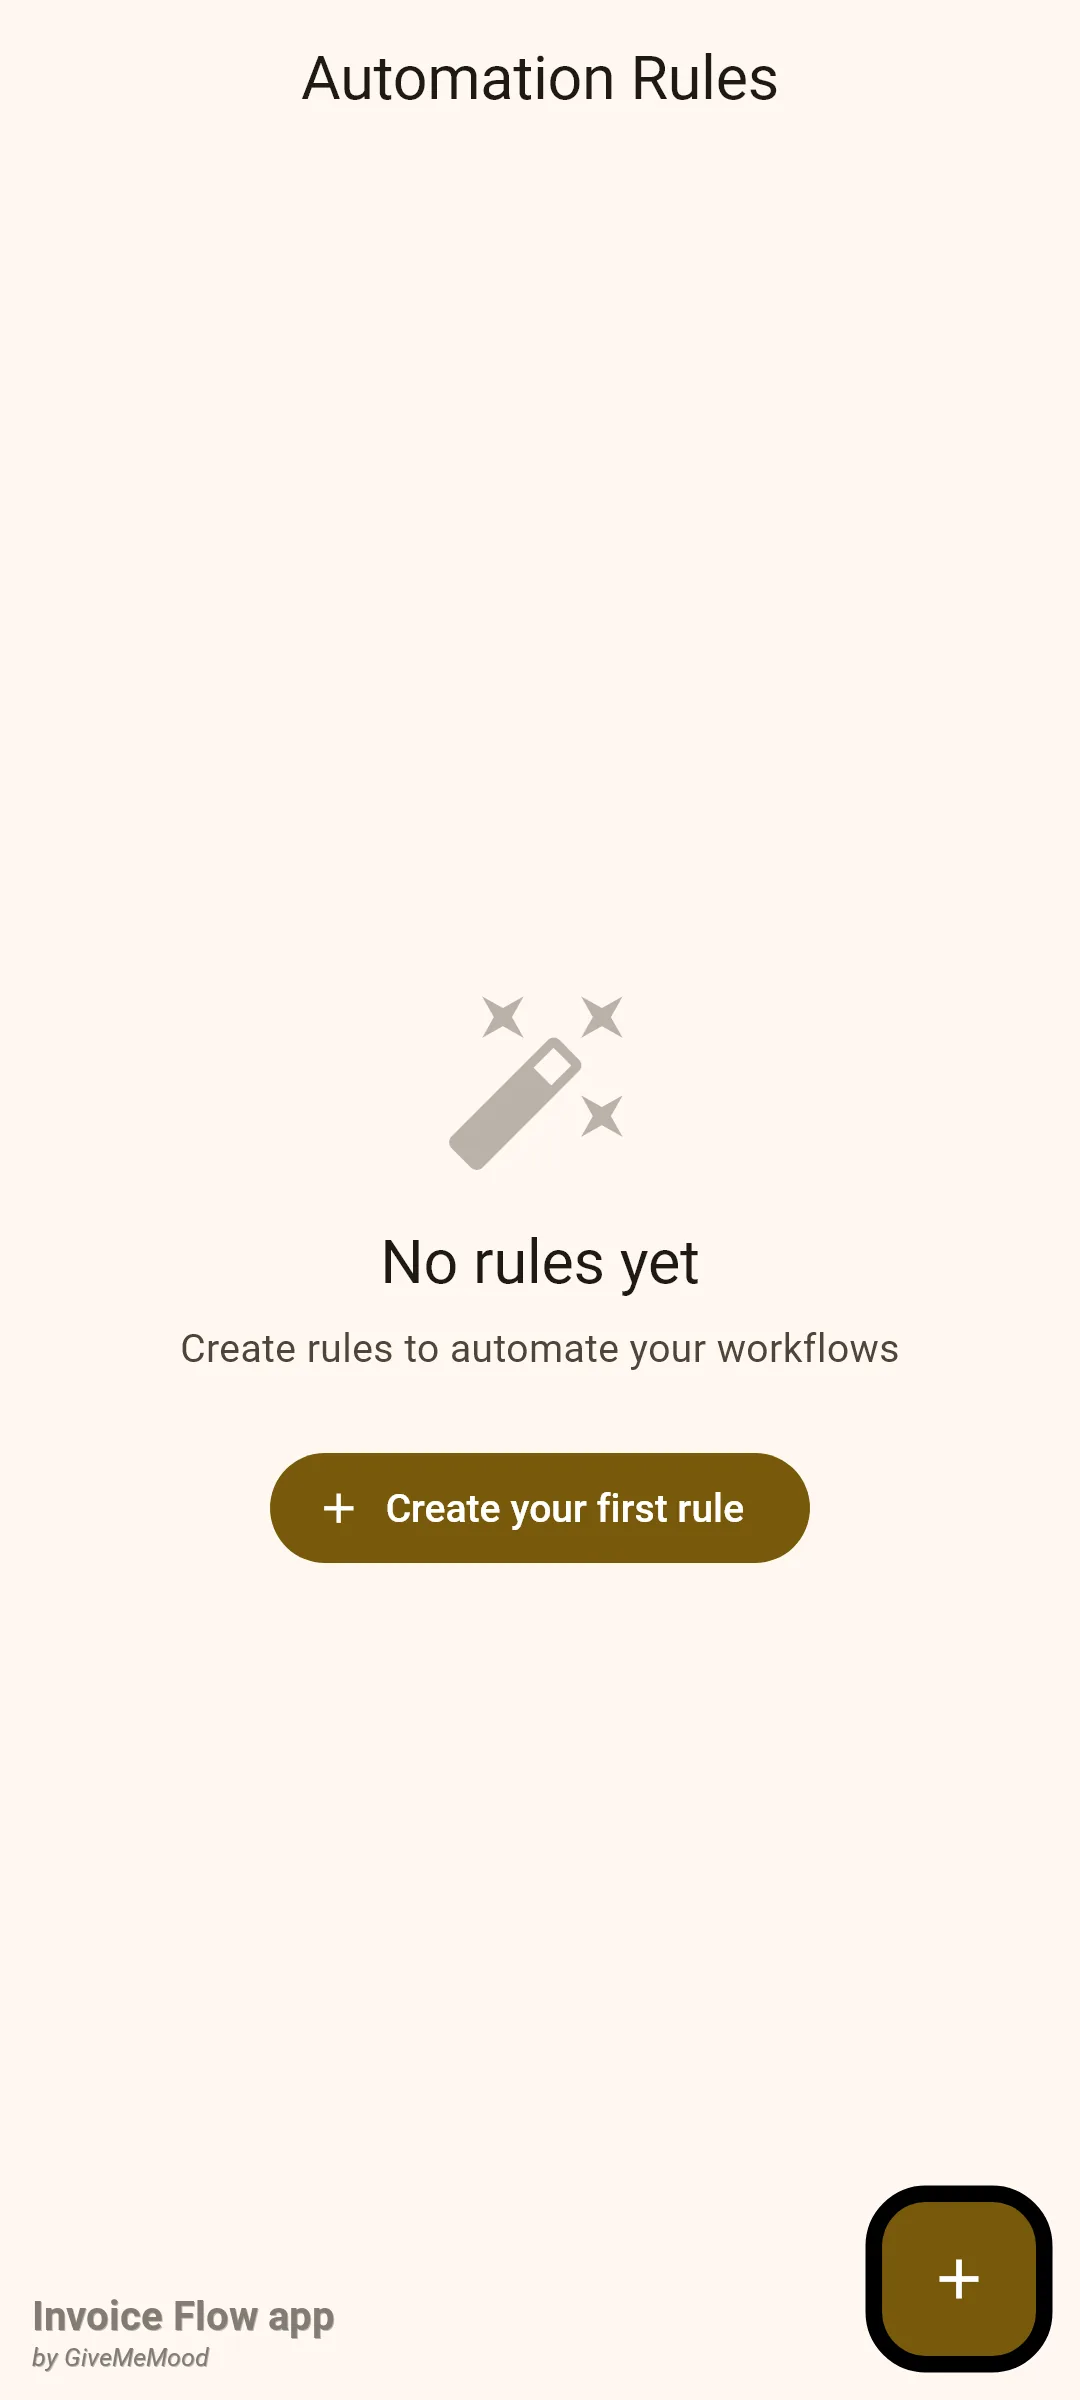
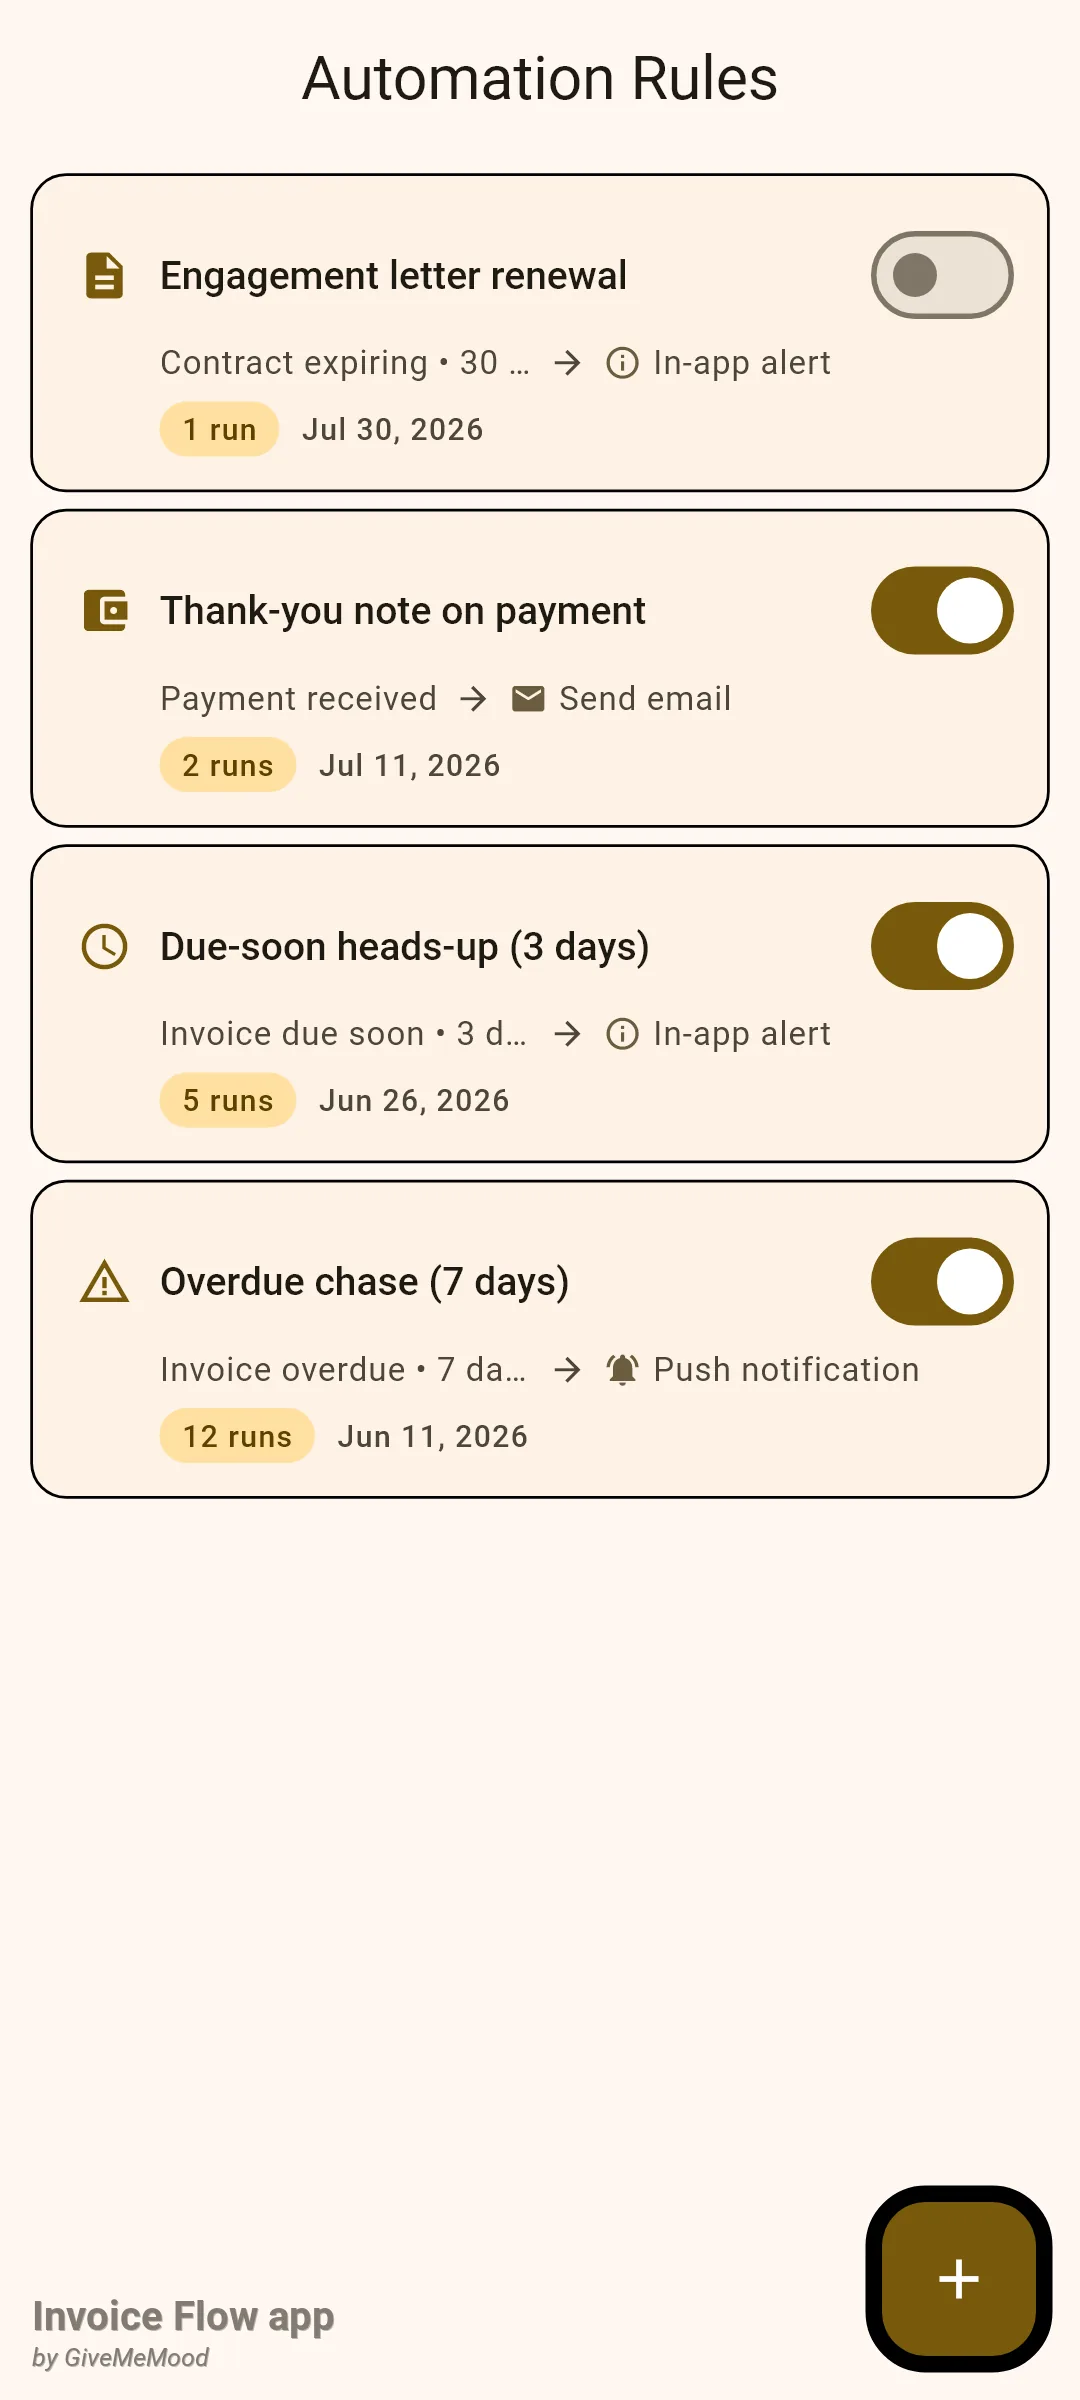
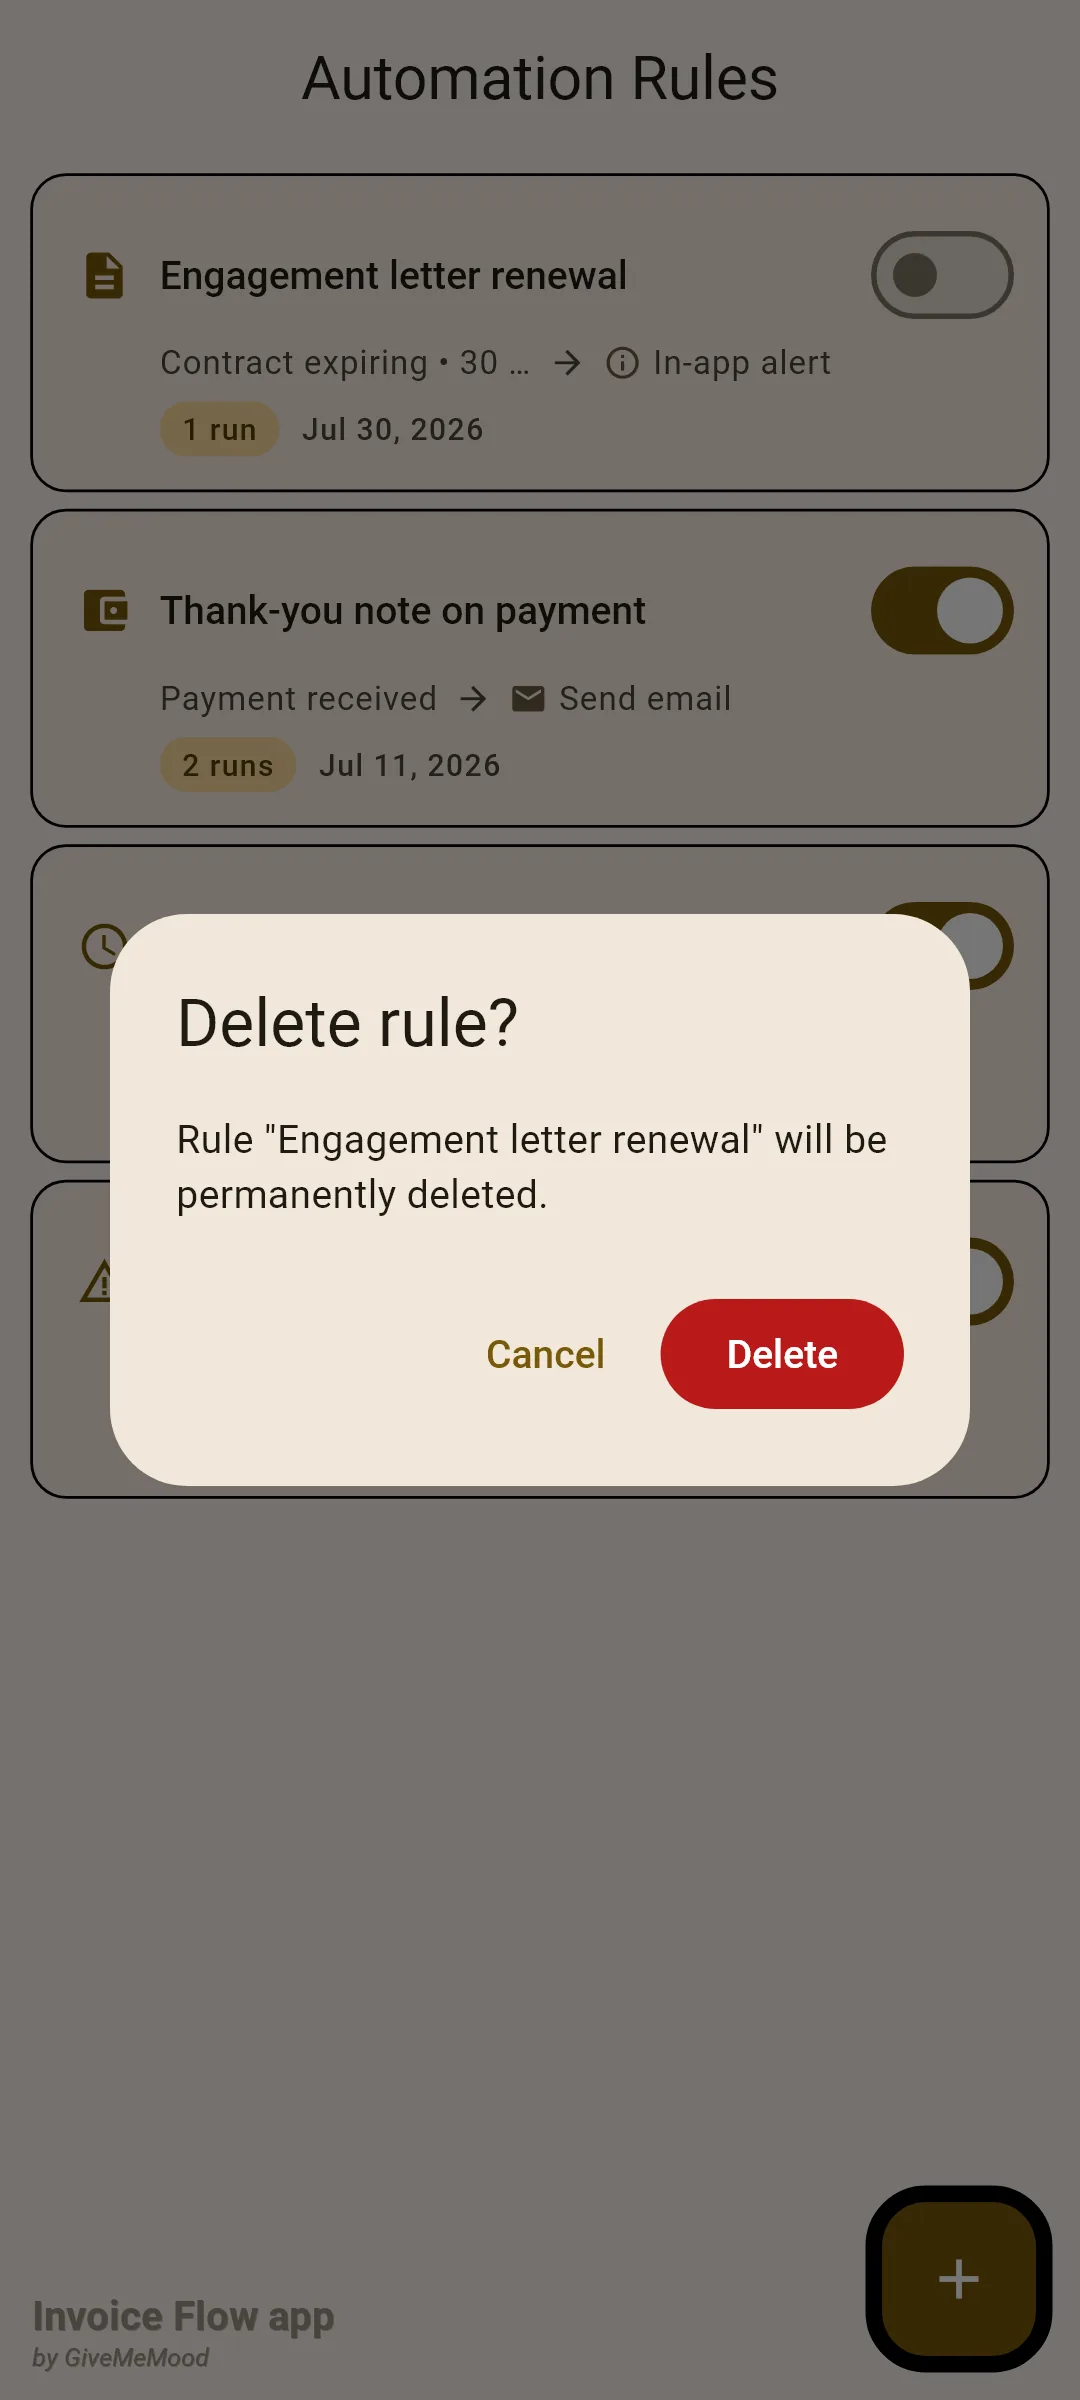
The Automation Rules screen is a plain list. Each rule is a card with a trigger icon, the rule name, an on/off Switch, a second line reading trigger, arrow, action (for example “Invoice overdue • 7 days overdue → Push notification”), and a third line with a pill showing how many times the rule has run and the date it was created. A + button in the corner opens the editor. When the list is empty you see “No rules yet” and a Create your first rule button instead.
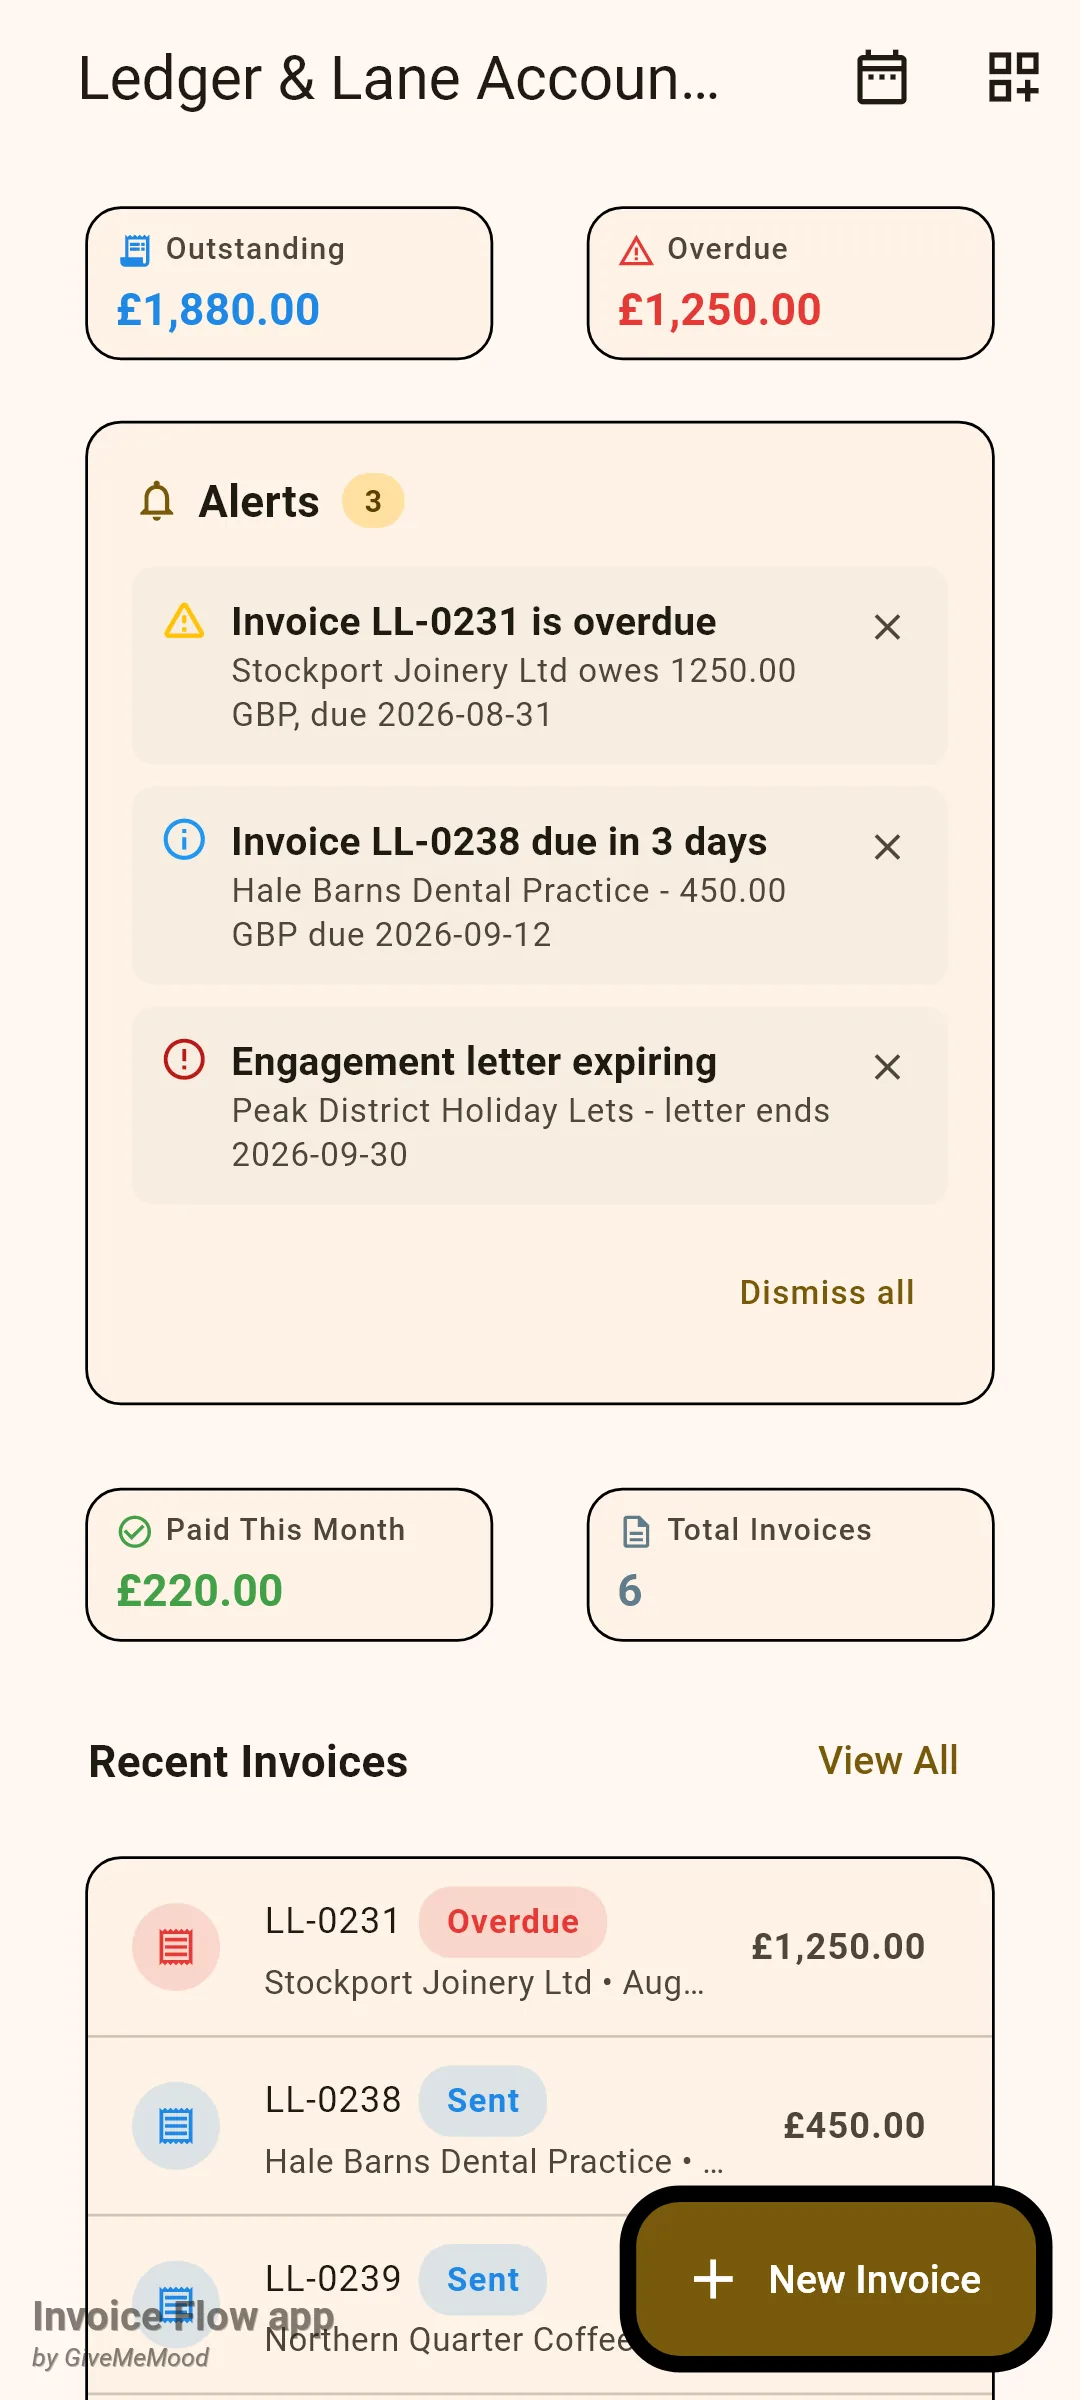
The third place to know about is the Dashboard. If you enable the Alerts widget through the Dashboard widgets icon in the app bar, a card titled Alerts appears whenever there are undismissed alerts, with a count pill, up to five entries and a Dismiss all link.
How to set reminder timing
Ledger & Lane wants every unpaid invoice to trigger a heads-up three days ahead of the due date and a chase seven days after it. Here is how to confirm or change those values.
- Open Settings and, under AUTOMATION, tap Notifications.
- Make sure Invoice reminders is switched on. If you turn it on for the first time on Android 13 or later, the system asks for permission to show notifications; accept it, or nothing will be delivered.
- Tap Remind 3 days before due. A sheet titled Days before due? offers 1, 2, 3, 5, 7 or 14 days. Tap the value you want; the sheet closes and the row updates.
- Tap Overdue after 7 days. The sheet Days after due? offers 1, 3, 7, 14 or 30 days. Pick one.
- Leave the screen. There is no save button; each choice is stored immediately.
The new timing applies to invoices you save from now on. Reminders are scheduled at the moment an invoice is saved in the editor, and they are computed from the preferences in force at that moment. An invoice saved last week under a 5-day setting keeps its 5-day reminder until you open it and save it again, at which point the app cancels the old set and schedules a fresh one.
For an invoice due on Friday 12 September, the firm’s settings produce three notifications, each at 09:00 local time:
| Reminder | When | Title | Body |
|---|---|---|---|
| Before due | Tue 9 Sep, 09:00 | Invoice LL-0238 due soon | Payment due in 3 days |
| On due date | Fri 12 Sep, 09:00 | Invoice LL-0238 is due today | Payment is due today |
| After due | Fri 19 Sep, 09:00 | Invoice LL-0238 is overdue | Payment is 7 days overdue |
Tapping any of them opens the invoice.
How to create an automation rule
The rule editor needs an active trial or Pro subscription; on a free account the + button and Create your first rule both take you to the upgrade screen. Viewing the list, toggling a rule on or off and deleting rules work on every account.
- Open Settings, tap Automation Rules, then tap + (or Create your first rule).
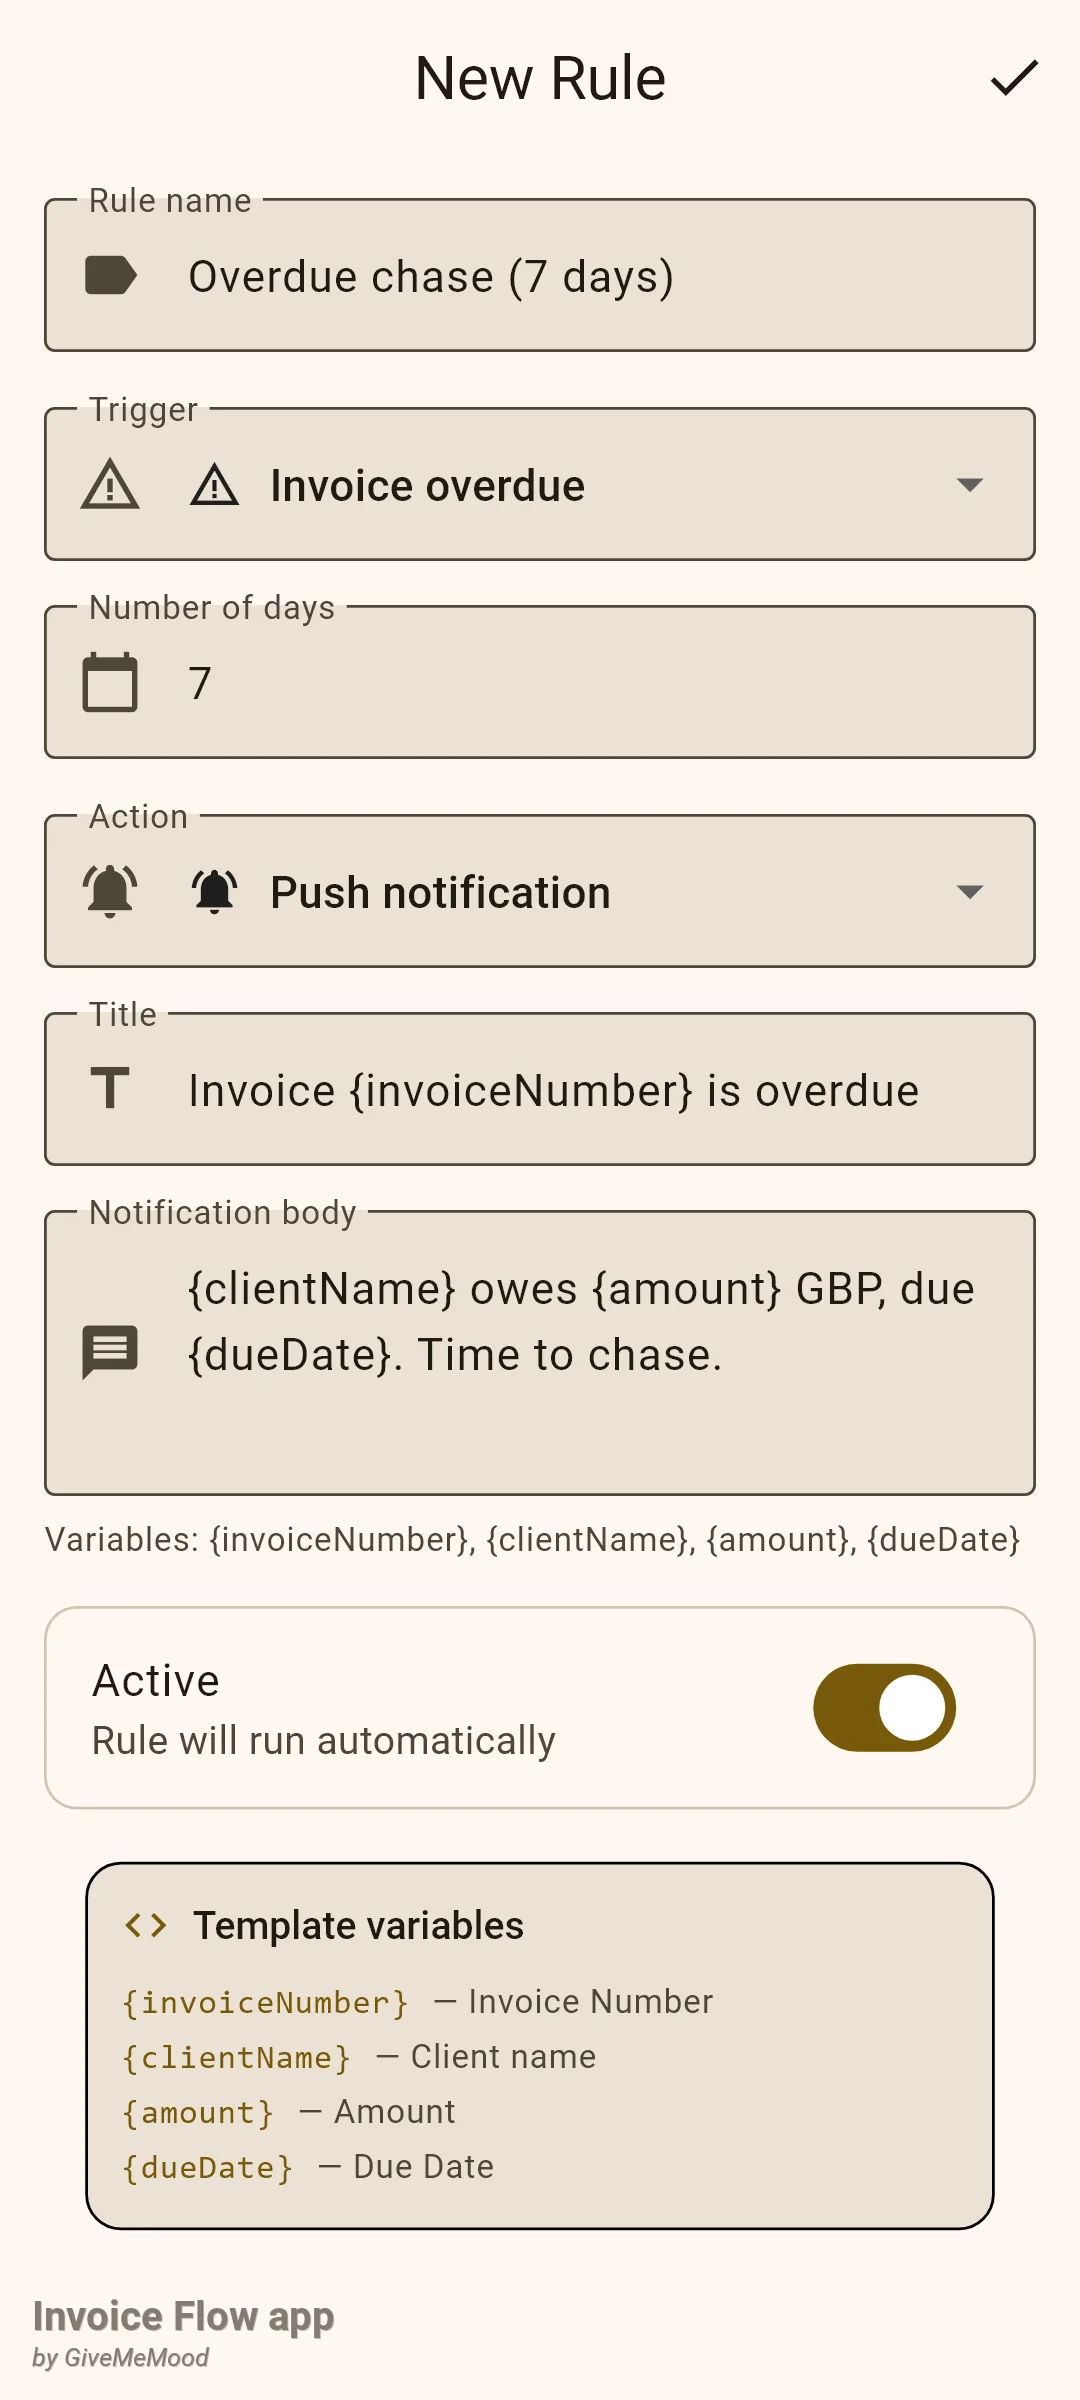
- Type a Rule name. It is required, and it is what you will see on the card, so make it descriptive: "Overdue chase (7 days)".
- Open the Trigger dropdown and choose one of Invoice created, Invoice sent, Invoice overdue, Invoice due soon, Payment received, Invoice paid, Contract expiring or Amount threshold. The default is Invoice overdue.
- If a Number of days field appears (overdue, due soon, contract expiring), enter a whole number. Changing the trigger resets it to 7, or 30 for contracts. For Amount threshold you get an Amount field and a Period dropdown with Monthly or Weekly instead.
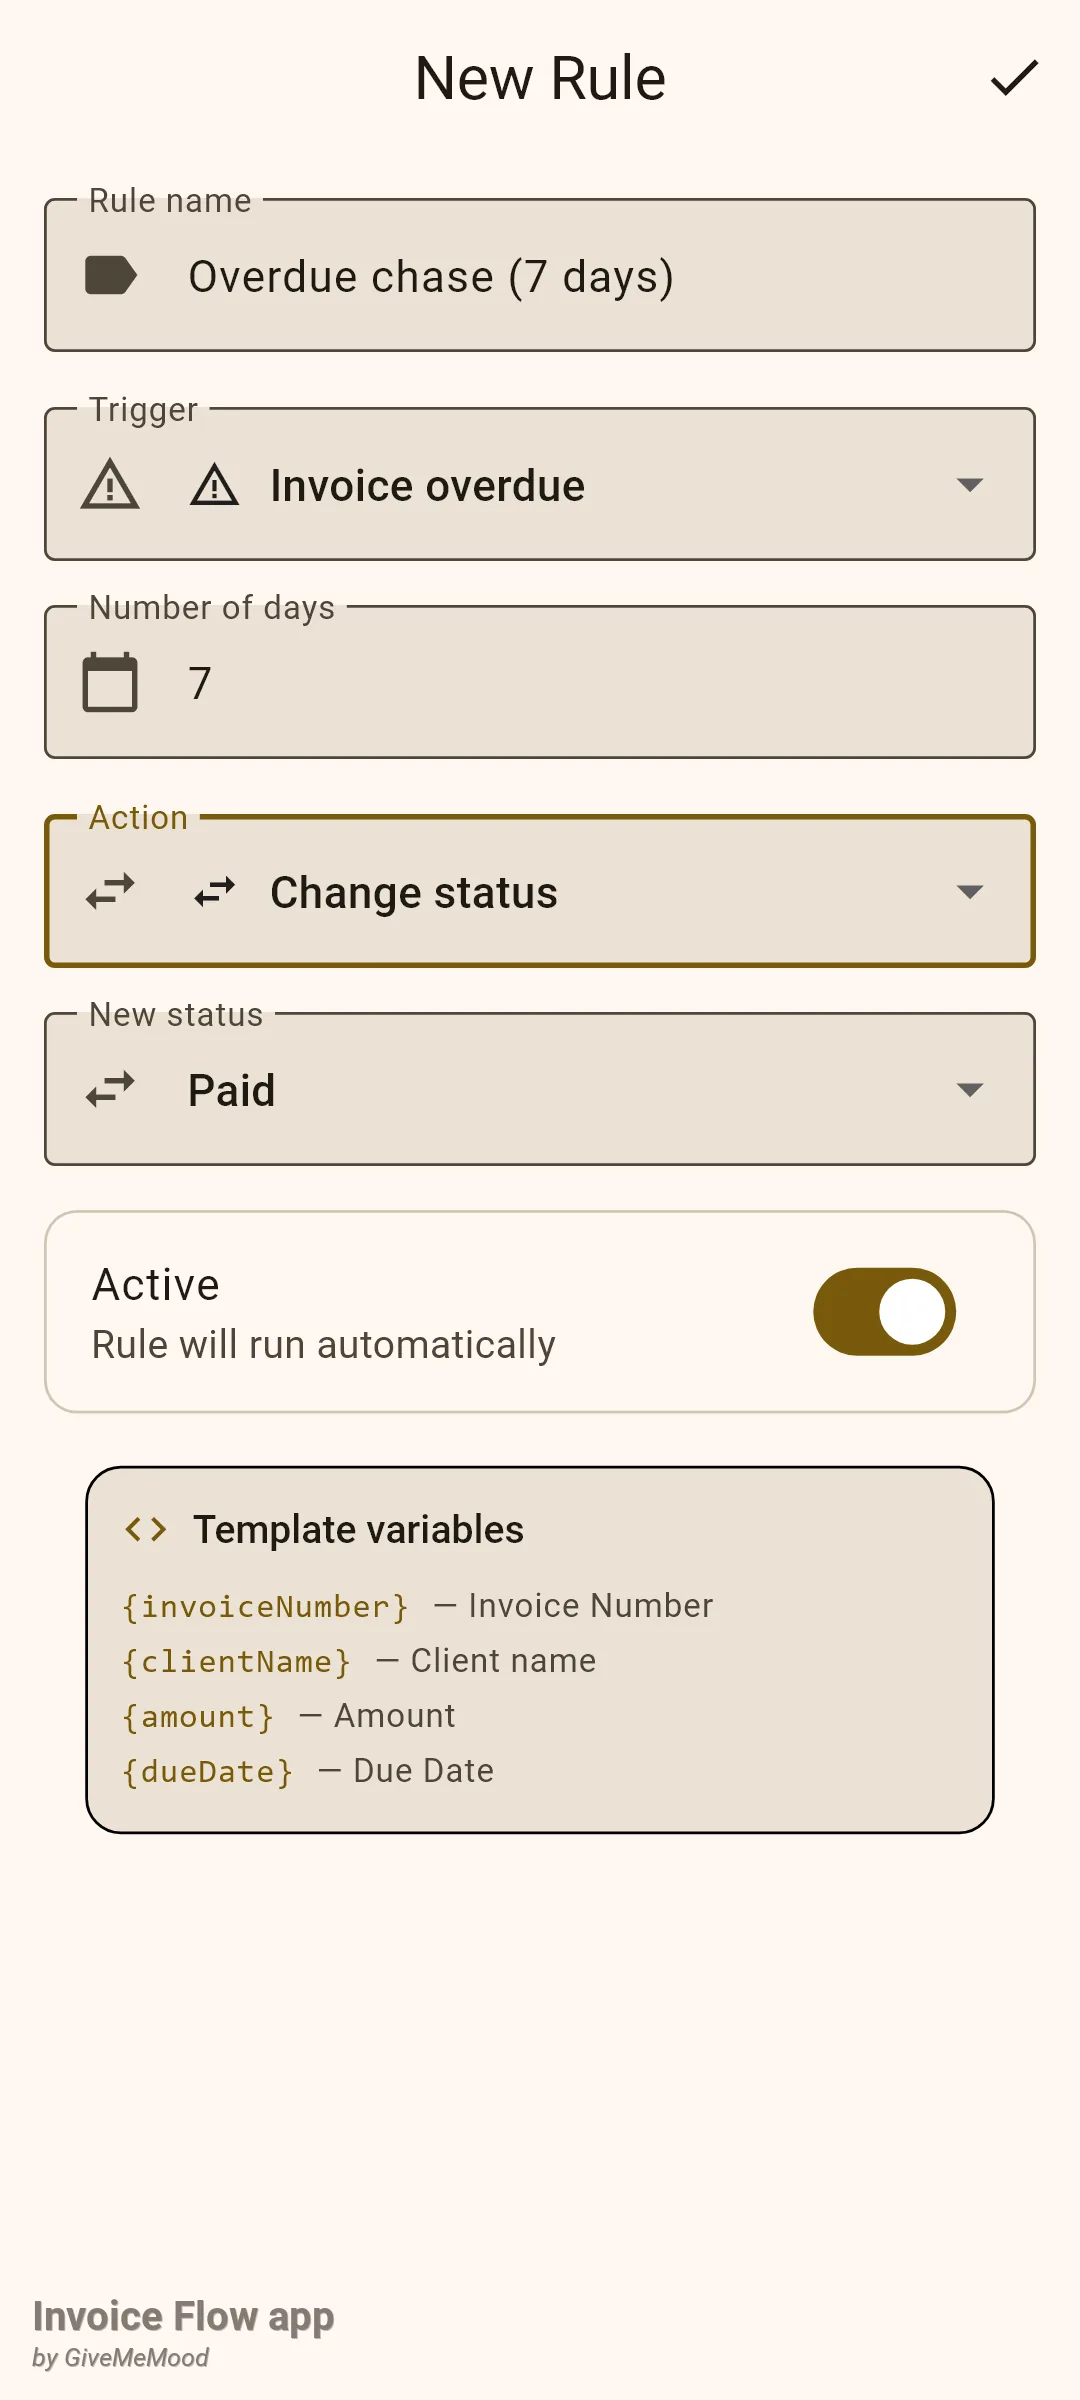
- Open the Action dropdown and choose Push notification, In-app alert, Send email, Change status or Generate invoice.
- Fill in the fields the action needs. Push notifications and in-app alerts take a Title and a Notification body; you can drop in {invoiceNumber}, {clientName}, {amount} and {dueDate} anywhere in the text. Send email takes Email address, Subject and Email body. Change status shows a New status dropdown. Generate invoice has no fields, just an explanation card.
- Leave Active on, then tap the check mark in the app bar. A "Rule saved" message appears and you return to the list.
How to pause, edit or delete a rule
- To pause a rule without losing it, flip the Switch on its card. Inactive rules stay in the list with the switch off.
- To edit, tap the card. The editor opens with all fields filled in and the title Edit Rule; save with the check mark.
- To delete, swipe the card from right to left. A dialog titled Delete rule? names the rule and warns that it will be permanently deleted. Tap Delete to confirm or Cancel to keep it. The swipe alone never deletes anything.
How to read in-app alerts on the Dashboard
In-app alerts are rows in a small table that the Dashboard shows in its Alerts card. Rules with the In-app alert action are meant to feed it, and so are the email-type actions (see below).
- On the Dashboard, tap the Dashboard widgets icon in the app bar and enable Alerts.
- When alerts exist, the card lists up to five, each with a coloured icon: blue for info, amber for warning, red for error.
- Tap an alert to mark it read and jump to what it refers to: the invoice, the contracts screen, inventory or expenses.
- Tap the small x to dismiss one alert, or Dismiss all to clear the card. Dismissed alerts are hidden, not deleted.
Rules and details
Local payment reminders
- Reminders are created only when an invoice is saved from the invoice editor, whether new or edited. Changing the status from the invoice detail screen does not create them. Marking an invoice paid or cancelled from the detail screen cancels all three.
- No reminders are scheduled for invoices already in the paid or cancelled status, or while Invoice reminders is off.
- All three reminders fire at 09:00 in the phone’s local time zone. If the scheduled time is already in the past when you save (for example you enter an invoice that was due yesterday), Android shows that notification straight away.
- The texts are frozen in the app language in use when you saved the invoice. Switching the app to another language later does not translate reminders already scheduled.
- Each reminder is an Android notification in the “Invoice reminders” channel, so you can silence or re-style it in the system notification settings without touching the app.
- There is no screen listing pending reminders; they exist only as scheduled notifications.
- The three FROM THE APP switches control remote topics (release notes, offers, tips). They are independent of invoice reminders and off by default except App updates.
- Late-fee accrual, if you use it, also raises a local notification from the start-up recalculation. See the late-fees guide.
Automation rules and the engine
The engine runs once per cold start of the app, in the background, right after the splash screen. It reads active rules, evaluates the time-based triggers and performs each action at most once per rule, per invoice or contract, per calendar day. There is no background service; if the app is not opened, nothing is evaluated. The only event-driven trigger is Payment received, which the app raises when you tap Mark as Paid on an invoice.
For completeness, this is what the engine is designed to do when it does match a rule:
| Trigger | Condition the engine checks | Available in editor |
|---|---|---|
| Invoice overdue | status is sent, not archived, due date at least N days ago | Yes |
| Invoice due soon | status is sent, due within the next N days (default 3) | Yes |
| Contract expiring | contract signed, end date within N days (default 30) | Yes |
| Payment received | raised by Mark as Paid | Yes |
| Recurring invoice due, Low stock, Expense threshold | schedule due today, stock at or below threshold, expenses this month or week over an amount | No |
| Invoice created, Invoice sent, Invoice paid, Amount threshold | no evaluator exists | Yes |
- Push notification shows a system notification in the reminders channel with your title and body.
- In-app alert inserts a row for the Dashboard card, with the same title and body and a link back to the invoice or contract.
- Send email never sends mail on its own, by design. It creates an in-app alert whose title is your subject and whose body ends with the address in brackets, so sending stays a deliberate manual step. The address the engine reads comes from the client record, not from the field in the editor.
- Change status writes the new status directly onto the invoice, skipping the side effects the normal status change performs (reminder cancellation, inventory, project totals).
- Generate invoice duplicates the triggering invoice as a new draft for the same client with a fresh number and today’s dates, then posts an alert “OLD → NEW”.
- Placeholders that exist in the engine beyond the four shown in the editor:
{clientEmail},{overdueDays},{daysRemaining},{contractTitle},{endDate}.{amount}is the amount still due, to two decimals;{dueDate}is printed as yyyy-mm-dd.
Validation and defaults
- Rule name is required; Number of days accepts digits only and must not be empty; Amount must not be empty.
- New rules default to trigger Invoice overdue, 7 days, action Push notification, active. Change status defaults to Paid; Period defaults to Monthly.
- Opening the editor (new or existing) is Pro-gated; the rule list, switches and delete are not. The Notifications screen is available to everyone.
- Rules and alerts are ordinary app data and are included in backups. Reminder preferences (the switches and day counts) are device settings and are not carried in a backup; after a restore on a new phone, revisit the Notifications screen and re-save any invoices whose reminders you need.
Tips
Related guides
- Sending invoices by email for the manual follow-up that a reminder should prompt.
- Late fees for the surcharge that can accrue after the overdue reminder.
- Invoice statuses, list and history for how sent, overdue and paid are determined.